Depotting MAC Eye Shadows

February 24, 2012

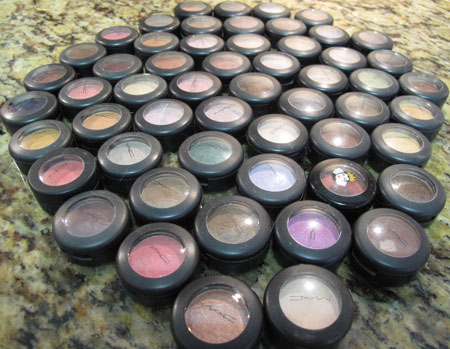
MAC eye shadows are like frisky little bunnies in my makeup drawer…they multiply! I knew that space in my drawer was getting pretty tight, but I was surprised to count over 50 wee shadow bunnies hiding in there.
I don't mind having that many, in fact I kind of love having a bunch to be honest. It's a fun little indulgence that isn't that expensive, and it's just good clean fun to add a new shadow to my collection.

Mac Depot Stash Before

The problem is it's pretty impossible to remember what colors are hiding in the stack. And at 6 AM it takes more time than I have to dig around in the pile looking for that gray I think I have. The time had clearly come to depot my MAC eye shadow collection. To the Google we go for instruction! To the Google!
I found lots and lots of tutorials – both video and text – on depotting eye shadows of all brands, especially MAC. Some folks like to bake the pots in a low oven, some prefer waving a candle or butane lighter underneath the pot, and others use a clothing iron to toast the bottom of the pot. The method I chose was using a hair flat iron because it seemed the simplest and safest.

Before you get started, please heed my very serious warning…BE CAREFUL with this project! You're using two super dangerous weapons: a sharp knife and a hot iron. I'm a self-confessed klutz, and I just barely managed to avoid burning off a finger or all my hair.

However, I did stab myself lightly a few times and came close to really hurting myself until I figured out how to manage this process more gracefully. It reminds me of using one of those treacherous oyster knives to open an oyster shell, but you aren't wearing those big thick protective gloves to depot shadows. So please be careful!

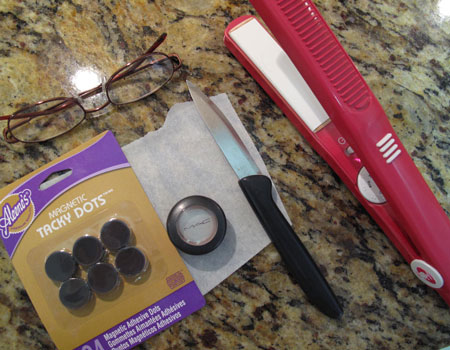
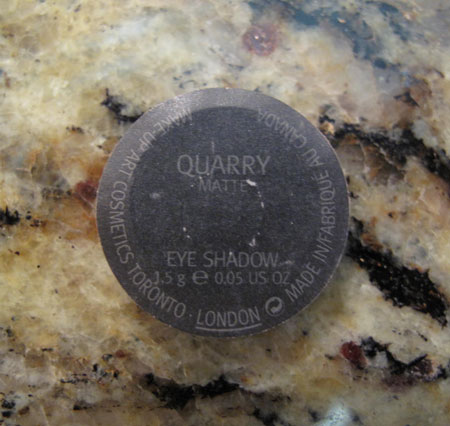
MAC Depot Tools

All you need for the flat iron method is:

  • a flat iron
  • a small piece of parchment paper to protect the iron from melty plastic
  • a sharp thin knife
  • a soft towel to use as a work surface
  • 3/4″ labels
  • 3/4″ thin magnets
  • reading glasses to see what you're doing if you're 40-plus like me

The first step is to get the plastic insert that holds the MAC pan out of the plastic case. This is the part where I was the biggest threat to my own life. What you want to do is wedge the tip of the knife in-between the plastic insert and the case, and pop the insert out. It's easiest to do that near the back hinge where the lid connects to the bottom part of the case.

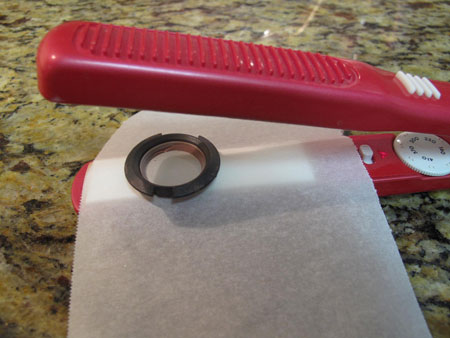
Once the insert is out, place it face up on the parchment on the flat iron. I had my iron heated to around 370 degrees.

MAC Depot Iron

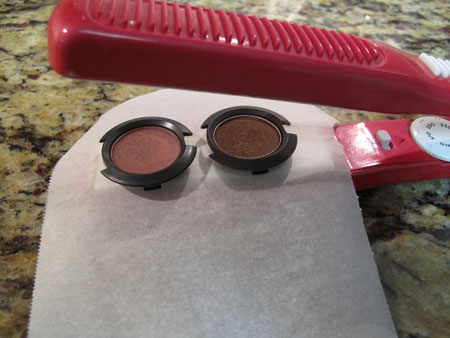
Once you get your rhythm going, you can do two at a time.

MAC Depot Iron 2

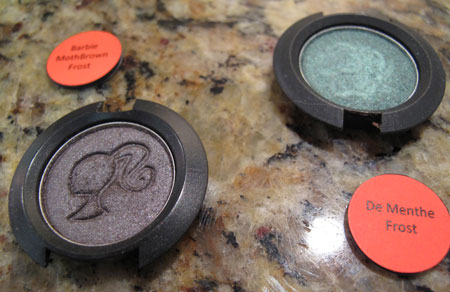
These guys are waiting their turn on the iron. That Barbie line was so awesome!

MAC Depot Waiting

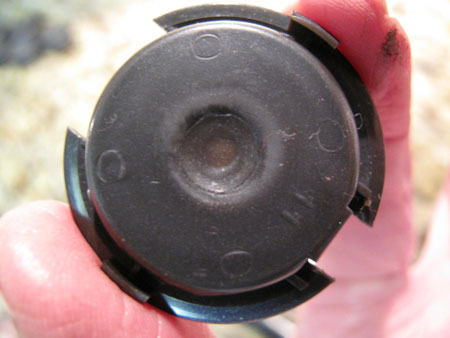
Carefully lift the insert off the iron after 20 seconds or so, and check to see if the bottom of the insert is starting to soften. You're looking for a little dent in the middle of the insert.

MAC Depot Bottom Dent

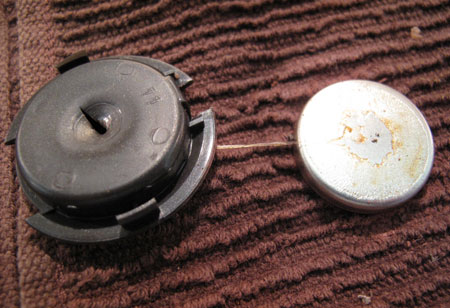
Once you see that, you can poke at the hole with the tip of the knife and try to gently pop out the eye shadow pan onto the towel. If the plastic is still too hard to do that, place it back onto the iron for a few more seconds. Keep checking it until the pan releases.

MAC Depot Pan Free

The pan is going to be really warm now, so again be careful. I snap the melty insert back into the case, and then put it aside. If you left it on the iron until it got warped, you might have a little trouble getting it snapped back into the case.

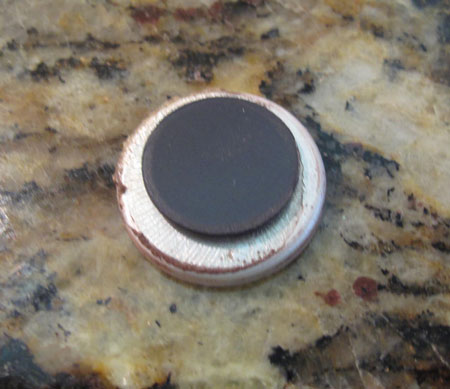
While the pan is still upside down, I like to place a self-adhesive 3/4″ magnet onto it. The warm glue on the back of the pan will also help it adhere.

MAC Depot Magnet

Some people clean the back of the pan with q-tips and alcohol or makeup remover before adding a magnet, but I didn't think it was necessary. If there's a lot of glue and it seems like a big task to remove it all, you can rub a little baby powder over the cooled glue with your finger to neutralize the stickiness.

Some of the tutorials I read suggested removing the original MAC label from the bottom of the case and attaching it to the pan. I tried that but didn't love the result.

MAC Depot Black Label

The only thin magnets I found were 3/4″ and the original label is more like 1″ so there was a little awkward overhang. I also am not a huge fan of the black label because it's a bit hard to read, and if you've had the shadow for a while the label might be faded or worn, making it even harder to read.

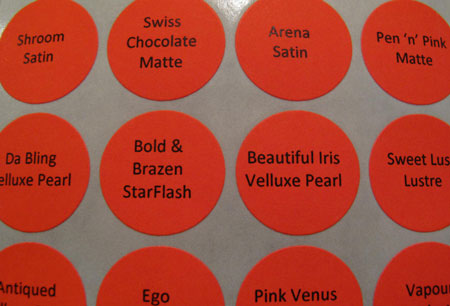
What I used was a 3/4″ adhesive label from Avery. I had red so that's what I used. I think white would get grubby really quickly anyway.

You could hand-print the labels, but I like to laser-print them. They look really nice, but I also love that I have the label stored in my computer so if I ever want to replace a dirty label I print a clean one off in a jiffy. The Word document is also a nice little database of my shadows.  Yes, I am a little OCD, thanks for asking.

MAC Depot Label Sheet

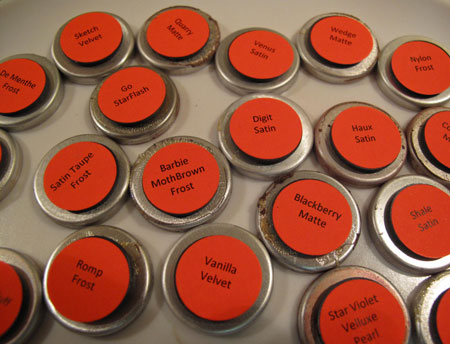
I just peeled the laser-printed label off the sheet and attached it to the magnet on the pan.

MAC Depot Backs

That's it.  Rinse and repeat a few dozen times til all the kids are depotted!

Once you have all the pans depotted and labeled, you need a palette to put them in. I bought 3 MAC palettes that were supposed to hold 15 shadows, but I pried the insert out and made room for 10 more shadows. I was a little impatient though, and just used a butter knife on my nice new palettes, and ended up scratching them a little. Oops! You'll be more careful than I was!

I since found out about another option called the Z Palette, which I might try next. The appeal of the Z Palette for me is that the lid is clear so you can easily see the colors inside. The downside is that some reviewers mentioned that the construction of the palette could be more sturdy.

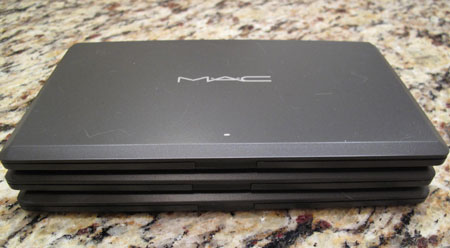
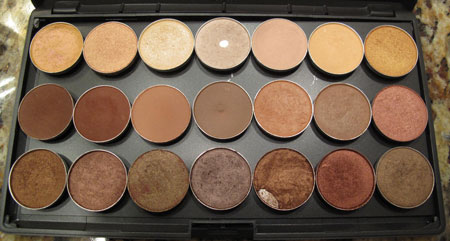
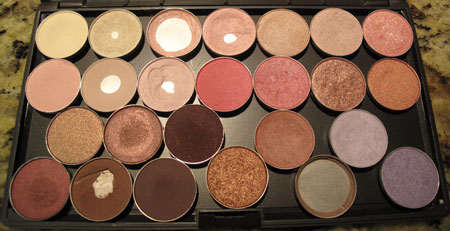
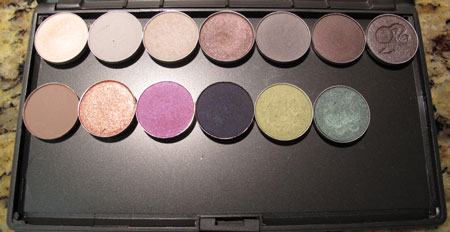
After a little bit of time, my space-consuming collection was transformed into this neat compact stack that makes me very happy:

MAC Depot Palettes

 This palette has all warm colors.

MAC Depot Warm Palette

This one has all cool colors. 

MAC Depot Cool

This one has grays, duplicate backups of favorite limited edition colors, and some random brights with room to add more.

MAC Depot Spares

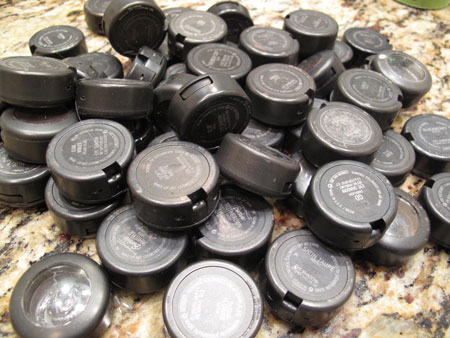
I had these guys leftover after the project:

MAC Depot Empties

It might look like a pile of junk on its way to the recycling bin, but no! This pile is headed to the Back to Mac program. For every 6 empties you turn into a MAC counter or online, you get a free lipstick. If you return them to a MAC store though, you can choose an eye shadow or a lipstick. These empties will allow me to bring home 9 more new shadows for free! Wheee!!

Now I'm on a roll with a mission to depot all of my shadows. Next project: depot the few LaFemme and Stila shadows I have, and liberate all the other random pans whose packaging is taking up way too much room!

~BigSis

Kiss Fashion Toenails Review

September 18, 2011

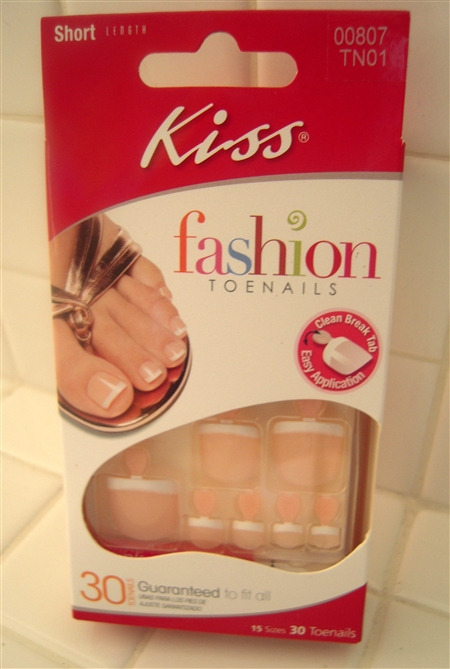
One of my best buds, Patty, recently turned me on to these Kiss Fashion Toenails and I'm happy that she did because if she hadn't, I never would have bought them. I never was a fan of the old Lee Press On Nails because they didn't even look remotely natural to me.

When I first saw these nails on Patty, I thought her toes looked great and I was just about to ask her if she treated herself to a french pedicure, but she was so excited about her “find” that before I could even ask the question, she burst out with “Didn't you notice my toes?”  🙂

BigSis and I both have always been pretty fanatical about maintaining a nice pedicure. I can't even wear clear polish on my fingernails because of my job, but I never go without color on my toenails. My sister has always done her own pedicures and they look great, but I've never, ever been able to paint my toes nicely.

I usually treat myself to a cheap pedicure at a local salon about every 6 weeks or so and I just touch them up in-between appointments. And, in the summer time, I keep acrylics on my big toes for several different reasons. For $25.00, it's well worth it to me because I kill too birds with one stone since I get to sit in one of those amazing massage chairs while getting my pedi. It's a great stress buster for me.

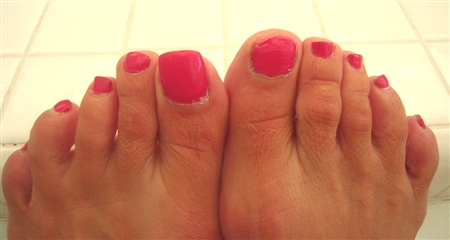
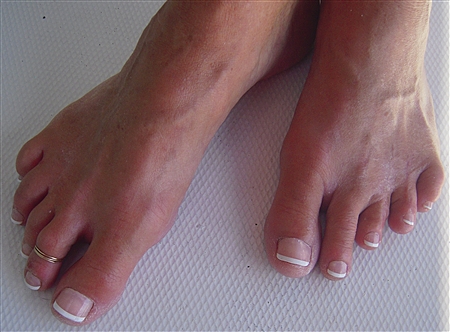
Anyway, lack of time and money has kept me out of the nail salon for WAY too long and this is how bad my pedicure looked before I tried these nails. You can tell that I lost the acrylic on the right big toe and tried to camouflage it, but it still looks horrible.  I should be humiliated to show this “before” photo, but just tryin' to keep it real.


Maybe I like having a nice pedicure because it makes the ugly toes look a little better! 🙂

At Wal-Mart or CVS, you'll find the Kiss toenails for only $6.99 and you get a box of nails with a great selection of sizes, the glue, and a nail file, in case you want to file them down more. I was a little skeptical about being able to find a size to fit each weird shaped toenail and my big toes but since it says right on the box ‘Guaranteed to fit all', I figured I had nothing to lose by trying them.

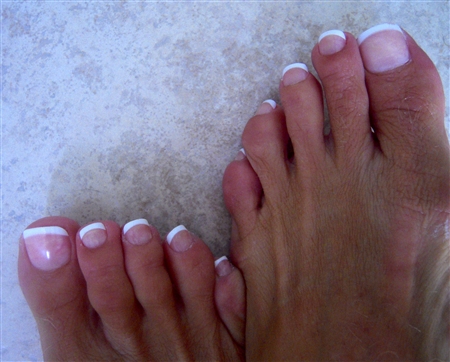
I was pleasantly surprised with how easy these were to put on and with the way they turned out. I guess press on nails have come a long way because these Kiss fashion toenails really do look pretty darn close to a professional french pedicure.

Not too bad, huh?

This first set that I tried was the short version but the next box that I bought were the super short ones and I liked those even better.

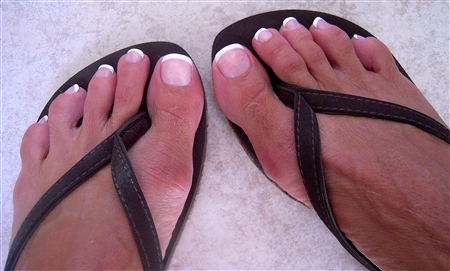
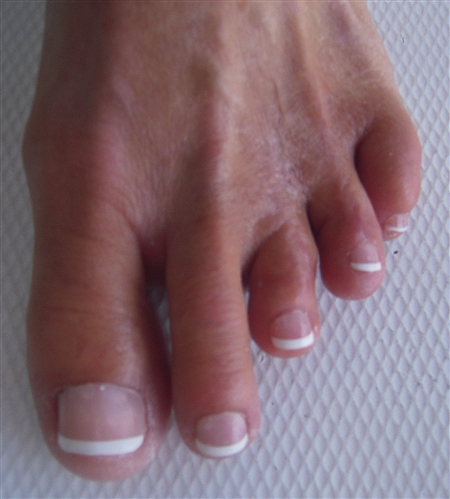
And here are Patty's cute little toes.

And for any of you who may have suffered an unfortunate trauma to a toe or perhaps undergone a hammer toe surgery with complications and permanent loss of a toenail, as Patty did, these nails can be glued right to the missing nail bed.  It's a fantastic fix and no one would ever guess!  See, you can't even tell which one of Patty's toes is really missing the toenail.

These are super easy and super fast to put on so if you ever find yourself needing a quick pedicure and don't have the time to get to the salon, you might want to give these Kiss fashion toenails a try! And, I'd love to hear what you think if you try them.

My only advice is to remove these the proper way, as instructed. Don't get impatient like I did and just rip them off; that leaves the real nail a little damaged. 🙂

~LilSis

Summer is in full swing so don’t forget your sunscreen!

July 15, 2011

photo credit: mommamia on flickr


Summer has been my favorite season for about as long as I can remember, but I wouldn't say that I'm a sun worshiper, or anything that extreme. I just enjoy any time that I have where I can get out in the sun, even if it's just for a walk, a bike ride, or sitting outside reading for an hour. And, I always feel a little more cheerful after spending any amount of time out in the sunshine! 🙂

Not that it's likely it'll happen anytime soon, but, if I ever did have a lazy Summer day where I had no responsibilities and could do whatever I wanted; I would spend the entire day in a lounge chair with a good book and my iPod; either at the beach or poolside.

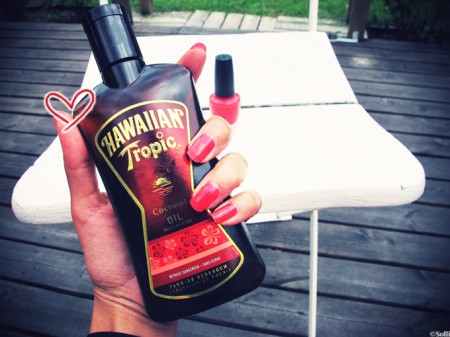
Photo credit: sollis.se

As much as I would love to slather myself in red label Hawaiian Tropic Coconut Oil because it reminds me of those long-gone, carefree, teenage days with friends at the lake or by the pool, I do keep sunscreen on at all times.

We've got Native American Indian in our blood, so I'm lucky that I tan easy and rarely burn. I've also never have had any type of skin cancer, which is pretty amazing considering that when I was younger, I would lay out for the entire day covered in tanning oil!

And, yes, I'll admit it, my friends and I did try the baby oil and iodine combo. My only excuse for that is that we didn't know any better and back in those days no one even talked about sun damage from ultraviolet rays. Now that we do know better, we just need to make sure that our kids don't fry themselves like some of us used to do on a regular basis.

A lot of people, including my hubby, haven't been as lucky when it comes to sun damage and skin cancers. His family has the Irish skin with fair complexions that freckles and burns easily. When he was young, they spent a lot of time of the lake and he would get so sunburned that his skin would blister. Most doctors agree that the skin cancers we have now were caused by sun damage we experienced when we were younger. A lot of my hubby's relatives, like him, have experienced serious cases of skin cancer, including melanoma.

We've talked quite a bit about sun damage and sunscreens here on BigSisLilSis since both BigSis and I are passionate about the issue. I have to stay on top of my hubby and my son every single day to make sure that they have on their sunscreen. Since HayHay surfs for hours at a time, it's crucial for him to wear the best sunscreen that we can find.

Summer is in full swing now that we're in mid-July so I thought this would be a good time to do a recap of some of our previous posts about sunscreen and sun damage.

  • The very best waterproof sunscreen that we've found is Vertra, which is what HayHay wears now when surfing. I talked about Vertra and some other great Summer products in this Top 15 Summer Beauty Products post.
  • My hubby used to wear the Neutrogena Ultra Sheer Dry Touch but now his favorite is the Neutrogena Sport Face, which doesn't sweat off and burn his eyes. I mentioned both of these and a few others when I talked about Skin cancer and sunscreen.

We hope everyone is having a great Summer so far; but whatever you do, please don't forget your sunscreen! 🙂


~LilSis

Clarisonic Mia Review

May 13, 2011

Step into Spring with this fun new color!

I just received an email from Clarisonic about their new tangerine Clarisonic Mia; so now you can choose from ten gorgeous colors; including yellow, pink, turquoise, blue, garnet, and more!  If you're going to use this wonderful little cleansing system every day, you might as well get one in your favorite color, right?

I haven't talked about the results I've seen from using my Clarisonic Mia, so I thought this would be a good time since I've been using it regularly for about four months now.

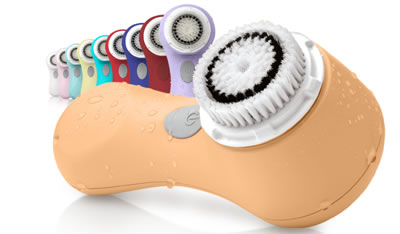
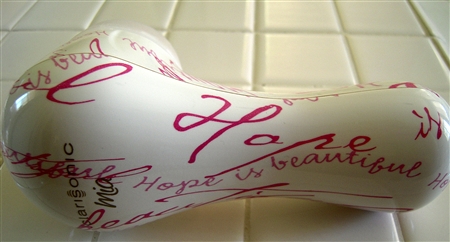
They don't have a photo of my Mia on the Clarisonic site any more since it was a limited edition, so here's a photo of my cute, little Mia.


If you love the design on this one, you can still buy the CLARISONIC Mia Sonic Skin Cleansing System, Limited Edition Hope is Beautiful from Amazon for $129.99.

BigSis talked about the results she saw from using her Clarisonic back in January of last year. I still wasn't able to justify the initial investment at that time, but after she talked about the Pink Clarisonic in October of last year, I decided since she was so happy with her results, it was definitely worth me giving it a try.

I was really very lucky and never had skin problems as a teenager or through my 20s and 30s. I admit that I was even quite lazy taking care of my skin through my 20s but when I turned 30, I decided that it was time to take better care of it. Since then, I've been religious about taking off my makeup at night and using eye creams, night creams and day time moisturizers to try to take care of my somewhat dry skin.

I guess you can say that I've still been a little lazy because I've been using the Olay cleansing wipes to take off my eye makeup and to wash my face. During these “pre-menopausal”, very “hormonal” last few years, I've had monthly breakouts that I've never experienced in my entire life! So, what I was doing obviously wasn't working and that's when I decided to buy myself a Clarisonic.

Neither of us are getting paid to endorse this product, but when we find something that works for women our age, we love to share it with everyone. I use mine once a day, at night, and you can still use your favorite cleanser like I do, instead of the Clarisonic cleanser and it works just as well.

Here are a few things that I noticed within a very short time using my Mia:

  • Less breakouts immediately and now very rare breakouts!
  • Pores appear smaller.
  • Skin seems tighter and feels smoother.

This cleansing system has made more difference in my skin than I could have imagined. I wish that I hadn't waited so long to buy myself one but I'm happy that I finally did. If you have any issues at all and want to improve the look and cleanliness of your skin, we both highly recommend the Clarisonic!  🙂

~LilSis

Cruelty-Free Eye Makeup Remover: Philosophy Just Release Me

May 1, 2011

Hurray!  I finally found it after almost a year of searching…the perfect eye make-up remover!  It's oil-free, cruelty-free, and super-effective yet extremely gentle thanks to the aloe, chamomile and cucumber.

What is it?  It's Philosophy Just Release Me.

One of the things I love about Philosophy is their sense of humor. Here's the story from the bottle of Just Release Me:

“from caked on to baked on, from lid lock to grid lock, from dressed up to stressed out, from high shoes to win-lose, from run fast to slow down, it's time to release your eye makeup and set your sights free”

Cute, huh?  I like it already!

Philosophy Just Release MeJust Release Me reminds me a lot of my old long-time favorite eye makeup remover; Lancome Bi-Facil, which I dropped like a hot potato when I banned animal-tested products from my home last summer.

Both of these removers are oil-free, dual-phase and look the same in the bottle: thin blue liquid separated in two layers that need to be shaken before using to blend together.

Both removers quickly remove all traces of makeup – even loads of mascara – without pulling or rubbing delicate under-eye skin, and without losing any eyelashes.

I've used both of these products in the same manner, with great results.  I wet a cotton round with hot water and squeeze out most of the water, then add a dab of remover.  I hold the cotton round over my eye for a few seconds, and then gently wipe away all of the remaining makeup, turning the pad over if necessary to finish up.

What's different between the two?  Just Release Me is $18 for 6 ounces ($3 per ounce), and Bi-Facil is $26 for 4.2 ounces ($6.19 per ounce).  That's more than double the price!

And the biggie that I already mentioned is that Lancome animal tests and Philosophy does not.  That's more than big…it's huge.

Just Release Me is currently sold out on the Philosophy web site, but it's in stock at Drugstore.com, Sephora and at Ulta, which is where I got mine.

Philosophy does not animal test, but they are not a vegan company.  If you're ok with that, then Just Release Me may be the eye makeup remover for you!

~BigSis

Does Latisse Grow Eyelashes? Does Botox Reduce Wrinkles?

February 26, 2011

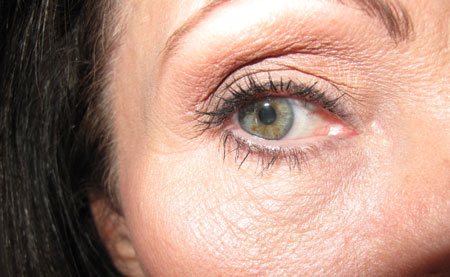
At age 52, I finally got my first Botox. I had needed it for a long time, since my crows feet were pretty bad. I was procrastinating because…well, I don't know why I put it off. I obviously shouldn't have! Just take a look for yourself.

Sagginess…

Eyes Bad 1 Before Botox Latisse

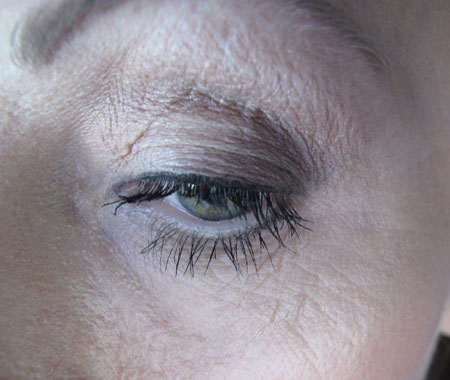
crepiness…
Eyes Bad 3 Before Botox Latisse

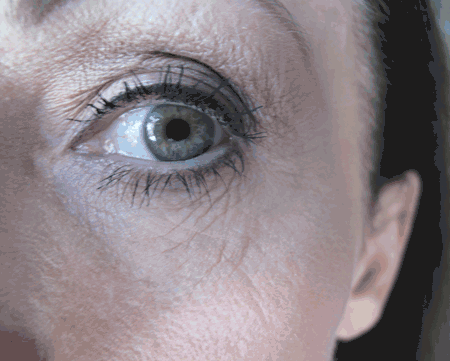
and wrinkles. Oh, my!

Eyes Bad 2 Before Botox Latisse

Wow! I skerd myself! In defense of my poor eyes though, I do have to say these “before” photos were taken after I got a makeover from a makeup artist. I had masses of concealer and powder piled up under my eyes which accentuated the wrinkles. They were still my wrinkles – I have to own up to them – but they were looking especially heinous with all that makeup gooped upon them.

Also notice the skimpy eyelashes. My lashes aren't uber-short, but they definitely lacked fullness, and a little extra length would be nice.

I absolutely noticed the wrinkles, sags, bags and crepey skin every time I looked in the mirror, and finally addressed it with a very conservative bit of Botox in early December. I actually wished my doctor had been slightly more aggressive with it, but it's a start and I think it absolutely helped. That's not to say that other women might not have success with some of the Best Face Oils For Anti Aging and other products like it, they do! For me personally, I felt like this was my best option.

If I had it to do over again, I wouldn't have waited so long for my first foray into Botoxland. It was relatively inexpensive, and the procedure was a piece of cake.

There were 3 tiny – I mean tiny little needle pricks around each eye. I'm not freaked out by needles, but even if you are, I still think this process is really non-threatening. Just don't look when the needles come out to play. 😀 It was totally worth it to me, and I'll keep doing it as long as there is no revelation about Botox causing cancer or something equally disturbing.

While I was at the doctor's office, I also talked to a rep for Allergan, the company who makes Latisse. They were offering a $100 rebate on the product, which pretty much paid to fill the first prescription. Insurance doesn't cover Latisse, of course, since it's a cosmetic item.

My first prescription for Latisse cost me about $114, and was supposed to cover 30 days' application of the product. Instead of one drop per eye per night though, the nurse in my doctor's office suggested that one drop shared between both eyes is plenty. That's how I've been using it, and that first round of Latisse is just now almost gone nearly 3 months later. That works out to less than $1 a day.

I'm not a doctor so I can't recommend that you use Latisse as I did, but I can tell you what I did and that the shared drop per night seemed to be adequate for me. I think that using one drop per eye would have been wasteful overkill with dripping excess to wipe away.

I haven't had any side effects from Latisse, but you should consider them before you try it. The most-publicized potential issue is that light brown, green or hazel eyes can permanently change to a darker brown. From what I understand, that is only a rare risk when Latisse is used to treat glaucoma, which involves using the product in the eye, not on the skin around it.

That explains what I did. So how do those scary eyes look now after a little Botox here…

Eyes Good 1 After Botox Latisse

and there…

Eyes Good 2 After Botox Latisse

and some Latisse each night?

Eyes Good 3 After Botox Latisse

These aren't 20 year old eyes, but I'm not 20. These eyes have seen things and been through things, and they're entitled to a few earned war wounds. Maturity isn't an easy road, and getting there can leave a little evidence of the journey, right?

They're still my 52 year old eyes, but they're not quite as scary as before. These “after” photos were taken with no concealer, foundation or powder, so you can still see little imperfections like brown spots, but you don't see the previous horror. Hurray! As the years pass, it seems that it is deemed more acceptable for the average person to undertake such treatments. Trends in cosmetic surgery have evolved with more people improving on what they have. In fact, this source here shows the statistics of cosmetic surgery throughout the world in recent years.

In these photos I had about 8 weeks of Latisse behind me, and the full effect is supposedly reached at 16 weeks. At 4 weeks, I could already see longer lashes, and now they are thicker as well.

If you ask me if Botox reduces wrinkles, I say absolutely ‘yes'. And if you wonder if Latisse really works and grows longer and thicker eyelashes, I say ‘yes' again. I don't foresee ever getting a facelift, but I'll keep doing these little tweaks because they work. To me they're no-brainers. There's no cutting, no downtime, and the expense isn't prohibitive. It feels good to be doing a little something to fend off the ravages of time, but still look like me.

Now I need to tweak those brown spots…

Monthly sale items.

~BigSis

Spring 2011 TEXAS OPI Collection

February 24, 2011

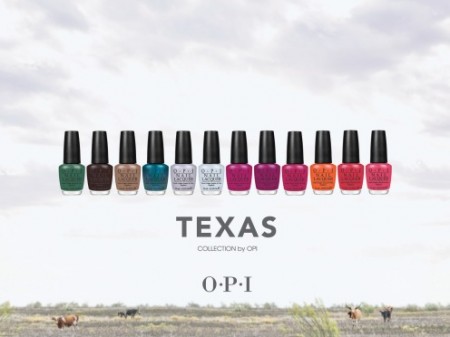
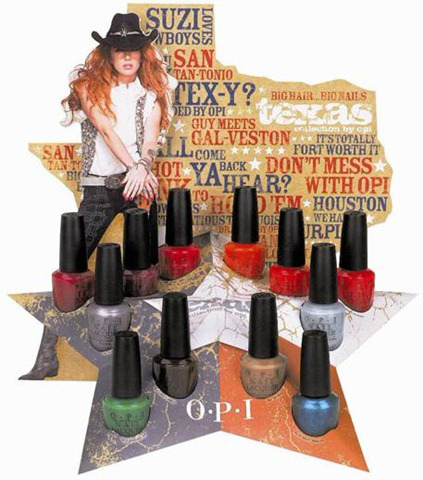
OPI Spring 2011 Texas Collection

Just ask us where we're from and we'll tell ya! The Texan way to answer, though, is “I'm Texan; born and raised!”

I've lived in Southern California for almost nine years and that's a question that I still hear every day! (I guess I'll never get rid of my “twang”.)

Even though I don't live there any more, I'll always be a Texan in every way; so that's why I have to give a shout out to OPI for this awesome Spring 2011 Texas Collection!

OPI Spring 2011 Texas Collection

These colors are amazing and even though OPI always has unique names for their colors, I thought these were especially creative, even though they did leave out our “Big D.”

  • Austin-tatious Turquoise
  • Do You Think I'm Texy?
  • Don't Mess with OPI
  • Guy Meets Gal-veston
  • I Want to Be A-Lone Star
  • Big Hair- Big Nails
  • It's Totally Fort Worth It
  • Y'all Come Back Ya Hear?
  • San Tan-Tonio
  • Too Hot Pink Too Hold ‘Em
  • Houston We Have a Purple
  • Suzi Loves Cowboys

If you would love to have the entire collection at a reduced price, and if you act fast, Amazon has the OPI Nail Texas Collection 12 bottles for a limited time.

OPI Spring 2011 Texas Collection

I've always had a “thang” for orange colors, especially on my toes, so I think the first one I'm gonna try is Y'all Come Back Ya Hear?

~LilSis

3 More Mascara Reviews…and a Surprise

January 9, 2011

eye

A couple of months ago, I gave up my long-time favorite mascara – Loreal Voluminous – because it was animal-tested.  I went on a search for a new awesome product and reviewed four mascaras that disappointed me: Smashbox Hyper Lash, Tarte Lights Camera Lashes, Revlon 3D Extreme and MAC Zoom Lash.

Since then, the mascara search has continued with these three prospects:

Physicians Formula Organic Mascara ($9.95 retail)

  • This mascara is said to be 100% free of harsh chemicals, synthetic preservatives, parabens, clumping, smudging, flaking, fibers and dyes.  It is also supposed to provide 5x Lash Boosting for lash length, volume and definition naturally, with a 100% recyclable “Eco-Brush” that claims to define each lash with ultra-soft plastic bristles.
  • Did it deliver on all those claims?  Ehhh.  It was ok.  I didn't take it back to the store, and actually used it several times.  I did get a little flaking, but not a terrible amount, and it removed very easily at night.
  • My main beef with this mascara is that the look it provides is too natural for me.  As I mentioned in my previous review, I'm looking for volume and curl-retention.  I didn't get deal-killing clumping with this mascara, but I didn't get the volume I crave either.  I also wasn't a big fan of the plastic brush.

Josie Maran GOGO Instant Natural Volume Argan Mascara ($22 retail)

  • I really wanted to love this mascara since Jose Maran Cosmetics donates one mascara to a City of Hope cancer patient for each GOGO (Get One Give One) mascara purchased.
  • It claims to deliver full, longwearing, clump-free, water-resistant definition and to evenly build thickness and smoothness, delivering a full fringe of blacker-than-black lashes with dewy shine. It also includes Argan Oil which is supposed to condition and support hair growth for lush, supple, healthy lashes.
  • So did this mascara walk the walk?  Sadly, no.  I tried it twice, and had to take it back to the store.  It clumped horribly, no matter how thoroughly I tried to wipe off the excess on the neck of the tube.  Besides that, the brush was enormous to the extent that it was unwieldy, and I found it nearly impossible to apply the product to my lower lashes without also applying it under my eyes.
  • For the price, I had high expectations for Jose Maran's mascara, especially when it came highly recommended by the Sephora sales rep.  The only thing I liked about this mascara is the GOGO program, so back it went.

Mally Beauty Volumizing Mascara ($20 retail) (QVC 2/pk $28)

  • I happened to randomly catch Mally Beauty on QVC, and liked her energy and was sold on a kit that included her Volumizing Mascara.  Mally claims that this mascara helps create the look of gorgeous, full, luxurious lashes with a combination of natural waxes and carefully chosen powders. It comes with a plush brush that is said to work with the powders in the formula to help thicken lashes without clumping and give you gorgeous volume that lasts.
  • Was I disappointed yet again?  NO! You read that right…I wasn't disappointed with Mally's Volumizing Mascara! I actually tried a mascara that I like!
  • Mally Volumizing Mascara gives me volume, curl and definition.  It doesn't smudge, flakes only a teensy bit (which mascara doesn't, frankly), and is easy to remove at the end of the day.  I will absolutely reorder this mascara in the QVC 2-pack.
  • For now, my mascara search is over.  I can't say that I won't try another hyped-up mascara that crosses my path, but for now, I'm thrilled to have found one that I'm happy to use every morning. 😀

Next up, I have some fun new vegan products lined up on my bathroom counter, waiting to be tried out.  I have Lip Tar from Obsessive Compulsive Cosmetics and three loose Sugarpill eyeshadows.  Can a 40-plus woman pull off these vibrant young colors?  We're about to find out!  😀

photo credit: kitty nancy

~BigSis

Urban Decay Eyeshadow Primer Potion Hacked Again!

November 15, 2010

We're big fans of Urban Decay's Eyeshadow Primer Potion.  Like other fans though, we hate wasting all of that product that the applicator wand doesn't reach.  A while back, LilSis hacked into Urban Decay's cute little purple genie bottle to show just how much waste there is.

Urban Decay Primer Potion Hack

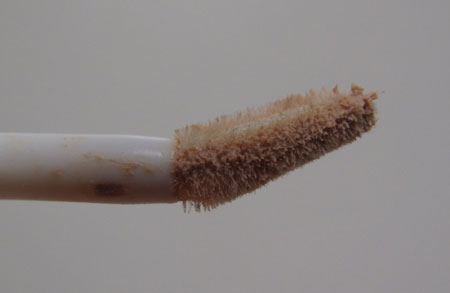
Urban Decay's answer to the waste was to keep the cute bottle, but to redesign the wand.  The idea was that the newly-bent wand could reach into the curves of the bottle to access the previously-wasted potion.

Urban Decay Primer Potion Wand

We didn't love the new wand, but were happy tolerate it if it helped us get some of that wasted potion out of the bottle and onto our eyelids.

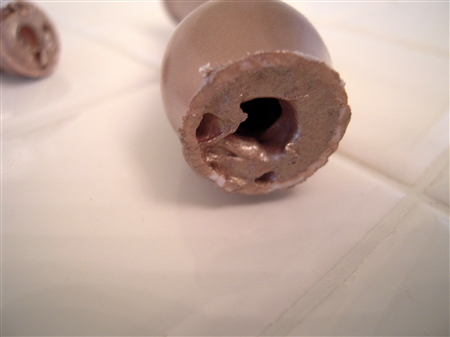
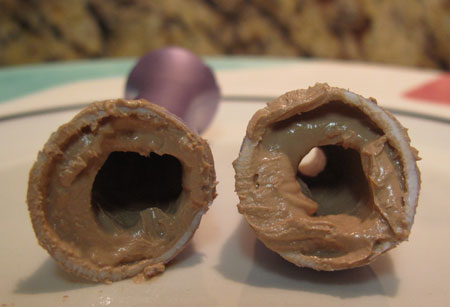
Did it do that though?  Like LilSis, I had to hack into the bottle myself to see.  I intentionally used this bottle as long as I possible could; trying to eek out every last little bit of primer.  When I finally whipped out my knife, I couldn't get one more dab out of this bottle.

Note: Don't try this at home.  I used a serrated knife and serrated my finger twice before I got through the hard plastic!  There was blood.  Lots of blood.

Urban Decay Primer Potion

Do you see much waste?  I do!  Lots of waste!

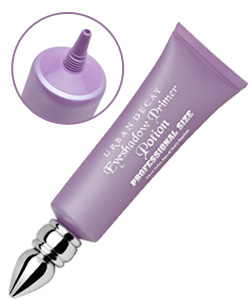
The good news?  Urban Decay heard all the grumblings and came out with the Primer Potion in a tube!

Urban Decay Primer Potion Tube

When the tube first came out, I thought I heard that it was limited edition, but the web site doesn't say so.  The original purple genie bottles are still available too.

Whichever packaging you prefer, you're still getting our favorite eyeshadow primer and we wouldn't dream of applying shadow without it.  Not only does it hold the shadow onto your lids ALL DAY without creasing or fading, it also intensifies the color of your shadow.  Bonus!

I've been using this product for years, and I'm still amazed sometimes when I take a look into the mirror after a long day.  My eyeshadow still looks perfect and just-applied even though it may have been on for 16 hours and survived 8 hours of work and 2 workouts!  It sounds impossible, but it's true!  Go, Urban Decay!


Clarisonic Mia -Sonic Cleansing on the Glow!

~BigSis

4 Disappointing Mascara Reviews

November 11, 2010

L1007145.JPG  by Irving Penn at MoMA

Because of Loreal's animal testing, my favorite Loreal Voluminous mascara has been banished from my bathroom.  I used it for years and years, and loved it.  But it's gone now.  Permanently.  Adios, animal tester!

If I don't like a product, I usually don't review it on BigSisLilSis.  We all get enough negativity in our day without me being Negative Nellie and adding to it, right?

It turns out however that it's UBER hard to find a good mascara that isn't animal tested, so I'm making an exception to my rule.  I'll share my thoughts about what I've tried lately, and you can take my comments with a grain of salt.

I'm sorry to say that of the last four mascaras I've tried, I don't like any of them.  Not one ding dang one!  Boo!

Here's what I've tried and tossed:

  • Smashbox Hyper Lash ($21) – I had really high expectations for Hyper Lash after hearing rave reviews on the radio from a local DJ, so I bit the bullet and spent more than I ever do on mascara.  First off, the brush on Hyper Lash is really different.  It has bristles on one side to apply the product and a comb on the other side to separate the lashes.  The first coat went on truly clump-free.  Hurray!   The only problem is that one coat was very thin and skimpy, so I needed two additional coats and that caused a lot of clumping.  I didn't get any volume or lengthening, and I felt that my lashes just didn't show up.  I got some fine flakes under my eyes by the end of the day, and my lashes looked dry.  Hyper Lash isn't waterproof, but was hard to remove.  This mascara was pricey and it went back to the store.
  • Tarte Lights Camera Lashes ($19) – I like Tarte's nice big normal brush, but the product was fairly thin so I didn't get any volume, similar to the result I got with Hyper Lash.  I didn't get much clumping, which was great, but this mascara provides an extremely natural look and I just need more from a mascara.  If your naked eyelashes look like Bambi's, this mascara may be enough for you, but it's not for me.  It removed fairly easily, but I did have some flaking during the day.  It isn't a bad product, but for the price, I expected better results.
  • MAC Zoom Lash ($14) – I wanted a thicker formula than what Tarte and Smashbox offered, so I guess I should be careful about what I wish for.  I went into a MAC store and asked for their best mascara for volume without clumping, and Zoom Lash was their recommendation.  Zoom Lash is radically thick to the point of being gloppy, and the small short-bristled brush made it impossible for me to apply it without a huge goopy mess.  It also straightened out my just-curled lashes. Rats!   This may be my least favorite MAC product ever, I'm sad to say!  I should have taken it back; I hate it that much.  Why didn't I?
  • Revlon 3D Extreme ($7.50) – 3D Extreme is super thick too, and has another weird brush.  What happened to plain old big brushes that reach every lash?   This one is flat with short bristles on each side with a rounded bulb kind of a thing at the end of the wand.  I don't get it.  What am I supposed to do with this contraption?  What I did get was clumping galore, and straightened lashes like Zoom Lash gave me.  Fail!

I'm disappointed at what I've found so far, and I haven't even restricted my search to vegan mascaras.  Sheesh!  The search for a good mascara will continue though.  I'm not encouraged, but I'm also not giving up and resorting to wearing false eyelashes every day!

Hey, volume-building, clump-free, perfectly-thick, cruelty-free mascara!  Come out, come out, wherever you are!

photo credit: Susan NYC

~BigSis