A few St. Patty’s Day favorites.

March 15, 2012

I wish that I could have a St. Patrick's Day party this year, but unfortunately I have to work on Saturday night and I'm not too happy about that. 🙁

St. Patty's Day parties are always fun and very easy to put together; all you really need is green beer and/or a festive green cocktail, corned beef and cabbage, and some potatoes.

Have everyone wear something green. pass out some silly party hats as your guests arrive and you're ready to get the party started!

Here are a couple of our favorites that you might want to try for your St. Patrick's Day celebration.

First, the cocktail.

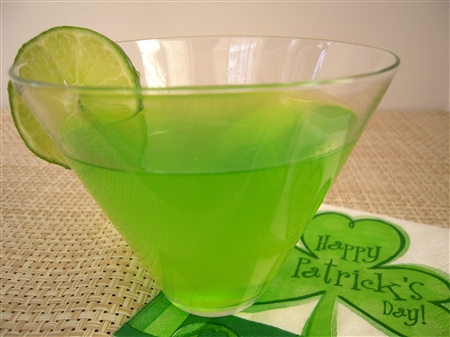
This Glowing Green Gecko is perfect for St. Patty's Day!

Glowing Gecko

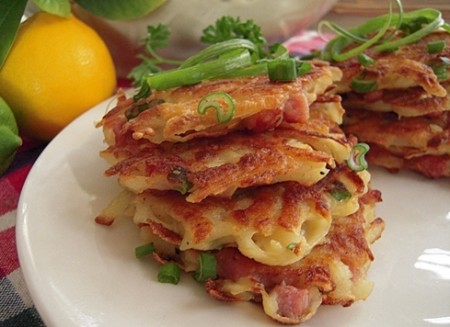
Then, here are some easy and yummy Ham and Potato Pancakes.

Ham and Potato Pancakes

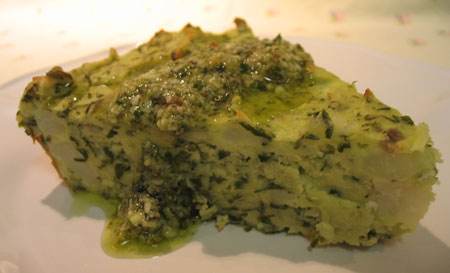
Or, if you're vegetarian, try this awesome Dilled Potato Pie that can be served with pesto or just a dab of butter on top.

Dilled Potato Pie with Pesto

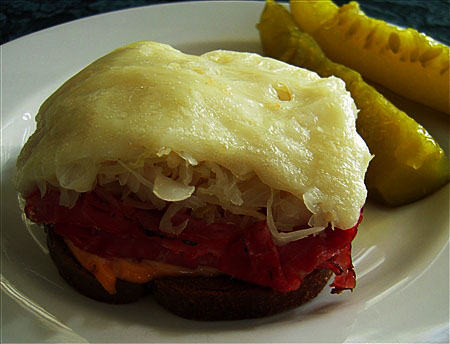
And, this open-faced Reuben Sandwich is delicious and can easily be cut into smaller pieces and served as an appetizer.

Reuben Sandwich

And, a fun green dessert is just icing on the cake.

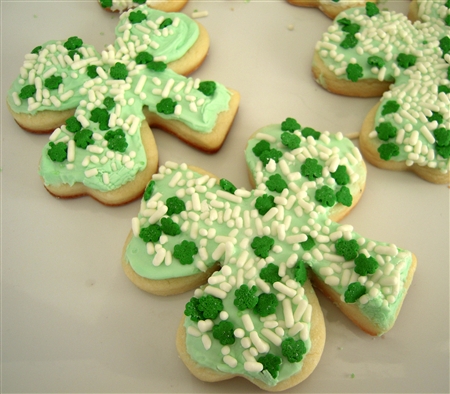
These St. Patrick's Day Clover Cookies are fun and tasty.

St. Patrick's Day Clover Cookies

Hope everyone has a very Happy St. Patrick's Day!

(And, don't forget an Irish toast. This is a fun one.)

“May your neighbors respect you,

trouble neglect you,

the angels protect you,

and Heaven accept you.”

~LilSis

Happy New Year!

January 1, 2012

Happy New Year to all our friends, family, and readers of BigSisLilSis!

Here's hoping that everyone has a happy, healthy, prosperous 2012!

I like the ring of 2012, so I'm thinking, praying that it's gonna be a good year.

What did you do last night? Did you make it to midnight?

I almost did. We watched New York City welcome the New Year and then fell asleep about 15 minutes before midnight.

Have you heard the old wives tale that says if a home is in disarray on New Year's Day, then you'll struggle with clutter and a dirty house for the rest of the year?

I stayed up long enough to clean up our mess from last night just in case there's any truth to this tale. 🙂

What will you do today to welcome in the new year?

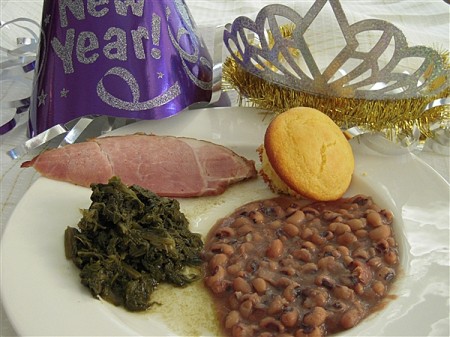
I'm making the Traditional Southern New Years Dinner  of ham, black eyed peas (for good luck) and greens (for prosperity) for family and friends. Here's my plate from last year.

I actually ate several more bowls of peas throughout the day. You know that you can never eat too many black eyed peas on New Year's Day!

I also concocted a new black eyed pea dip this year that I didn't have time to post but I'll share that recipe with you soon. It was so good that you can make it any time; not just for New Year's Eve!

Did you make any New Year's Resolutions?

I always do. They motivate me and help keep me focused. I like putting them in black and white because I feel more committed and I can look back at them throughout the year to see how I'm doing. I'll be posting my goal list for 2012 later this week.

Have a fantastic, Happy New Year!


~LilSis

2011 Resolutions Revisited

December 26, 2011

Yes, it's that time of year again. It's time to start thinking about the new year and whether or not you'll be making any New Year's Resolutions for yourself.

Some people despise New Year's Resolutions, but I love them. Resolutions and/or goals help me to stay focused and motivate me to start the year off on a positive note. They don't have to be something major like quitting smoking or losing 20 pounds. They can be small goals that you would like to achieve or just a few things that you would like to improve on during the new year.

(photo credit: Zastavki)

But, before I look forward to 2012, I want to take a little time to revisit my Resolutions for 2011.  In 2010, I had 12 things on my list and that was a bit difficult to maintain throughout the year, so for 2011, I purposely made a shorter, more realistic list.

I only had five things on my list for 2011, so let's see how I did.

1. Goal. GO TO BED EARLIER.

Reality: This one is really, really hard for me because night time is finally my time to relax and do whatever I want to do, without interruptions. The first part of the year I had a crazy schedule which made it easy for me to stay up too late if I didn't have an early morning. About four months ago, I got a regular, set schedule which has me starting work at 4:00 a.m. so I HAVE FINALLY learned how to force myself to go to bed at 9:00 p.m.

2. Goal. Plan healthy meals for the week and do all grocery shopping in one trip.

Reality: I try so hard to do this on Mondays, but depending on my work schedule how manic the Monday happens to be, I don't always make this happen. I despise last minute trips to the grocery store two or three times a week, so this is back on the list for 2012.

3. Goal. Get back to yoga class twice a week.

Reality: Since I work on the mornings when my favorite classes are held at the gym, this didn't work out. Yoga is definitely at the top of my list for 2012. If I can't get to the gym, I'll find a way to do it at home. My sanity and “mental well-being” depend on it!

4. Goal. Restrict weekday “cocktails” and afternoon snacking.

Reality: I would have to say that I've managed to cut out most afternoon snacking on the weekdays, but need to get stricter on the weekends. I've done better on weekday cocktails, unless, of course, someone calls me and wants to get together for a drink during the week. But, I have learned how to say “no”, sometimes.

5. Goal. Weigh in once a week on Friday morning.

Reality: I'm pretty good about doing this but it needs to be more of a mandatory thing so I don't let 3 or 4 pounds sneak up on me. I'm not one who is going to weigh every morning, but it's much easier for me to maintain my weight when I weigh once a week. This is still on my list for 2012.

(photo credit: indieshuffle)

Considering that 2011 was a tough year in a lot of ways, I feel pretty good about not completely “throwing in the towel” when it comes to trying to stay in shape.

Between age, stress, hormones and a work schedule that prevents me from early morning exercise, a few pounds have managed to sneak back on my body. So…what am I going to do about it?

Stay tuned.  I'll be back soon with my plan for 2012.

~LilSis

This year; it’s a Snowball Fight!

December 24, 2011

We couldn't let this holiday season sneak by us without a silly little video from JibJab, now could we?

Last year, BigSis and LilSis did a little Disco and the year before, we were Dancing Elves. We get a kick out of these videos just because they make us laugh and hopefully make some of you laugh too!

This year; it's a Snowball Fight, girls against the guys!


Personalize funny videos and birthday eCards at JibJab!

From our family to yours; have a very Merry Christmas!

~LilSis
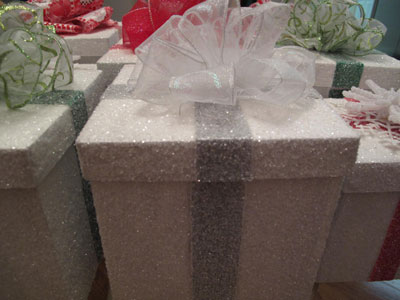
How to Make Glittered Paper Mache Gift Boxes

December 18, 2011

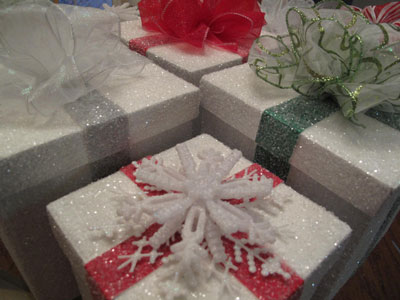
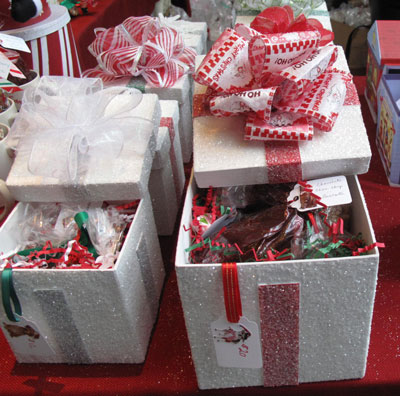
One of the things I made for the Charity Bake Sale for In-Sync Exotics was a set of glittered paper mache gift boxes.  After they were finished, I filled them with paper shred and loaded them up with cookies.

Glitter Paper Mache Box 6

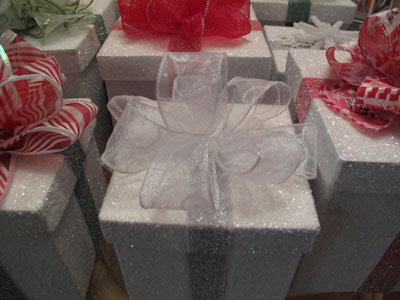
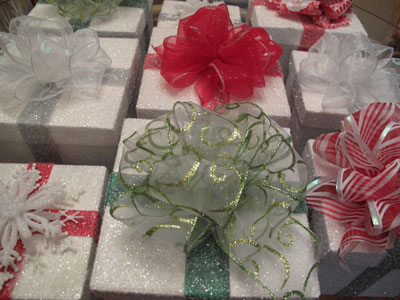
They look like they're covered in sugar or snow, don't they?  There is still time for you to make them for Christmas, so let me show you how easy they are to do.

Glitter Paper Mache Box 3

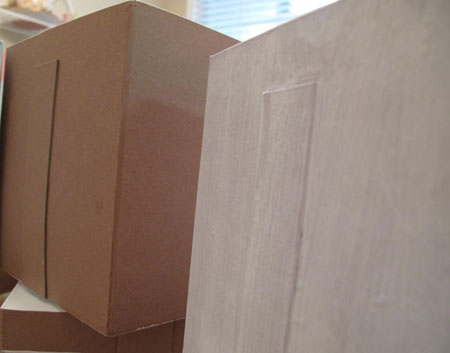
First, make a quick trip to the craft store for the paper mache boxes.  Mine happened to have the ribbon design as part of the paper mache, but if you can't find this style, a plain box would work fine too.  I found 3 sizes of this same style.  The largest one was a bit bigger than I wanted so I got the smaller 2.

You will also need craft paint in white and colors, white craft glue, glitter and ribbon.  You probably already have those items laying around from other projects.

The first step is to remove any price tags or other labels that might be on your box.  Mine also had a hideous cardboard bow on the top that I pulled off.  Once you have a smooth surface to work with, cover the entire box and lid – inside and outside – in a base coat of white paint.  You don't want that cardboard brown color showing through your sparkly glitter.

Glitter Paper Mache Box 2

I added a second coat of white to the inside of the box and lid, and the bottom of the box since those areas wouldn't get glittered, and I wanted them to look nice and not streaky.  Let the paint dry completely.

Next, I painted the ribbon design with one coat of a contrasting color paint. I chose silver, red and green since I was doing Christmas boxes, but you could do any color.  These don't have to be just for Christmas, but you might have an easier time of finding the boxes at Christmastime. Let the contrasting paint dry.

Here comes the fun part!  Working with just one side of the box at a time, add an even layer of craft glue with a foam brush, and then heavily sprinkle/pour on the glitter and gently tap off the excess. Work your way around the box, being careful not to damage any wet freshly-glittered areas as you go.  Do the same with the lid. Allow the glue to dry overnight or until it is completely dry.  Don't worry if a little glitter falls off as you touch the boxes; that's normal.

Glitter Paper Mache Box 4

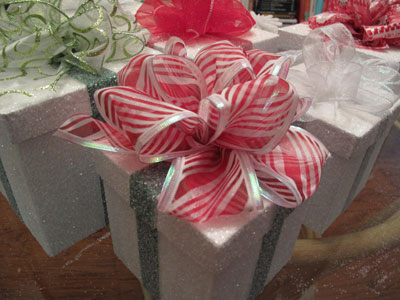
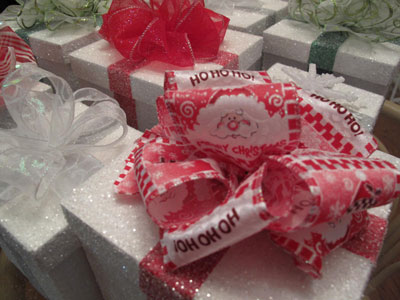
When your boxes are absolutely dry, you can add a pre-made bow or ornament to the top, or make your own bows as I did.  I also used a dollar store snowflake ornament on a couple of mine for fun.

Glitter Paper Mache Box 5

I went to a bow-making class at Container Store a few years ago, but I needed a refresher.  I found their Gorgeous Gift Presentation pdf on their web site, and it includes bow-making instructions with photos.

Glitter Paper Mache Box 1

You just start with wired ribbon and follow the directions for the type of bow you like.  I'm not a pro, but it's a pretty fun little holiday exercise.  When you're satisfied with your bow, hot glue it to the top of the box and you're done!  Voila and ta da!

Glitter Paper Mache Box 7

Fill your boxes up with baked goodies as I did, or with any other gift.  Your recipient will love it and think you're uber crafty!

Glitter Paper Mache Box Filled


~BigSis

Poinsettias, poinsettias, and more poinsettias!

December 1, 2011

Know what a 6oo foot long greenhouse full of beautiful pots of poinsettias looks like?

Answer: Gorgeous!

BigSis and I took a little road trip with a couple of friends to a local casino the other day just for a little penny-slot playing and lunch by the pool in some nice, warm sunshine!

On the way back, we decided to make an impromptu visit to Zalinda Farms, which happens to have the largest selection of poinsettias that I've ever seen! I didn't know it, but California is the top growing state for poinsettias in the U.S.

(It was so much fun being in the middle of all these flowers.)

Unfortunately, BigSis is allergic to these beautiful flowers so she stayed back with our friend, G, while Patty and I took a few quick pics. Even though they were closing, the owner was nice enough to let us in for just a few minutes. (We probably did beg just a little bit.) 🙂

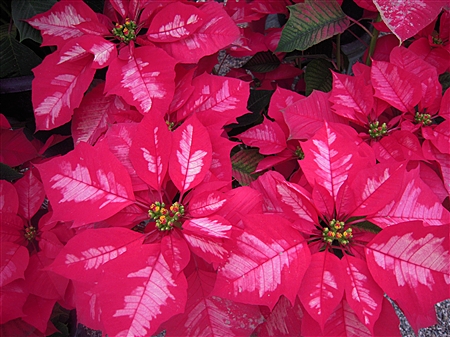
Christmas Poinsettias

Christmas Poinsettias

They had so many varieties of poinsettias to choose from but this was one of my favorites!

Christmas Poinsettias

Our time together while BigSis was here in California flew by faster than ever but we had a great time, as usual! BigSis is back in Dallas now and we both had to get back to reality and back to work today.

Since the big Charity Bake Sale is right around the corner, I'm sure we'll be hearing from BigSis about some of the goodies that she's working on. Hopefully, she'll have time to share with everyone a quick “how to” on some gorgeous glittery gift boxes that she made for the Bake Sale.  🙂

~LilSis
40 Days Until Christmas

November 15, 2011

When we opened our doors for business at 4:30 this morning where I work, Christmas trees and beautiful decorations were revealed, Christmas Blend was brewing, our holiday packaging filled the shelves, red aprons were donned, and, yes; the Christmas music began.

BUT, am I ready? No.

Is it time to start getting ready? Yes!

After Halloween, it seems like the days fly by, even faster than normal. I'm never quite ready to think about Christmas when the retailers fill their shelves with Christmas items, which seems to get earlier and earlier every year. With so many other things on our minds; Christmas, which is supposed to be a joyous time of year, just seems to add more stress to our lives. My goal is to not allow that to happen this year.

For a lot of us, myself included, there's going to be a tighter budget for Christmas this year. So, what that means for me is better planning and getting my list ready earlier. My intention is to try to make a lot of my family's Christmas gifts this year, which means that I need to get started now!

Over the next few weeks, we'll be talking a lot about the big Charity Bake Sale benefiting In-Sync Exotics, but we'll also be sharing some tips to hopefully help make your Christmas planning and shopping go a little smoother.

To get you started, this 4 Top Tips to Get your Christmas Planning Started that was posted by BigSis last year is worth taking a peek at again in case you want to get started early. And this one on how to Make a Christmas Game Plan has links to sites where you can download free printable planning pages.

It may seem too early to start talking about all this Christmas planning, but the best way to avoid stress and last minute chaos is to be organized and plan ahead. So, I'm getting started; how about you?


~LilSis
Happy Veterans Day!

November 11, 2011

Happy Veterans Day and THANK YOU to all those who served our Country!

~LilSis
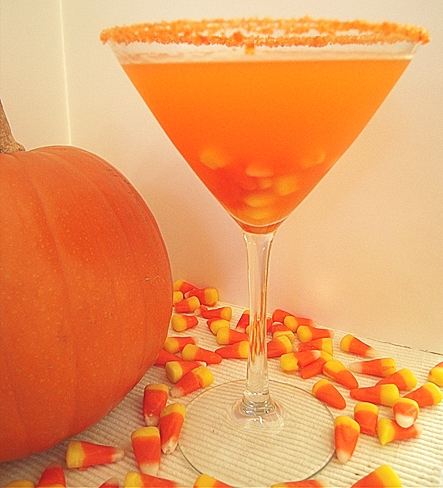
Candy Corn Martini

October 31, 2011

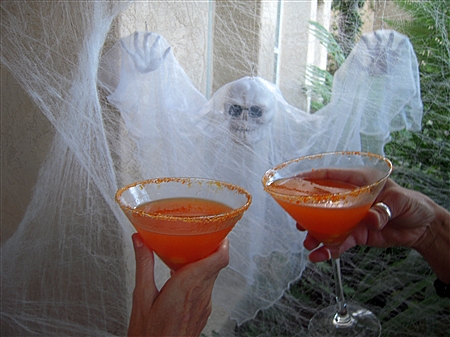
Candy Corn Martini

Like sweet drinks?

If you do, then I think you'll really enjoy this drink, but, if you also love candy corn like I do, then you're going to love this drink! But, beware! It's super sweet!  🙂

We're celebrating Halloween here at Lil Sis' house with a festive Candy Corn Martini. There are several different recipes floating around for this martini, but I started with Food Network's Candy Corn Cordial Recipe and adapted it a little. Almost all of the recipes for this drink call for an egg white to create some froth on top, but I chose to leave that out.

I decided that the martini would look even more festive with some orange sugar around the rim, so I just made my own by mixing a few drops of red and yellow food color with several tablespoons of sugar.

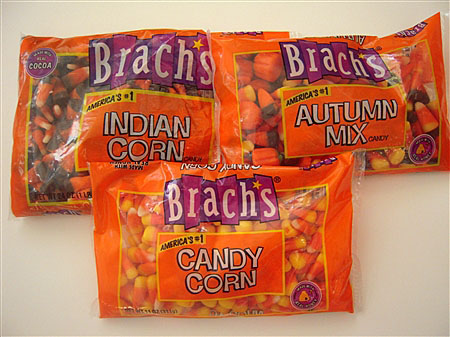
Let me start by saying that I don't have a sweet tooth and normally don't eat candy or drink sweet drinks, but due to my obsession with candy corn, I had to try this one. I started out this Halloween season only buying one bag of candy corn to make these martinis, but on my last couple of trips to the store, I couldn't resist when I saw the Indian Corn and the Autumn Mix.

I'm going to have to take all of this to work just to get it out of my pantry or I'll be eating candy corn for months.

Brach's Candy

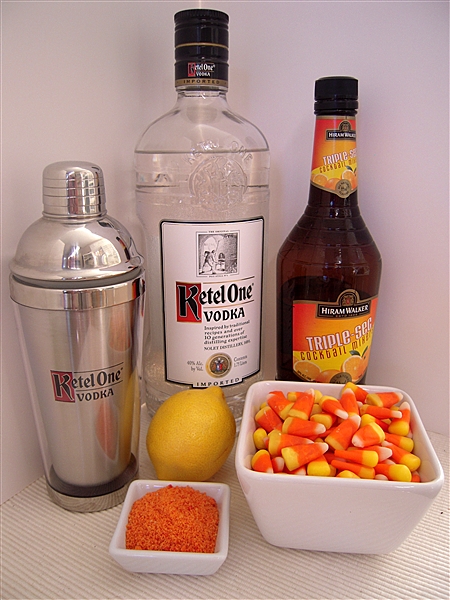
Now, let's get to the Candy Corn Martini. This is a very simple cocktail to make; you just have to allow a few hours to infuse the vodka with the candy corn. Here's all you need:

Candy Corn Martini Ingredients

Candy Corn Martini
(adapted from Food Network)

1/2 c. candy corn
1 c. vodka
2 oz. orange liqueur (I used Triple Sec)
Juice of 1/2 lemon
Candy corn for garnish
Sugar
Red and yellow food coloring

Infuse the vodka: Combine the candy corn and vodka in an airtight container; set aside for at least 3 hours, then strain.

Make the martinis: Rub some lemon juice on the rim of the glass and turn the glass upside down into a plate of the orange colored sugar. Add 4 ounces of the candy corn vodka, the orange liqueur, and the lemon juice to a shaker filled with ice. Shake vigorously for at least 30 seconds. Strain into 2 chilled martini glasses and garnish with candy corn.

Candy Corn Martini's

Enjoy!

HAPPY, HAPPY HALLOWEEN!

~LilSis
Halloween Pumpkin Decorating Ideas

October 26, 2011

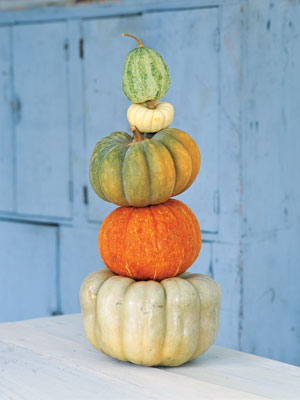
Pumpkin Tower

Pumpkin Tower (from Country Living Pumpkin Decorating Ideas)

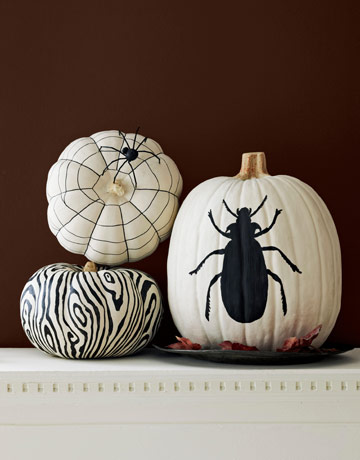
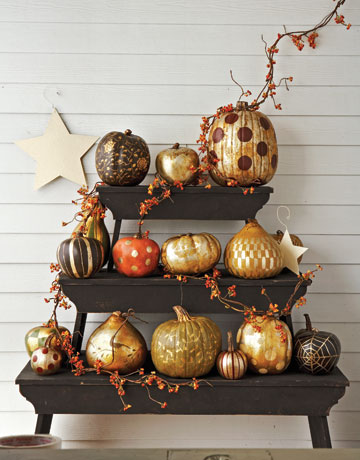
Even if you don't have the time to carve a pumpkin this year or just want to try something different, there are lots of different ways you can decorate your pumpkins without carving them. I found these unique ideas in Country Living's Pumpkin Decorating Ideas.
Graphic Black and White Painted Pumpkins

Graphic Black and White Painted Pumpkins (photo credit: Country Living)


Gold and Silver Gilded Pumpkins

Gold and Silver Gilded Pumpkins (photo credit: Country Living)

Last year, I talked about how I ran out of time to plan our pumpkin carving night at our house and now that our youngest is 18, he's not as interested in carving pumpkins as he was when he was younger. When we had all the kids at home, years ago, we always had a blast on pumpkin carving nights and at the end of the night we ended up with seven uniquely carved “Jack-o'-Lanterns” lined down the front walk.

Even though things aren't the same these days, I do still love to decorate the front porch with different sizes and shapes of pumpkins and hopefully this year, I'll have some time to decorate a couple of them.

Last year, I posted some Quick and Easy Pumpkin Decorating Ideas for those of you who still want to decorate pumpkins but don't have the time to carve them.

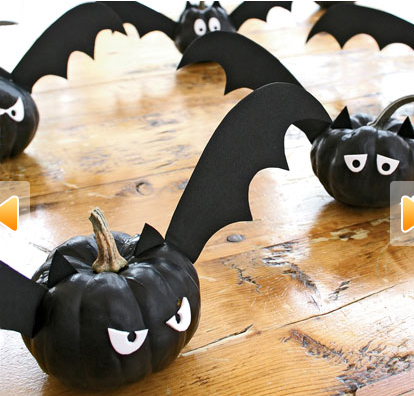
A couple of my favorite ideas from that post are these miniature pumpkin winged bats

Miniature Winged Pumpkin Bats

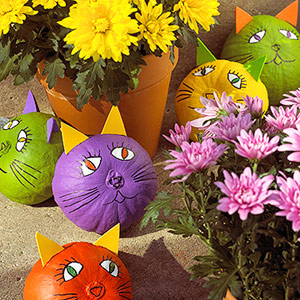
and these adorable, painted kitten pumpkins.

Painted Kitten Pumpkins

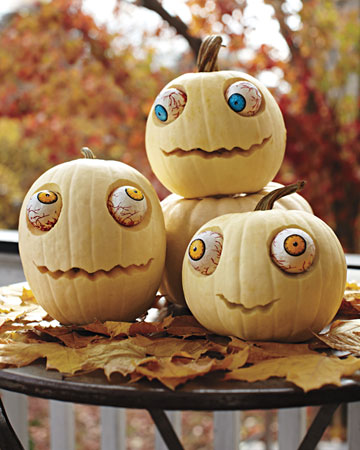
Here are a few more fun ideas from Martha Stewart's Halloween Pumpkin Carving and Decorating Ideas.

Zombie Pumpkins

Zombie Pumpkins (photo credit: Martha Stewart)


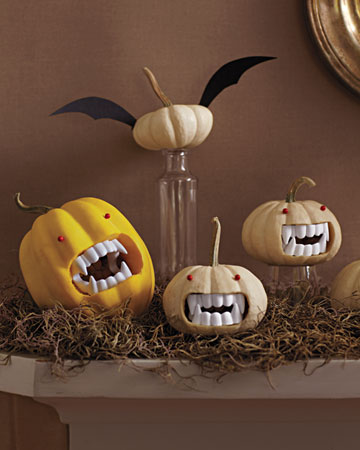
Fanged Pumpkins

Fanged Pumpkins (photo credit: Martha Stewart)


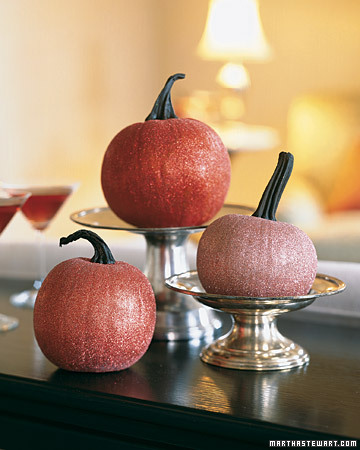
Glittered Pumpkins

Glittered Pumpkins (photo credit: Martha Stewart)

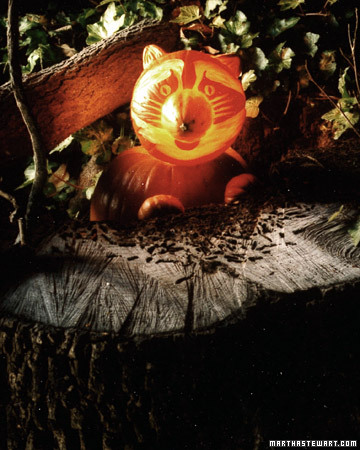
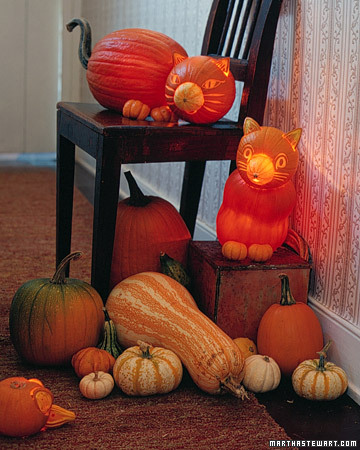
And, no, we aren't getting paid by Martha Stewart, but if you do have the time to carve pumpkins this year, you've got to check out her Halloween Pumpkin Carving Ideas! She has some of the cutest carved pumpkins! Here are a few that I love.

Pumpkin Raccoon

Pumpkin Raccoon (photo credit: Martha Stewart)

Cat Pumpkins

Cat Pumpkins (photo credit: Martha Stewart)

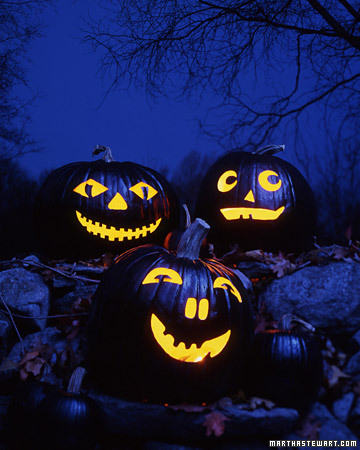
Black Magic Carved Pumpkins

Black Magic Carved Pumpkins (photo credit: Martha Stewart)

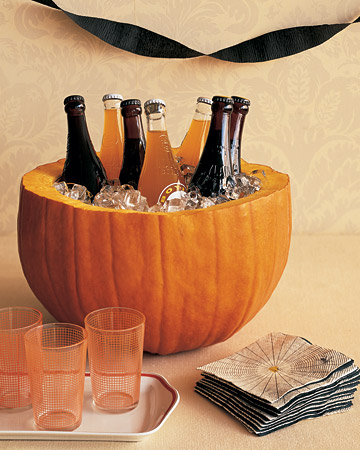
And, I love this Pumpkin Party Cooler so much that I think I'm going to have to make one of these!

Pumpkin Party Cooler

Pumpkin Party Cooler (photo credit: Martha Stewart)

Isn't that cute and festive? And, since I love making festive cocktails, I decided to experiment with a new one for Halloween this year! Be sure to come back in a few days to see whether or not my Candy Corn Martini was a success. 🙂


~LilSis