Easter Chicks Deviled Eggs

March 29, 2013

Easter Chicks Deviled Eggs

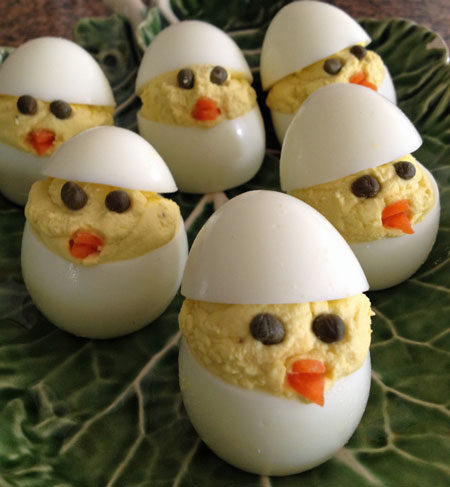
I first saw a photo of these cute little Easter Chicks Deviled Eggs on Pinterest several weeks ago so I repinned it to my LilSis Holiday Goodies board so I wouldn't forget to make these for Easter. This would be a fun little project to get the kids to help with because these little Easter Chicks are sure to be the hit of the party! Let's get started.

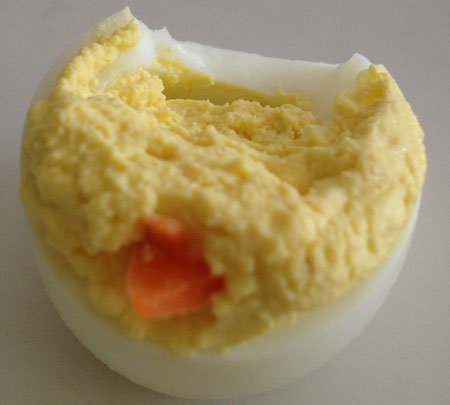
First, cut a little slice off the wide end of your boiled eggs to create a flat surface so the chicks will sit flat and not roll all over the plate. Next, on the narrow end, cut a wider section off, that will become the chick's little hat; (about 1/3 of the egg). Carefully remove the yolks from the eggs and place in a bowl.

You can start with your favorite recipe for the deviled eggs; but for this little project, a very basic deviled egg is perfectly fine. It's more about the cuteness of the little chicks than anything else.

For mine, I simply mashed my egg yolks, added a splash of pickle juice, a little mayo, ground mustard, and lemon pepper to taste. No reason to measure, just don't use too much mayo or pickle juice because you don't want the egg yolks to be runny.

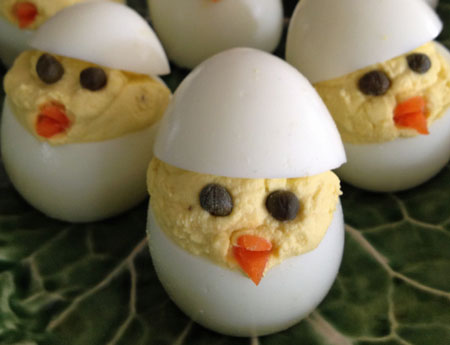
When you've got your deviled egg mixture ready, just put in a plastic baggie and cut a little hole in the corner and squeeze the mixture into the egg.  I used capers for the eyes and little triangles of baby carrots for the beaks.

I got in too big of a hurry to take photos along the way, but if you need the visual instructions,  A Thrifty Mom website has some easy step by step photos.

Easter Chicks Deviled Eggs

These are fun, simple and inexpensive to make and almost too cute to eat, don't you think?

Easter Chicks Deviled Eggs

Almost. 🙂


~LilSis

Silk-Dyed Easter Eggs

April 7, 2012

Silk Dyed Easter Eggs

I had so much fun with my Natural Dye Colored Easter Egg project  last Easter so I decided to try something different again this year.

Before I started these, I watched an instructional video on Martha Stewart and I also browsed online a little bit just checking out some other tutorials on how to make these Silk Dyed Easter Eggs.

I loved the gorgeous eggs from Our Best Bites so I suggest checking out their site for step by step instructions.  Each and every one of their eggs are beautiful! I didn't have as colorful silk as they used but I'm still pretty happy with my results.

I didn't take the time to photograph each step but these are really easy to make. Here's a photos of a few of the eggs after they were wrapped in the silk squares. I tied the twist tie at the top of some and on the side of some depending on the pattern of the silk.

Next, wrap the eggs in some kind of white fabric; an old pillowcase or napkin works perfect. This step can be done at the same time when you wrap the silk around the egg, but I wanted to make sure the silk was really tightly wrapped around the egg, so I wrapped in the silk first, then the white fabric.

Here are the wrapped eggs in a big stock pot ready to be covered in water. Just cover with water, add 1/4 c. vinegar, then boil at a slow boil for about 20 minutes.

Silk Dyed Easter Eggs

Let them cool a few minutes and then you're ready to unwrap. This was the best part; like Christmas morning. 🙂

Silk Dyed Easter Eggs

Silk Dyed Easter Eggs

A few of these have more subtle patterns because I think the scarf I used wasn't 100% silk. That's the most important part about this process. For the pattern to transfer in detail to the egg, the fabric has to be 100% silk.

Silk Dyed Easter Eggs

This was one of the subtle patterns created by the animal print scarf that I believe was not 100% silk. (the tag was missing, so I took a chance.)

Silk Dyed Easter Eggs

This was a random design that I thought was pretty; just made by the way the silk was tied.

Silk Dyed Easter Eggs

This pretty pattern was created from an old tie that I dug out of my hubby's closet.

Silk Dyed Easter Eggs

These are my favorites. They turned out the best and were actually made from an old pair of my hubby's silk boxers! (That explains why there was no ‘before' photo.)

Silk Dyed Easter Eggs

Silk Dyed Easter Eggs

Silk Dyed Easter Eggs

Silk Dyed Easter Eggs

So; be creative, have fun,

and most importantly,

have a Blessed Easter Sunday!

~LilSis

Crazy Colored Easter Eggs

April 9, 2009

Flickr Photo by Barefoot Kitchen Witch

Flickr Photo by Barefoot Kitchen Witch

If you haven't seen The Barefoot Kitchen Witch's twist on Coloring Easter Eggs, you've gotta check it out! I love these! She used a method similar to making Chinese Tea Eggs and they turned out awesome!

carton-of-colored-eggs

She even made deviled eggs out of one batch. You can read how to make these crazy colored deviled eggs here.

deviled-easter-eggs3

I bet the kids would have a blast making and eating these!  I hope I have time to make these or my pastel colored eggs are going to look awfully boring in comparison!

~LilSis