Easter Cupcakes and Candies

March 27, 2011

Even though Easter isn't until April 24th this year, it isn't too early to start thinking about which goodies you'll be making for your Easter celebration. Here are a few of our favorite Easter cupcakes, candies and baking ideas that might help get you started. 🙂

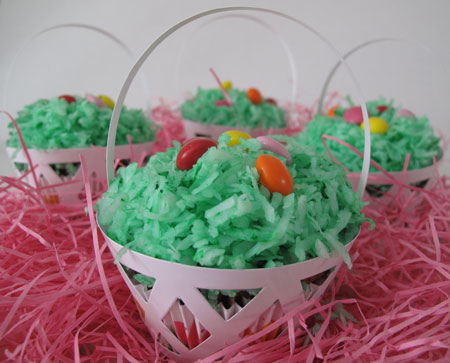
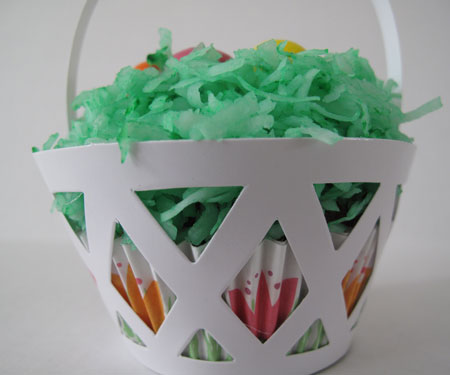
Easter Basket Cupcakes

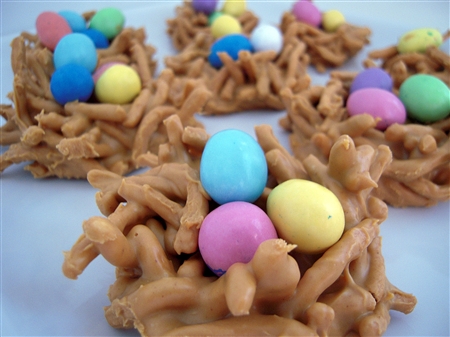
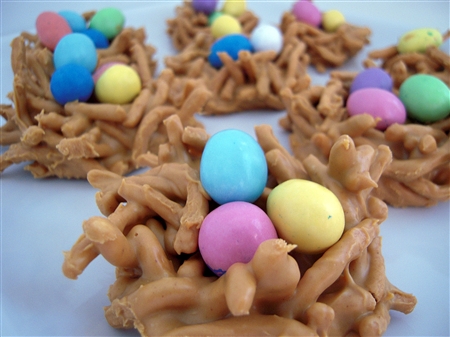
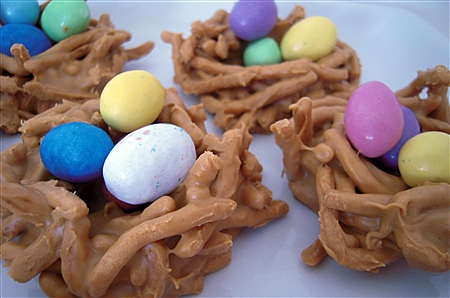
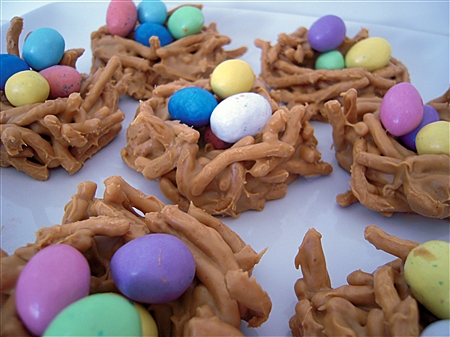
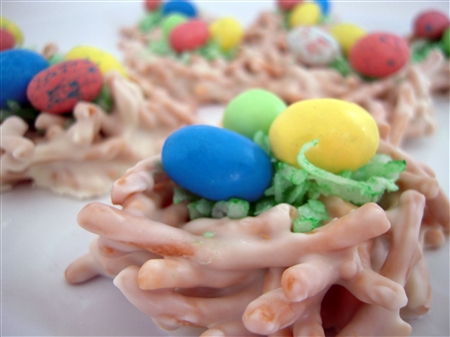
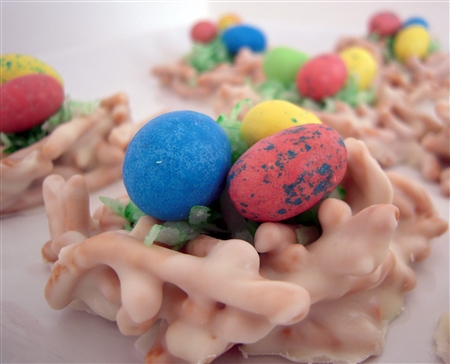
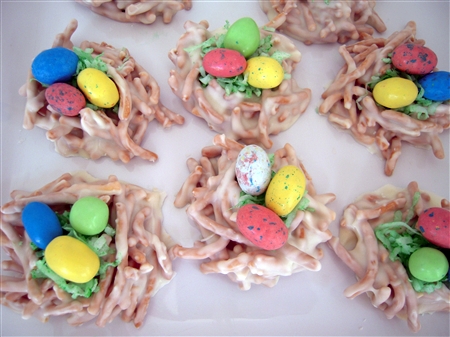
Easter Bird's Nest Candy

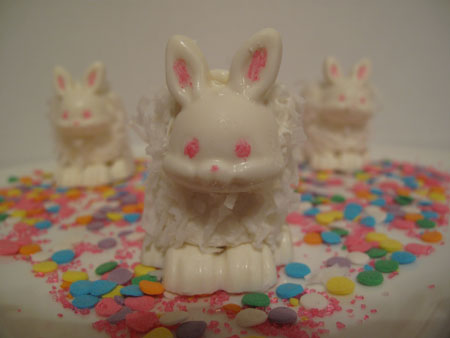
Marshmallow White Chocolate Easter Bunnies

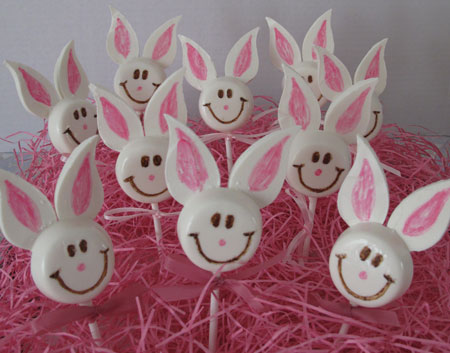
White Chocolate Smiley Face Easter Bunnies

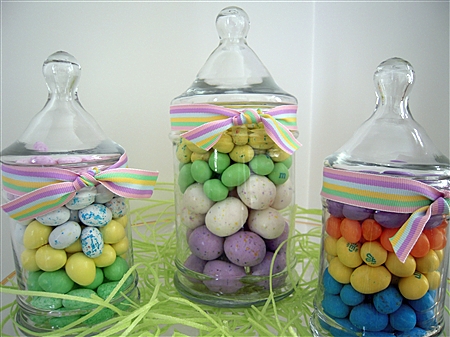
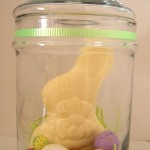
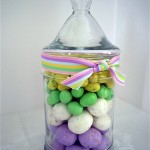
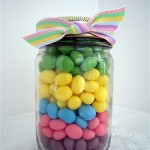
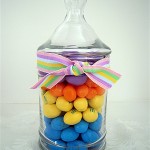
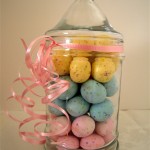
Easter Candy Gifts

And you'll find some great Easter Baking Ideas in this roundup that BigSis put together last Easter.

~LilSis

How to Make Painted Glass Marble Magnets

March 20, 2011

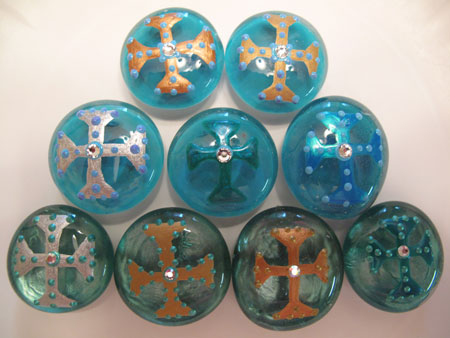
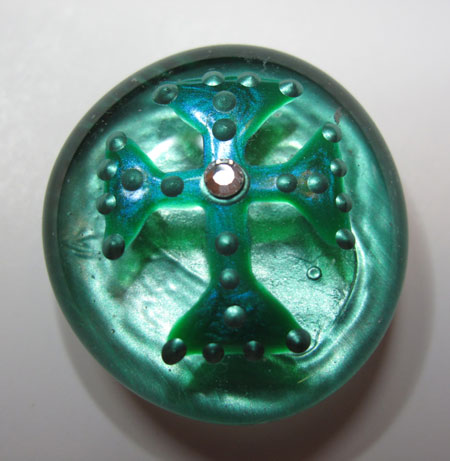
Glass Marble Done Fav Green

You've probably seen tutorials for making adorable magnets from the flat glass marbles that are used as filler in vases of flowers. Most of the instructions I've seen involve gluing paper of some kind to the back of the marble: scrapbook paper, gift wrap, newsprint, hand-drawn images, whatever.
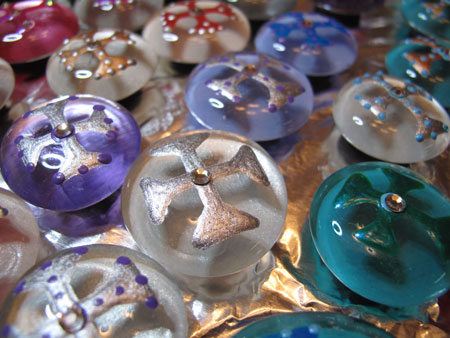
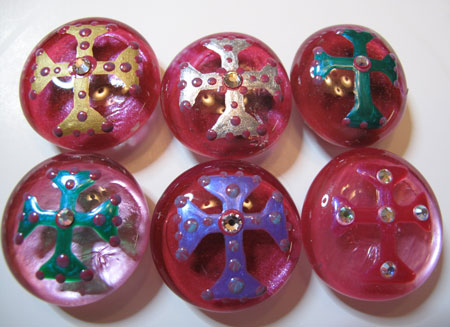
Glass Marble Done Group1

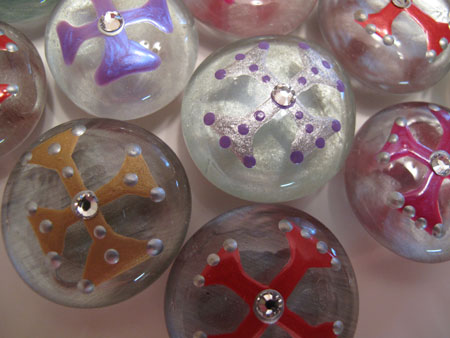
I think those marble magnets are really cute and easy to make, but I like to do mine in a different way.  I like to paint them!

There are probably lots of ways to do this, and you can absolutely inject your own creativity.  I'll show you the method I came up with, and then you can take off with your own ideas.
Glass Marble Done Group4

Let's start with the supplies you need:

  • Flat glass marbles: Available at craft stores, discount stores, pretty much everywhere. I buy the clear ones because I can see my template through them, but you can also find really pretty blue, green and amber colored ones.
Glass Marble Paint

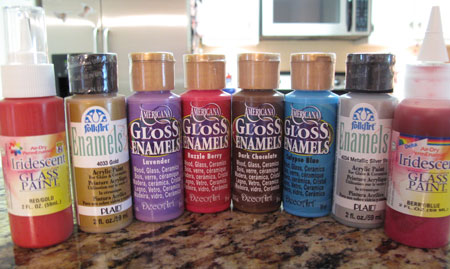
  • Glass paint: I prefer the air-dry kind that doesn't require baking.  I use FolkArt Enamels, Americana Gloss Enamels, DecoArt Ultra Gloss Metallics (these might be discontinued), and Delta PermEnamel.  My favorites are PermEnamel Shimmers and their Iridescent Glass Paint.  Delta PermEnamel is the glass paint equivalent of MAC eyeshadows: they come in jillions of colors, have great textures, apply well and look beautiful!
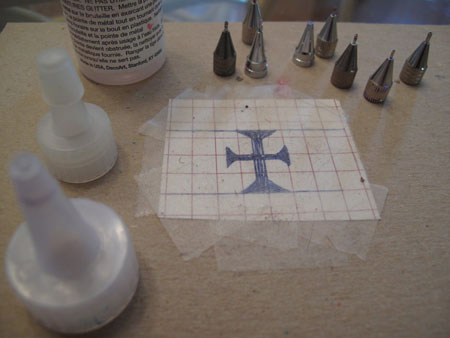
  • Glass painting kit with tips, adapter caps and plastic bottles.
Glass Marble Tip Kit

  • Grid paper:  To make your painting template.
  • Swarovsky crystals: Find them in the jewelry-making aisle at your craft store.
  • Tweezers: To apply the crystals.  Just raid your bathroom drawer, don't buy special jewelry-making ones.
Glass Marble Magnets Glue

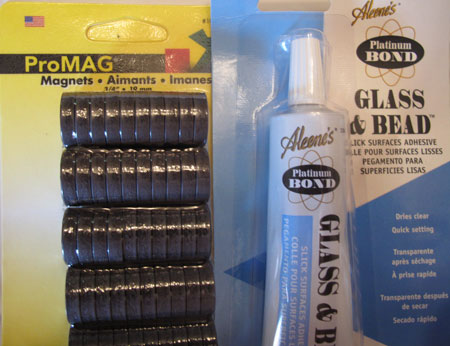
  • Magnet “buttons”
  • Glue: Strong glue for slick surfaces, like Aleene's Glass & Bead Adhesive, E6000 or Bond 527.
  • Magnifying craft light: If your eyes are “mature” like mine.  This is close work, so don't be too proud to use it!

The first step is to create a clean painting surface, and sometimes these marbles are a little dirty.  I give mine a quick rinse in straight white vinegar, but you could also use alcohol.  I use a large plastic container, and fill it with the marbles.  As you remove the marbles from the bag, be very careful.  They're glass, of course, and it isn't unusual to find a broken or badly-chipped marble.

You'll notice that I'm working with a lot of marbles.  It makes sense to me to paint a large batch at one time, since I already have all the stuff out.  Changing paint colors requires washing supplies, so I might as well do several marbles of each color while I'm at it. For this tutorial, I painted 7 dozen marbles.

Add vinegar or alcohol to cover the marbles, and let them sit for a few minutes.  Scoop them out with a slotted spoon, and lay them out on a thick towel in a single layer.
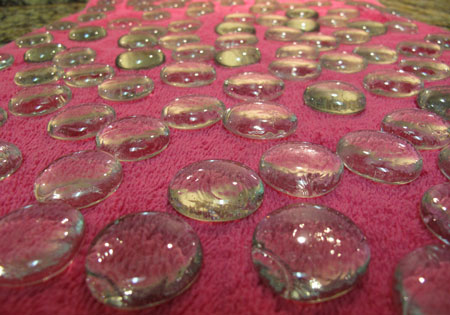
Glass Marble Magnet Wash

You can blot them a little or just let them naturally dry.  I've never had a problem with spots forming, so air drying is usually fine. You definitely want the marbles to be completely dry before you start painting.  Try not to touch the surface of the marbles from this point on, since the natural oils in your fingers could interfere with the paint adhering.

Once they're dry, remove the marbles from the towel and place them on an old foil-lined cookie sheet or tray.  I also cover another tray or sheet with foil to have a place for the marbles as I finish working on each one.  This 7 dozen is all lined up, ready to get dolled up!
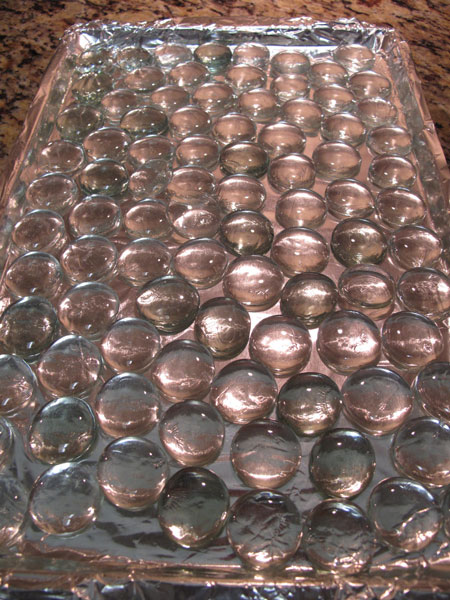
Glass Marble Magnet Dry

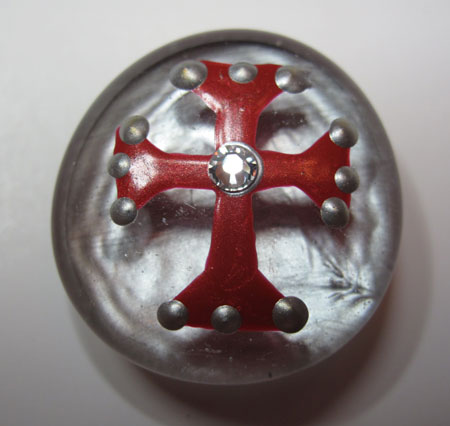
You may be able to freehand your design, but I can't.  Years ago, when I came up with the idea of painting these, I tried freehanding and it wasn't pretty.  I'm crafty, but not artsy, so I need a template.  I like to paint crosses, so it was very easy to draw a cross template on a piece of gridpaper.  Can you tell how well used/loved this template is? 🙂
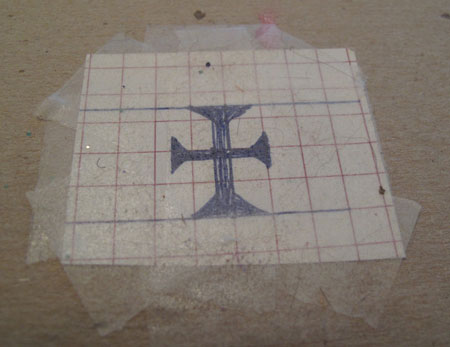
Glass Marble Magnet Template

Once you get your design drawn out, attach it to a piece of cardboard so it's sturdy.  Here's a trick for you.  Cover the design with a few pieces of removable two-sided tape.  This semi-sticky surface will hold onto the marble just enough to keep it stable and in place while you're painting on it.  When the tape eventually gets covered with cat hair (or dog hair or lint) you can easily peel it off and replace it with fresh tape.  It really makes a big difference.

If you need the magnifying light, now is the time to pull it out. Place your template on your work surface, and choose a marble, any marble.  Imperfections are common in these guys, so don't expect a perfect flawless one.  That's part of their appeal.  Discard chipped ones or any that just aren't pretty to you.  Center your marble on top of the sticky template.

Here comes the fun part…painting!  Select the color you want to paint your crosses.  I love metallics: gold, silver and bronze.  I also love the gorgeous shimmery opalescent colors from Delta PermEnamels.  You can customize the color of your marbles for the occasion or the season, or just use the colors you like.
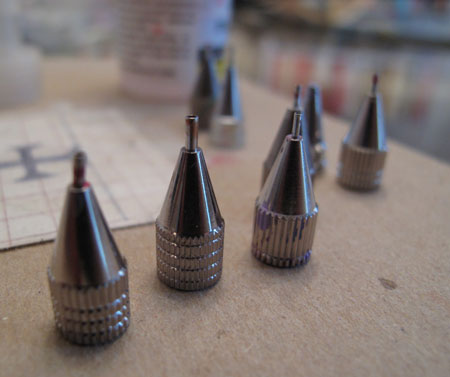
Glass Marble Magnet Tips

So how do you get the paint on the marbles?  Using a brush is too tricky for non-artist me, so I went looking for an easier solution. What I found are these brilliant metal glass painting tips that look like little ballpoint pen tips.  I've seen a couple of different kits at the craft store, and the tips may vary a smidge, but they always include the tips, small plastic bottles, and the adapter caps that screw onto the paint bottle.

The little metal tips snuggly screw onto the plastic adapter caps. I find that they also fit perfectly on the caps of some paint bottles.  If you're using paint that comes in a chubby jar like the Delta PermEnamel, you'll need to pour a bit of it into a small paint bottle that fits the adapter cap.
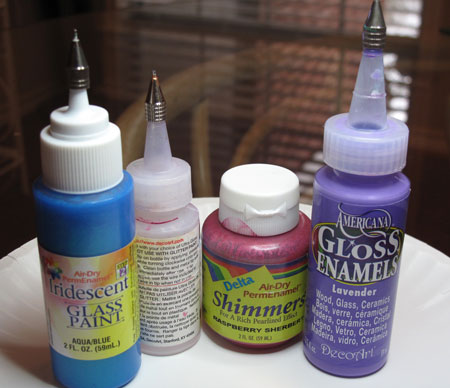
Glass Marble Tips on Caps

Once you have the tip securely on the paint bottle, test it out before you paint.  I keep a paper plate and a paper towel nearby for this purpose. Draw a line of paint on the paper plate to make sure the paint is flowing smoothly, and then wipe off the tip cleanly.

These painting kits also come with a little piece of wire that you can use to dislodge any clogs that might form in the tips, so keep this little jewel on your paper plate too.  Some paints are really bad about clogging, but others don't clog at all.

And a word to the wise, when you change paint colors and switch to a new tip, be sure to drop the used tip and cap into a cup of water.  If you let it sit and dry out, you'll pretty much be up a creek and have to toss those pieces.  You'll never get dried paint out of that skinny little tip.

Now, back to painting.  I start at one end of the marble, and just follow the template, filling in the design.  You don't want to squeeze the paint bottle really, just hold the bottle like you were holding a marker or pen, and guide the paint around the template.  The paint shouldn't be so thick that it will drip or ooze, but you do want good even coverage after two coats.
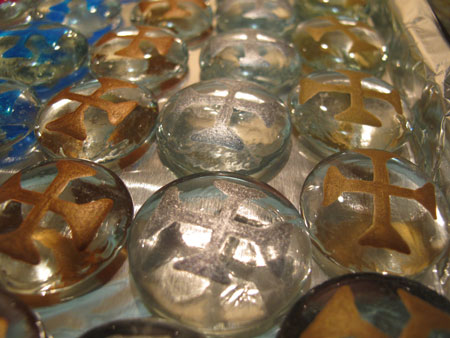
Glass Marble Magnet 1 Coat Metallic

Don't drive yourself crazy by striving for perfection, especially with this first coat. After the second coat, you'll be happy with what you see, so don't worry.  The main thing is to keep within the lines, and have fun!  If you make a mistake, you can try to clean it up with a toothpick.  If it's a doozie of a boo boo, just toss the marble and move on to the next one!

Tada!  First coat complete!
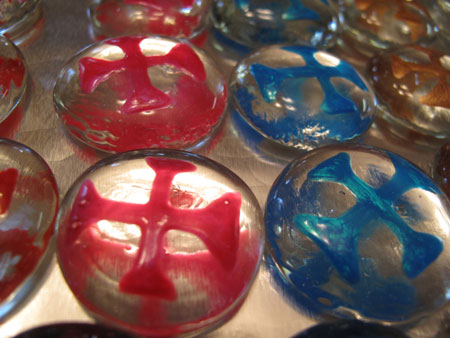
Glass Marble Magnet 1 Coat Close

Let the first coat dry thoroughly; I prefer overnight.  For the second coat, you won't need the template, so just make sure you stash it in a safe place for next time.

Take the same color paint, and add your second coat.  You can smooth out any rough edges and fill in any sparse areas.  Once you're finished, allow the second coat to dry overnight again.
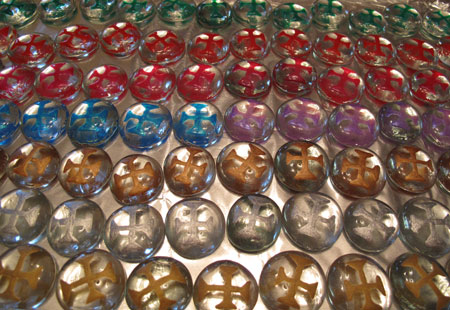
Glass Marble Magnet 1 Coat Wide

Did you think we were finished?  Oh, heck no.  The fun's just starting!  We're going to add a background color to the BACK of your marble.  You can skip this step if you want to, and sometimes I do, but I think it really adds a lot.  It gives dimension and depth to the marble, adds a contrasting or complementary color, AND hides the magnet you're going to glue on the back. Go a little crazy with your background color, or just let the design color be the star.
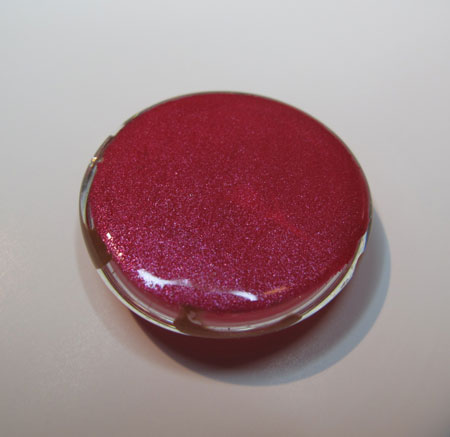
Glass Marble Magnet Back1

For this step, I use a small flat paintbrush.  And…you got it, let it dry overnight.
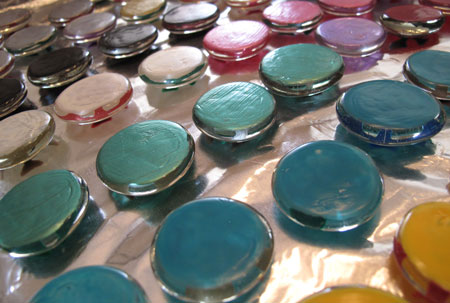
Glass Marble Magnet Back All

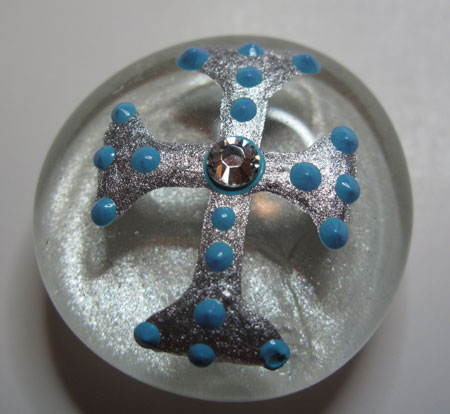
If you've chosen a sheer color, like my pearly white, you might want to add a second coat after the first sets up, but it isn't necessary.  It's up to you!  If you want to see how a color might look behind your cross, just hold up your marble to the bottom of the paint bottle, like this.
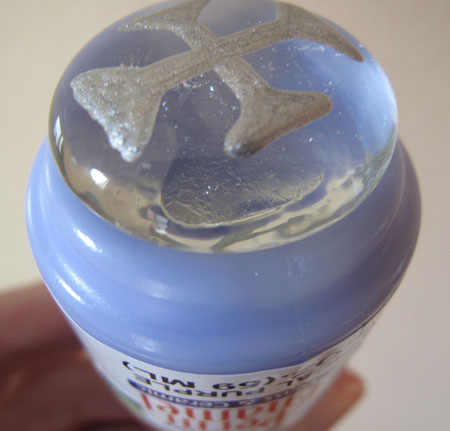
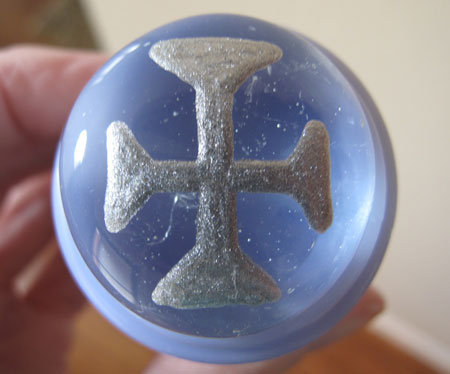
Glass Marble Magnet on Paint2

Glass Marble Magnet on Paint1

We're coming down the home stretch, so stay with me.  You have two coats of color on your cross, plus a coat or two of background color on the back of the marble.  I like to add a magnet at this point.  If I do it now, I don't have to rest the marble on it's frontside after the delicate little dots are applied, and risk smushing them down a bit.  I like for the decorations to be as dimensional as possible.
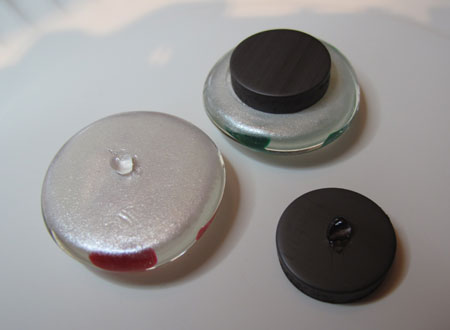
Glass Marble Magnet Glue

To attach the magnet, add a tiny dot of glue to the magnet and to the back of the marble, and allow it to sit for a minute or two (check your particular adhesive for directions).  Any longer and the glue may dry too much.  Attach the magnet, and set aside to dry… overnight.
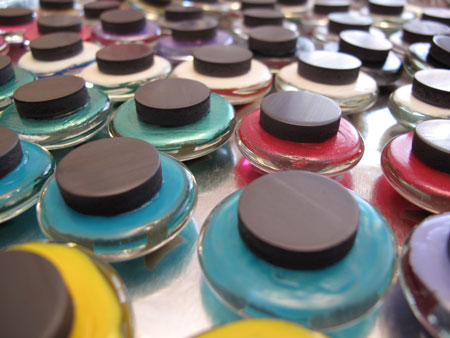
Glass Marble Magnets All

Now the last steps!  It's time to decorate the front of the marbles.  I do dots because they're easy and I like how they look, but you could do squiggles or lines or anything else your imagination can conceive of.  Choose any color!  I really like adding a dot color that coordinates with the background color, but other times, the dot color just comes out of the blue.

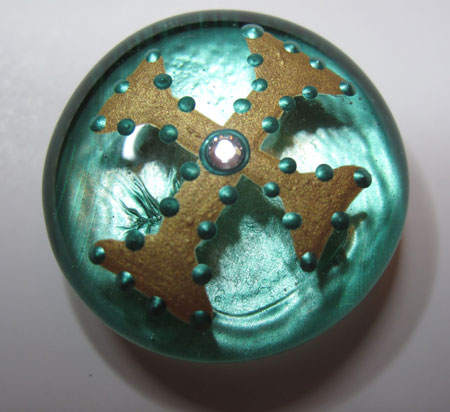
Before I add the decorative dots, I add one teensy tiny dot of paint (you could use glue, but you already have paint in your hand) to the center of the cross and carefully place a swarovsky crystal with the tweezers.  Press it down very gently.  Then just add dots here and there all over the marble, in any pattern you like.
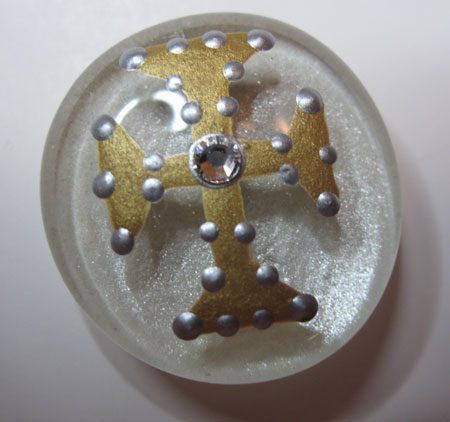
Glass Marble  Magnet Done Fav Gold

Voila!  Your marble magnet is finished! Do you love it?
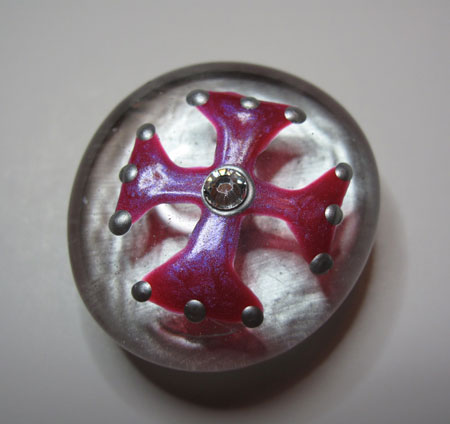
Glass Marble Magnet Done Fav Pink

I love to give these painted marble magnets as little gifts, so they need to be packaged up cute.  I've seen people put the paper-backed magnets in Altoid tins, and it's kind of cool that they stick in place and don't rattle around.  You'd have to decorate the tin though, and you have to deal with the raised logo on the front of the tin unless you buy flat new ones.
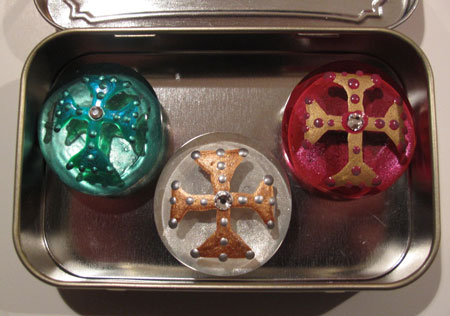
Glass Marble Magnet in Altoid Tin

You could also put the marble magnet in a little drawstring bag with a bit of pretty shred.  This is kind of sweet and Eastery-baskety.
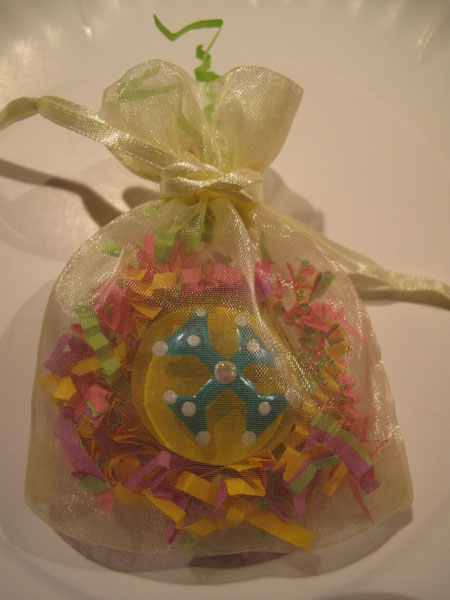
Glass Marble Magnet Favor Bag

What I like to do though is to take this beautiful marble to the next level by customizing a little paper mache box for it, with stamping, embossing and a scripture hidden inside.  Then it goes into the drawstring bag, and then into a handmade origami box. And if that isn't enough, we'll then wrap up the whole thing with a tulle bow.  Overkill?  Nah!  There's no such thing as overkill when it comes to giving gifties!

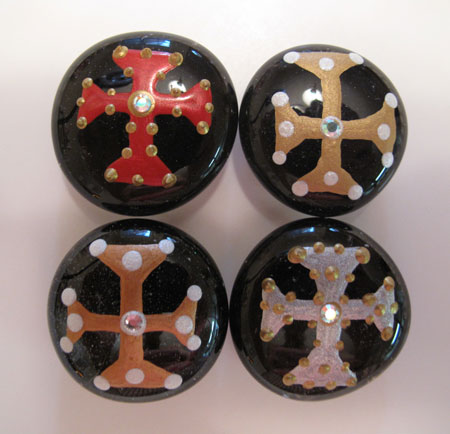
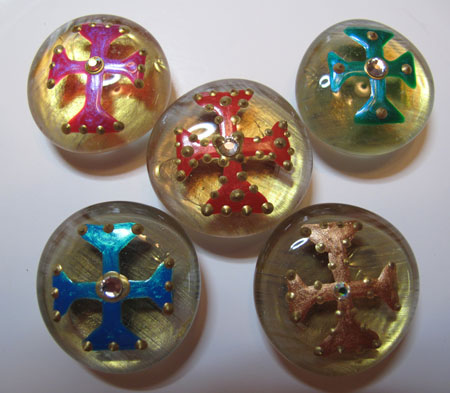
I'll show you how to do all of that next time, and share some of my favorite ways to give these away!  Til then, here are a few more of my favorite marble magnets from this big batch.  See you soon!
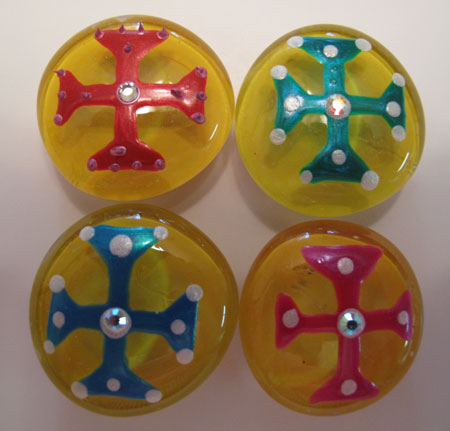
Glass Marble Magnet Done Yellow

Glass Marble Magnets Done Blue

Glass Marble Magnet Done Fav Silver

Glass Marble Magnet Done Black

Glass Marble Magnet Done Gold

Glass Marble Magnet Done Fav Red

Glass Marble Magnet Done Purple

Glass Marble Magnet Done Fav Green2

Glass Marble Magnet Done Pink

~BigSis

Natural Dye Colored Easter Egg Project Recreated for Country Living Magazine

March 12, 2011

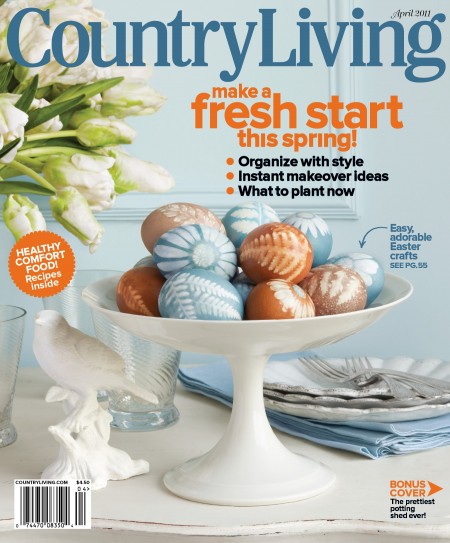
Country Living Magazine April 2011 Issue

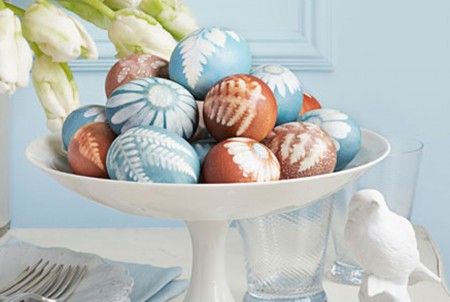
Do the eggs on the Country Living Magazine's April, 2011 cover look familiar?

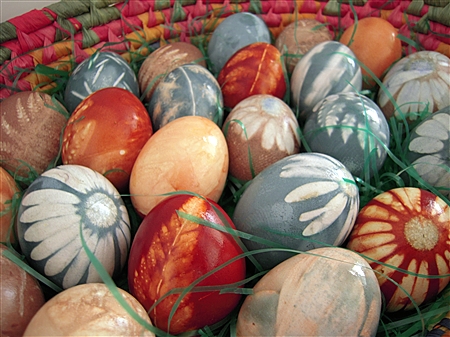
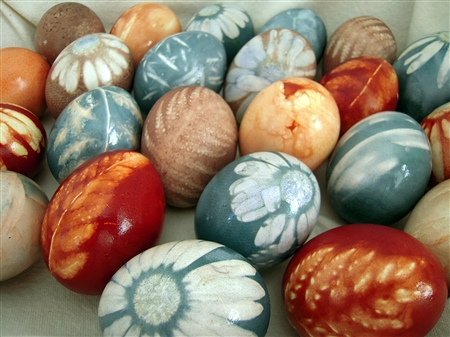
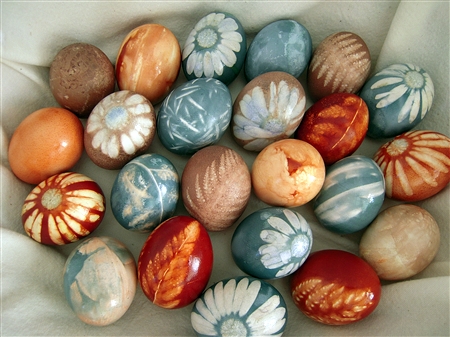
Do you remember this Natural Dye Colored Easter Egg post that I did for Easter last year?

Natural Dye Colored Easter Eggs

Now that the April issue of Country Living Magazine is officially on the newsstand, we can finally announce this exciting news!

We were contacted by an Editor from Country Living Magazine back in January to see if I would be interested in recreating this Natural Dye Colored Egg Project for the April issue of their magazine. And, of course, I said yes! 🙂

Natural Dye Colored Easter Eggs

It's true; the eggs beautifully displayed on this pedestal were made by me, in my kitchen in Southern California, and were carefully packaged and shipped overnight to County Living in New York City for their photo shoot!

The Editor had originally planned on the project being featured in the craft section of the magazine, but we were thrilled when we received the news that the Editors decided to feature the project on the cover. And the project is also featured on their website in the 10 Adorable Easter Craft Projects section.

If you've come to our site after reading about us in Country Living Magazine, we would like to extend a HUGE welcome to you!

If you like this project, we want to encourage you to Subscribe to our Feed and Like us on Facebook. We have plans to share more craft projects here on our site, as well as continue with our recipes, beauty product reviews and tips we discover that help us in our quest to live a fit, healthy and responsible lifestyle that’s still fun!

We don’t claim to be experts in any one thing, but what we do know is what women care about and like to talk about.  That’s what we love to share with you here on BigSisLilSis.

To celebrate this project making the cover of Country Living Magazine and to welcome our new readers, we decided to give away a Country Living book. And since the Editor at Country Living was so kind to donate FOUR books to us, we'll be having a Country Living Book Giveaway each week for the next four weeks.

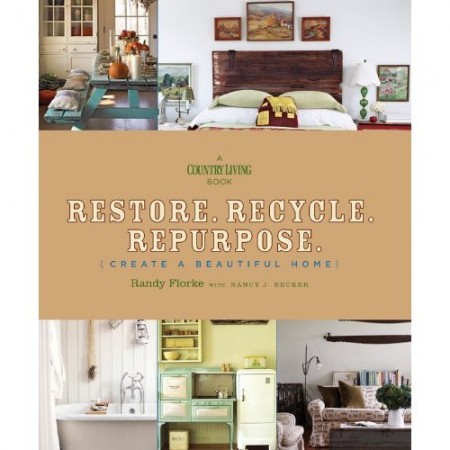
To kick-start this series of giveaways, the first book we'll be giving away to one lucky reader is this gorgeous book!

Restore. Recycle. Repurpose. Create a Beautiful Home

(A Country Living Book)

Restore. Recycle. Repurpose. A Country Living Book

And when I say gorgeous, I mean gorgeous! I LOVE this book!

(I really wanted to keep this book for myself, but it's more fun to give than receive, right?) 🙂

This book is full of beautiful photos and inspiring ideas on how everyone can create a home that's as harmonious with the environment as it is beautiful. The book is jam-packed with great, practical advice on ways you can “go green” in each room of your home.

Do you want to know how this lovely book can be yours?

It's easy!

Here are the details!

You can do any or all of these for a chance to win:

  • Leave us a comment. Do you have any fun or unique ways to decorate eggs for Easter? Or any fun tips on “going green” in your home?
  • Subscribe to our Feed and leave us a comment letting us know if you already subscribe or if you're a new subscriber.
  • Subscribe via email. (It's easy to do in our top right sidebar!) Leave a comment if you already subscribe via email or if you're a new subscriber.
  • Like us on Facebook and leave us a comment letting us know that you Like us.
  • Tweet this post and leave us a comment that you tweeted it.
  • Stumble this post and leave another comment to let us know it's stumbled.

So, there you have it. You can enter up to seven times! Since the winner will be chosen at random.org; obviously, the more times you enter, the better your odds of winning this beautiful book.

This giveaway will officially end at midnight on Friday, March 18th and on Saturday, March 19th, we'll announce the winner and the next book giveaway!

(I’ll let ya in on a little secret. If you follow us on Twitter or Like BigSisLilSis on Facebook, we'll be giving you some bonus chances to enter during these next six days.)

Mabel's Labels www.mabel.ca

~LilSis

Can we just pretend it’s still Easter?

April 5, 2010

I know we've thrown a lot of Easter projects at you over the last week or so, but believe it or not, I have a couple more!  After this post, I promise, no more Easter talk til 2011.

I worked on these little White Chocolate Smiley Face Easter Bunnies over a period of days, but then guess what happened when I was finally putting the post together on Saturday afternoon?  My internet went down, of course!  Ding dang Time Warner employee accidentally disconnected me when he was working on someone else's service in the hood, and they couldn't get anyone out here to fix it til Monday morning.

So call me selfish, but I am not going to let all that work go to waste without showing you the bunnies!  I don't care that Easter is over!  😀  Let's just pretend that it's still Easter!

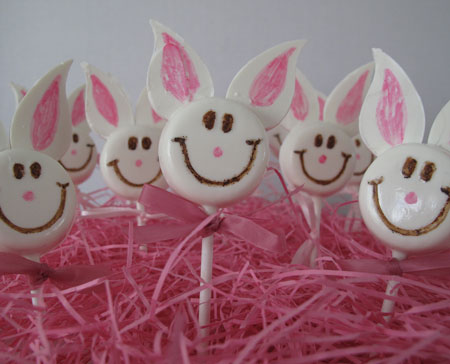
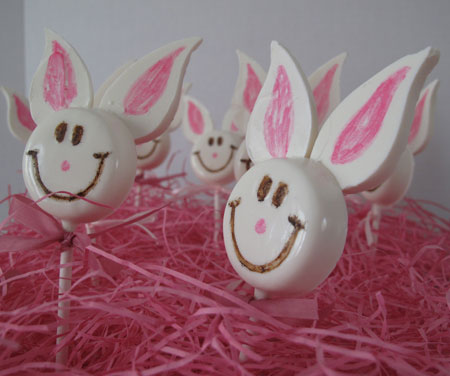
Now, on with it.  I won't bore you with instructions that you won't need til next March, but I do want to show you the photos.  These are the White Chocolate Smiley Face Easter Bunnies.

Smiley Face White Chocolate Easter Bunnies

Smiley Face White Chocolate Easter Bunnies

Smiley Face White Chocolate Easter Bunnies

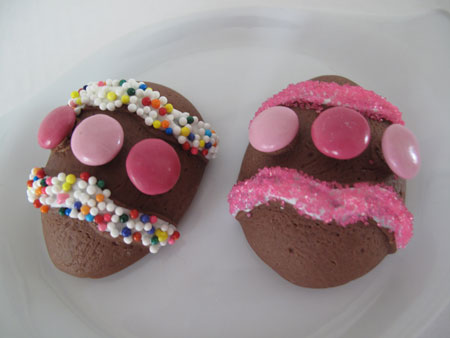
Oh, and one more thing…Chocolate Fudge Easter Eggs; molded and decorated in pink, of course!

Chocolate Fudge Easter Eggs

Now, we can all go back to our after-Easter worlds!  Thanks for indulging me!

~BigSis

Natural Dye Colored Easter Eggs

April 2, 2010

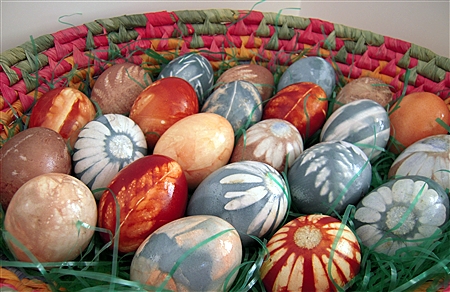
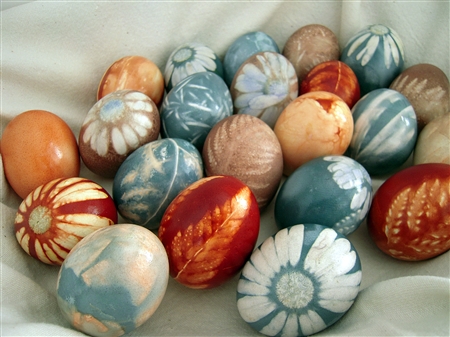
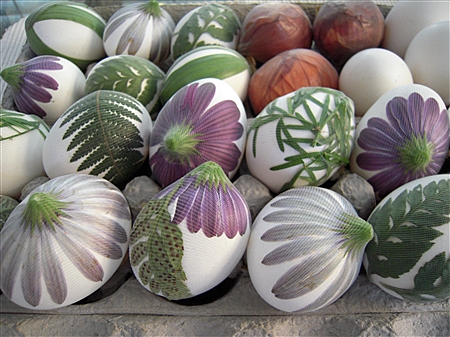
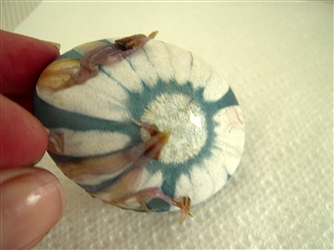
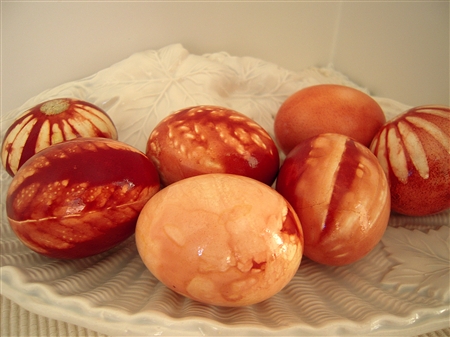
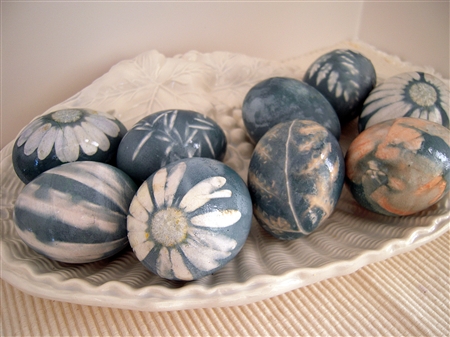
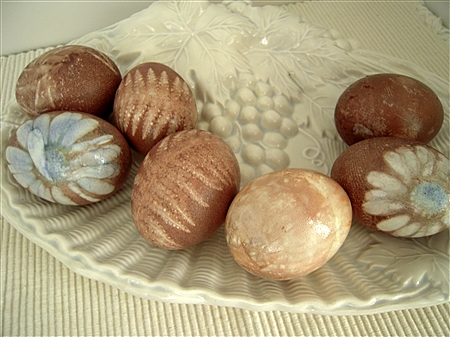
Natural Dye Colored Easter Eggs

Are you tired of coloring Easter Eggs the same old way? I am. I'm tired of just plopping a dye tablet in a cup, adding a little vinegar and water and taking turns putting the eggs into the cups. Boring!

And, if you'd like to be a little more health conscious and avoid the artificial dyes, you may want to consider using one of these natural dyes to color your eggs this year!

Natural Dye Colored Easter Eggs

This was a little time consuming, but it was one of those projects that was so much fun because the end result is somewhat of a surprise. It reminded me of how I always feel when I open up my kiln after a glaze firing. It's like Christmas! The anticipation almost kills me every time. When I had more time for ceramics, I would almost always find a way to incorporate some leaf or flower impressions in most of my projects. In my wall tiles and mosaic tiles, I've used a lot of the same leaves and flowers that I used for this project.

Alright, sorry I'm rambling about ceramics; let's get back to the Easter eggs. This was my first experiment in making natural dyes so I was winging it a bit and didn't have any idea of how these would turn out. I looked over a few recipes online but didn't use one in particular, just the basic method, so let's get started.

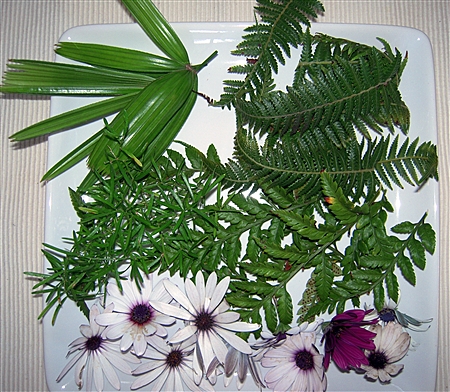
First, gather your leaves, flowers or stickers that you plan to use for this project. Here's what I used.

Natural Dye Colored Easter Eggs

Next, depending on which variation you want to make, you'll use one of these.

1 head of Purple cabbage (If making the blue eggs.)
Yellow onion skins (I used the skin from 3 onions for this rust color.)
1 bag of fresh cranberries (For the disappointing brownish color.)

Whichever color you decide to make will determine the size of your pan. Obviously the whole head of purple cabbage will take a larger pan than if you use one of the other two ingredients.

Once you decide which color you are going to make, use the appropriate size pan. But, before you add the vegetable or fruit to your pan, place an egg in the pan and fill it with enough water to cover the top of the egg by at least an inch. Then remove the egg. Don't add more water. If you use too much water, the color of the dye will end up being too diluted.

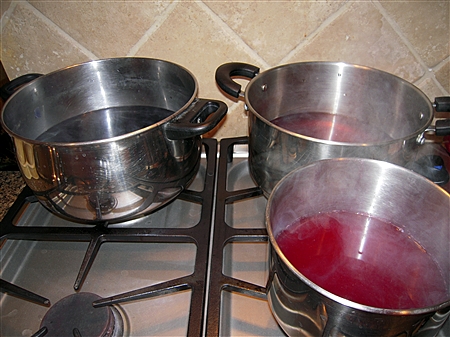
Place the sliced cabbage, onion skins, or cranberries into the pan and boil for thirty minutes, covered to minimize evaporation. Allow water to cool slightly, and then strain contents over a bowl, pressing pulp to remove any remaining liquid.

Rinse the pan, pour in dye water, cover, and return to low heat to keep warm while preparing eggs.

Here are the natural dyes all strained and waiting for the eggs.


Natural Dye Colored Easter Eggs

Next, you'll want to gather a few more items.

Vinegar
Scissors
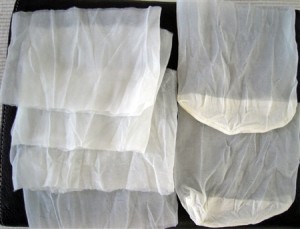
Pantyhose
Twist ties
Slotted Spoon
Paper towels
Vegetable oil

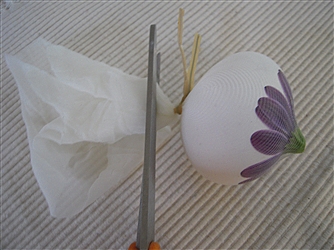
Now, cut the pantyhose into 4 inch pieces.

(Some instructions I saw said that you needed to buy several pairs of knee highs and just use the toes, but I just bought two 99 cent pair of pantyhose, cut them into pieces and it worked fine.)

Natural Dye Colored Easter Eggs

Now for the fun part.

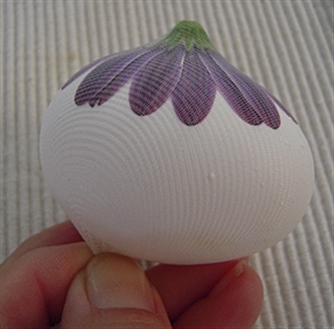
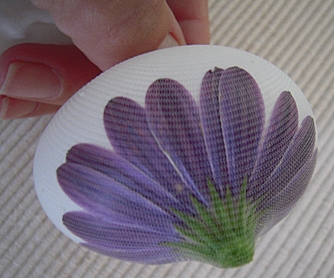
One at a time, place leaves, flowers, or stickers on the egg as desired. Some of the plant materials will stick better if you dip them in water first.


Natural Dye Colored Easter Eggs

Place the egg in your hand, and gently place the egg inside the hose, make sure your design is still how you want it, and then pull the hose securely it the back and secure with a twist tie. (I thought this was easier than trying to tie in a knot while holding everything in place.)


Natural Dye Colored Easter Eggs

Trim the excess hose from the back.


Natural Dye Colored Easter Eggs

Repeat with remaining eggs.

Return dye to a gentle boil and stir in vinegar. I used 4 T. for the purple cabbage and 3 T. for the onion skins and cranberries since they were in smaller pans.

Here are all my eggs ready to go into the dye.


Natural Dye Colored Easter Eggs

Gently lower the eggs into the pan and boil for 30 minutes. Turn off heat, cover, and let stand for 2- 3 hours, or until desired color is obtained.

Remove eggs with a slotted spoon and place back on egg carton to cool slightly.

Here's what they look like after you've taken them out of the dye.


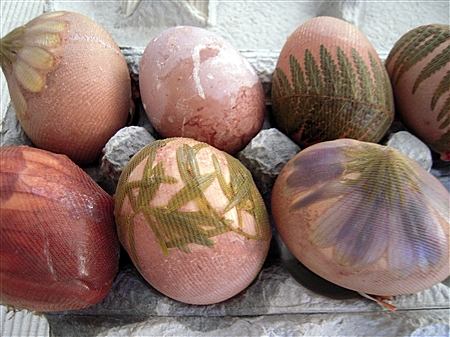
Natural Dye Colored Easter Eggs

Natural Dye Colored Easter Eggs

Carefully untie the twist tie or cut the hose and unwrap eggs. Carefully pull off and discard any remaining plant materials or stickers.


Natural Dye Colored Easter Eggs

I let mine sit for an extra 5 or 10 minutes after I unwrapped them just so they could cool a bit more.

Dampen a paper towel lightly with oil and buff eggs until shiny. Remove excess oil with clean paper towel.

Be very careful not to wipe too hard as some of the dye might come off.

Natural Dye Colored Easter Eggs


Natural Dye Colored Easter Eggs

Natural Dye Colored Easter Eggs

Natural Dye Colored Easter Eggs

Natural Dye Colored Easter Eggs

Natural Dye Colored Easter Eggs

Natural Dyed Easter Eggs

Like I said before, this project was pretty time consuming, but it was so much fun for me! I feel like I got my creative juices stirring again. 🙂

A few notes:

I kept one egg without any decoration to put in each dye color and I didn't care for any of those three at all.

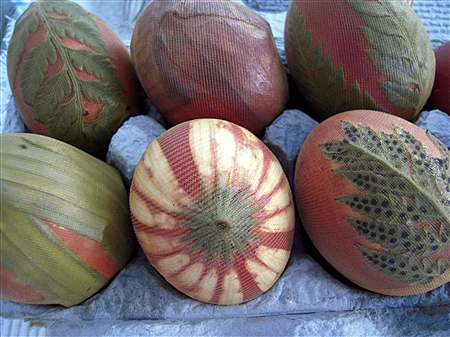
I used just plain yellow onion skin on one egg in each dye color and a couple of those made some beautiful marbling. The one with the onion skin in the purple cabbage dye was probably my favorite. It had a gorgeous brownish-blueish marbling effect.

I wasdisappointed in the brownish color that I got from the cranberry dye, but on one egg where I used a purple flower, it gave off a beautiful blueish color in the center of the white flower. I don't think that I would bother using cranberry again for this project. I was expecting a purplish color, not brown.

The dark rust color from the onion skins is probably my favorite. And this dye didn't even need to sit for two hours before it intensified in color. You could probably even take these out after 30 minutes or so.

I just love this method of using the leaves and flowers for contrast in color on these eggs. I'm already thinking of ways to use this for another project.

I should have posted this sooner, but I hope you give these a try if you have a little time before Easter!

~LilSis

Marshmallow White Chocolate Easter Bunnies

April 1, 2010

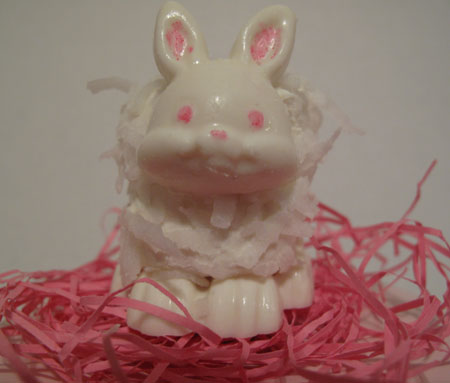
Marshmallow White Chocolate Easter Bunnies

When you hear the words “Marshmallow” and “Easter”, do you think of Peeps or maybe those super-sugary marshmallow eggs with the hard sugar shell?  I don't because I don't like either of those Easter candies.  To me, they're the Easter version of the hard-as-a-rock peanut butter taffy wrapped in black or orange paper that you got at Halloween as a kid, and tried to pawn off on your unsuspecting little brothers in exchange for their chocolate candy bars!

I have a new Easter marshmallow treat to share with you, and these also have white chocolate.  This project isn't quite as fancy and classy as the Easter Bird's Candy Nests that LilSis made yesterday, but they're pretty fun to make and I think kids would have a ball putting them together.

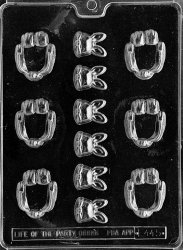
The key is to get yourself a candy mold like this.  It has bunny heads and bunny bases with feet and tails (bunny butts).

Easter Bunny Mold

I got mine at my cake supply store, but you can find them online too.  I have bunches of these kinds of molds.  They're only about $2.50 each, and you can use them for chocolate, candy melts or even soaps.  Buy just one or two, and you'll be addicted to them.  You can customize candy for any kid's party theme and color scheme.  Wrapped up in foil papers, people will be shocked that you made these cute candies yourself.  I made little green frog chocolates for a kid's party once, and the kids were thrilled!

So back to this project.  Here's what you do:

  • Melt some candy melts or chocolate wafers (I like the Guittard White Chocolate Wafers; they come in mint too).  I nuke them for 30 seconds, then stir, and repeat til all are melted.
  • Pour the melted chocolate into a squeeze bottle, and fill the cavities in the mold.  Once it's filled, tap the mold gently on the counter to bring any air bubbles to the surface.  Add more chocolate if needed.
  • Refrigerate the mold for a few minutes until the shapes are set and cold.  Unmold.
  • Now the fun part!  Use more melted chocolate to lightly coat large marshmallows, then immediately roll in shredded coconut.  Chill for a few minutes to set.
  • Decorate the bunny faces if you like.  I used food markers, but they tended to slide around a little on the chocolate, so you'll probably come up with better ideas than BigSis-in-a-hurry did!
  • Add a dab of melted chocolate to the bottom of the marshmallow and gently press onto the base.  Then, with a dab of melted chocolate, add the bunny face to the front of the marshmallow.

You just made a Marshmallow White Chocolate Easter Bunny!

Marshmallow White Chocolate Easter Bunny

~BigSis

Easter Bird’s Nest Candy

March 31, 2010

I can't believe Easter is just four days from today! If you're like me and don't enough time to make a cute Easter Bunny Cake or Easter Basket Cupcakes, here's a quick and easy candy treat.

I decided to try two different versions of the Easter Bird's Nests. They're a little messy, but I think they turned out pretty cute.

For the first batch, I used this recipe that calls for butterscotch chips and peanut butter. If I made these again, I would just eliminate the peanut butter. These were more gooey and took longer to set than the ones with just the chips.

Bird's Nests

2 c. butterscotch chips
1 c. peanut butter
2 c. Chow Mein noodles
Any egg shaped Easter candy (I used Robins eggs and M&M')

Cover a baking sheet or pan with waxed or parchment paper. Either melt the butterscotch chips and peanut butter in the top of a double boiler or in the microwave (heat 1 minute, stir, continue heating in 10 second increments until melted and smooth.) Stir in Chow Mein noodles. With buttered fingers shape mixture into one big nest or individual ones. Place on prepared pan. Refrigerate until firm. Fill with jelly beans or other candy.

For the second batch, I simply melted 2 cups white chocolate chips and added 2 cups Chow Mein noodles. I thought the little white nests would look cute with some grass inside them so I made some green grass by adding a few drops of green food coloring to a little coconut and shaking it up inside a baggie.

I think that I like the white chocolate version better but I could have used an extra cup or more of Chow Mein noodles because they seemed a little runnier than they should have been. These firmed up really quickly though which makes it easier to get them decorated if you're in a hurry.

So, what's next in our Easter treat lineup? Come back tomorrow to find out! 🙂

~LilSis

Easter Basket Cupcakes!

March 30, 2010

Easter Basket Cupcakes

Happy early Easter, everyone!  And happy good-excuse-to-use-pink-holiday!  I DO love me some pink, and I really love pink with green.  But actually, I love pink with any and every other color.  Pink is probably the most perfect color in the rainbow, don't you think?  Ok, BigSis, you're getting off track.  Focus, focus, focus, girl!  We're talking about Easter baking today, not your obsession with all things rosy.

Sorry…back to the program!  I love Easter, I love color, and I love baking.  Voila!  Easter Basket Cupcakes!

You can use any recipe of course.  Since I'm 3 months into doing the vegan thing, I baked up a batcheroo of my all-time favorite Pumpkin Walnut Bread.  I baked tons of it for the last couple of bake sales, more for Christmas gifts, and I'm still baking it.  I can't get enough of it, so here it is in its' cute little Easter basket outfit!

I found these super-delicious Wilton Easter Basket Cupcake Wrappers at my Michael's store, and I bet your local craft store has them too.  They may even be on sale this week like mine were!

Instructions?  I got 'em for you:

  • Bake any cupcakes you adore in a cute paper liner.
  • Let them cool, then frost or not.  I chose not.
  • Convince some coconut to pretend that it's Easter grass.  I added about 6 drops of liquid green food coloring to about half a bag of shredded coconut in a ziploc baggie.  Mush it around until the coconut/grass is all pretty green.
  • Add a pile of coconut/grass to each cupcake, and top with some jelly beans or whatever for an extra shout of faux egg color.  I didn't have jelly beans and don't really like them anywho, so I wasn't about to buy any.  I used Skittles and M&Ms.  You're the boss of these cupcakes, so you do what you want!
  • Make the little basket wrappers, and secure with tape to be sure they don't come unhinged at an inappropriate time.
  • Drop each cupcake into the Easter Basket wrapper, and add the handle.  I just tucked it into the sides so it would be easy to remove for faster cupcake access!

Easter Basket Cupcake

That's it!  Hoppy Easter!

~BigSis

Easter Candy Gifts

March 29, 2010

The April 2010 issue of Martha Stewart Living is loaded with creative and crafty ideas for celebrating Easter. If I had the patience, I would have attempted the adorable Easter Egg Sugar cookies, but I knew they would never have come out as beautiful as the ones in the magazine.  So when I saw the adorable Easter Candy Parade, I thought these cute little jars might be something I could put together since they didn't require any baking! 🙂

These are perfect little gifts for teachers, friends, neighbors or coworkers. I think they're a lot more fun and colorful than just giving someone a bag of candy or a chocolate bunny for a Happy Easter gift.

WalMart had a huge assortment of pretty, colorful Easter candy this year. I used a combination of Speckled Malted Milk Balls, Mini Robin Eggs, Pastel Peanut M&Ms, Speckled Jelly Bird Eggs, SweetTarts Jelly Beans, Reese's Pieces Pastel Eggs, the white chocolate bunny, and even some edible green apple grass. I also got the apothecary jars at WalMart for around $3.00 each.

These are so easy to make that the kids would even enjoy putting these together themselves. I went a little overboard so I've got to go get more jars so I can make more gifts or else we're going to end up with way too much Easter candy left in this house!

~LilSis
Sponsor a Bunny for Easter!

March 27, 2010

Easter Farm Animal Adoption

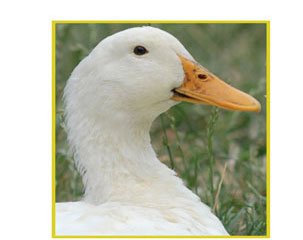
It's tempting to buy a cute little chick, duckling or bunny at Easter.  They grow up though, and then how do you care for them?  Little chickies are adorable, but a full-grown feisty chicken is another story!
How about sponsoring a farm animal instead of buying one that you aren't prepared to care for long-term?  Farm Sanctuary has a great farm animal adoption program that could be a perfect solution.  Do you have children who have outgrown Easter egg hunts?  Maybe you have a grandchild out of state?  Or perhaps you have a niece or nephew who loves animals?  Maybe you've decided this is the year you'll be more creative at Easter, and you just don't want to bring a bunch of candy into the house.  What a great idea to sponsor a farm animal in the name of someone special!
All you need to do is go to Farm Sanctuary's adoption page and choose a duck, bunny or chicken to sponsor for $10-$15 per month, based on a one-year sponsorship.

I'm especially partial to Buttercup!

Buttercup

and Howard!

Howard

You or your gift recipient will receive an adoption certificate with a color photograph of the adopted friend, an adoption card, an invitation to schedule a VIP tour to meet the adopted friend, and other great benefits depending on the animal. If a year is more than you want to commit to, you can also make a one-time gift that will be greatly appreciated.

So if you're looking for something different to do at Easter this year, here's a way to do that and help a great cause at the same time!

~BigSis