Hatch Chile Tofu Scramble with Spinach and Avocado

September 15, 2012

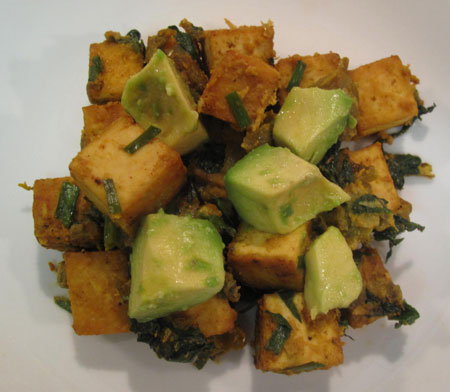
Tofu Scramble Top Close

If you’ve been vegetarian for a while, you’re probably like me. You’ve eaten a lot of tofu scrambles; some good and some less than great. Ok, some are downright horrible.

The worst ones are boring, bland, mushy, and total dullsville. Since tofu has essentially no flavor of it’s own – that’s why we can easily transform it into Kung Pao or chocolate cream pie with a flick of the wrist – you have to ADD goodies to it to get awesomeness.

In my opinion, the best tofu scrambles are spicy and flavorful with a little veg thrown in and a nice firm texture with some crispy bits. That’s what I was going for with this recipe, and I think I made myself pretty happy.

I should probably call this a tofu saute rather than a scramble since I kept the cubes pretty chunky and didn’t break them up much. I’m mostly calling this delicious though. It’s not only the best tofu scramble/saute I’ve ever made, it’s the best one I’ve eaten. Here’s how you make it.

Hatch Chile Tofu Scramble with Spinach and Avocado

1/2 cup mild hatch chiles, roasted, cleaned, and chopped
3 large cloves garlic, pressed
1 package firm tofu, diced chunky
3 Tblsp water
1 tsp Braggs Liquid Aminos
1/4 tsp onion powder
1/2 tsp Penzeys Forward Seasoning
1 Tblsp Frank’s Red Hot Sauce
1/4 cup nutritional yeast
1 cup baby spinach, very firmly packed and roughly chopped
2 Tblsp chives
1 large avocado, diced
Olive oil as needed for sauteing

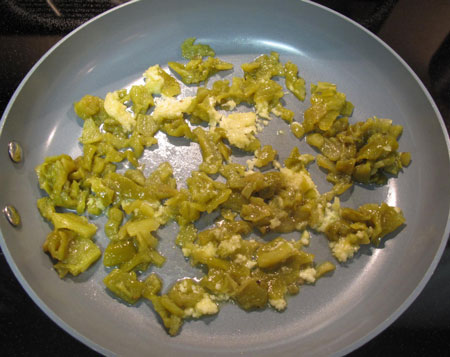
Tofu Scramble Hatch Chiles

In a large non-stick skillet, saute the chiles and garlic in 2 tblsp of olive oil for about 5 minutes. Season with salt and pepper while they’re softening. Remove from the skillet and set aside while you prepare the tofu.

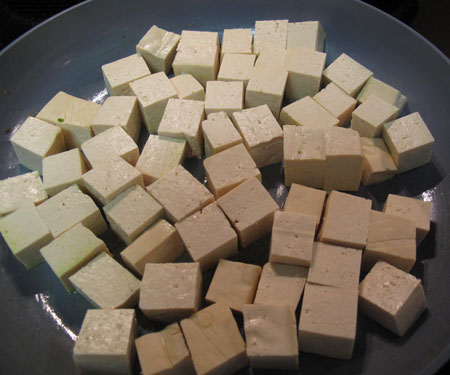
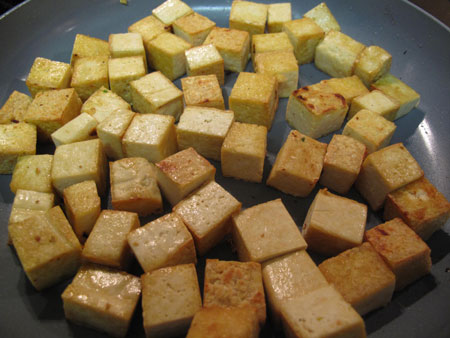
Add another bit of olive oil to the same pan, and add the chunky cubes of tofu. Arrange them in one layer so that all of the cubes are in contact with the pan. Toss them around every few minutes to get a golden color on all sides. This may take 10 to 15 minutes.

Tofu Scramble Uncooked

While the tofu is browning, mix your wet sauce ingredients together in a small bowl: the water, Braggs, onion powder, Forward Seasoning and Frank’s Red Hot Sauce.

Tofu Scramble Browned

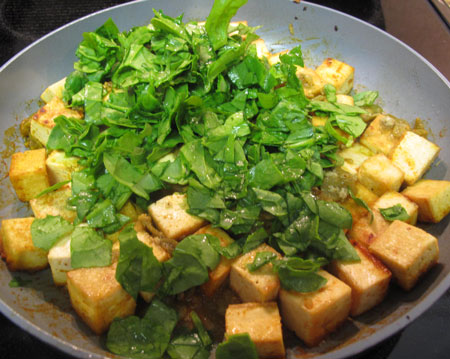
Once the tofu is evenly browned to your liking, add the chiles and garlic back in, sprinkle in the sauce, and stir to distribute evenly. Add in the nutritional yeast and the spinach, and mix together.

Tofu Scramble Spinach

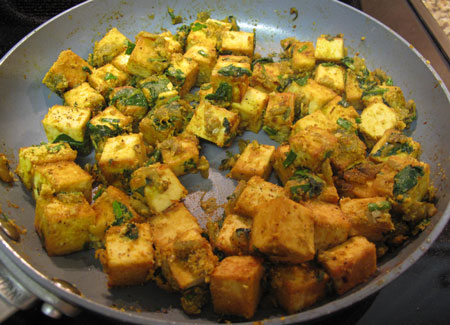
Cook over medium low heat until the spinach is wilted and the sauce is absorbed into the tofu. The sauce, yeast and chiles meld together to make the most incredible coating that I wish I had more of.

Tofu Scramble Done Pan

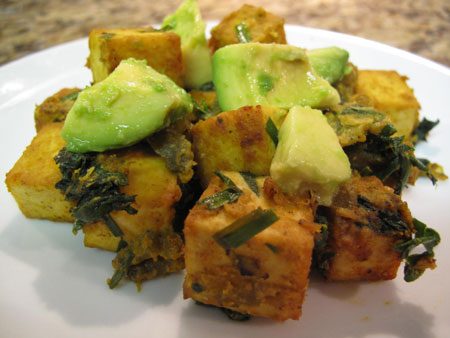
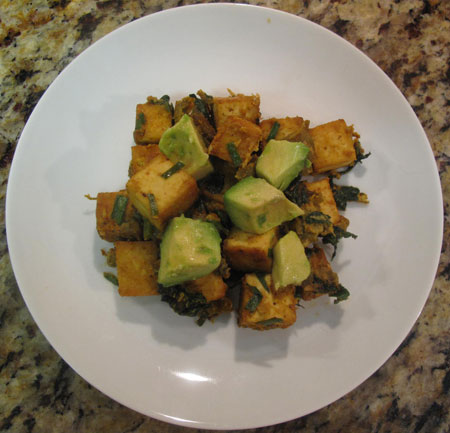
Add the chives and serve immediately with the diced avocado and a tiny touch of salt on top. Serves 3 or 4.

Tofu Scramble Close

Notes: 

  • Hatch chiles are available for a short period of time at the end of the summer, so if you don’t have a stash in your freezer, don’t despair. The Hatch flavor is amazing, but there are acceptable substitutes. I would probably add in a jar of diced green chiles from the mexican aisle in the grocery store, along with a finely diced jalapeno or two. Just add any chile you like. Chipotles would be good too, and you can find them on the same aisle packed in a jar with adobo sauce. Just be careful and start with a tiny amount, since these dudes can be super hot.
  • I used Trader Joe’s super firm tofu, and froze it and defrosted it to get a firmer texture. If you like more of a scramble, just skip the freezing/defrosting step and use a firm tofu. Break it up a little bit as it’s cooking.
  • I like the flavor of Braggs, but you can easily substitute tamari, soy sauce or plain ol’ sea salt.
  • Add in any other veggies that you like. I think that onion, asparagus, broccoli, kale and mushrooms are all super happy in a tofu scramble.
  • Penzeys Forward Seasoning is amazing (and salt-free), but don’t fret if you don’t have it. It’s a spicy little blend of black pepper, onion, paprika, garlic, turmeric, thyme, basil and rosemary. Just substitute what you like. Pepper, paprika, turmeric and thyme would be a good start. Cumin is also found in lots of tofu scrambles; I’m just not a huge fan, but you use what you like. It’s your dish! Make it delicious and make it your own!

Tofu Scramble Top Plate


Note from LilSis:

I think this looks scrumptious and I would definitely make it for myself, but unfortunately, if I tried to serve this to my meat and potato lovin’ guys as a meal; they would probably laugh, thinking it was a practical joke!

~BigSis

Apple Cider Vinegar Purifying Hair Treatment

August 19, 2012

Cher Apple Cider Vinegar

Maybe we don't want our hair QUITE this shiny!


Did you know that apple cider vinegar is actually good for your hair? You might think it would dry out your hair and scalp, but that’s not the case. I have very dry hair, and have been using this natural treatment for a while with only great results.

Apple cider vinegar purifies the hair; removing product build-up from the hair and scalp. It adds softness, body and shine.

It’s a natural product, it costs just pennies, and most of us probably already have it in our pantry.

Here’s how you do it:

  • Make sure that you use apple cider vinegar, not white distilled vinegar. I’ve used the more expensive organic apple cider vinegar in a pinch, but I usually just buy the cheap store brand and haven’t noticed any difference. I know organic is always preferable when it comes to what we put in and on our bodies, but in this case I’m not stressing about it.
  • Shampoo your hair as usual, rinse and towel dry. Gently sprinkle the vinegar onto your head aiming for your scalp rather than the hair ends. I say “gently” because you do NOT want a drop of this vinegar flying into your eyes! I probably use around 1/4 cup of vinegar, but you don’t need to measure. Just keep sprinkling until you feel like your head is saturated.
  • I usually do this over the sink instead of in the shower since I want to leave it on for a while. I think the chance of getting vinegar in your eyes in the shower is greater too, with all that water spraying around. If you’re doing this treatment in the shower though, make sure the container you take into the shower isn’t glass.
  • Once you get the vinegar on, massage it into your scalp and work it around, again being careful to protect your eyes from any wild splashes. Work it through to the ends, and use a wide tooth comb to distribute it. Be careful, wet hair is fragile.
  • Leave the vinegar on for a few minutes. I usually aim for around 15 minutes.
  • Thoroughly rinse the vinegar out in cool water. I think cold water adds shine too because it closes the cuticle of the hair. Massage your scalp to rinse free any build-up the vinegar has dissolved, and rinse, rinse, rinse.
  • Condition and style as usual.

You might notice a lingering trace of vinegar aroma for the next couple of days when your hair is wet, but once it’s dry there’s no tell-tale smell. No one will accuse you of smelling like a salad!

I like to use this treatment once a week if possible to keep product build-up to a minimum. Give it a try!


Photo credit: Rapscallion’s Flickr Photostream

~BigSis

The Best Vegan Trader Joe’s Products

August 11, 2012

Trader Joe'sThere’s a lot to love about Trader Joe’s; not the least of which is that they carry plenty of vegan products and they’re easily identified with a “V” on the front of the package.
We’ve only had Trader Joe’s stores here in Texas for two months now, and I’ve already made three 90-mile round trips to stock up on products that I can’t get anywhere else. These are some of my favorite vegan Trader Joe’s products so far.
I’m planning to keep updating this list, and to make it easily accessible from our home page. If you have any favorite items I should check out, let me know!


Snacks

  • Pretzel Slims: Everything
  • Reduced Guilt Pita Chips with Sea Salt
  • Wasabi Roasted Seaweed Snack

Pantry Staples

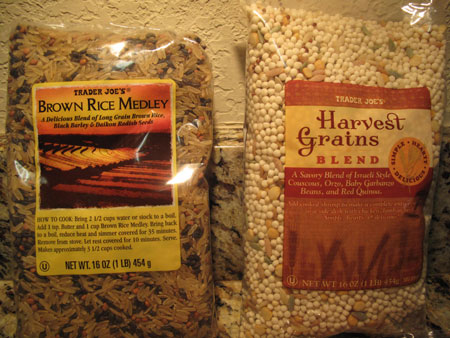
  • Brown Rice Medley
  • Harvest Grains
  • Diced & Fire Roasted Organic Tomatoes with Organic Green Chiles
  • Artichoke Antipasto
  • 100% Spanish Organic Extra Virgin Garlic Flavored Olive Oil
  • Almond Butter with Roasted Flaxseeds
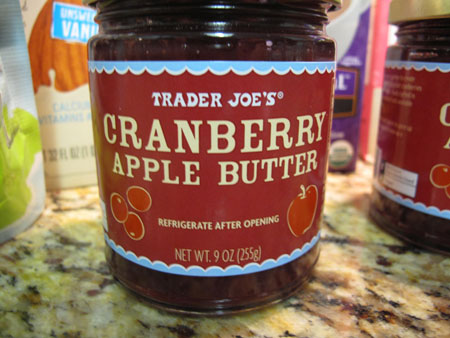
  • Cranberry Apple Butter
  • Semi-Sweet Chocolate Chips

Nuts

  • Sliced Roasted Unsalted Almonds
  • Whole Roasted Unsalted Almonds
Bakery
  • Kalamata Olive Bread

Sweets

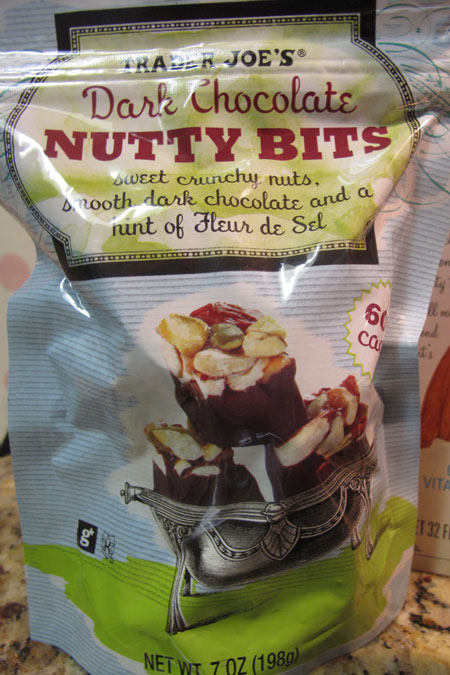
  • Dark Chocolate Nutty Bits

Refrigerated Items

  • Organic Tofu Veggie Burgers
  • This is Not a Tub of Cream Cheese
  • Chunky Olive Hummus
  • Cut and Cleaned Bag of Kale
  • Tangerine Juice
  • Reduced Fat Mayonnaise

Frozen

  • Chicken-less Mandarin Orange Morsels
  • Falafel
  • Dorot Crushed Garlic


For a complete list of Trader Joe’s vegan products,
please see the guide on their web site.

~BigSis

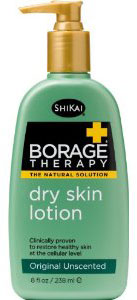
The Best Vegan Body Lotion: ShiKai Borage Therapy Dry Skin Lotion
July 12, 2012

Actually, that’s not exactly true. At least it isn’t the whole story. ShiKai Borage Therapy Dry Skin Lotion isn’t just the best vegan body lotion I’ve ever used. It’s the best body lotion I’ve ever used, period. Vegan or non-vegan, it’s the best by a mile.

Shikai Borage Therapy LotionWhat’s so great about it? It works!

The bottle claims that instead of working on the skin’s surface, Borage Therapy works at the cellular level, fighting the cause of dry skin and healing it.

It also claims to relieve dry itchy skin quickly, and says that the skin will retain moisture to become healthier and more supple.

I don’t claim to know what’s happening to my skin at the cellular level, but here’s what I do know for sure:

  • My skin is softer and smoother than I’ve observed with any other body lotion.
  • The softness stays. Even though there is no stickiness or greasiness, this lotion keeps working. When I shower the next day, I can feel a soothing layer of healing lotion rinsing from my skin. I didn’t even know it was still there, but it was still doing it’s thing.
  • When I apply ShiKai Borage Therapy, it sinks in immediately. It doesn’t go white on my skin, and it doesn’t take a while to absorb into the skin. Who has time in the morning to wait on your body lotion to absorb before you can get dressed for work? Not me.
  • I use the lightly-fragranced variety, and I love the scent. It’s a very soft, almost citrusy scent. There is also an unscented formula if that’s your preference.
  • There are no animal ingredients and no animal testing is used. Sweet!

I found ShiKai Borage Therapy at my favorite hippie health food store, but you can also find it at Whole Foods, through ShiKai’s web site, or at Amazon.com at a great price. I highly recommend it if you want to say goodbye to dry skin!

~BigSis

Welcome to Texas, Trader Joe’s!

June 17, 2012

I couldn’t stand it. The first Trader Joe’s store in the entire big state of Texas opened a full 48 hours ago, and I hadn’t been yet. Regardless of the parking chaos and the packed aisles, I had to go. Happy day, oh happy, happy day!

The new store is in Fort Worth, with the next location in Plano opening September 7th, and two Dallas stores scheduled for 2013 and 2014. The Fort Worth store is about an hour away for me, so 3 hours and $124 later, here is a sampling of what came home with me.


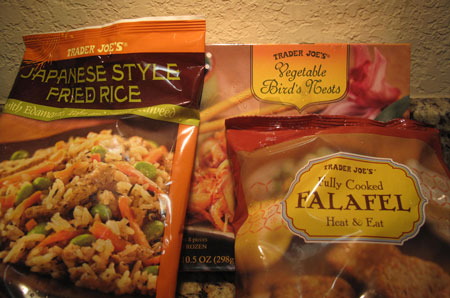
Trader Joe Frozen Entrees

All 3 of these sound incredible. The bird's nests are kale, carrot and onion.


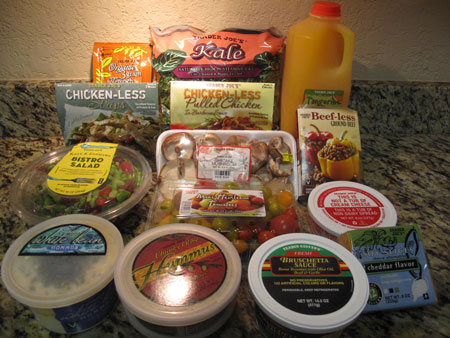
Trader Joe Refrigerated

Lots of lunches and snacks here...


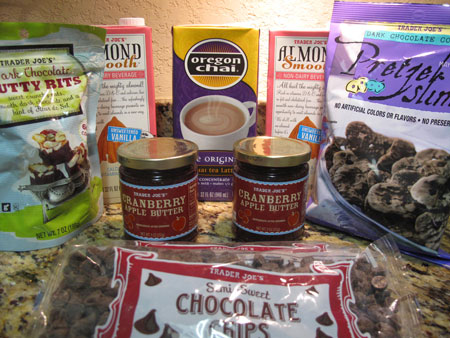
Trader Joe Pantry Items

I couldn't leave without TJ's chocolate chips (vegan but not kosher now).


Trader Joe Spreads

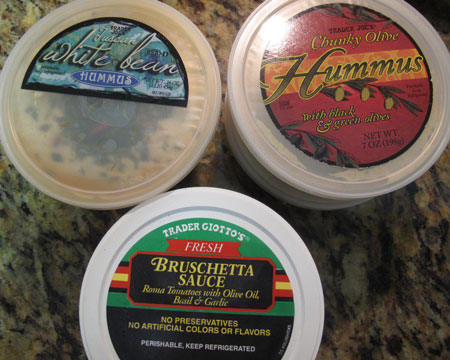
The olive hummus is unbelievable!


Trader Joe Seasoning

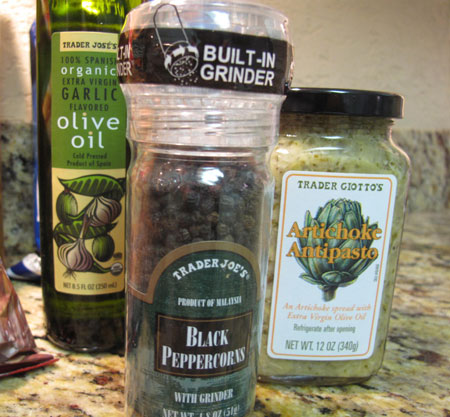
Can you believe $3.99 olive oil and $1.99 pepper?


Trader Joe Produce

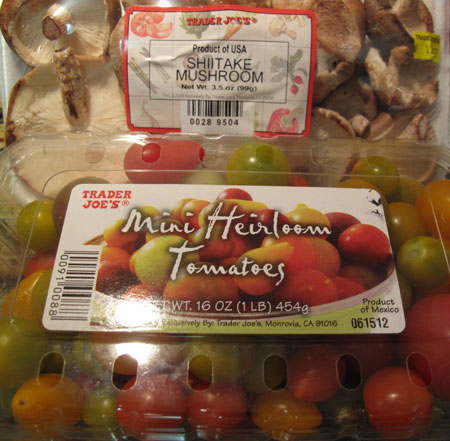
These heirloom tomatoes were only $2.99 and shiitakes just $2.79.


Trader Joe Snacks

The almond butter with flax is toasty scrumptious, and just $4.99 for 16 oz.


Trader Joe Grains

The best grain blends ever. My favorite is the Brown Rice Medley, LilSis' is the Harvest Grains.


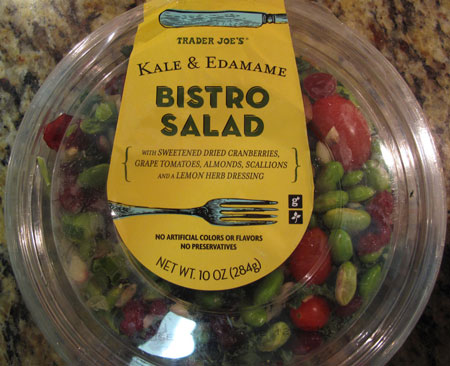
Trader Joe Bistro Salad

TJ's, you're talking my lunch love language.


Trader Joe Nutty Bits

As delicious as they sound, even to a non-sweet eater. And they're vegan!


Trader Joe Cranberry Apple Butter

I can't believe I found this again, and it's not even Christmas!


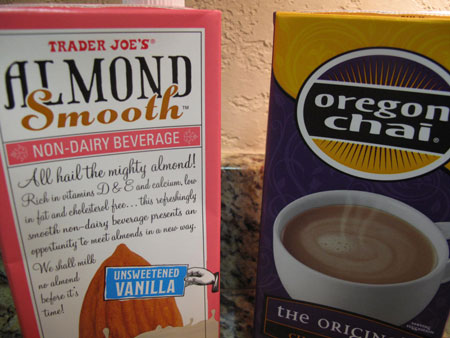
Trader Joe Chai

Chai $3.49 + Almond milk $1.69 = LOTS cheaper than Starbucks!


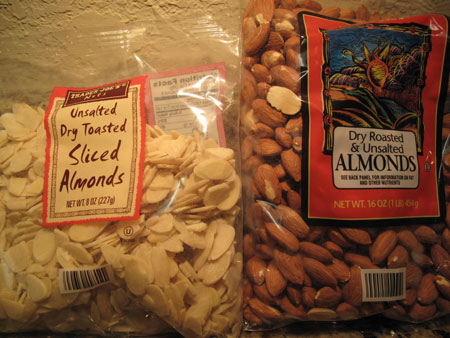
Trader Joe Almonds

My favorite almonds ever!


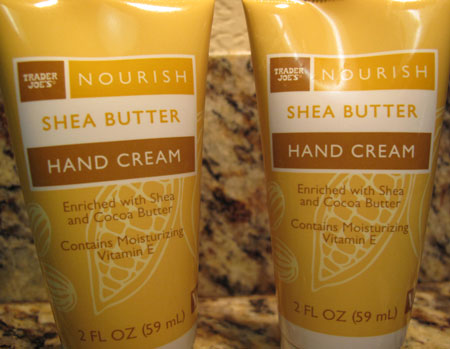
Trader Joe Hand Cream

$1.99 vegan hand cream that's awesome!


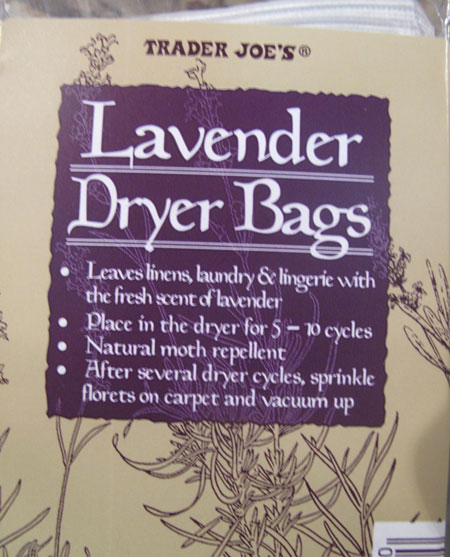
Trader Joe Lavender Dryer

Buy these!


So that’s a quick look at my first trip to the first Trader Joe’s in Texas. It’s been a LONG time coming, and the Dallas/Fort Worth area is buzzing like you can’t believe. Welcome to Texas, Trader Joe’s! We promise that you’ll be happy that you came!

~BigSis

Sunday Supper: Pumpkin Bisque

June 3, 2012

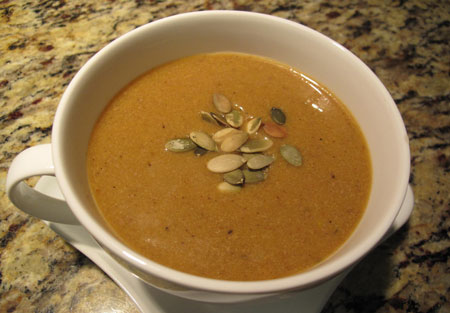
Pumpkin Bisque

I know pumpkin is more of a fall flavor, but after I made Memorial Day’s U.S. Navy Bean Burgers based on Celine Steen’s White Bean Cutlets, I wandered through her cookbook (The Complete Guide to Vegan Food Substitutions) some more and found her Pumpkin Bisque.

It sounded so simple to put together and I had almost all of the ingredients, so away I went. You literally combine the ingredients in a pot, bring them to a boil, and simmer for 10 minutes. Done.

The base for the soup is a can of pumpkin puree with some non-dairy milk (I use almond milk) and vegetable broth. Then you add flavors that are anything but wimpy: peanut butter, onion, garlic, garam masala, cayenne and vegan worcestershire sauce.

I followed the recipe exactly except for omitting the marmite (who has that on-hand in the U.S.?) and the maple syrup since the bisque was already plenty sweet for me.

I love how quick and inexpensive this soup was, but the flavor profile is a bit out of my comfort zone. I measured the spices precisely, but this soup was HOT! That’s coming from a spicy Texas girl who isn’t afraid of heat. Maybe my Penzeys Garam Masala was dramatically more powerful than most?

Besides the heat, which I cooled with a dollop of Sunflower Seed Sour Cream, it was a little weird to me that the soup was also pretty sweet. I can appreciate the balance of flavors, but I don’t think it’s really my thing.

But, you never know what you like until you try it, and it’s always a good thing to branch out of the ordinary a little bit!

~BigSis

Indian Bridal Glow Mask Top 10 Tips and Photos!

June 1, 2012

Indian Bridal Mask Doctor Oz

Scary, huh? What in the world is going on here?

Remember when I told you about the Indian Bridal Mask a couple of weeks ago? I had seen it on Doctor Oz, and whipped up a batch from turmeric, chickpea flour and almond oil.

Well, I mentioned that I might take photos on my next use of the mask, and LilSis pretty much dared me to show the dirty reality of this process.

So, without further ado – and certainly without any pride or ego – here are the photos I promised/threatened to share!

When I said it was messy, I wasn’t kidding and I wasn’t exaggerating. You schmear it all over your face and pretty soon it looks like your neon mustard color skin is melting off your bones…

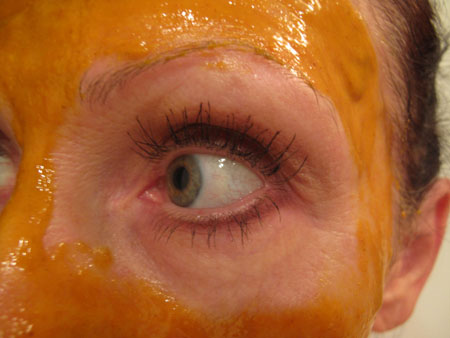
Indian Bridal Mask Eyes

Be sure to avoid your eye area with the mask.

Now that I’ve been through this process twice, here are my Top 10 Indian Bridal Mask Tips:

  1. Keep the concoction away from your eyes.
  2. Even though the mixture smells kind of interesting, don’t eat it!
  3. Mix the ingredients up in a plastic or paper bowl, and use a plastic spoon so you can toss it all in the trash when you’re done.
  4. Half or quarter the recipe if you don’t want to have a lot of leftovers hanging around. Store any leftover mask in the fridge in a glass container.
  5. Wear gloves when you apply the mask and when you remove it.
  6. Wear old clothes when you do this treatment, just in case! Any miniscule drip or crumb of this mask will cause a HUGE yellow stain.
  7. Protect your sink and application area with paper towels.
  8. Remove the excess product with damp paper towels before you rinse. Don’t use a washcloth until all traces of yellow are gone from your face.
  9. When you think your face is clean, rinse it even more. Pay special attention to your eyebrows, hairline, neck and nostrils.
  10. Gather up all of your trash items, and check your bathroom carefully for any stray mask bits before you leave. Examine the bottom of your feet or shoes to make sure you don’t track yellow all over your house.

If you follow these tips, your chances of a yellow disaster should be lessened. You’ll have nice, smooth, silky skin to enjoy and that makes us girls very, very happy. All of the care that you took with this process will be completely worth it!

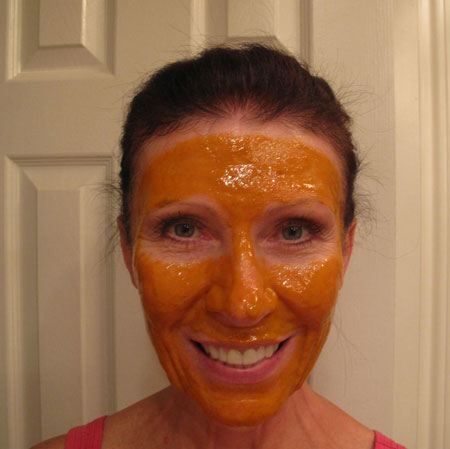
Indian Bridal Mask Happy

Happy face…anticipating the silky smooth skin!

PS: I was clearly overdue for botox (7 months) in these photos, and I’m smiling even more now that I just took care of that little issue!

~BigSis

Vegan Ranch Burgers

May 28, 2012

Yesterday’s burger – the U.S. Navy Bean Burger – got two thumbs up! Next on the menu…Vegan Ranch Burgers.

LilSis’ Spinach Turkey Burgers looked really tasty to me, and I thought they’d be pretty easy to veganize. I found this recipe for Vegan Ranch Burgers on VegNews and thought it would be the perfect place to start.

The base for the burgers is TVP (textured vegetable protein) and wheat gluten with a little panko. Flavors come from onion, mushrooms, garlic, dill, chipotle, parsley, nutritional yeast, tomato sauce and tamari.

I followed the recipe pretty exactly except for reducing the tamari by 75%, and adding a couple of big handfuls of fresh spinach. Sounds good, right?

Somehow I managed to mess this up. 🙁  Badly.

I started out ok. I got my mise en place done and started the mushrooms, garlic and onion sauteing. The TVP was nuked in veggie broth for a few minutes, and was standing by. Then everything went into the blender to whiz around. Sweet, this was going well! I’m kind of proud at how efficiently I’m cooking. Maybe I should do a cooking video?

Why isn’t this working? Maybe I need a little water; I did leave out 3 tablespoons of the tamari since it makes my eyes uber puffy. I add a couple tablespoons of water, and then a couple more, and a couple more, but the blender still won’t budge. Crap! What’s wrong?

Oh, oops. The directions say to use a food processor. Not a blender.

I dump everything into the food processor, and put the blender in the sink to soak. Now the concoction seems too wet. Maybe I added too much water? 🙁

Did I also process too long? The mix seems really really gluten-ish. Not in a good way.

I scrape everything out of the food processor, and put the processor in the sink to soak. Maybe the mix will come together if I just chill it for a while. That’s the ticket. I’m sure that’ll work. It works for cookie dough!

Half an hour later, I take the burger stuff out of the fridge and portion into 6 patties. I’m still hopeful that this is going to turn out well. I’m so confident that I even pull out my scale and weigh the burger balls so they’re all equal in size (5.25 ounces, if you care).

I don’t have a grill pan, so I oil up a couple of Green Pans, and plop the perfectly-shaped and evenly-weighed patties in. I set the timer for 10 minutes per side, as per the recipe.

So now the patties are sticking? I guess I needed more oil. I used my Green Pans though. For cryin out loud, stuff ain’t supposed to stick in a Green Pan!

I add a bit more oil and try to swish it under the sticking patties. The timer goes off so I flip the patties over, and set it for another 10 minutes on side #2.

I’m noticing that these guys are getting pretty dark. Too dark. They’re still way mushy though. I’m sure they aren’t done. I keep cooking. And cooking. Now they’re really getting dark. And they’re still wiggly.

Now I give up. I put/slam a couple of patties on a paper plate and nuke the daylights outta them. You just try being mushy now, you stubborn veggie patty nemesis of mine!

Finally! The patties seem firm. Only problem is, now they look like beef. And feel like beef. And they look nothing like the pretty photo on VegNews.

Vegan Ranch Burger Pile


I try to make the patties look pretty so you don’t see my disaster…

Vegan Ranch Burger

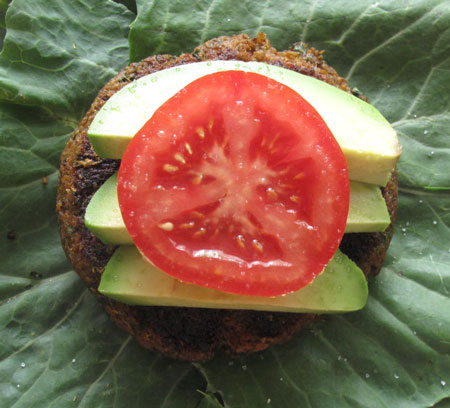
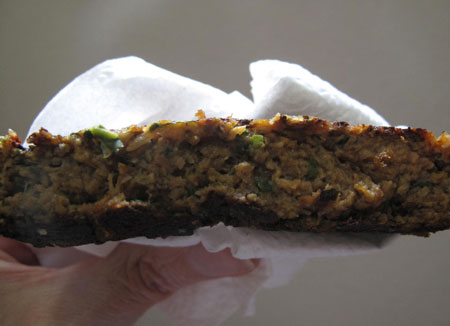
…but all I’ve really done is cover up the patty with avocado and tomato. The ugly is still lurking there in-between the avocado and the collards.

The bright point is that the flavors were pretty good. It didn’t taste “ranchy” to me, but it was tasty. Not hot and not too spicy; just a nice balance of flavors.

The main issue I had was the texture. First it was mushy, then it was too beefy. I know I took a bunch of wrong turns with this burger, so I can’t fault the recipe (I love you, VegNews). I’m finding though that my taste tends away from beefy texture that is too realistically meat-like. I probably am better off with burgers that don’t contain TVP or wheat gluten.

Vegan Ranch Burger Close

The other issue is that I dirtied up a ton of dishes, wasted some good ingredients, and took a big chunk of time out of my day that I could have spent on Pinterest! 🙂

And the worst part? It was all my bad. I’m sure this recipe works beautifully when the cook doesn’t screw it up!

The bottom line? I’m not gonna lie…I’m a better baker and LilSis is a better cook! I bet she could take this recipe and throw these dudes on her magic grill and they’d be freakin awesome! I’m gonna go make brownies now…this mess was stressful.

~BigSis

U.S. Navy Bean Burgers

May 27, 2012

Before I went vegan a couple of years ago, I had been vegetarian for over 16 years and had consumed more than my share of Morningstar Farms frozen meat substitutes. I don’t really do that any more since I try to eat as few processed foods as possible and less soy, and most of the frozen veggie burgers, patties, and sausages aren’t vegan anyway. I’m not really a fan of most of the ones that are vegan, so it works out.

I do get plenty of protein, thank you for wondering. 🙂 One of the ways I do that is through beans, so I was intrigued by this recipe for a burger made with white beans. It’s from one of my cookbooks called The Complete Guide to Vegan Food Substitutions by Celine Steen. It’s a fabulous little cookbook that I’ve glanced through several times, but this is the first time I’ve made anything from it.

Celine calls this recipe White Bean Cutlets, and says you can use any white bean. In honor of Memorial Day, I made this with navy beans, and am proclaiming it the U.S. Navy Bean Burger!

This is my own little tribute to my nephew and niece-in-law who are serving in our Navy right now. At this minute, they are separated from each other and from their little baby boy, so a big thank you and God bless you goes out to them.

Now for the burgers…

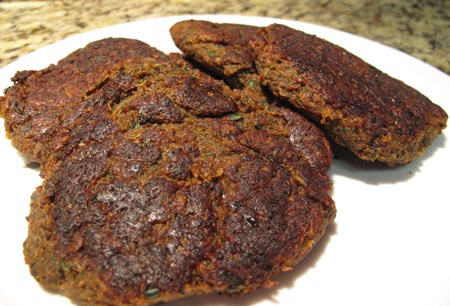
Navy Bean Burger

U.S. Navy Bean Burgers (vegan, soy-free, corn-free)

1 15 oz can navy beans, drained and rinsed
1 tblsp minced garlic
1 tblsp dried parsley
1/2 tsp paprika
1/2 tsp Beau Monde
1/4 tsp ground pepper
1/4 cup olive oil
1 cup panko bread crumbs
Oil for sauteeing

In a large mixing bowl, combine the beans, seasonings and olive oil. Mash all together with a fork until few whole beans are seen. Add in the panko and mix together well. Let the mixture sit for 20 minutes.

Divide the mixture into 4 equal portions, and shape into burgers. Saute in a small amount of oil over medium heat for 4 or 5 minutes per side, until golden and crispy on the outside.

 Navy Bean Burger Closer

I loved these burgers! You can tell how quickly the recipe comes together. In literally 30 minutes (including sitting time) you can have dinner on the table. You’ve also spent maybe $2 on entrees for 4 people. You can’t even do that at Taco Bell!

My cooking style is usually pretty spicy with big flavors, so this mild flavored burger was a departure for me, and I was surprised by how much I enjoyed it. The recipe lends itself to a wide variety of variations. I think you could add some cooked chopped mushrooms to the mixture, along with any spice combination you like. I followed Celine’s recipe pretty closely this first time, just subbing Beau Monde for celery salt, and omitting 1/4 cup of water I didn’t need.

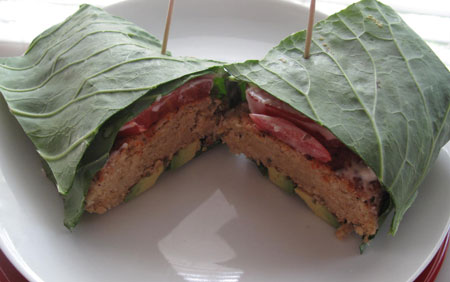
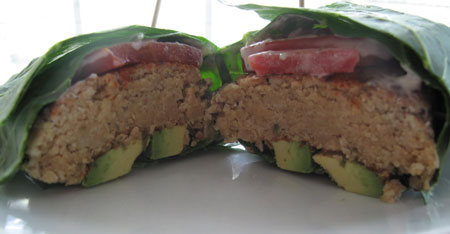
So how do you serve these? I’m not big on bread these days (these already have bread crumbs in them too), so I’m into making collards wraps with anything I’d put in a sammie or on a bun. The bean burgers are delicate in flavor, almost like a fish would be, so I added some Veganaise tartar sauce to my wrap, along with avocado and tomato. With a sprinkle of salt and a dash of Frank’s Red Hot Sauce, this is a delicious, quick, inexpensive, and healthy lunch for 4.

I’ll be back tomorrow with another Memorial Day vegan burger that’s the polar opposite of this one. Did I like it as much? Hmmm…we’ll see!

~BigSis

Indian Bridal Glow Mask from Doctor Oz Show

May 20, 2012

I love the Doctor Oz Show, and record it every day like clockwork. I always learn something from it. It might be a supplement I never heard of, a medical issue to be aware of, or a new beauty product I need to try.

About a month ago, I saw a Doctor Oz segment on ancient skin secrets from other cultures. His guest was Shalini Vadhera, who has written a book called Passport to Beauty. Two of Ms. Vadhera’s treatments intrigued me.

One was a Korean rice water treatment to fade brown spots. I haven’t tried that one yet, but I will. Even with sunscreen, I still end up with brown spots on my face, mostly on my upper cheekbones just outside the protection of my sunglasses.

The other treatment that caught my attention is called the Indian Bridal Glow Mask. Indian women use it on their face and body to make their skin smooth, bright and soft for their wedding day. It sounds pretty simple.

Just mix 1 cup of chickpea flour with 3 tablespoons of turmeric, and add enough almond oil to make a paste. The chickpea flour absorbs oil, the almond oil moisturizes, and the turmeric is anti-inflammatory and antiseptic.

Indian Bridal Glow Turmeric Mask Dr Oz

The directions are to apply the paste to your face and let it sit for a few minutes. Instead of just removing it with a washcloth, you rub it off with your hands to exfoliate, which also is supposed to take off some of the peach fuzz that most of us have on our cheeks.

I finally tried the Indian Bridal Glow Mask today, and am pleased to report that it was surprisingly effective. Dare I say it was incredible even?

My skin feels softer and smoother than I can ever remember it being, even after using my favorite exfoliator; the amazing Exfolikate by Kate Somervell. I only have a small sample size tube of Exfolikate from a New Beauty Test Tube a while back, but if I bought a small 2-ounce size tube it would cost me $85! (PS: if you aren’t getting the Test Tubes, you HAVE to do it! You will thank me.)

So, I could spend $85 for 2 ounces of a fabulous professional exfoliation product, or I can spend a couple of dollars on simple ingredients that I might already have in the house (which I did). Which is more appealing?

I can tell you I’d spend that $85 if I had to in order to get great skin, but if I don’t have to, I’m spending that $85 on something fun, like shoes, workout clothes, craft supplies, a kitchen gadget, or anything pink.

Back to the Indian Bridal Glow Mask. I just used it on my face, and saw amazing exfoliation. My pores look smaller, my skin texture is smooth, and there is absolutely zero irritation. Lots of heavy-duty scrubs and masks can leave behind redness, and inflamed delicate areas that can start to peel in a day or two. That is not the case with this mask.

I didn’t see a complete removal of  peach fuzz, but I think some of it is gone. The demonstration on Doctor Oz showed that the mask was drier than mine was, and when it was rubbed off, it actually came off in blobs. Mine was creamier than that, so the exfoliation was probably milder on my skin. I didn’t feel that I added too much oil though; just enough to make a peanut butter consistency paste.

I have lots of the mask left, so I put it in a glass jar to save in the fridge until I do the next treatment in a week. I think it should be ok. If not, then next time I’ll decrease the batch by about 75%.

One huge word of caution about this mask: BE CAREFUL! I cannot tell you how messy this concoction is! The turmeric will stain everything it comes in contact with. I’m not using the mask on my body as suggested, since the turmeric would absolutely instantly cause a huge yellow stain in the shower that I don’t want to imagine.

I recommend mixing the mask in a plastic or paper bowl with a plastic spoon so you can throw it all away. When I was rubbing the mask off and wiping the residue off with wet paper towels, I had a couple of layers of paper towel in the sink to catch any drips. Otherwise I would have been scrubbing a yellow sink for a while.

Make sure you wear gloves when you work with the mask. It will stain your fingers and fingernails. Strangely enough, it didn’t stain my face at all. Not sure why, but it didn’t.

I’ll use this mask again next week, and might let it sit on my skin a little longer to dry out more. I may get a photo of it actually on my face…it’s pretty scary looking!

I highly recommend this treatment and am really excited about it! I love that it was effective, inexpensive, and completely natural, and I can’t wait to try the Korean Rice Water Treatment next. I think that Shalini Vadhera just might be on to something!

~BigSis