Overnight Bloody Marys

February 17, 2010

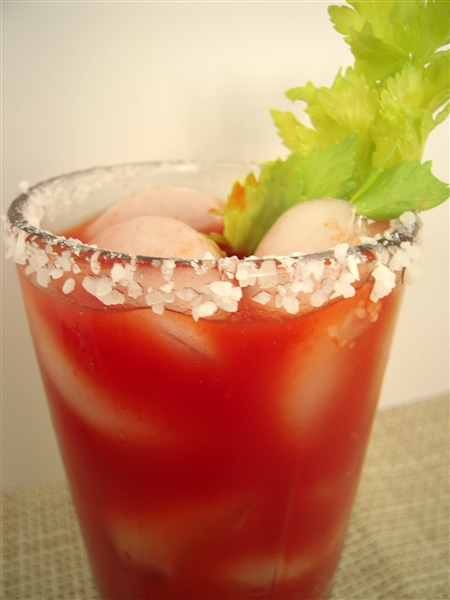
BigSis and I made this Bloody Mary recipe for a big family get-together on Thanksgiving about ten or twelve years ago. This recipe is perfect for a big party or a holiday celebration since you make it the day before and it makes a full gallon. I love anything that can be made ahead of time that helps eliminate last minute preparations.

With this already chilled in the frig, all you have to do the day of the party is stir in the vodka and you're ready to serve to your guests as they arrive. It also comes in handy if the cooks get a little thirsty while working in the kitchen. 🙂

This past Sunday, we had a big Valentine's Day Brunch so I decided to make this recipe since we were serving a pretty big group of friends. I even ended up doubling the recipe. Since V-8 has more than enough sodium, I eliminated the regular salt and the Seasoned Salt from the recipe and just used one teaspoon of celery salt instead.

Overnight Bloody Marys
(adapted from 1994 edition of Southern Living “Our Best Christmas Recipes”)

1 46 oz can tomato juice
1 46 oz can V-8 (I used the Spicy)
1 c. lemon juice
1/2 c. water
2 T. Worcestershire sauce
1 t. celery salt
Frank's Red Hot (to taste)
3 c. vodka

Combine first seven ingredients in container and stir well. Cover and chill at least 8 hours. Stir in vodka just before serving.

We set up a Bloody Mary bar with Tabasco, Frank's Red Hot, celery sticks, green olives, pickle spears, horseradish, cocktail onions, and lemon and lime wedges so everyone could season and garnish their Bloody Mary to suit their own taste.

I won't wait another ten years to make these again! 🙂

~LilSis

SOUPER Bowl for Super Bowl Sunday

February 3, 2010

This Super Bowl is going to be a little different for me since I'm in Texas visiting my family this week. If I was home, I'm sure I'd be cooking for a bunch of hungry, meat-eating, football-watching guys.

BigSis, BigT and I will probably still end up watching the game just for the halftime show and the commercials, but we won't be going “hog wild” with the snacks since we're all trying to eat a little healthier this year.

So, instead of Sliders, cocktail weinies and Velveeta dip, how about a nice bowl of soup or chili for the Super Bowl? Rather than grazing on nothing but appetizers all day, you could make a couple of big crockpots of soup or chili and just put out the fixins for everyone to help themselves whenever they get hungry.

Here are a few of our all-time favorites.

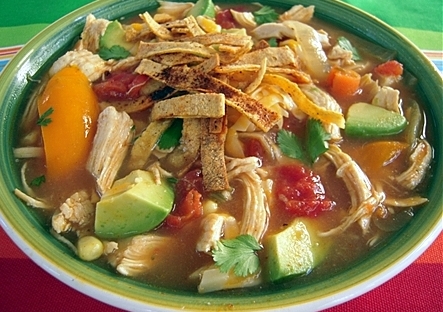
Classic Tortilla Soup

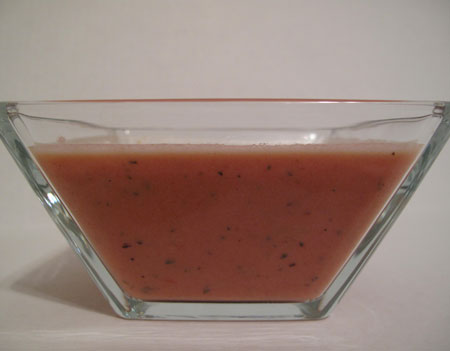
Creamy Tomato Soup

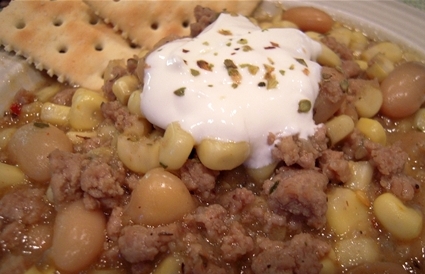
White Turkey Chili

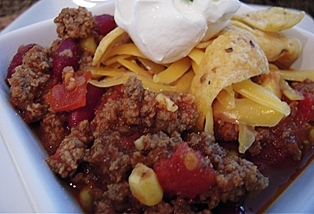
Chili Con Carne

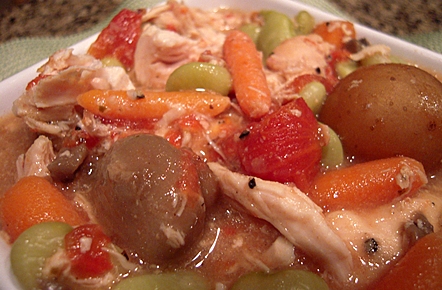
Super Easy Chicken Stew

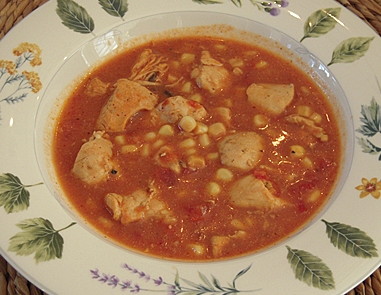
Chicken Enchilada Soup

And, this soup doesn't have a photo but we're including it since there are all kinds of germs going around and this soup can help fight off the little buggers.

Immune Boosting Soup

Whatever you cook for the Super/Souper Bowl, enjoy the day!

~LilSis

White Turkey Chili

January 26, 2010

When there's a little chill in the air at night, there's nothing quite like a hot bowl of chili.  It's one of my favorite meals to cook, whether for just the three of us or for a house full of friends or family.

Normally, I would make my own chili recipe and serve it with a bunch of grated cheddar, Fritos, and sour cream, but since we're trying to eat healthier this year, I decided to make a white turkey chili and eliminate the Fritos and cheddar cheese.

I've only made turkey chili a few times and the guys never liked it but I was still determined to keep looking until I found a good recipe. Last week, I decided to try this White Turkey Chili recipe from Ellie Krieger that I found online at Food Network. It's a healthy, quick and easy recipe and everyone loved it! What more can you ask for?

I did make a few changes for various reasons. I didn't have hominy on hand, so I used corn instead, I substituted crushed red pepper flakes for the poblano peppers, tripled the garlic and eliminated the celery. I also tweaked the seasoning a little bit to suit our taste, but that's it.

White Turkey Chili
(adapted from Ellie Krieger online at Food Network)

1 T. canola oil
1 medium onion, diced
1/2 t. crushed red pepper flakes
3 cloves garlic, minced
1 t. ground cumin
1/2 t. ground coriander
1/2 t. cayenne pepper, plus more to taste
1 pound ground white meat turkey
(2) 15.5 ounce cans low sodium cannelini beans, drained & rinsed
4 c. low-sodium chicken broth
3/4 t. dried oregano
1 15 ounce can sweet white corn, drained
1 – 2 t. low sodium Spike
1 t. Penzeys Shallot Pepper
1/2  t. salt
reduced-fat sour cream

Heat the oil in large pot or Dutch oven over medium heat. Add the onion and crushed red pepper flakes, stirring occasionally for about 8 minutes. Add the garlic, cumin, coriander, and 1/4 t. of the cayenne and cook, stirring, until fragrant, about 30 seconds.

Add the ground turkey and cook, breaking up the meat with a spoon, until the meat is no longer pink, about 2 minutes. Add the white beans, broth, and oregano. Cook, partially covered and stirring occasionally for about 25 minutes.

Add the corn, and seasonings to taste and continue cooking, partially covered for 10 minutes or longer. Ladle into individual bowls and top with 1 tablespoon of sour cream and a sprinkle of oregano.

As Ellie says, “It's a breeze to make, satisfying to eat, and the variations are only limited by your imagination.”

~LilSis

Raw Vegan Lunch Adventure

January 25, 2010

Occasionally, all of us girls at the office sneak out for a lunch together, and last Friday, we decided it was time to shake it up a little bit.  Sometimes we go for a posh girlie lunch at a fancy place, like Stephan Pyles or Fearing's at the Ritz Carlton, and other times it's a cheap delicious lunch at Cafe Brazil.  This week, we went raw vegan!  The “we” is me; a 15-year vegetarian/3-week vegan, and 3 open-minded carnivores!

I don't want to say where we went since the restaurant was having a bad day: their chef quit, they were short-handed, and they were having a sewage issue.  Probably not the day to give them a fair review!

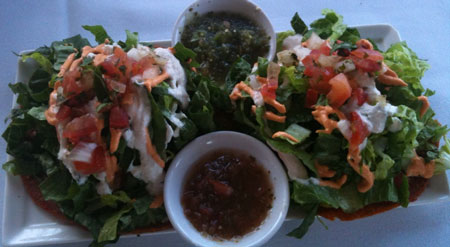
All 4 of us got something different so we could share.  Some dishes were more successful than others.  Our favorite was the Coconut Kale Enchiladas.  I never thought I'd say those words!  Marinated kale was wrapped in coconut tortillas with nacho cheeze, pico de gallo, salsa verde, and cashew sour creme.  It was spicy and really tasty, but not sweet at all as you might think it would be from the coconut.  I usually find raw kale to be too tough and chewy, but this was perfect.  I would order this again.

Coconut Kale Enchiladas

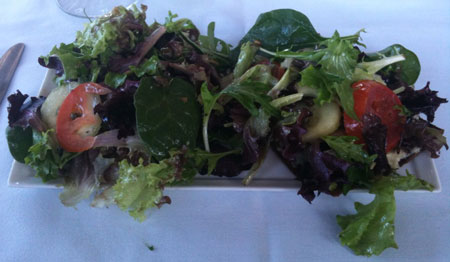
Our second choice was the Greek Pizza. Creamy tahini hummus was topped with a Greek salad of cucumbers, avocado, red onion, capers, fresh tomatoes, Greek olives, chopped parsley, and romaine.  The dressing on the salad had a great flavor, and the hummus base was delicious.  You had to dig a bit to get to the “pizza” part, but it was delicious digging!

Greek Pizza

In third place was Raw Tacos. Crisp corn tortillas are topped with chipotle flavored beans, guacamole, nacho cheeze, pico de gallo, and salsa verde.  This is a pretty dish as the previous two are, and had fresh ingredients on top, but we found the “tortilla” and bean topping to have a slightly bitter flavor.

Raw Tacos

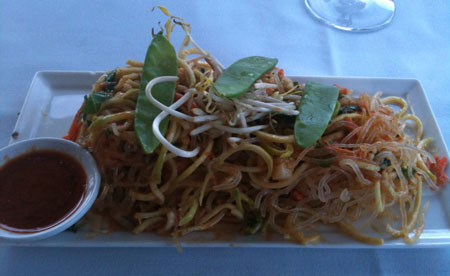
And our least favorite by a mile was the Raw Pad Thai.  Kelp noodles are tossed in almond butter and chili sauce, and
garnished with crispy vegetables.  This dish was practically inedible, sorry to say!  It was bland, watery and had a pretty nasty texture.  The kelp noodles were oddly crunchy, and were mixed with slightly slimy zucchini noodles.  None of us could eat this.

Raw Pad Thai

In spite of the challenges of the day, our waitress did her best to take care of us, and it was a pretty fun eclectic experience.  Maybe we'll go back after they've had time to recover from last week!

~BigSis

Super Bowl

January 20, 2010

Even though I'm not a big football fan any more, I still think it would've been fun for the Chargers to end up in the Super Bowl. Unfortunately after last week's loss, it's just not going to happen for San Diego this year. It would have been a blast for all for our friends who are “die hard” Charger fans and, since I'll use any excuse to get friends together, we probably would have thrown a big ol' Super Bowl Party.

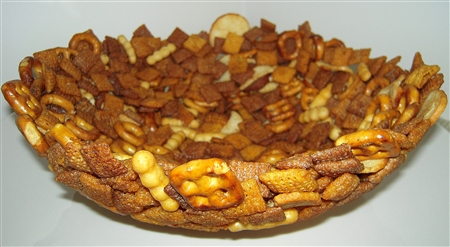
Super Bowl

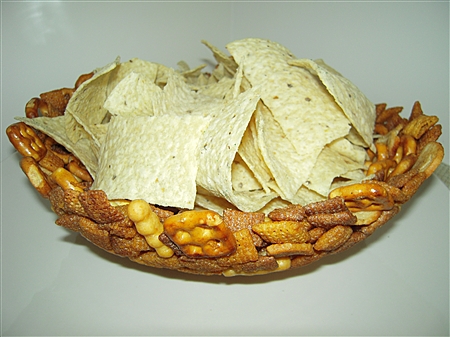
I saw this edible snack bowl, “Super Bowl”, in the January/February issue of Food Network Magazine and I thought HayHay might get a kick out of it. So, just to try it out and see if it would really work, I made it on Sunday since the guys were watching football all day, and chips and dip are a must on “football watching days”.

And even though the article says that the bowl is sturdy enough for dip, I just served their tortillas chips in it.

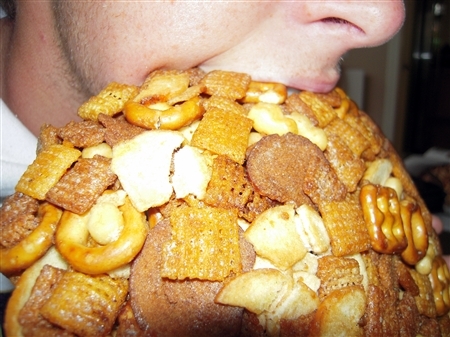
HayHay was quite intrigued over the fact that the bowl was edible, so as soon as I told him that it was okay to dig in, he took a big chomp!

And, guess what? He quickly found out that Chex mix baked with a couple of egg whites pressed into the shape of a bowl isn't so tasty after all. So, I ended up breaking the bowl apart into small pieces, spreading it out on a cookie sheet, sprinkling with salt and garlic powder, baking in the oven at 350 for about 30 minutes and presto, the Chex mix was crisp again and was devoured in minutes.

I like how the bowl turned out and I think it might be a fun way to serve chips and dip occasionally for a party, but since this recipe requires 8 cups of Chex mix, it almost seems like a waste of two good bags of Chex Mix. If I made this again, I would probably do smaller bowls and just serve nuts or some of the same snack mix in them.

Super Bowl
Food Network Magazine

2 large egg whites
8 cups snack mix (Chex Mix or Asian rice cracker mix)
Cooking spray

Preheat the oven to 325. Beat the egg whites and 2 T. water in a large bowl with a mixer until slightly stiff peaks form. Add the snack mix and toss until evenly coated.

Generously coat a 3-quart ovenproof bowl with cooking spray and place the snack mix in it. Crumple a large sheet of foil and mold into a bowl shape about one-third the size of the 3-quart bowl. Coat the outside of the foil bowl with cooking spray and press into the snack mix to make a well in the middle, forming the snack mix into a bowl shape.

Place the bowl with the foil into the oven and bake until the snack mix sets, 30 minutes. Remove from the oven and let cool slightly, 5 minutes. Carefully remove the foil. Cool 30 more minutes, invert the edible bowl onto a plate and cool completely.

~LilSis

Creamy Tomato Soup, Cut the Cream!

January 11, 2010

It may be beautiful and sunny in LilSis' neck o' the woods, but it's colder than a well-digger's butt here in Texas.  I guess that's pretty darn cold, right?  Our last few nights have been close to 10 degrees, and our daytime highs have been well below freezing.  It's definitely soup season here!

I've been trying my new vegan diet on for size this week, and so far, it's been pretty easy.  I've been disappointed to see how many of my favorite products have unexpected animal products in them, but I'll adjust and it really motivates me more. It'll just take a little getting used to, and my palate will need to happily adapt to a dairy and egg-free world.  I did lose 3 pounds this week, but I think it's because it was kind of a detox from the semi-bad eating I've been doing for the last month or so, and some of that weight was bloaty water weight from too much salt, sugar, etc. It's the “etc” that gets you every time!

So dinner the other night needed to be 1) soup, 2) vegan, and 3) quick and easy.  Voila!  Here's what I came up with: Creamy Tomato Soup with no added salt, no butter, no cream, no guilt AND lots of flavor!  It's vegan, but I wanted to share it with you because it's so delicious, but isn't loaded with bad fats like the tomato basil soups you usually find.

You can use any seasonings you like.  I used the salt-free Italian seasoning and Mural of Flavor, and surprisingly didn't have to add any salt at all.  I think it may have something to do with the citrus peel in the Mural of Flavor, since lemon reduces our perceived need for salt.  I'm super-sensitive to salt and get big “salt bags” under my eyes from a small amount of it, so being able to skip the salt is huge for me.

Creamy Tomato Soup
(recipe by me)

28 oz can Fire Roasted Crushed Tomatoes
Water (I filled the tomato can about halfway full, but make your soup as thick or thin as you like)
2 tblsp Italian seasoning (I used Pampered Chef salt-free)
Penzeys Mural of Flavor, optional but really tasty
3/4 cup cashew cream (see note below)

Simmer the tomatoes and water in a medium saucepan with the Italian seasoning and Mural of Flavor for about 20 minutes to let flavors develop a bit.  With an immersion blender, puree the soup until it is smooth, or leave it chunky if you prefer.  Stir in cashew cream and heat through.

Note: Cashew cream is my new favorite discovery.  It's from Tal Ronnen's book “The Conscious Cook“.  You might have seen Tal on Oprah recently.  Cashew cream can be used in place of milk or cream in lots of recipes.  All you do is soak some raw cashews for 12 to 24 hours, and when whiz them around in a blender with just enough water to cover them.  That's it!  Just cashews and water.  Sure, nuts do have fat, but it's good fat and you aren't guzzling a gallon of this stuff.  You're just using 3/4 cup in this whole recipe.

~BigSis

Butter Burgers?

January 5, 2010

This past Saturday we had SirHoney's cousin and her husband over for dinner before they had to return home to Chicago on Sunday. I was totally exhausted after coming home from our Christmas trip with a cold and from overindulging in food and beverages for two days while celebrating New Years. (I probably overdid it since I knew it would be my last splurge for a while.)

Saturday was January 2nd, which was the official day for me to start the Ten in 10 challenge, but I decided to go ahead and let SirHoney make hamburgers since I wasn't really up to hosting a big dinner party. We always buy lean ground beef so I figured that I would just have a burger with lettuce and tomato without the bun, and stay away from the chips and dip.

We had a nice visit and as we were all finishing up our burgers, SirHoney asks if the burgers were okay. We all told him that they were great! They were a little large and we realized that they were 1/2 pound burgers once we noticed that he only made eight patties out of four pounds of beef.

So, he asks again if we hadn't noticed anything different and we all said no and asked why. I thought maybe he used some new seasoning or something, then he finally admitted that he put a dollop of butter inside each hamburger patty as he was making them.

Are you kidding me?

A half pound hamburger patty filled with butter!

And I ate it on my first day of my challenge to lose ten pounds?

Really?

(I don't know if he's secretly been watching Paula Deen, or what, but I do know that he won't be making me dinner again any time soon.)

~LilSis

Best-Ever Almond Toffee

December 30, 2009

The weekend before we left for Chicago, I decided that I was going to make Almond Toffee to give to our friends and neighbors for Christmas. It probably wasn't the best timing to try a new recipe as we were still finishing up Christmas shopping, wrapping, and packing in preparation for our trip to Chicago the following day.

On top of all that, we ended up spending most of the weekend in Mission Bay at HayHay's surf competition since he made it all the way to the finals. But, somehow, in the midst of all that, I did manage to make two batches of toffee.

I'd like to give a “shout out” and a “huge thanks” to Anna of Cookie Madness for taking the time to reply to me via email regarding a couple of questions I had about the instructions.
I really appreciate it, Anna!

This recipe is one that Anna has made for many years and since the directions are a little long, I think it's best for you to go to Cookie Madness for the Best-Ever Almond Toffee recipe. You'll also want to read her Almond Toffee Revisited post which has more tips on making this toffee turn out “just right”.
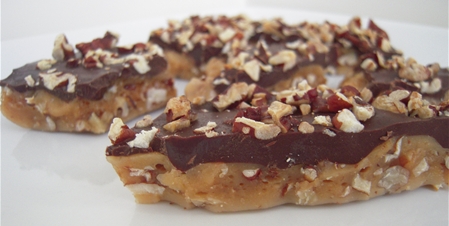
Pecan Toffee

For my first try at this recipe, I just made the small batch so I could get a feel for it. I substituted pecans for the almonds, since I had some on hand, but I didn't like it as much as I thought I would. Other than that, this batch was just a teensy bit thicker than I would have liked, which may have been because the temperature got up to almost 295 before I poured it out of the pan. It was still crispy and crunchy, just not perfect.

BigSis has made this toffee almost every Christmas for as long as I can remember. And, guess what? Hers is always perfect. Mine turned out pretty darn good for being my first time to make it, but it wasn't perfect. That's okay though, I still gave myself a little pat on the back for trying something new and not having a meltdown over a slightly thick batch of toffee.
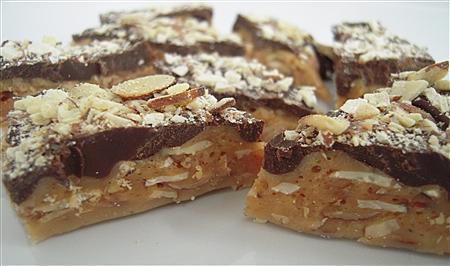
Best-Ever Almond Toffee

For my second batch, I went ahead and doubled the recipe since I was feeling a little better about the process. This time I did use almonds, but since I discovered that I don't like chopping chocolate, I used semi-sweet chips instead. (I shouldn't have done that!) When I asked for a couple of expert opinions from the chocolate lovers in my house, they both noticed that the chocolate in the first batch was better.

This batch also turned out a little too thick, as you can tell in the photo, but it was still good. I don't think anyone else really noticed, but this batch got a little chewy after the initial crunch. It wasn't as crispy and crunchy as it should have been, but I think I know why. I panicked just a little after I poured it into the pan and I think I gave the pan one too many teeny, tiny taps, which Anna specifically advised me not to do. I knew right away that some of the air bubbles were popping and apparently that's what keeps this toffee so crunchy.

When in Chicago, my mother-in-law happened to pull out some toffee that her brother-in-law had sent to her from Florida. Even though I usually bypass the sweets, I was curious to try it because of my recent attempts at toffee making. This toffee was even thicker than my second batch but somehow was still really crunchy and crispy. It's supposedly made at some special store and our uncle loves it, so if I ever end up with a perfect batch of toffee, I'm going to send some to him and my mother-in-law. I'm sure they'd both be surprised!

All in all, in the end, I did learn a few things about making toffee.

First of all, toffee making is not for wimps. I never knew how long it took to get candy up to 290 degrees and with constant stirring, it's a bit of a workout. Secondly, I would invest in a new thermometer before attempting this again.
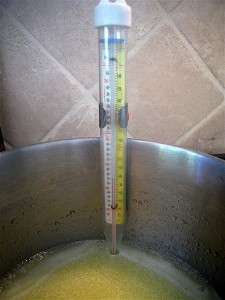
This is the thermometer that I used, which is the “attach-to-the-pan” type that Anna advises not to use. It's all I had and I didn't have time to go get a new one, so the fact that both batches turned out thick probably means that my thermometer was a bit off.

Lastly, just stick exactly to Anna's Best-Ever Almond Toffee recipe! Don't make substitutions, use a good thermometer, and follow the instructions to a tee and I bet you end up with a perfect batch of toffee! 🙂

~LilSis

Baked Camembert

December 21, 2009

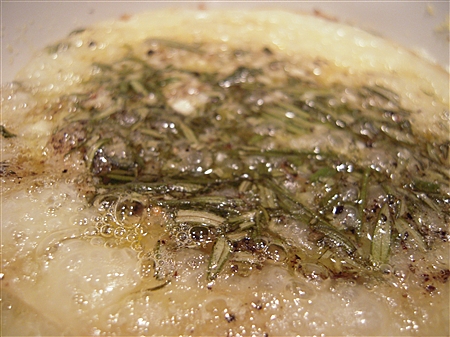
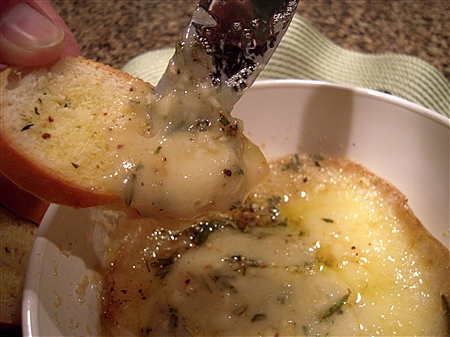
Camembert 1

Lovely, ooey, gooey, creamy, bubbly, yummy melted cheese!

What more could you ask for?

Maybe some garlic, rosemary, and olive oil on top?

Oh yeah!

How 'bout some toasted baguette bread to spread it on?

Now you're talkin!

It doesn't get much better than this.

SirHoney & I devoured this entire wheel of cheese, just the two of us, within minutes. I'm not too proud to admit that.

Unfortunately, my habit of munching on cheese and crackers before dinner is about to come to a screeching halt after the first of the year, so I decided to just go all out on this night.

And, you know what?

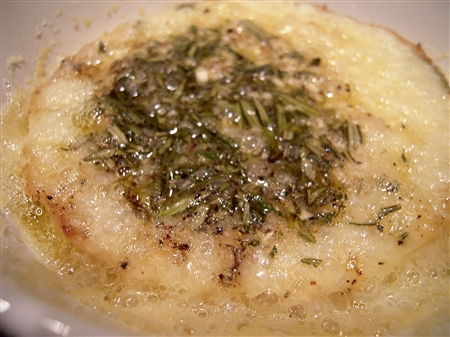
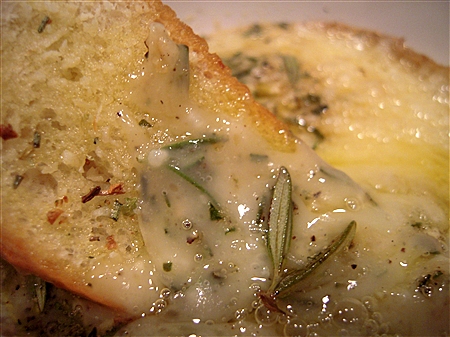
Camembert 2

It was worth it.

The minute I saw this recipe, I ripped it out of the magazine because I knew that I'd be making it soon. I found it in the November issue of Food Network Magazine recently while trying to catch up on my magazine reading.

I've always liked Jamie Oliver, and his cookbook, Cook with Jamie, is one of my absolute favorites. I love the beautiful full page photos next to each recipe in his book. I've determined over the years that I'm what you call “a visual learner” so I love this style of cookbook. I need to put his new book, Jamie's Food Revolution, on my Amazon wish list!

His recipe for the Baked Camembert was originally intended to be poured over pasta, but I decided to try it as an Appetizer instead so we could dip into it with some toasted baguette bread slices.

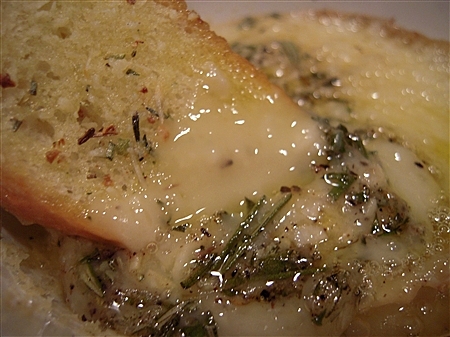
So, dip into it, we did.

Closeup cheese on toast

Then, we spread a little,

Closeup3

And, then, dipped some more.

Closeup2

I've baked a lot of brie but this was my first time to bake Camembert cheese so I wasn't sure about the consistency. It did seem a little thinner than brie, so next time I'll try it poured over some cooked pasta and spinach.

Baked Camembert
(adapted from Jamie Oliver via Food Network Magazine)

1 8 oz. box camembert cheese
2 cloves garlic
1 spring fresh rosemary
Fresh ground pepper
Extra-virgin olive oil
Baguette bread
Rosemary Herb Seasoning Mix (I used Pampered Chef)

Slice the baguette bread, brush each slice with a little olive oil and sprinkle with your favorite Herb seasoning. Toast in preheated oven at 350 for a few minutes then set aside. Open the box of cheese and unwrap it. Place it back in the wooden container or put in a small Corning Ware dish. Score a circle in the top of the skin, then lift it off and discard.

The original recipe called for slicing the garlic and just picking the rosemary leaves off from the stem. Since I knew that I was spreading on the toasts and not pouring over pasta, I pressed the garlic cloves and finely chopped the rosemary instead.

Just spread the garlic and rosemary on top of the cheese, sprinkle with some pepper and drizzle with a little extra virgin olive oil. Place the cheese into the preheated oven for 25 minutes. (If cooking in the box, place the box on a cookie sheet before placing in oven.)

Remove cheese from oven and let sit for a minute or two, then dig in. This makes an awesome, quick and easy appetizer perfect for serving at your next party.

~LilSis

Super freak, super freak, it’s super freaky!

December 18, 2009

You know what freaks me out? Don't laugh…but, the baking isle at the grocery store really, really freaks me out.

I know that sounds weird, especially on the ‘tail end' of BigSis talking about her huge Bake Sale success! Once again, proving the point that we are as different as we are alike.

BigSis probably gets excited when she shops for baking supplies.

Me; I'm on the verge of an anxiety attack.

AND, I'M NOT KIDDING!

I'm not even exaggerating.

I shouldn't even admit to this.

I'm completely intimidated.

I don't know where anything is.

I'm nervous as a cat.

I feel like a total moron!

Every. Single. Time.

Yesterday, on my list of things to do was to buy the ingredients for the goodies I was going to make for our neighbors. I was going to make the Peppermint Bark recipe from Culinary Concoctions by Peabody and the Almond Toffee recipe from Anna of Cookie Madness.

Both of these recipes did NOT require very many ingredients. You'd think it would be simple. I usually have better results with candy making versus baking, so I was feeling pretty good about my choices until I read over the recipes a little more closely. I got a little nervous when I realized that I needed to temper the chocolate for the Peppermint bark, so I had to email BigSis a question about that. Then, I read where Anna even admitted that she sometimes screws up her toffee after having made it for over 20 years! Yikes! I'm thinking I'm in over my head, again.

Yet, I was determined to make these two candies so I made a special trip to the store and I was in a hurry, as usual. I quickly picked up the candy canes and the parchment paper, which was luckily on an end cap, then I head down the baking isle. First of all, there are way too many different types of chocolate to choose from and they're all expensive! I needed 14 ounces for the bark so I did my best to pick the right bittersweet chocolate and grabbed four of the 4 ounce bars.  Last on my list for the bark was the white chocolate. Where the heck is the white chocolate? Why isn't it right with the regular chocolate? Did regular grocery stores not carry it? Did I need to make another trip to find Michaels for the special kind of chocolate that melts? I dunno.

Now, I'm irritated. I started to call BigSis, like I do 90% of the time I find myself on the baking isle, but I realized she was still at work and it would be really dumb to bug her with such a stupid question. So, I put the candy canes and the bittersweet chocolate back and scratched the bark off my list! I already had pecans at home, so I grabbed baking soda and two bars of semi-sweet chocolate for the toffee and checked out.

So, when I finally got home from the store, I started some chicken and veggies for homemade soup and got out some garlic, rosemary, olive oil, and Camembert cheese to make an an appetizer version of a Jamie Oliver recipe I found in Food Network Magazine.

Ahhh…back in my comfort zone.

The Baked Camembert turned out so good that SirHoney and I single handily devoured the entire thing before dinner! Hopefully I got a few decent photos that I can share with you later!

I have to make the toffee today when I'm not rushed and don't have two hungry guys hovering over me acting like they haven't eaten in weeks.

If you don't see a post about the toffee in the next few days, you'll know that I screwed it up and my neighbors will probably be getting fudge for Christmas. (I don't think I've ever messed that up.) But, then again, that would require another trip to the baking isle and I don't think I'm up for that!

~LilSis