Holiday Potatoes: Make Ahead Mashed Potatoes

November 8, 2010

Holiday Potatoes: Make Ahead Mashed Potatoes

Holiday Potatoes: Make Ahead Mashed Potatoes

We did share our recipe for Holiday Potatoes last November, but they are definitely worthy of another mention, especially at this time of the year. These potatoes are on our Thanksgiving and Christmas menus every year, without fail. My guys would actually love it if I would make these more often instead of saving them for special occasions.

Trust me when I say that this recipe will not disappoint.

Holiday Potatoes

9 large potatoes (I used white, but you can use Russet or Yukon Gold) peeled and quartered
4 cloves garlic, peeled
1 stick butter, softened
12 oz. cream cheese, softened
1 c. sour cream
3 large shallots, peeled and thinly sliced
1 1/2 c. canola oil
salt and pepper to taste

Place the potatoes and the garlic cloves in a large saucepan and add water to cover. Boil until potatoes are tender. Meanwhile, in a medium skillet, heat the oil until hot, add the shallots and cook over medium heat, stirring frequently, until they are golden, about 15 minutes. Using a slotted spoon, transfer the shallots to a paper towel to drain.

Once tender, drain and place the potatoes in a large bowl. Cut butter and cream cheese into small pieces and add to bowl. Beat with electric mixer until potatoes are fluffy. Beat in sour cream. Add salt and pepper to taste. Serve immediately or place in a buttered casserole dish and refrigerate.

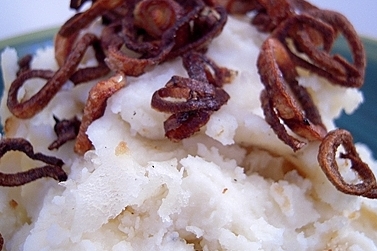
To reheat, bake for 20 minutes or so at 350 degrees. If the potatoes are completely cold, they may need 45 minutes to heat through.  I like heating mine until they’re a little brown around the edges. Right before serving, sprinkle the shallots with salt and garnish the potatoes with the shallots.

If you've never tried a Make Ahead Mashed Potato Recipe, I can almost guarantee you that once you make these, you'll never go back to making last minute mashed taters EVER again!  Instead of peeling and boiling potatoes in a busy kitchen, just pull these out of the fridge, pop them into the oven, and visit with your family while they're heating.  That's one more thing to be thankful for!

~LilSis

Halloween Parade of Pets in Costume

October 31, 2010


Instead of talking about ghosts and goblins or trick-or-treating today, we decided to do something a little more fun!

Let's be honest, doesn't it make you smile when you see a cute little doggie or kitty cat dressed in a costume? 🙂

Without any further delay, let's get this parade started!

Katie in Halloween Princess Dog Costume

Nicki's Katie looking precious in her Princess outfit!

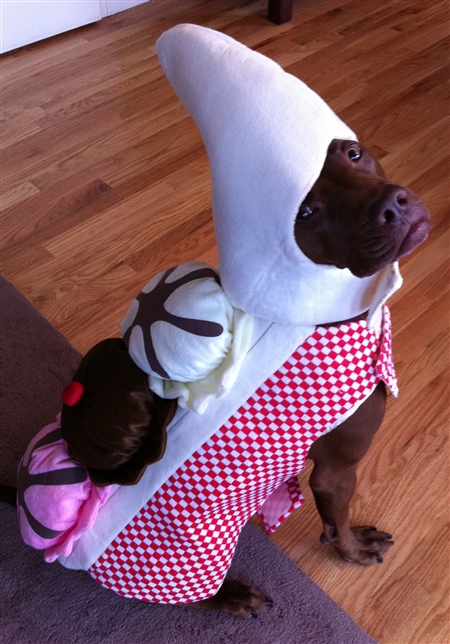
Roxy in Halloween Dog Banana Split Costume

Lisa's Roxy is adorable all dressed up as a Banana Split!

Brady Halloween Devil Cats in Hats Costumes

Kristen's Brady is a beautiful little devil! Where's Jerry, Tom??

Bru Devil Halloween Cats in Hats Costume

Bru also calls Kristen Meowmy, and is another little devil!

Beau Cats in Hats

Lauren's Beau is adorable in his Texas Rangers cap!

Beau Tiger Halloween Cats in Hats

Beau again...now he's working the Tony the Tiger look!

Ashy Halloween Pirate Cats in Hats

BigSis' Ashy as a scary one-eyed pirate! Argghh!

Ashy Halloween Cowboy Costume Cats in Hats

Ashy in his Cowboy ensemble! Git along lil' doggie!

Cats in Hats: Devil TomTom

LilSis' lil devil, TomTom

Cats in Hats: Devil TomTom

He is a pretty lil Devil, isn't he?

Gaby Halloween Pirate Costume Cats in Hats

BigSis' Gaby tries the pirate hat on for size! Love the dreadlocks, Gaby!

Gaby Halloween Pumpkin Costume Cats in Hats

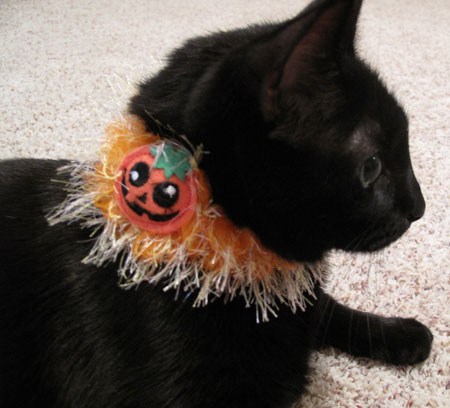
Gaby also models a stylish pumpkin scrunchy collar/necklace!

Gaby Halloween Cowboy Costume Cats in Hats

Gaby makes a very handsome cowboy, don't you think?

Gaby Done Being Halloween Cowboy Cats in Hats

Gaby was apparently WAY over the cowboy look!

(Happy Halloween photo credit: Julicath Flickr Photostream)


10% Monthly Coupon Code Banner

~LilSis

Quick and Easy Pumpkin Decorating Ideas

October 30, 2010

Did Halloween sneak up on you? It did for me. I actually managed to buy two pumpkins a few days ago but they've yet to be carved. Every year we usually do some pretty elaborate carvings and have three or four nice jack-o-lanterns lit up on the front porch but I don't think that's going to happen this year.

If you don't have the time to carve your pumpkin the old fashioned way or just don't feel like making a monstrous mess, it's not too late! Here are a few quick and easy decorating ideas that I've come across.

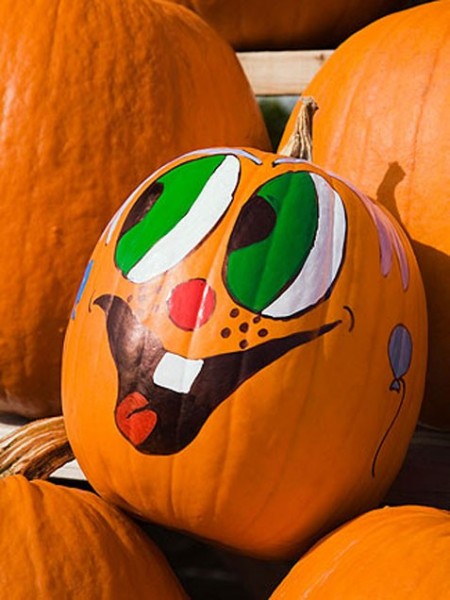
Painted Pumpkin Faces

To get the kids to join in on the fun, just give them some paints or markers, glue and glitter and let them be creative in making their own punkin' faces!

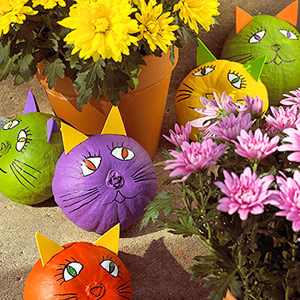
Painted Kitten PumpkinsThese little painted kitten pumpkins are adorable!

Funny Face Pumpkin Stickers

Or find some cute funny face stickers that they can just stick right on. These are actually printable stickers from Family Fun.

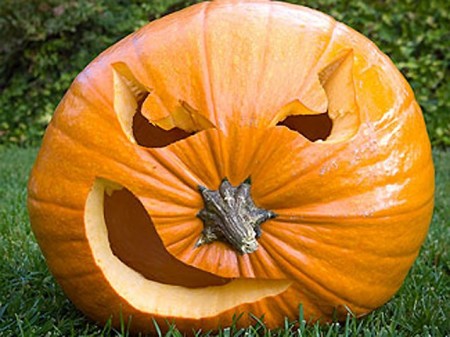
Pumpkin Top PumpkinsAnd who says that you have the cut the top off of your pumpkin to create the traditional lid? I like this idea to just cut out the bottom and carve the top, allowing the stem to be the nose.

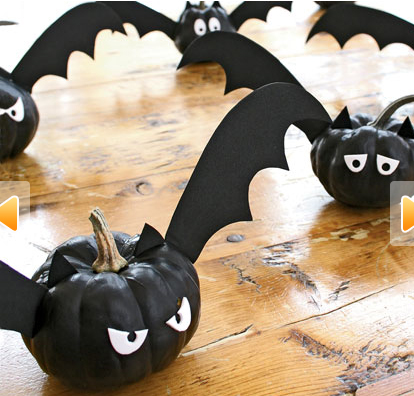
Pumpkin BatsWhy not turn miniature pumpkins into cute little winged bats? All you need is black paint and craft foam.

Martha Stewart Candy Decorated Pumpkins

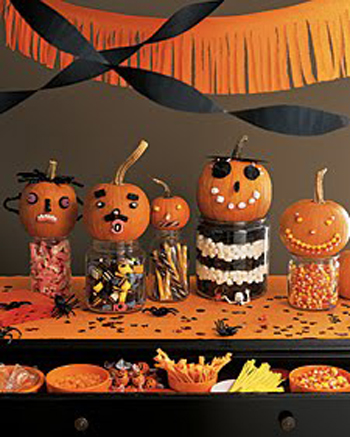
Here's an idea from Martha Stewart on how to decorate your pumpkin Halloween faces with a variety of candies.

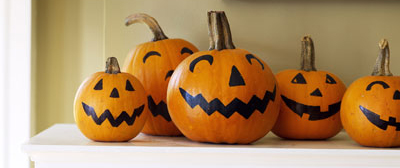
Snaggle Tooth Painted PumpkinsAnd it doesn't get much easier than this! Just freehand your snaggletoothed pumpkin face on with a pencil, then finalize the sketch with a black marker in less than five minutes.

Whatever your plans are for this year, we wish you safe and Happy Halloween!

~LilSis

On the “Rocks”

August 10, 2010

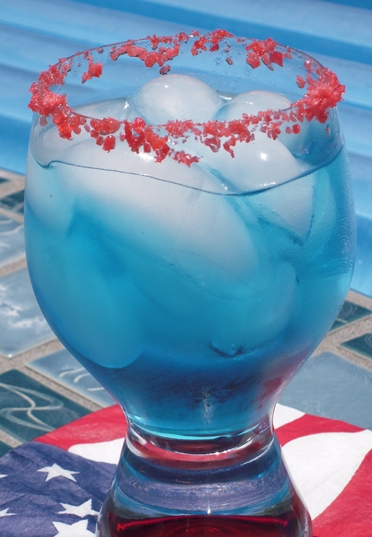
Last month I shared the Funfetti Firecracker Cupcake recipe with you for a fun way to turn cupcakes into little firecrackers. Here's another way you can use those little exploding candies, Pop Rocks to liven up your next summer party. I made these fun cocktails for the 4th of July but they would also be very festive for a Labor Day party.

On the "Rocks"

On the “Rocks”
(adapted from Food Network Magazine July/August 2010)

Juice from half a lemon
Strawberry (red) Pop Rocks
1 part vodka
2 parts juice or mixer (I used Rose's Blue Raspberry Mix)
1 part seltzer water or club soda

Pound the Pop Rocks packet before opening to crush the candies into smaller granules, then pour them out onto a plate. Next, just dampen the rims of the glasses with lemon juice and dip the rims in the candies.

So you don't disturb the candies on the rim, just mix the vodka and juice, or mixer, in a shaker first and then pour over ice and add a splash of seltzer or club soda. Serve immediately as the Pop Rocks will start popping as soon as you put them on the rim.

Note: These also turn out really pretty using cranberry or pomegranate juice with the Tropical Punch (blue) Pop Rocks. (As pictured in Food Network Magazine.)

To make these for the kiddos, just eliminate the alcohol and use any color juice and Pop Rocks. These are so easy, it would even be fun to let the kids help make their own. 🙂

~LilSis

Memorial Day Prayer

May 31, 2010

American Flag

On this Memorial Day, we take a moment to remember the service men and women who have given their lives defending our country and protecting our freedom.  We thank you.

We ask for God's blessings on the families who were left behind when their loved ones made the ultimate sacrifice.  We thank you.

We appreciate the service of all of our veterans who did make it back home; some physically injured and some emotionally wounded.  We thank you.

And we think of our military personnel who are unselfishly serving right now all around the world.  We thank you.

Tomorrow, we'll get back to work and our daily business, and we probably won't think of you in gratitude as often as we should.  Today though, we thank God for you all and lift up this prayer on your behalf.

Dear Heavenly Father,

As we remember those who have made the ultimate sacrifice for our freedom, we think of how they have followed in the footsteps of your son, our Savior, Jesus Christ. Please hold our service men and women in your strong arms. Cover them with your sheltering grace and presence as they stand in the gap for our protection.

We also remember the families of our troops, and ask for your unique blessings to fill their homes and your peace, provision and strength to fill their lives.

May the members of our armed forces be filled with courage to face each day and may they trust in the Lord's mighty power to accomplish each task. Let our military brothers and sisters feel our love and support.

In the name of Jesus. Amen.

~Memorial Day Prayer by Mary Fairchild

~BigSis

Cinco de Mayo Recipe Roundup

May 3, 2010

Is it really May already? I must say this every month, but it does seem like time is flying by faster than ever before.  I know we had an early Easter this year but where did the rest of April go? We've got Mother's Day already right around the corner and before you know it we'll be celebrating Memorial Day and the Fourth of July!

But before we get ahead of ourselves, we've got Cinco de Mayo sneaking up on us in just two days. So, whether you're looking for an easy appetizer to take to a party or you're cooking for a large group of friends and family, here are some of our all time favorite recipes that are perfect for a Cinco de Mayo celebration.

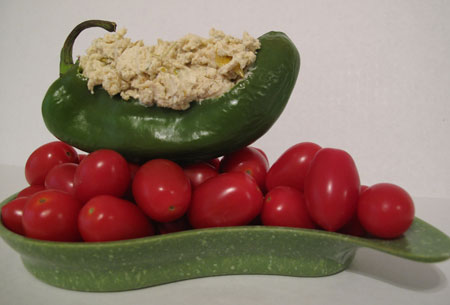
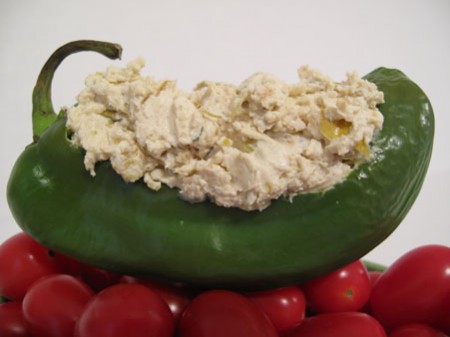
Hatch Green Chile and Garlic Goat Cheese

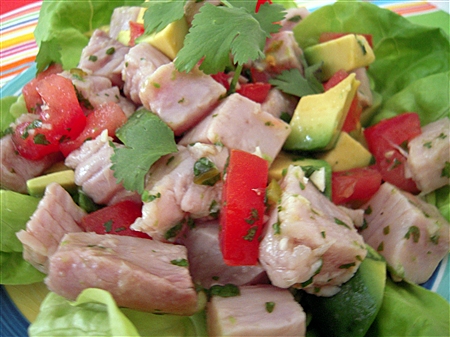
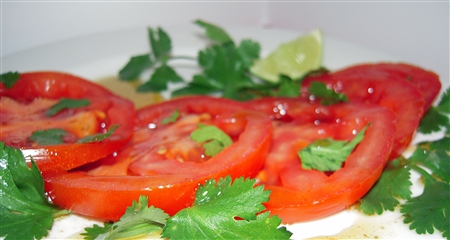
Ceviche Salad with Avocado, Cilantro and Green Chile

Ceviche Salad with Avocado, Cilantro and Green Chile


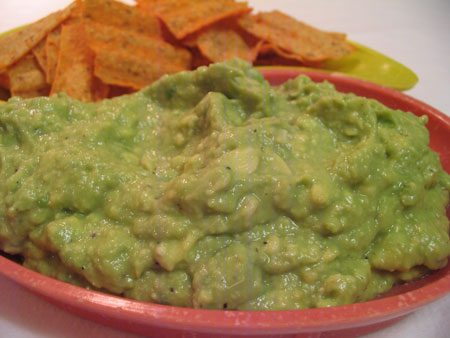
Super Simple Guacomole

Super Simple Guacamole

https://bigsislilsis.com/2010/04/27/roasted-garlic-dressing-with-green-chili/

Roasted Garlic Dressing with Green Chilli


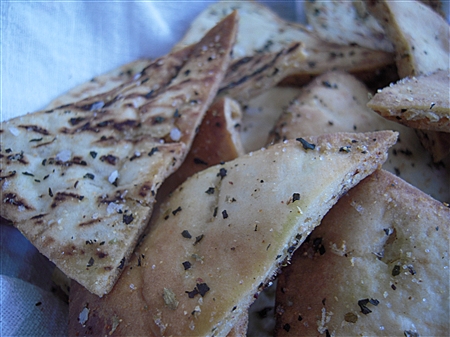
Homemade Pita Chips

Homemade Pita Chips

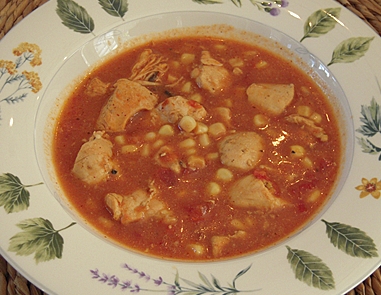
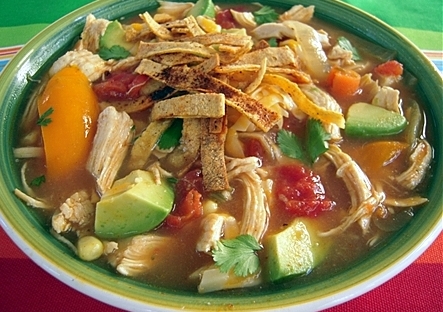
(This is a terrible photo, but this soup is perfect topped with grated cheese, sour cream and toasted tortilla strips)

Chicken Enchilada Soup

Chicken Enchilada Soup


Classic Tortilla Soup

Classic Tortilla Soup

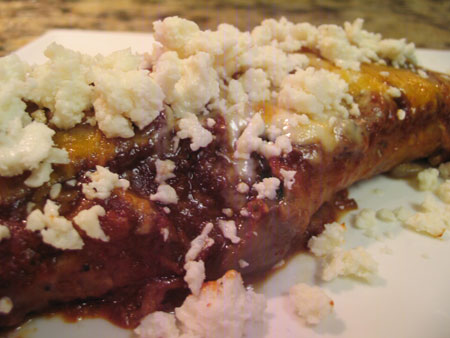
Spinach Mushroom Enchiladas

Spinach Mushroom Enchiladas


Shrimp with Garlic and Chile Pepper

Shrimp with Garlic and Chile Pepper


This next recipe is one of Bry's favorite appetizers but every time he makes them they're gobbled up so quickly we never have time to take a photo! Yes, they're that yummy!

Bry’s Stuffed Peppers

15 fresh jalapeno peppers
1 pound Italian sausage
1 (8 oz) cream cheese
1/2 pound bacon

Cut peppers in half lengthwise. Clean out seeds with spoon. Set aside on foiled lined cookie sheet. Saute sausage and drain. Add the cream cheese to the sausage and mix well.  Spoon into peppers and wrap 1/3 slice of bacon around each pepper. Bake at 350 for approximately 20 – 30 minutes. Put under the broiler for a few minutes to further brown the bacon, if desired. Drain on a paper towel, then serve warm.

And, lastly, we can't forget about something sweet.

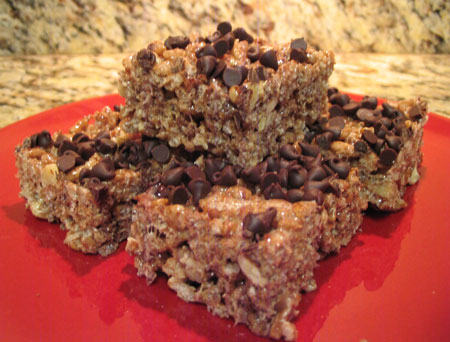
Mexican Chocolate Rice Krispies

Mexican Chocolate Rice Krispie Treats

Hopefully, we've given you a couple of ideas to help you with your celebration, but whatever you decide to do on Wednesday, have a safe Cinco de Mayo! 🙂

~LilSis

Can we just pretend it’s still Easter?

April 5, 2010

I know we've thrown a lot of Easter projects at you over the last week or so, but believe it or not, I have a couple more!  After this post, I promise, no more Easter talk til 2011.

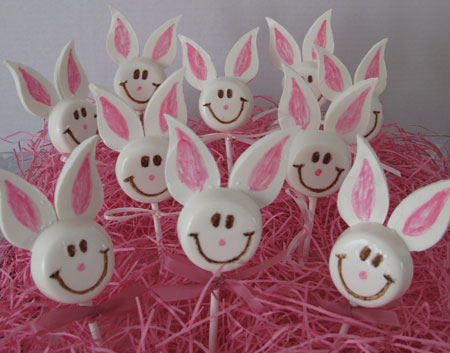
I worked on these little White Chocolate Smiley Face Easter Bunnies over a period of days, but then guess what happened when I was finally putting the post together on Saturday afternoon?  My internet went down, of course!  Ding dang Time Warner employee accidentally disconnected me when he was working on someone else's service in the hood, and they couldn't get anyone out here to fix it til Monday morning.

So call me selfish, but I am not going to let all that work go to waste without showing you the bunnies!  I don't care that Easter is over!  😀  Let's just pretend that it's still Easter!

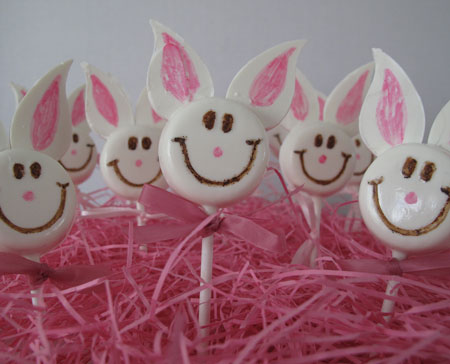
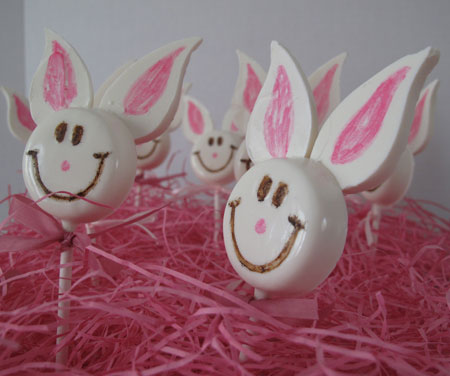
Now, on with it.  I won't bore you with instructions that you won't need til next March, but I do want to show you the photos.  These are the White Chocolate Smiley Face Easter Bunnies.

Smiley Face White Chocolate Easter Bunnies

Smiley Face White Chocolate Easter Bunnies

Smiley Face White Chocolate Easter Bunnies

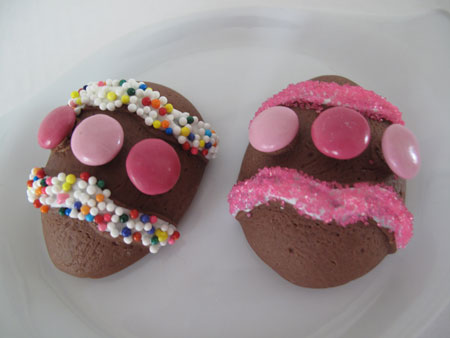
Oh, and one more thing…Chocolate Fudge Easter Eggs; molded and decorated in pink, of course!

Chocolate Fudge Easter Eggs

Now, we can all go back to our after-Easter worlds!  Thanks for indulging me!

~BigSis

Natural Dye Colored Easter Eggs

April 2, 2010

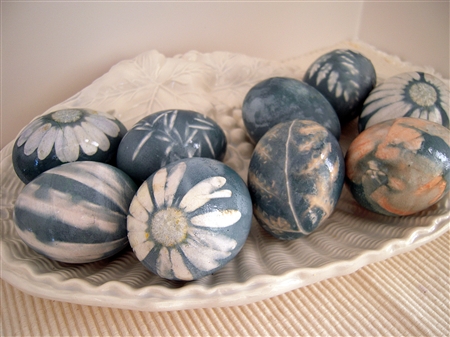
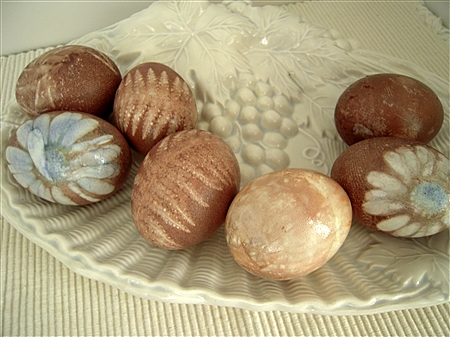
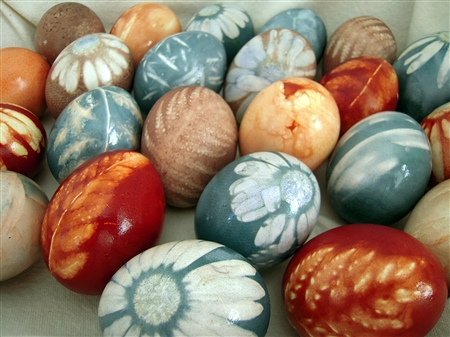
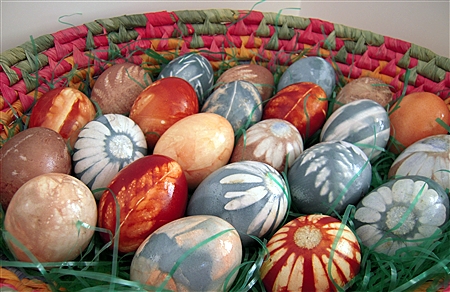
Natural Dye Colored Easter Eggs

Are you tired of coloring Easter Eggs the same old way? I am. I'm tired of just plopping a dye tablet in a cup, adding a little vinegar and water and taking turns putting the eggs into the cups. Boring!

And, if you'd like to be a little more health conscious and avoid the artificial dyes, you may want to consider using one of these natural dyes to color your eggs this year!
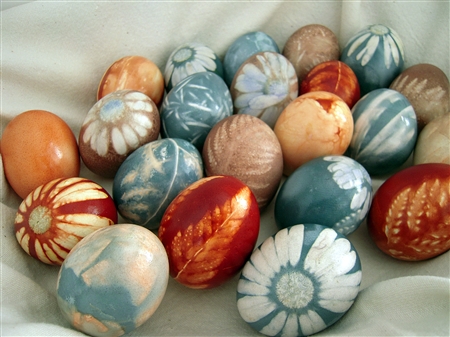
Natural Dye Colored Easter Eggs

This was a little time consuming, but it was one of those projects that was so much fun because the end result is somewhat of a surprise. It reminded me of how I always feel when I open up my kiln after a glaze firing. It's like Christmas! The anticipation almost kills me every time. When I had more time for ceramics, I would almost always find a way to incorporate some leaf or flower impressions in most of my projects. In my wall tiles and mosaic tiles, I've used a lot of the same leaves and flowers that I used for this project.

Alright, sorry I'm rambling about ceramics; let's get back to the Easter eggs. This was my first experiment in making natural dyes so I was winging it a bit and didn't have any idea of how these would turn out. I looked over a few recipes online but didn't use one in particular, just the basic method, so let's get started.

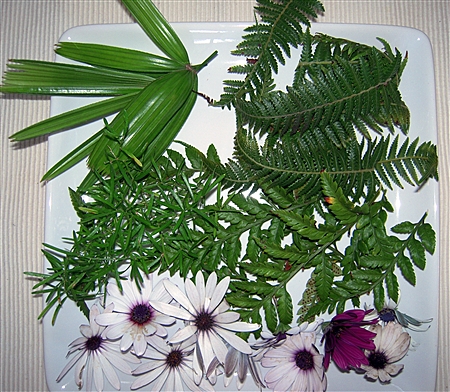
First, gather your leaves, flowers or stickers that you plan to use for this project. Here's what I used.

Natural Dye Colored Easter Eggs

Next, depending on which variation you want to make, you'll use one of these.

1 head of Purple cabbage (If making the blue eggs.)
Yellow onion skins (I used the skin from 3 onions for this rust color.)
1 bag of fresh cranberries (For the disappointing brownish color.)

Whichever color you decide to make will determine the size of your pan. Obviously the whole head of purple cabbage will take a larger pan than if you use one of the other two ingredients.

Once you decide which color you are going to make, use the appropriate size pan. But, before you add the vegetable or fruit to your pan, place an egg in the pan and fill it with enough water to cover the top of the egg by at least an inch. Then remove the egg. Don't add more water. If you use too much water, the color of the dye will end up being too diluted.

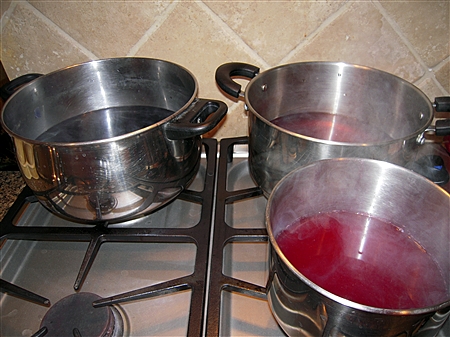
Place the sliced cabbage, onion skins, or cranberries into the pan and boil for thirty minutes, covered to minimize evaporation. Allow water to cool slightly, and then strain contents over a bowl, pressing pulp to remove any remaining liquid.

Rinse the pan, pour in dye water, cover, and return to low heat to keep warm while preparing eggs.

Here are the natural dyes all strained and waiting for the eggs.

Natural Dye Colored Easter Eggs

Next, you'll want to gather a few more items.

Vinegar
Scissors
Pantyhose
Twist ties
Slotted Spoon
Paper towels
Vegetable oil

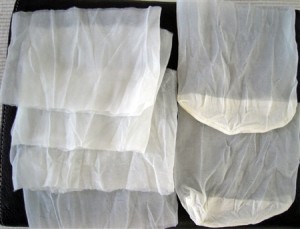
Now, cut the pantyhose into 4 inch pieces.

(Some instructions I saw said that you needed to buy several pairs of knee highs and just use the toes, but I just bought two 99 cent pair of pantyhose, cut them into pieces and it worked fine.)
Natural Dye Colored Easter Eggs

Now for the fun part.

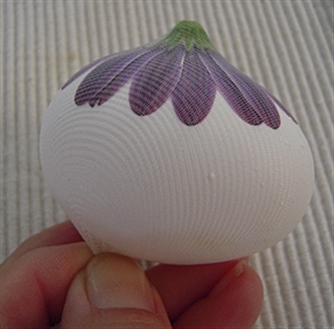
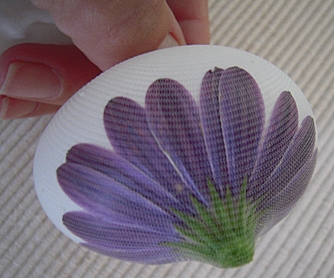
One at a time, place leaves, flowers, or stickers on the egg as desired. Some of the plant materials will stick better if you dip them in water first.

Natural Dye Colored Easter Eggs

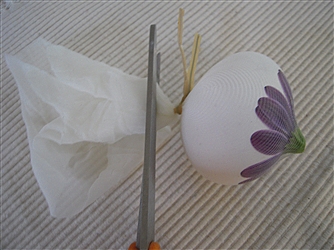
Place the egg in your hand, and gently place the egg inside the hose, make sure your design is still how you want it, and then pull the hose securely it the back and secure with a twist tie. (I thought this was easier than trying to tie in a knot while holding everything in place.)

Natural Dye Colored Easter Eggs

Trim the excess hose from the back.


Natural Dye Colored Easter Eggs

Repeat with remaining eggs.

Return dye to a gentle boil and stir in vinegar. I used 4 T. for the purple cabbage and 3 T. for the onion skins and cranberries since they were in smaller pans.

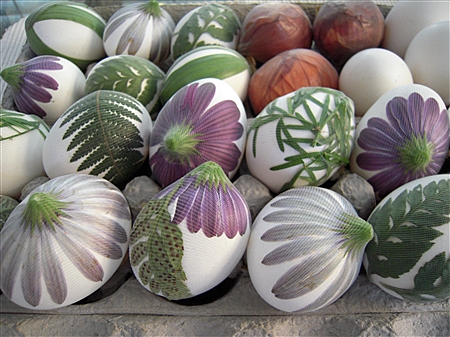
Here are all my eggs ready to go into the dye.

Natural Dye Colored Easter Eggs

Gently lower the eggs into the pan and boil for 30 minutes. Turn off heat, cover, and let stand for 2- 3 hours, or until desired color is obtained.

Remove eggs with a slotted spoon and place back on egg carton to cool slightly.

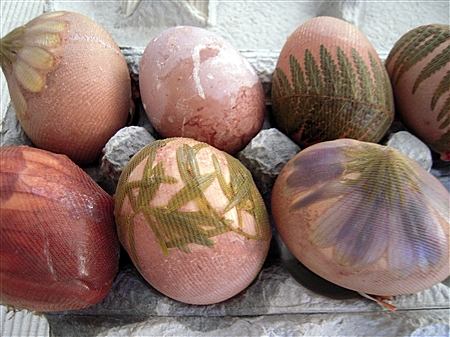
Here's what they look like after you've taken them out of the dye.


Natural Dye Colored Easter Eggs

Natural Dye Colored Easter Eggs

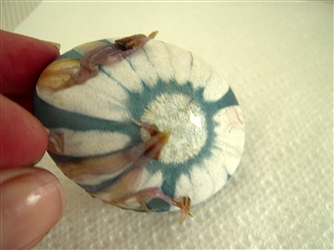
Carefully untie the twist tie or cut the hose and unwrap eggs. Carefully pull off and discard any remaining plant materials or stickers.

Natural Dye Colored Easter Eggs

I let mine sit for an extra 5 or 10 minutes after I unwrapped them just so they could cool a bit more.

Dampen a paper towel lightly with oil and buff eggs until shiny. Remove excess oil with clean paper towel.

Be very careful not to wipe too hard as some of the dye might come off.
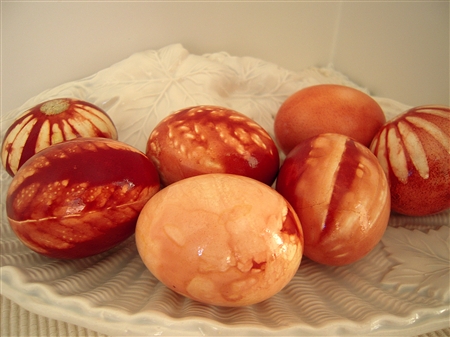
Natural Dye Colored Easter Eggs
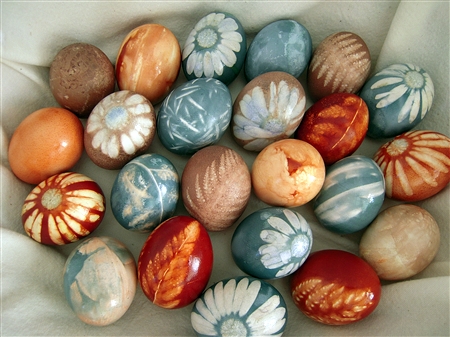
 

Natural Dye Colored Easter Eggs

Natural Dye Colored Easter Eggs

Natural Dye Colored Easter Eggs

Natural Dye Colored Easter Eggs

Natural Dye Colored Easter Eggs

Natural Dyed Easter Eggs

Like I said before, this project was pretty time consuming, but it was so much fun for me! I feel like I got my creative juices stirring again. 🙂

A few notes:

I kept one egg without any decoration to put in each dye color and I didn't care for any of those three at all.

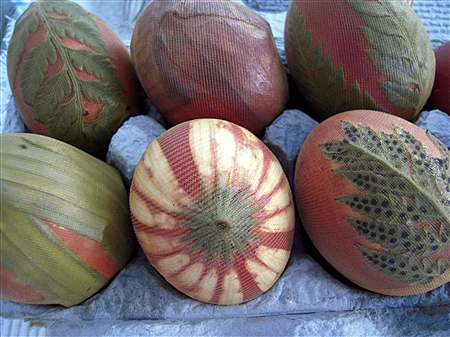
I used just plain yellow onion skin on one egg in each dye color and a couple of those made some beautiful marbling. The one with the onion skin in the purple cabbage dye was probably my favorite. It had a gorgeous brownish-blueish marbling effect.

I wasdisappointed in the brownish color that I got from the cranberry dye, but on one egg where I used a purple flower, it gave off a beautiful blueish color in the center of the white flower. I don't think that I would bother using cranberry again for this project. I was expecting a purplish color, not brown.

The dark rust color from the onion skins is probably my favorite. And this dye didn't even need to sit for two hours before it intensified in color. You could probably even take these out after 30 minutes or so.

I just love this method of using the leaves and flowers for contrast in color on these eggs. I'm already thinking of ways to use this for another project.

I should have posted this sooner, but I hope you give these a try if you have a little time before Easter!

~LilSis

Marshmallow White Chocolate Easter Bunnies

April 1, 2010

Marshmallow White Chocolate Easter Bunnies

When you hear the words “Marshmallow” and “Easter”, do you think of Peeps or maybe those super-sugary marshmallow eggs with the hard sugar shell?  I don't because I don't like either of those Easter candies.  To me, they're the Easter version of the hard-as-a-rock peanut butter taffy wrapped in black or orange paper that you got at Halloween as a kid, and tried to pawn off on your unsuspecting little brothers in exchange for their chocolate candy bars!

I have a new Easter marshmallow treat to share with you, and these also have white chocolate.  This project isn't quite as fancy and classy as the Easter Bird's Candy Nests that LilSis made yesterday, but they're pretty fun to make and I think kids would have a ball putting them together.
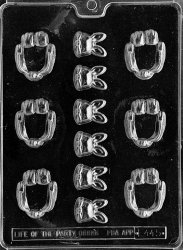
The key is to get yourself a candy mold like this.  It has bunny heads and bunny bases with feet and tails (bunny butts).

Easter Bunny Mold

I got mine at my cake supply store, but you can find them online too.  I have bunches of these kinds of molds.  They're only about $2.50 each, and you can use them for chocolate, candy melts or even soaps.  Buy just one or two, and you'll be addicted to them.  You can customize candy for any kid's party theme and color scheme.  Wrapped up in foil papers, people will be shocked that you made these cute candies yourself.  I made little green frog chocolates for a kid's party once, and the kids were thrilled!

So back to this project.  Here's what you do:

  • Melt some candy melts or chocolate wafers (I like the Guittard White Chocolate Wafers; they come in mint too).  I nuke them for 30 seconds, then stir, and repeat til all are melted.
  • Pour the melted chocolate into a squeeze bottle, and fill the cavities in the mold.  Once it's filled, tap the mold gently on the counter to bring any air bubbles to the surface.  Add more chocolate if needed.
  • Refrigerate the mold for a few minutes until the shapes are set and cold.  Unmold.
  • Now the fun part!  Use more melted chocolate to lightly coat large marshmallows, then immediately roll in shredded coconut.  Chill for a few minutes to set.
  • Decorate the bunny faces if you like.  I used food markers, but they tended to slide around a little on the chocolate, so you'll probably come up with better ideas than BigSis-in-a-hurry did!
  • Add a dab of melted chocolate to the bottom of the marshmallow and gently press onto the base.  Then, with a dab of melted chocolate, add the bunny face to the front of the marshmallow.

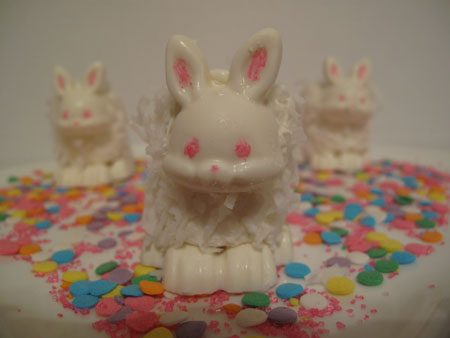
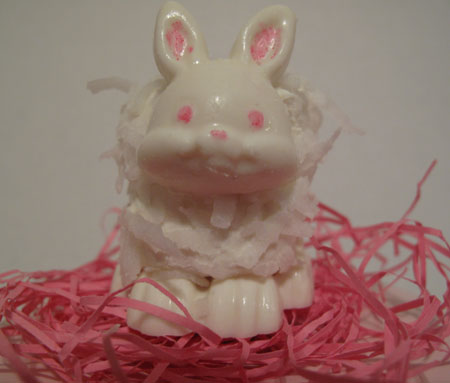
You just made a Marshmallow White Chocolate Easter Bunny!

Marshmallow White Chocolate Easter Bunny

~BigSis
Easter Bird’s Nest Candy

March 31, 2010

I can't believe Easter is just four days from today! If you're like me and don't enough time to make a cute Easter Bunny Cake or Easter Basket Cupcakes, here's a quick and easy candy treat.
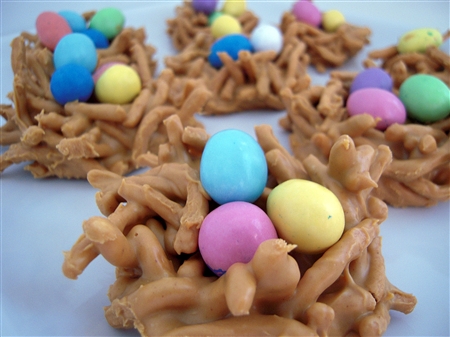
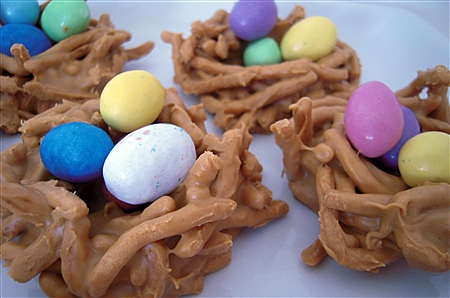
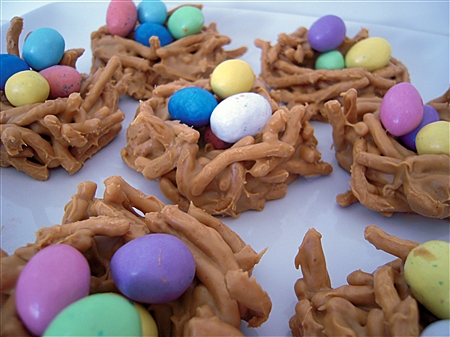
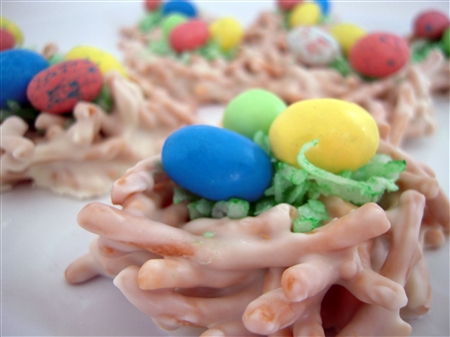
I decided to try two different versions of the Easter Bird's Nests. They're a little messy, but I think they turned out pretty cute.

For the first batch, I used this recipe that calls for butterscotch chips and peanut butter. If I made these again, I would just eliminate the peanut butter. These were more gooey and took longer to set than the ones with just the chips.

Bird's Nests

2 c. butterscotch chips
1 c. peanut butter
2 c. Chow Mein noodles
Any egg shaped Easter candy (I used Robins eggs and M&M')

Cover a baking sheet or pan with waxed or parchment paper. Either melt the butterscotch chips and peanut butter in the top of a double boiler or in the microwave (heat 1 minute, stir, continue heating in 10 second increments until melted and smooth.) Stir in Chow Mein noodles. With buttered fingers shape mixture into one big nest or individual ones. Place on prepared pan. Refrigerate until firm. Fill with jelly beans or other candy.

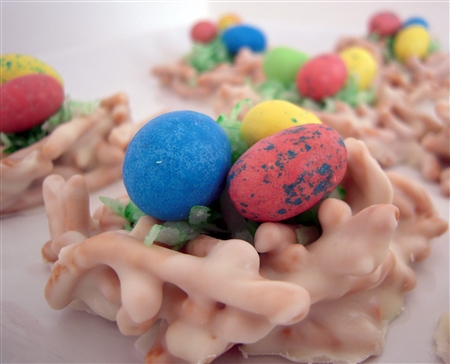
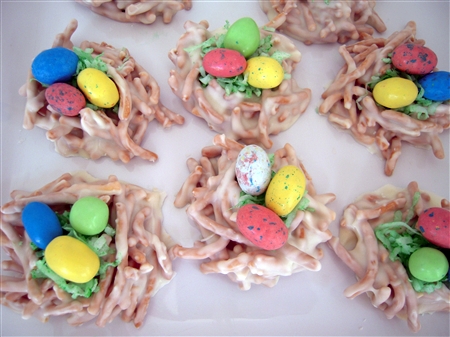
For the second batch, I simply melted 2 cups white chocolate chips and added 2 cups Chow Mein noodles. I thought the little white nests would look cute with some grass inside them so I made some green grass by adding a few drops of green food coloring to a little coconut and shaking it up inside a baggie.

I think that I like the white chocolate version better but I could have used an extra cup or more of Chow Mein noodles because they seemed a little runnier than they should have been. These firmed up really quickly though which makes it easier to get them decorated if you're in a hurry.

So, what's next in our Easter treat lineup? Come back tomorrow to find out! 🙂

~LilSis