Thanksgiving Turkey Cookies

November 21, 2010

Thanksgiving Turkey Cookies

Here's a quick and easy Thanksgiving dessert that's a fun one for the kids. I recruited my 17 year old to help with the eyeballs.

BigSis mentioned this recipe for the Thanksgiving Turkey Cookies a couple of years ago but I never got around to making them until now. We're celebrating Thanksgiving this year with a group of friends and I thought these cookies would be something a little different to take to the gathering.

As I've mentioned before, I'm not the baker in the family and I'm not particularly fond of baking from scratch so I love that you just use refrigerated cookie dough for this recipe.

Thanksgiving Turkey Cookies
(recipe adapted from Pillsbury)

1 roll Pillsbury refrigerated sugar cookies
1 container (16 oz.) chocolate creamy frosting
candy corn
orange decorating icing
Miniature M&M's
Tiny black or blue nonpareils

Heat oven to 350 degrees. Bake cookies as directed. Cool completely, about 20 minutes.

Spoon chocolate frosting into resealable plastic baggie and seal bag. Cut a small hole in the bottom corner of bag. On each cookie, pipe frosting on outer edge of half of cookie. Arrange candy corn over frosting for feathers.

Pipe orange icing onto each cookie to resemble turkey face and brown icing for the feet. Use a small dot of icing to attach the M&M's to the cookie for eyes and to dot on a tiny nonpareil for center of eyes.

These little guys were actually pretty fun to make! 🙂

(Note to BigSis: Here's a turkey that even a vegetarian can eat! ) 🙂


~LilSis

Adopt a Turkey for Thanksgiving!

November 19, 2010

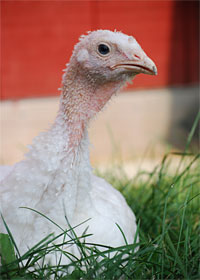
Adopt Turkey Daphne

Daphne

Most people are talking about preparing turkeys for the Thanksgiving meal, but LilSis is right that this Vegan Sis isn't one of them.

It's been 17 years since I feasted on anything that had a face or parents, and Thanksgiving is definitely not an exception. In fact, I think it's an opportunity to celebrate the real meaning of the day, and it doesn't have to revolve around a dead bird.

Instead of eating a turkey, how about adopting a turkey?  For just $30, you can sponsor a turkey through Farm Sanctuary, the nation’s leading farm animal protection organization.

“Save a life this Thanksgiving, and join me in starting a new tradition by adopting a turkey instead of eating one through Farm Sanctuary's Adopt-A-Turkey Project.” – Ellen DeGeneres, Farm Sanctuary’s 2010 Adopt-A-Turkey Project spokesperson

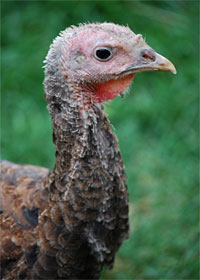
Adopt Turkey Velma

Velma

Your contribution will go toward the care of animals at the organization's New York or California facilities, and in return you get a color photo of your adopted bird buddy and fun info about him or her.

Plus you get the satisfaction of knowing you did something that honors life, and that if they could, these birds would express their thankfulness to you for that.

How about giving turkey sponsorships to your friends to celebrate your gratitude this Thanksgiving?  We're always trying to think of something different and thoughtful to give to those people on our Christmas list who have everything.  Do they have an adopted turkey?  Probably not!

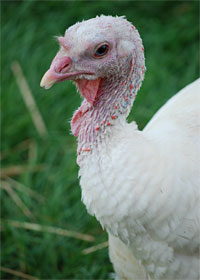
Adopt Turkey Kima

Kima

If you decide to celebrate turkeys this year, you'll be in good company!  On Wednesday, Farm Sanctuary submitted a petition with close to 14,000 signatures to President Obama, urging the White House to send the two turkeys who will be pardoned in a ceremony next week to their world-class shelter in Watkins Glen, New York.  The petition asserts that the shelter is uniquely equipped to provide the expert care necessary for the health, comfort and longevity of these birds.

Want to learn more about celebrating a compassionate Thanksgiving?  Here are a few links to get you started:

Top 10 Reasons Not to Eat Turkeys

PETA's Recipes for a Vegan Thanksgiving

Farm Sanctuary's Compassionate Thanksgiving Recipes

Happy Thanksgiving!

10% Monthly Coupon Code Banner

~BigSis

Top 10 Turkey Tips

November 17, 2010

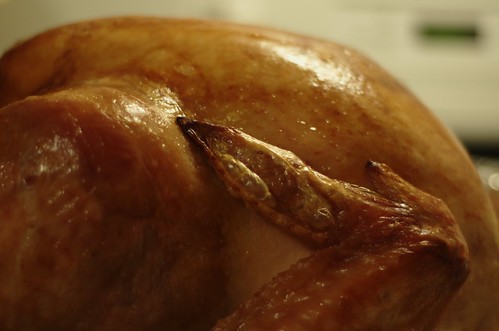
Roasted Thanksgiving Turkey

So, who's roasting a turkey for Thanksgiving next week? Whether it's your first time to roast a turkey or if you're an old pro, here are ten tips to help you assure that you roast the best turkey EVER!

  1. First, decide whether you are going to buy fresh or frozen. Plan ahead if you're buying frozen. The safest way to defrost a frozen turkey is in the refrigerator and a 20 lb. turkey will take between 3 -4 days to fully defrost.
  2. When choosing your turkey, be sure to read the nutritional label. A lot of the frozen turkeys are basted and will contain more fat and as much as four times the sodium as a fresh turkey.
  3. Decide on the size of the turkey you need based on how many people you will be feeding. If you want leftovers, Butterball says to allow approximately 1 1/2 pounds per person; so for 15 people, you would want to buy a 22 lb. turkey.
  4. Cooking times do vary depending on whether you purchased a frozen or fresh turkey. Allow 20 minutes per pound in a 350 degree oven for a defrosted turkey and 10-15 minutes per pound for a fresh turkey.
  5. I stuff a turkey the same way I do a large roasting chicken. Just loosely fill the turkey cavity with veggies like carrots, celery, garlic, onions and maybe some fresh rosemary. And, I like to add fresh herbs under the breast skin. A turkey will cook more evenly if it's not densely stuffed. (Our family always baked the stuffing separate from the turkey, never stuffed inside the turkey or in the bottom of the roaster.)
  6. For more even roasting, truss the turkey and tuck the wing tips under the shoulder of the bird. If you don't want to take the time to truss, just make sure the legs are tucked into the pocket of skin at the tail end.
  7. Before roasting, brush the outside of the turkey with either vegetable or olive oil. Season with salt and pepper and make a tent out of aluminum foil and place over the top of the turkey. (This will prevent the breast from browning too quickly.)
  8. Once you've got your turkey in the oven, just leave it alone! There is no need to baste every hour and opening the oven will drop the temperature which will effect the roasting time. About 45 minutes to an hour before you think the turkey is done, remove the foil so the breast can brown and baste with turkey juices. (Our mom also liked to rub butter on the skin at the stage.)
  9. Don't rely on the little plastic thermometers to pop out. Instead, check the temperature of the turkey with an instant read thermometer. The deepest spot on the turkey, in the thigh, between the leg and the breast should read 165 – 180 degrees. Make sure you do not overcook or you will end up with dry turkey breast.
  10. Remove from oven. Place the foil tent back over the turkey and let it rest for 20 – 30 minutes to allow to juices to redistribute throughout the turkey. To end up with a moist turkey, it's very important to let it rest. For best results, carve with a very sharp or electric knife.

Voila!  I know the first time I roasted a turkey, it was somewhat intimidating, but it really is pretty simple, isn't it?

photo credit: r_gnuce


~LilSis

Urban Decay Eyeshadow Primer Potion Hacked Again!

November 15, 2010

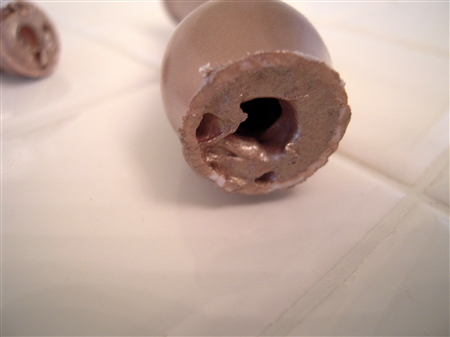
We're big fans of Urban Decay's Eyeshadow Primer Potion.  Like other fans though, we hate wasting all of that product that the applicator wand doesn't reach.  A while back, LilSis hacked into Urban Decay's cute little purple genie bottle to show just how much waste there is.

Urban Decay Primer Potion Hack

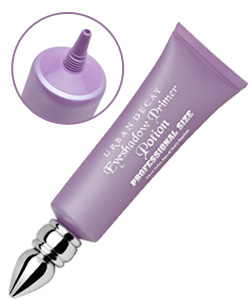
Urban Decay's answer to the waste was to keep the cute bottle, but to redesign the wand.  The idea was that the newly-bent wand could reach into the curves of the bottle to access the previously-wasted potion.

Urban Decay Primer Potion Wand

We didn't love the new wand, but were happy tolerate it if it helped us get some of that wasted potion out of the bottle and onto our eyelids.

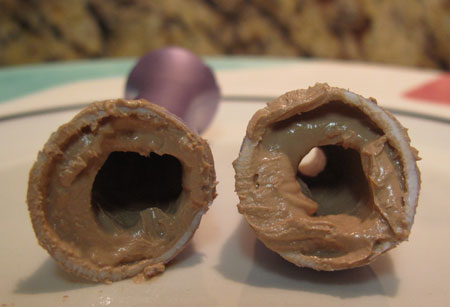
Did it do that though?  Like LilSis, I had to hack into the bottle myself to see.  I intentionally used this bottle as long as I possible could; trying to eek out every last little bit of primer.  When I finally whipped out my knife, I couldn't get one more dab out of this bottle.

Note: Don't try this at home.  I used a serrated knife and serrated my finger twice before I got through the hard plastic!  There was blood.  Lots of blood.

Urban Decay Primer Potion

Do you see much waste?  I do!  Lots of waste!

The good news?  Urban Decay heard all the grumblings and came out with the Primer Potion in a tube!

Urban Decay Primer Potion Tube

When the tube first came out, I thought I heard that it was limited edition, but the web site doesn't say so.  The original purple genie bottles are still available too.

Whichever packaging you prefer, you're still getting our favorite eyeshadow primer and we wouldn't dream of applying shadow without it.  Not only does it hold the shadow onto your lids ALL DAY without creasing or fading, it also intensifies the color of your shadow.  Bonus!

I've been using this product for years, and I'm still amazed sometimes when I take a look into the mirror after a long day.  My eyeshadow still looks perfect and just-applied even though it may have been on for 16 hours and survived 8 hours of work and 2 workouts!  It sounds impossible, but it's true!  Go, Urban Decay!


Clarisonic Mia -Sonic Cleansing on the Glow!

~BigSis

Bee Inspired

November 13, 2010

“Feeling gratitude and not expressing it is like wrapping a present and not giving it.”

~William Arthur Ward


I found out about these lovely boxes of quotes from Bee Inspired in the November, 2010 issue of Whole Living. I've always had a love for inspirational quotes. I've got a stack of books that are filled with quotes and I've found that it really helps me start my day off on a positive note to read something inspirational and uplifting first thing each morning.

I love that each of these beautiful boxes contain a year's worth of daily inspirational messages that are each hand rolled and hand tied into a small scroll. The boxes of quotes, which come in several different themes, such as Marital Bliss, Success, and Motherhood, start at $29.00 and would make a perfect gift for a special person in your life.

Here's the story about how Kristen Novak was inspired to create these beautiful boxes full of quotes. 🙂

The Bee Inspired Story

When I learned from my sister, Kelly, that her newborn child was diagnosed with Down Syndrome, I was at a loss as to how I could help her during this transitional time. We had always been close at heart, but now the distance between Saginaw, Michigan and Chicago, Illinois seemed worlds apart.

I desperately wanted to be there to give her daily hugs and support. That is when the idea of sending an “inspirational quote a day” was born. It was my way of being there to give her a “pick me up” when I could not, delivered exactly when she needed it most.

My love for inspirational quotes and the way they positively affect people’s lives inspired me to create a box filled with these treasures. After carefully selecting quotes to be shared with my sister, I individually hand rolled and tied each scroll with raffia. Then, I placed them in a custom designed box. Now I had a gift uplifting to the soul and beautiful to the eye!

This gift helped bridge the miles between us and let her know I was always with her at heart.

My hope is that this gift will inspire you and you might reach out and share the buzz with others.

Hugs and Smiles,

Kristin's Signature

(Note: Bee Inspired donates a portion of the proceeds from the signature gift box sales to the National Down Syndrome Society.)

~LilSis

4 Disappointing Mascara Reviews

November 11, 2010

L1007145.JPG  by Irving Penn at MoMA

Because of Loreal's animal testing, my favorite Loreal Voluminous mascara has been banished from my bathroom.  I used it for years and years, and loved it.  But it's gone now.  Permanently.  Adios, animal tester!

If I don't like a product, I usually don't review it on BigSisLilSis.  We all get enough negativity in our day without me being Negative Nellie and adding to it, right?

It turns out however that it's UBER hard to find a good mascara that isn't animal tested, so I'm making an exception to my rule.  I'll share my thoughts about what I've tried lately, and you can take my comments with a grain of salt.

I'm sorry to say that of the last four mascaras I've tried, I don't like any of them.  Not one ding dang one!  Boo!

Here's what I've tried and tossed:

  • Smashbox Hyper Lash ($21) – I had really high expectations for Hyper Lash after hearing rave reviews on the radio from a local DJ, so I bit the bullet and spent more than I ever do on mascara.  First off, the brush on Hyper Lash is really different.  It has bristles on one side to apply the product and a comb on the other side to separate the lashes.  The first coat went on truly clump-free.  Hurray!   The only problem is that one coat was very thin and skimpy, so I needed two additional coats and that caused a lot of clumping.  I didn't get any volume or lengthening, and I felt that my lashes just didn't show up.  I got some fine flakes under my eyes by the end of the day, and my lashes looked dry.  Hyper Lash isn't waterproof, but was hard to remove.  This mascara was pricey and it went back to the store.
  • Tarte Lights Camera Lashes ($19) – I like Tarte's nice big normal brush, but the product was fairly thin so I didn't get any volume, similar to the result I got with Hyper Lash.  I didn't get much clumping, which was great, but this mascara provides an extremely natural look and I just need more from a mascara.  If your naked eyelashes look like Bambi's, this mascara may be enough for you, but it's not for me.  It removed fairly easily, but I did have some flaking during the day.  It isn't a bad product, but for the price, I expected better results.
  • MAC Zoom Lash ($14) – I wanted a thicker formula than what Tarte and Smashbox offered, so I guess I should be careful about what I wish for.  I went into a MAC store and asked for their best mascara for volume without clumping, and Zoom Lash was their recommendation.  Zoom Lash is radically thick to the point of being gloppy, and the small short-bristled brush made it impossible for me to apply it without a huge goopy mess.  It also straightened out my just-curled lashes. Rats!   This may be my least favorite MAC product ever, I'm sad to say!  I should have taken it back; I hate it that much.  Why didn't I?
  • Revlon 3D Extreme ($7.50) – 3D Extreme is super thick too, and has another weird brush.  What happened to plain old big brushes that reach every lash?   This one is flat with short bristles on each side with a rounded bulb kind of a thing at the end of the wand.  I don't get it.  What am I supposed to do with this contraption?  What I did get was clumping galore, and straightened lashes like Zoom Lash gave me.  Fail!

I'm disappointed at what I've found so far, and I haven't even restricted my search to vegan mascaras.  Sheesh!  The search for a good mascara will continue though.  I'm not encouraged, but I'm also not giving up and resorting to wearing false eyelashes every day!

Hey, volume-building, clump-free, perfectly-thick, cruelty-free mascara!  Come out, come out, wherever you are!

photo credit: Susan NYC

~BigSis

Holiday Potatoes: Make Ahead Mashed Potatoes

November 8, 2010

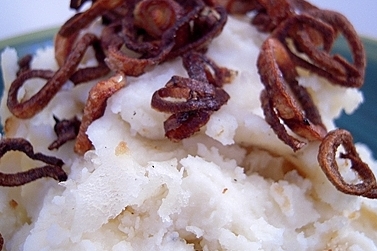
Holiday Potatoes: Make Ahead Mashed Potatoes

Holiday Potatoes: Make Ahead Mashed Potatoes

We did share our recipe for Holiday Potatoes last November, but they are definitely worthy of another mention, especially at this time of the year. These potatoes are on our Thanksgiving and Christmas menus every year, without fail. My guys would actually love it if I would make these more often instead of saving them for special occasions.

Trust me when I say that this recipe will not disappoint.

Holiday Potatoes

9 large potatoes (I used white, but you can use Russet or Yukon Gold) peeled and quartered
4 cloves garlic, peeled
1 stick butter, softened
12 oz. cream cheese, softened
1 c. sour cream
3 large shallots, peeled and thinly sliced
1 1/2 c. canola oil
salt and pepper to taste

Place the potatoes and the garlic cloves in a large saucepan and add water to cover. Boil until potatoes are tender. Meanwhile, in a medium skillet, heat the oil until hot, add the shallots and cook over medium heat, stirring frequently, until they are golden, about 15 minutes. Using a slotted spoon, transfer the shallots to a paper towel to drain.

Once tender, drain and place the potatoes in a large bowl. Cut butter and cream cheese into small pieces and add to bowl. Beat with electric mixer until potatoes are fluffy. Beat in sour cream. Add salt and pepper to taste. Serve immediately or place in a buttered casserole dish and refrigerate.

To reheat, bake for 20 minutes or so at 350 degrees. If the potatoes are completely cold, they may need 45 minutes to heat through.  I like heating mine until they’re a little brown around the edges. Right before serving, sprinkle the shallots with salt and garnish the potatoes with the shallots.

If you've never tried a Make Ahead Mashed Potato Recipe, I can almost guarantee you that once you make these, you'll never go back to making last minute mashed taters EVER again!  Instead of peeling and boiling potatoes in a busy kitchen, just pull these out of the fridge, pop them into the oven, and visit with your family while they're heating.  That's one more thing to be thankful for!

~LilSis

Goodbye to Daylight Savings Time 2010

November 6, 2010

Don't Forget Daylight Savings Time

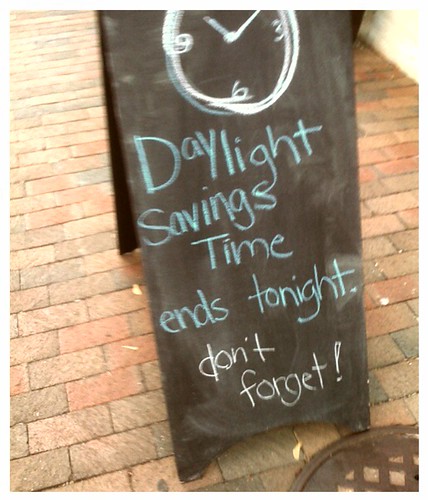
You do remember that we get an extra hour in our Sunday, right?  Happy dance, happy dance!

What to do with that precious hour?  Here our my Top 10 Ideas for using that extra hour:

  • Just do it!  Intending to exercise won't get you into your skinny jeans!  Start that exercise program TODAY and you won't have to make that same old New Years resolution to get in shape!  If you're working out super-hard, you may also be less prone to sabotage yourself by eating horribly during the holidays.  Bonus!
  • Dig around iTunes and download some new music to liven up your cardio playlist.
  • Clean your closets out now instead of scrambling to make that end-of-the-year charitable donation on December 31st.  You know you won't have time once the holidays get into full swing!
  • Have you met your medical insurance deductible for the year?  There may be some medical appointments you should schedule to take advantage of that situation, so make a list today of the calls you can make tomorrow.
  • Think about what you want to cook for Thanksgiving this year.  My recommendation of course, would be to skip the turkey and do a feast of veggies and sides!
  • Start your Christmas lists: gift list, Christmas card list, to do list.  It's never too early to begin!
  • Take advantage of the beautiful fall weather if you're blessed with it today, and get out there in it!
  • Hang out with your kids or grandkids without thinking about anything else you should be doing.
  • Sleep!

photo credit: Somewhat Frank

~BigSis

Smoky, Fire-Roasted Chili with Bacon

November 3, 2010

Smoky, Fire-roasted Chili with Bacon

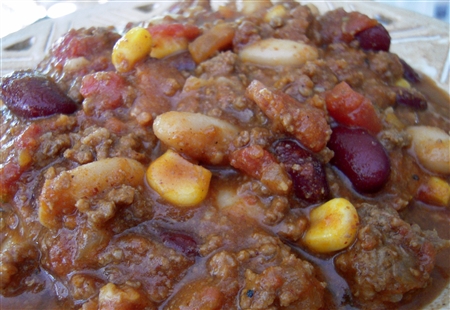
Chili isn't very photogenic, but at least you can see the yummy tomatoes, corn and different color beans.

A couple of weeks ago I made a Cowboy Beans recipe from “Rick Bayless' Mexican Everyday” Cookbook for a big potluck birthday party. It was my first time making the recipe and even though it was pretty simple, the beans were a big hit! I'll have to make them again soon and share the recipe.

A couple of ingredients in the bean recipe gave me an idea to try something different with my chili recipe for our annual chili cook-off, which was held this past weekend. The past two years my recipe has come in 3rd place but this year I wanted to kick it up a notch to see if I could beat out my rival 2nd place winner. And I'm happy to announce that out of 15 entries and 51 ballots, this chili recipe did bring home the 2nd place prize. 🙂

Smoky, Fire-Roasted Chili with Bacon

12 oz. pkg apple-smoked thick cut bacon, chopped into pieces
2 shallots, finely chopped
4 cloves garlic, minced
(2) 14.5 oz cans fire-roasted diced tomatoes
1 large onion, coarsely chopped
4 lbs. lean ground beef
14.5 oz can regular diced tomatoes
2 roasted and chopped Serrano peppers (with seeds)
1 roasted jalapeno pepper, chopped (with seeds)
16 oz. bottle dark beer
14.5 oz can tomato sauce
14.5 oz can dark kidney beans
14.5 oz can white kidney beans (or cannellini beans)
1 c. sweet corn (frozen or canned)
6 t. Penzeys Chili Con Carne Seasoning
2 t. Penzeys Smoky 4S Special Seasoned Sea Salt
2 t. Penzeys salt-free Arizona Seasoning
1 t. cayenne
1 t. cumin

In a large heavy-bottomed pan over medium-high heat, cook bacon, stirring until it begins to brown, about 4-5 minutes. Drain off fat, add the chopped shallots, reduce heat to medium and cook for another 4-5 minutes, stirring occasionally. Add the garlic, reduce heat to medium low and stir for another 2-3 minutes. Add the fire-roasted tomatoes with their juices and simmer another 10 minutes or so to blend the flavors.

(Note: Even though I use a lean beef, I brown the beef in a separate pot so I can drain the fat, instead of just adding the beef right into bacon and tomato mixture.)

In a separate large heavy-bottomed soup pan over a medium high heat, begin to brown the beef. Once the beef is almost browned, add the chopped onion and continue to cook until onions soften and beef is completely browned. Drain the fat. Add diced tomatoes and cook for 5-10 minutes over medium-high heat then add tomato sauce, beer and Serrano peppers. Simmer for about an hour and then add the bacon and fire-roasted tomato mixture, beans, corn and spices. Adjust seasonings to taste.

I made mine the day before and chilled in the crockpot overnight. When I reheated it, it was a little thick for my taste so instead of water, I added another bottle of beer. Voila!

(The extra bottle of beer is not listed in the recipe because you could use water to thin the chili, if desired.)

This chili definitely has a bit more heat to it than my normal Chili Con Carne recipe, but it wasn't overwhelming. You could use less peppers or none at all if you like a milder taste. Serve with warm cornbread for a complete meal or put out a selection of toppings such as grated cheese, sour cream, jalapenos, and Fritos.

(Note: Even though most of my spices are Penzeys brand, it's not absolutely necessary. The 4S spice contains Smoky Paprika and Seasoned Salt so those could easily be substituted for the 4S; and the Chili con Carne spice is a mixture of chili powder, cumin, garlic, and oregano.)

Half the fun of making your own chili is adjusting the spices to your own taste, right?

We had a great time with great friends at our annual chili cook-off!

Just for the fun of it, I'd thought I'd share a photo of me having a toast with my teeny, tiny, trophy! 🙂

~LilSis

We Texas girls are still proud of our Texas Rangers!

November 2, 2010

U.S. Flag held by Sailors before Game 5 of World Series

U.S. Flag held by Sailors before Game 5 of World Series

As I'm sure everyone knows by now, our Texas Rangers lost 3-1 to the San Francisco Giants last night in Game 5 of the World Series.  (sniffle, sniffle) 🙁

BUT, as BigSis mentioned before, we're hometown Arlington girls and we're still really PROUD of our TEXAS RANGERS for making it all the way to the WORLD SERIES!

~LilSis