St. Patrick’s Day Reuben Sandwich

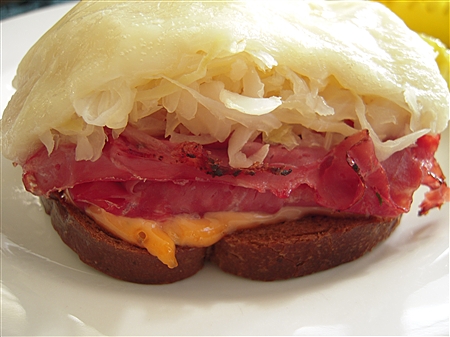
reuben

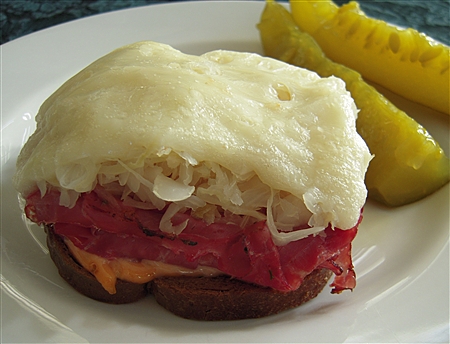
I wanted to be sure to get this post up today in case anyone is having their St. Patrick's Day celebration on Saturday. If you are hosting a party or just having a couple of friends over, these Reuben Sandwiches are easy and they're a real crowd pleaser.

I mentioned the recipe for these sandwiches a couple of days ago in my St. Patrick's Day Party Ideas post.  These are a little different since you bake them in the oven for a few minutes and serve them open faced.  If cut into smaller pieces, they made for excellent party appetizers.

I really love that you can put these together before the party. Whenever you're ready to serve, you just pop them in the oven for five minutes to melt the cheese.

In hindsight, I wish that I hadn't used Reduced Fat Swiss for this recipe. Full fat cheese probably would have gotten more browned and bubbly. I was trying to cut back a little bit on the fat considering the fat content in the mayo and the corned beef.

closeup-reuben

I've been thinking about these sandwiches so much that I decided not to wait until St. Patrick's Day to serve them. We're having them for dinner tonight!

~LilSis

Posted under Food

This post was written by LilSis on March 13, 2009

Tags: ,

Favorite Christmas Cookie: Snowballs

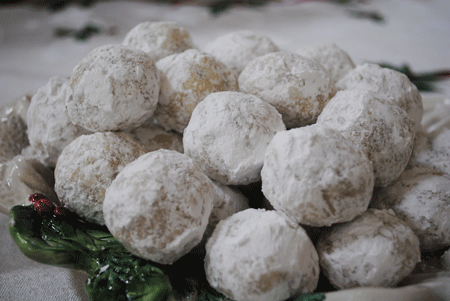
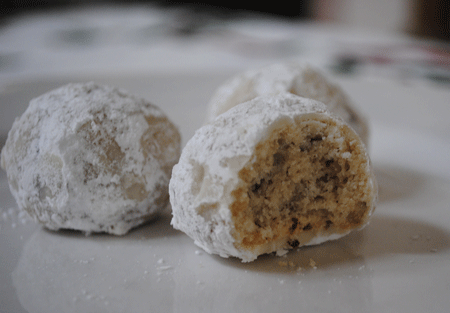
Snowball Christmas Cookies

For many years, our kids would wait, with much anticipation, for the tin of Grandma's cookies to arrive in the mail right before Christmas. Without fail, every year, until she wasn't able to do it anymore, my mother-in-law would mail a gorgeous tin full of a beautiful assortment of homemade Christmas cookies to each of the grand-kids.

Everyone had their favorite, so if you wanted one in our household, you had to be quick! One year, our beloved, SarahGirl (1/2 Lab & 1/2 Great Dane) decided that she wasn't going to wait for her cookie. The tin arrived as we were dashing out the door one day, so we quickly put it under the tree, not even thinking that the dog could possibly get into it since it was taped shut.

Yet, when we arrived home, we found that SarahGirl had somehow managed to remove the tape, open the tin and devour every single, ding, dang, last cookie!  (Shhhh… we never could bring ourselves to tell Grandma about the incident.)

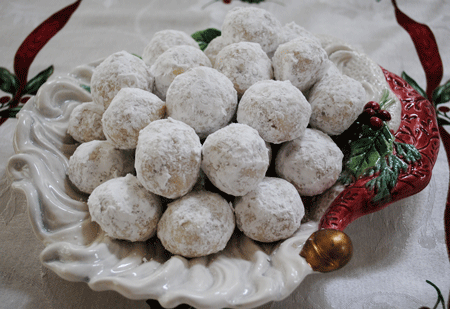
Her Snowballs were always my favorite!

Christmas Snowball Cookies

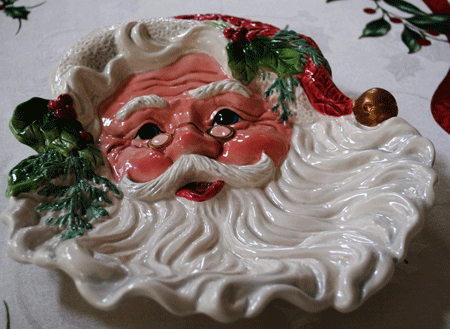
My Mother-in-law gave me this beautiful Fitz & Floyd Santa Plate about 15 years ago and ever since then, it's been the plate we've used to leave cookies for Santa on Christmas Eve night.

Santa Cookie Plate

Tonight, I'll be serving the Snowballs on it for a Christmas get-together we're having with a few friends.

Santa Cookie Plate with Christmas Snowballs

Snowballs

1/2 lb. butter, at room temperature
2 c. flour
1 c. chopped pecans
1 t. vanilla
1 c. powdered sugar

Preheat oven to 350 degrees. Cut the butter into small pieces, place in a large mixing bowl and gradually add the flour, the pecans, then the vanilla, combining all with your hands.

Form the dough into walnut size balls and place on a cookie sheet about an inch apart. Bake for 18 – 20 minutes, just until the bottoms are slightly brown.  Let cool for 5  minutes, then roll in the powdered sugar. Once completely cool, dust again with powdered sugar.

(Before I made these, I did a little browsing online and I did find quite a few variations of this recipe. Some have salt, sugar and even eggs in the dough but I decided to stick to my mother-in-law's recipe.)

The good news is that when my hubby tried one, he said they were perfect and tasted just like his Mom's. In my house, that's the best compliment I can receive. 🙂

~LilSis

Posted under Holidays

This post was written by LilSis on December 23, 2010

Tags: ,

Baked Camembert

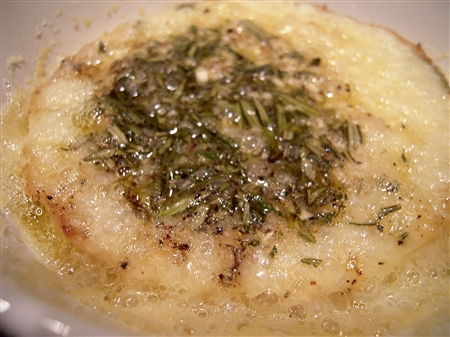
Camembert 1

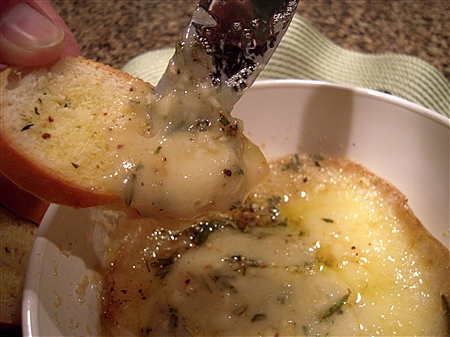
Lovely, ooey, gooey, creamy, bubbly, yummy melted cheese!

What more could you ask for?

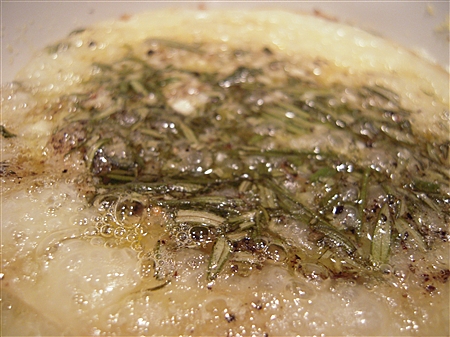
Maybe some garlic, rosemary, and olive oil on top?

Oh yeah!

How 'bout some toasted baguette bread to spread it on?

Now you're talkin!

It doesn't get much better than this.

SirHoney & I devoured this entire wheel of cheese, just the two of us, within minutes. I'm not too proud to admit that.

Unfortunately, my habit of munching on cheese and crackers before dinner is about to come to a screeching halt after the first of the year, so I decided to just go all out on this night.

And, you know what?

Camembert 2

It was worth it.

The minute I saw this recipe, I ripped it out of the magazine because I knew that I'd be making it soon. I found it in the November issue of Food Network Magazine recently while trying to catch up on my magazine reading.

I've always liked Jamie Oliver, and his cookbook, Cook with Jamie, is one of my absolute favorites. I love the beautiful full page photos next to each recipe in his book. I've determined over the years that I'm what you call “a visual learner” so I love this style of cookbook. I need to put his new book, Jamie's Food Revolution, on my Amazon wish list!

His recipe for the Baked Camembert was originally intended to be poured over pasta, but I decided to try it as an Appetizer instead so we could dip into it with some toasted baguette bread slices.

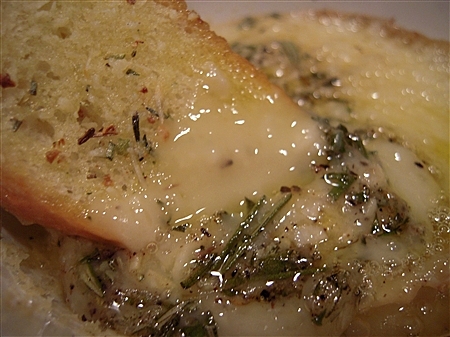
So, dip into it, we did.

Closeup cheese on toast

Then, we spread a little,

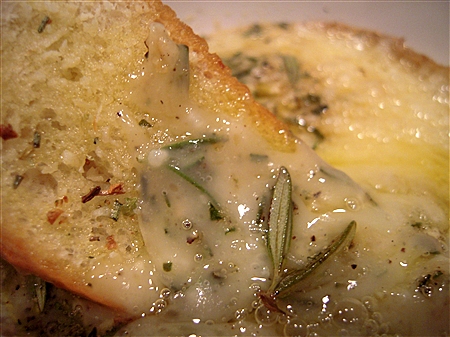
Closeup3

And, then, dipped some more.

Closeup2

I've baked a lot of brie but this was my first time to bake Camembert cheese so I wasn't sure about the consistency. It did seem a little thinner than brie, so next time I'll try it poured over some cooked pasta and spinach.

Baked Camembert
(adapted from Jamie Oliver via Food Network Magazine)

1 8 oz. box camembert cheese
2 cloves garlic
1 spring fresh rosemary
Fresh ground pepper
Extra-virgin olive oil
Baguette bread
Rosemary Herb Seasoning Mix (I used Pampered Chef)

Slice the baguette bread, brush each slice with a little olive oil and sprinkle with your favorite Herb seasoning. Toast in preheated oven at 350 for a few minutes then set aside. Open the box of cheese and unwrap it. Place it back in the wooden container or put in a small Corning Ware dish. Score a circle in the top of the skin, then lift it off and discard.

The original recipe called for slicing the garlic and just picking the rosemary leaves off from the stem. Since I knew that I was spreading on the toasts and not pouring over pasta, I pressed the garlic cloves and finely chopped the rosemary instead.

Just spread the garlic and rosemary on top of the cheese, sprinkle with some pepper and drizzle with a little extra virgin olive oil. Place the cheese into the preheated oven for 25 minutes. (If cooking in the box, place the box on a cookie sheet before placing in oven.)

Remove cheese from oven and let sit for a minute or two, then dig in. This makes an awesome, quick and easy appetizer perfect for serving at your next party.

~LilSis

Posted under Food

This post was written by LilSis on December 21, 2009

Tags:

Origami Gift Packaging for Painted Glass Marble Magnets

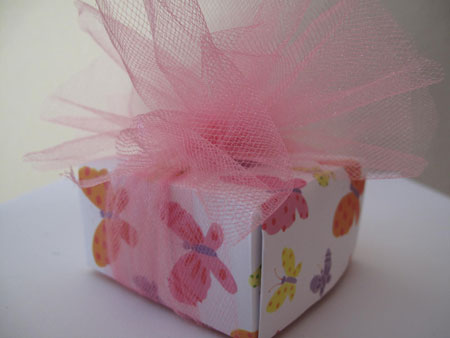
Origami Box Tulle Done

Last time, I showed you how to make painted glass marble magnets, and I promised to show you how I package them for gifting, so let's get started.  We have a lot of cute stuff to do!

The first component is the paper mache boxes.  Here's what you need:
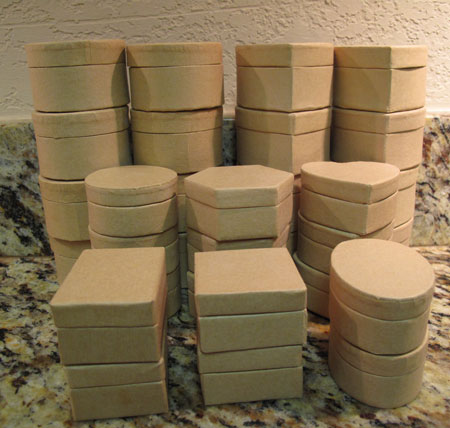
Glass Marble Paper Mache Boxes

  • Paper mache boxes: I like the smooth paper wrapped ones that you can find at most craft stores.  They usually come in a couple of small sizes, and if you're lucky you might find them packaged in lots of 6 including a heart, circle, oval, square, octagon and rectangle.
  • Parchment paper or round labels, and laser printer
  • Glue: Any glue suitable for paper, like Sobo or Elmer's
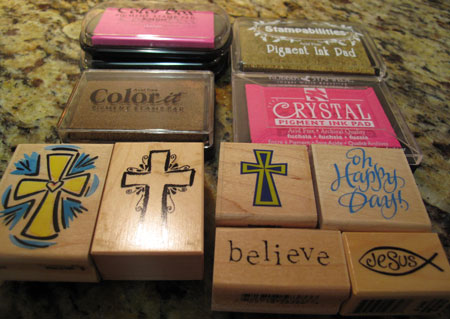
Glass Marble Stamps

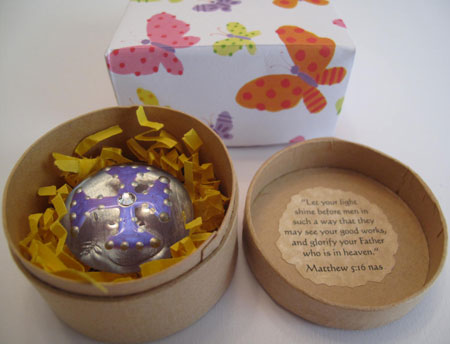
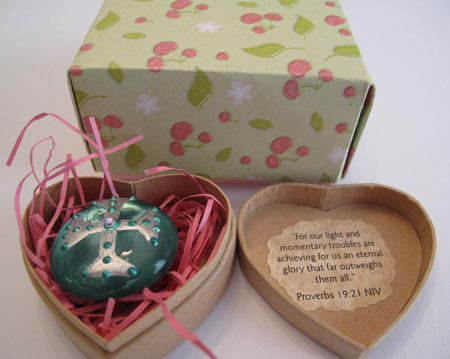
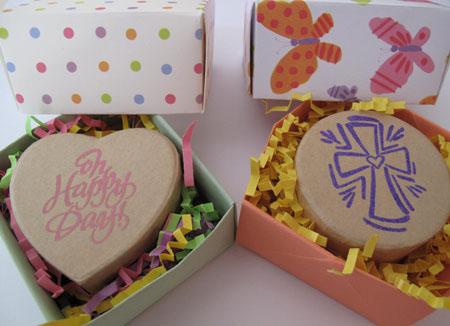
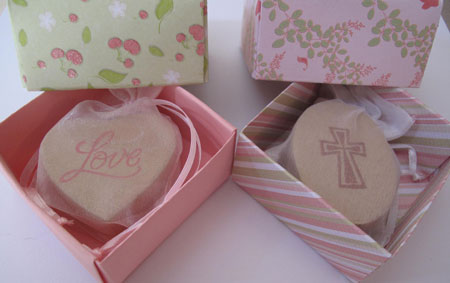
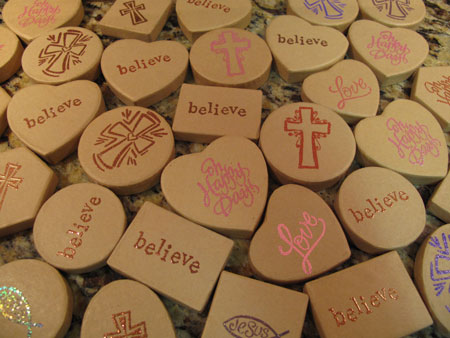
  • Stamps: I painted crosses on my marble magnets, so I'm keeping with that theme with my stamp choices.
  • Pigment ink pads
  • Embossing powders
  • Embossing heat tool
  • Tongs

Make the scripture circles:

Choose any scripture (or quote) that you like and type it up.  You can do it two ways.  You can buy a sheet of laser-safe Avery round labels and use the formatting template that comes with them in order to line the text up with the labels.

I like to go another way.  I print my scriptures on tan parchment paper to coordinate with the natural color of the paper mache boxes. I think I've seen kraft-colored round labels online, but I've never ordered them.
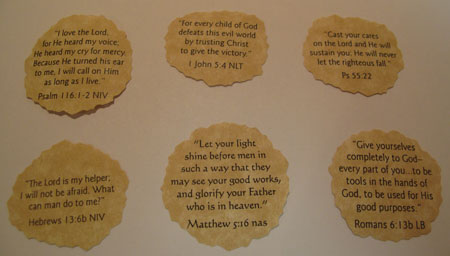
Glass Marble Scriptures

Use software that will allow you to draw circles; I use an old copy of Adobe PageMaker, but PowerPoint or a drawing program will work. Draw a bunch of circles on your page (check the size of your box lid to determine the circle size), fitting as many as you can on one sheet of paper.  Then type your scriptures into the circles, and print them out.  Carefully cut out the circles just inside the lines with scissors.  I like to use deckle-edge scissors for an uneven shape.

Add a bit of glue to the back of the parchment circle, smear it around evenly, and place it on the inside lid of your box.  Smooth it down so all edges will adhere.  Allow to dry completely.

Glass Marble Paper Mache Box Msg

Decorate the top of your boxes:

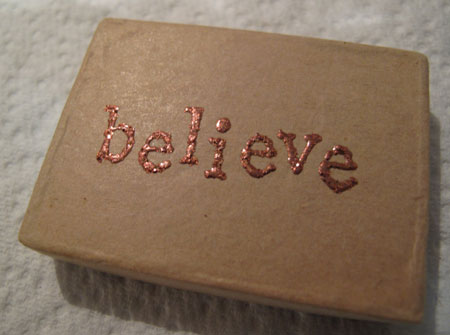
Glass Marble Believe

Choose a stamp that will fit the size and shape of your box.  I'm in love with this “believe” stamp.  if I ever got a tattoo, it would probably look like this “believe”!
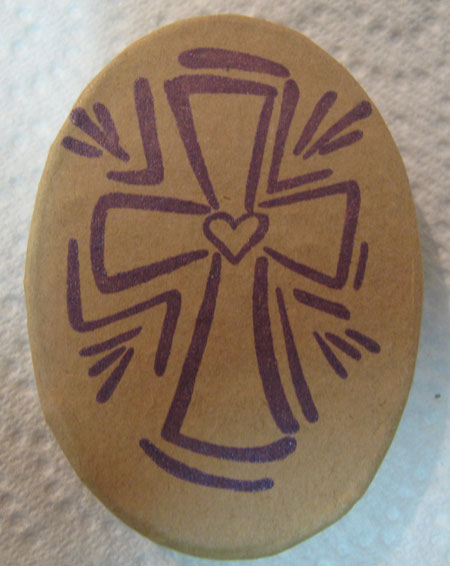
Glass Marble Purple Cross

Apply the pigment ink to the stamp and then apply the stamp to the box with even pressure, but don't press down too hard or you'll crush the box.  Try not to rock the stamp back and forth. Lift the stamp carefully off the box.
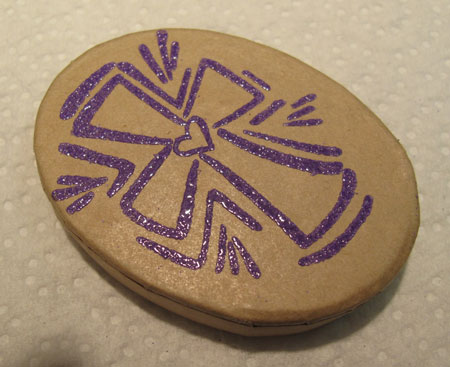
Glass Marble Purple Cross Embossed

Sprinkle a generous amount of embossing powder all over your stamped design.  I like to do this over a paper plate to catch the excess.  Use a different plate for each color of embossing powder. When you're finished, just bend the paper plate into a pointy little funnel and pour the powder back into the jar.

I'm crazy about a couple of embossing powders from Stampendous: Pearlized Carnelian (it turns all gold and gorgeous when heated) and Copper Tinsel (it goes all shimmery glittery).  I love how they look on the paper mache.
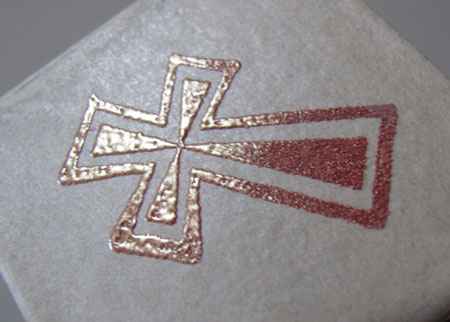
Glass Marble Emboss Color Change

Holding the box top with tongs, turn on the embossing heat tool. Hold it a few inches away from the stamped image, and move it back and forth until you can see the embossing powder has melted evenly all over the image.  It won't take very long;  maybe 10 seconds, depending on the stamped image.

Some powders – like the Pearlized Carnelian ad Copper Tinsel – will magically change color.  Be aware that some powders are very susceptible to scorching if they are heated too long, especially the glittery ones.  I've done it, so learn from my mistake!
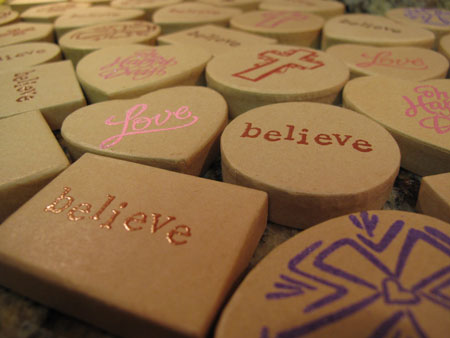
Glass Marble Paper Mache Box

Your paper mache box is finished! The bottom of your box is still blank at this point, so you can write something there (“Love, BigSis”), or glue on another parchment circle with a message on it (“Merry Christmas 2011”).

Now for the origami box you'll snuggle the paper mache box into!

All you'll need for the origami box is cardstock, a paper trimmer, a bone folder, two-sided tape, a ruler and a pencil.  Easy enough, right?  If you're a scrapbooker or a cardmaker, you already have these supplies on hand.

You'll need two pieces of cardstock for each box.  You can use solid colors, coordinate a printed top with a solid bottom, or use two coordinating prints.  With the paper trimmer, cut one 8-1/2″ square for the top, and one 8″ square for the bottom.  This will give you a finished box top that is about 3″ square, and a bottom that is about 2-13/16″ square.  I've seen some stacks of cardstock at the craft store that are already 8-1/2″ square, and that would be perfect for this project.

Origami Box How 1

With a ruler, lightly draw a diagonal line in pencil from corner to corner.  Some tutorials for this box will have you fold the paper corner to corner, but that will leave an “X” shaped crease on the top of your box, and I like for my box to be smooth, smooth, smooth on all 6 sides.
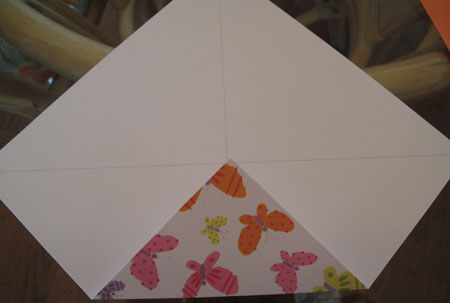
Origami Box How 2

Working on the wrong side of the sheet, take one corner and fold it up to the place where the two pencil lines meet in the middle of the page.  Unfold.  We're going to call that fold you made the “first crease”.  Do the same thing for the other 3 corners, so you'll have a “first crease” for all 4 corners.
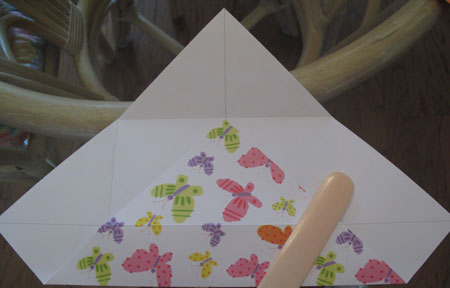
Origami Box How 4

Next, take a corner and fold it up past the middle of the page to meet the “first crease” at the pencil line.  Unfold.  Do the same thing for the other 3 corners. Each time you make a fold, crease it down sharply with the bone folder or the edge of a pen.  Doing this will make the shape of your box more crisp.
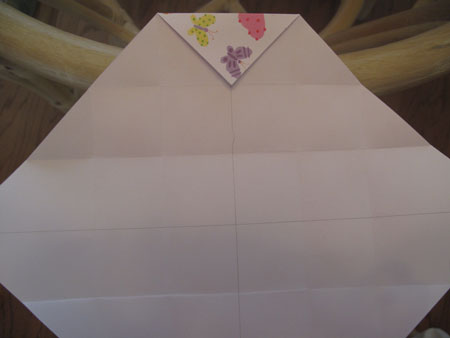
Origami Box How 6

For your last fold, take a corner, and fold it down to meet the “first crease” that is closest to it.  Unfold.  You're not going across the middle of the page for this fold.  Do the same thing for the other 3 corners.
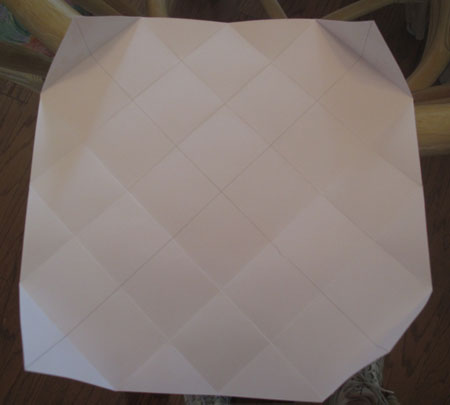
Origami Box How 7

So, you made 3 folds with all 4 corners:  up to the middle of the sheet, across the sheet to the “first crease”, and then down a tiny bit to it's own “first crease”.  Your page should look like this.  You have a nice grid of even squares, with a bigger square in the middle.  This is your box top or bottom.
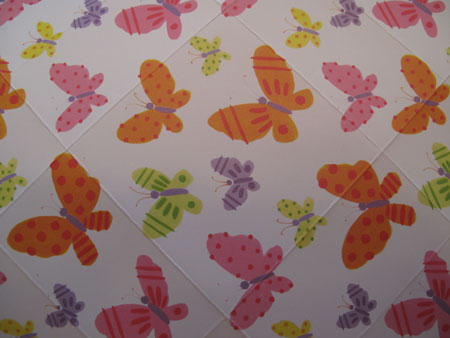
Origami Box How 8

Now we'll take this creased piece of paper and turn it into a box. You're going to fold two opposing sides of the page into a little valley shape, as you see in the photo.
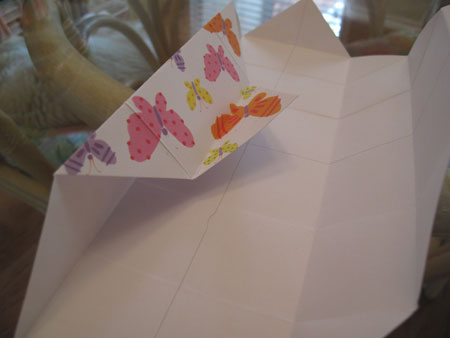
Origami Box How 9

Add a tiny bit of double-sided tape to the bottom of the point, so it will stay in place on the bottom of the box.  Do that for both sides. Do you see the box taking shape?
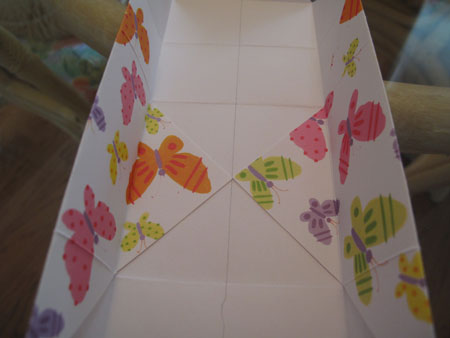
Origami Box How 10

On the ends, you want to have a smooth finish so you need to make a “valley fold”, tucking the end pieces under.  This is hard to describe in words, so please see the photo below.
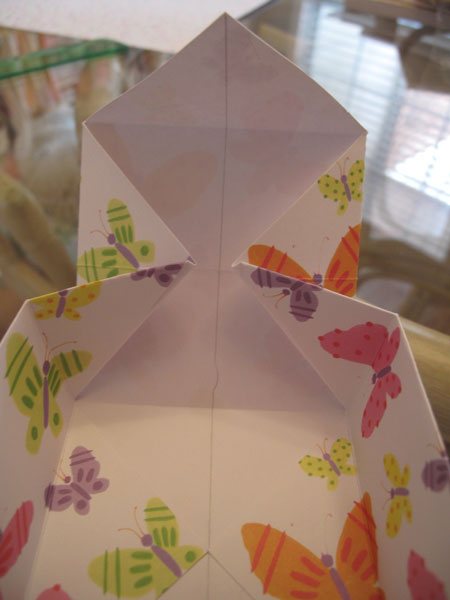
Origami Box How 11

Attach tape to the bottom of these points on each end, and adhere to the bottom of the box.  It might help to run the bone folder along the top edge of the box, to get a nice sharp edge there.
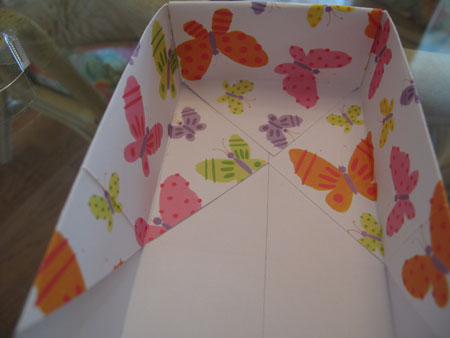
Origami Box How 12

Voila!  You just made a box out of nothing but paper and a bit of tape!  All you had to invest was about 8 minutes of your time per box!
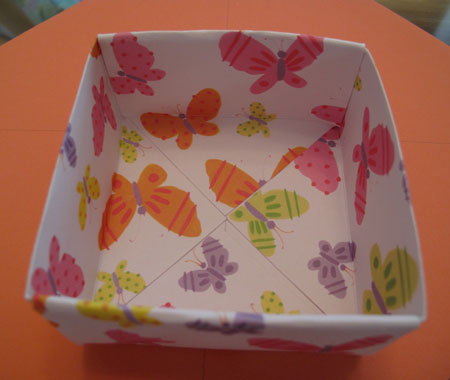
Origami Box Butterfly Inside

This is the inside of your box…

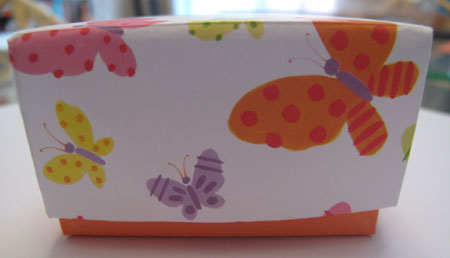
Origami Box Butterfly Done

one side of your completed box with it's solid orange bottom…
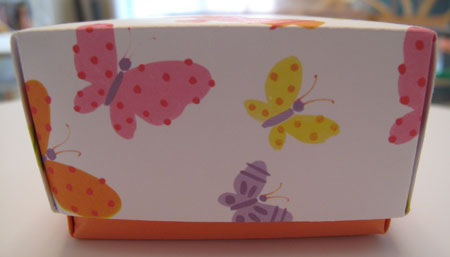
Origami Box Butterfly Done Side

and the other side.

You have all of these cool components; what do you do with them all?

You have painted glass marble magnets…
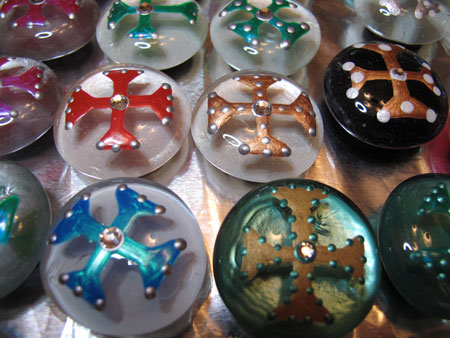
Glass Marble Done Group 2

paper mache boxes…

Glass Marble Paper Mache Boxes

and origami boxes.

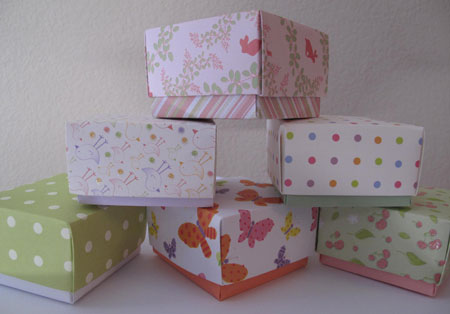
Origami Boxes Done

Let's put them together into a beautiful little gift that some lucky person will adore!
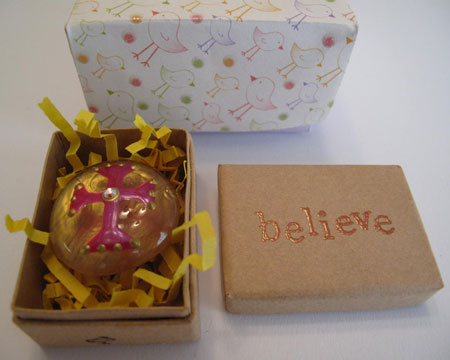
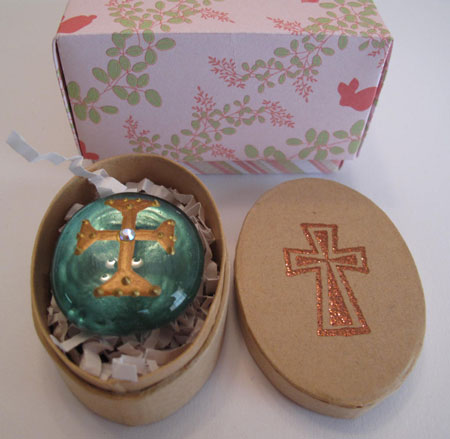
Origami Paper Mache Open 1

Origami Paper Mache Open 3

Origami Paper Mache Open 4

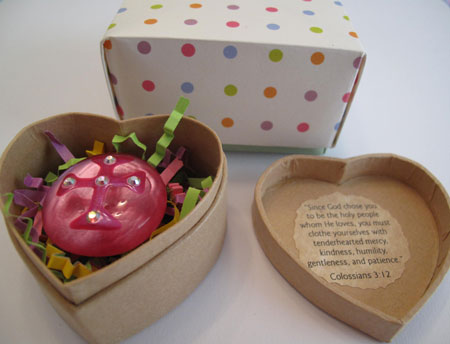
Take a paper mache box, add a little paper shred, and choose a marble.
Origami Paper Mache Open 5

Origami Paper Mache Open 6

Origami Paper Mache Open 7

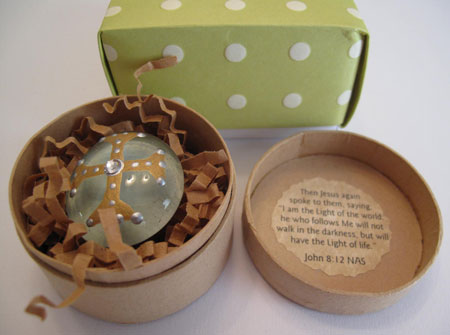
Tuck your paper mache box into a drawstring bag.  Some of the bigger boxes won't fit, but that's ok.
Origami Paper Mache Closed 1

Origami Paper Mache Closed 2

Origami Paper Mache Closed 4

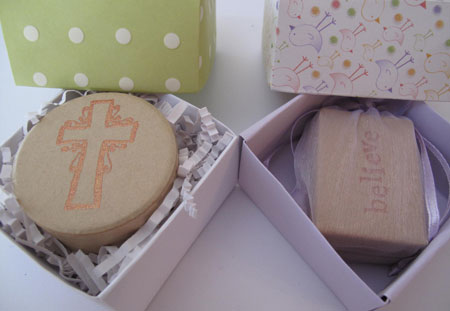
Place the paper mache box into the origami box, adding a little more shred around it if you want to.  Put the top on, and add a tulle bow.

Cut a piece of tulle that coordinates with your box color.  For this 3″ box, I used a piece around 6″ x 30″.  You want plenty of it to get a pretty full effect.
Origami Box Tulle Up

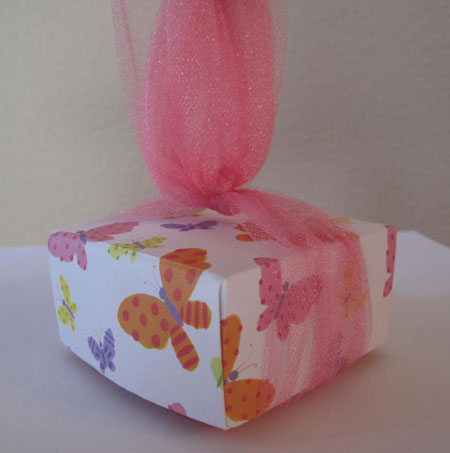
Tie the bow on as you normally would, and then cut the loops. Pull the cut loops and the loose ends straight up, and cut them straight across to be even. Pull each of the 6 ends out to open them up, and arrange into a poofy bow. Ends cut shorter will make a tighter looking “poof”, while longer ends will look fluffier.

Origami Box Tulle Done

There you have it!  Your pretty painted glass marble magnet is nestled in shred inside a box with a message inside a box with a bow!

Before I go, I want to give you some ideas on what you can do with these.  Of course, you could sell them.  I sold several hundred to an organization for their annual meeting a while back. Each participant got their own as a thank you gift for attending. I've also sold them a few at a time for Christmas gifts; they make awesome stocking stuffers and gifts for pet sitters, hairdressers, coworkers, or your kids' friends.  They're also great little non-edible treats to tuck into Easter baskets.

My favorite thing to do with these is to randomly give them away. One year on Valentine's Day, I took a whole bag of  them to the cancer floor in a local hospital, and let the nurses distribute them. I've also given one to the person working the drive-through at a fast food restaurant who seemed to be having a bad day. I've given them out to employees of a drugstore who were having to work on Christmas Eve, and I've also given them to the volunteers on my team at the church preschool.

I don't tell you about these things to boast or to glorify myself; I just want to give you some ideas and start you thinking.  I bet you can come up with many more ideas.  If you keep a few in your purse or in your car, you'll be surprised at the occasions that arise when a little gift of encouragement is needed.  I bet you'll be glad you have them, as I have been!  One little note: when I'm putting them in my purse or car, I just put the paper mache box in a drawstring bag, and skip the rest of the packaging.

I hope you enjoy this little craft project as much as I have enjoyed sharing it with you!  If you make any of these items, please send me a photo!

~BigSis

Posted under Home
This post was written by BigSis on March 23, 2011

Tags: ,

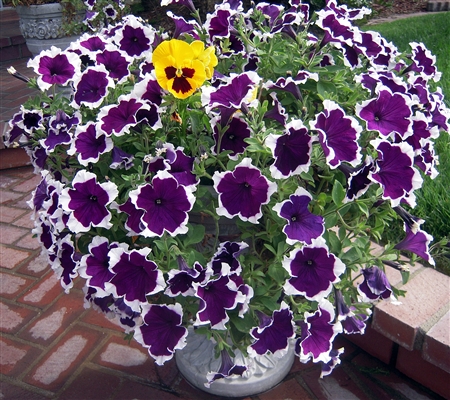
Happy petunias make me very happy!


Happy purple petunias on my front walk.

I've had to really ‘baby' these petunias that are in my front yard because they get a little more sun that they like, but they seem to be happy now, which makes me very happy!

I love how this random yellow pansy seeded right in the middle of this pot. 🙂

When BigSis was here visiting, we were talking while I was watering and we both agreed that petunias always remind us of our Grandmama. Petunias and snapdragons always bring back happy childhood memories of our visits to her house and of her beautiful flower garden.

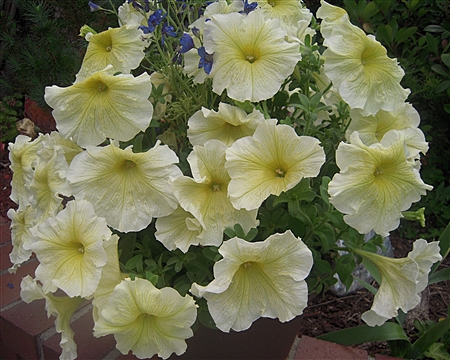
Happy yellow petunias

And I just love these yellow petunias that I bought for the shower! They're very happy in my backyard.

~Not to be “Debbie Downer”, but this week has been a bit of a melancholy week. We've both been extremely busy with work so there hasn't been much time for a new post, but it's also been a little hard to get in the mood to talk about anything related to Father's Day.~

Last year I was able to shop for Father's Day cards for my father-in-law for the first time since Daddy passed away, but for some reason, I couldn't do it this year; four years later. I had to ask my hubby to go pick them out for his dad so I wouldn't end up a blubbering idiot in Hallmark reading sentimental Father's Day cards.
Any time I'm a little ‘down in the dumps, I make myself go for a walk by the beach or just go out into my yard and do some gardening. Both of those things always cheer me up. I take great pride in my garden and have been recommended by a friend to use trugreen, as she uses the ohio branches of trugreen and has said how much it has helped her grow and maintain her garden, so I think I'll have to take a look for myself!
We're lucky that here in Southern California we have flowers that bloom year-round and right now I've got some blooming like crazy! So, instead of talking about Father's Day today, I wanted to post some pictures of some of my very happy flowers in my yard that make me very happy! 🙂

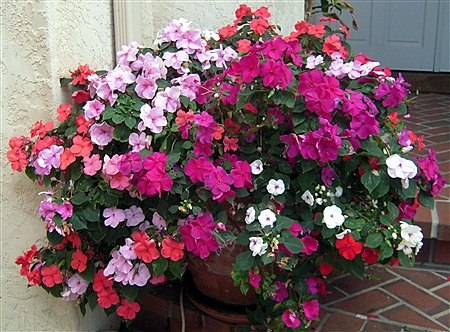
Happy Impatiens on my front porch.

In the winter, I just cut these impatiens back and leave the pots on the front porch and they come back in full force every Spring.

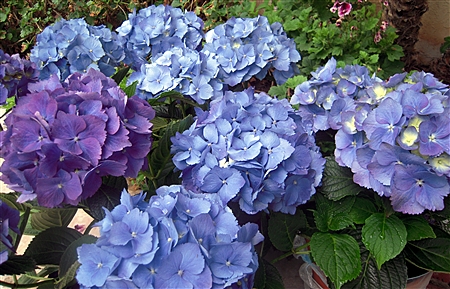
Happy Blue Hydrangeas

These blue Hydrangeas that I bought for the shower are absolutely gorgeous now that they're in full bloom.

Happy Pink Hibiscus

I have a huge Hibiscus tree in our back yard that has struggled for a couple of years with some mean ole bugs, but hopefully this is a sign of some happy hibiscus this year.

Happy Orange Hibiscus starting to open.

The orange Hibiscus tree had to be trimmed all the way back a couple of years ago because of bugs, but this is my first bloom of the year so I hope it's going to provide lots of happy blooms for us this year.

Happy pink Geranium.

We have several different varieties of Geraniums in our yard, but these pink ones are very happy.

Happy Bird of Paradise

And, one of my most favorite flowers is the Bird of Paradise and I'm really lucky to have several of these happy plants in my yard.

So, whatever you do tomorrow, whether you're able to celebrate Father's Day with your father or just spend some time reflecting on happy memories, as we'll be doing, we wish you all a very Happy Father's Day!


~LilSis

Posted under This & That

This post was written by LilSis on June 18, 2011

Tags:

Cats in Hats for Halloween

Happy Halloween!!

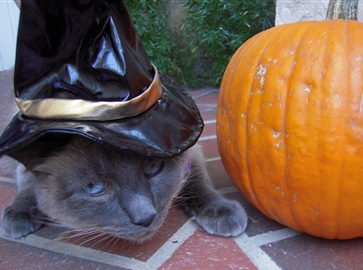
Happy Halloween from TomTom

Happy Halloween from TomTom

When I saw this little witch hat at Petco, I couldn't resist buying it for TomTom. Can you tell how much he loves it? 🙂

This is actually the only photo I was able to get with his eyes open. He gets so humiliated when I put a hat on him that he won't even look at me! It's probably a combination of humiliation and anger. (He's probably sitting here secretly plotting how he's going to get back at me for making him do this.)

If you've been reading us for a little while, you know that both BigSis and I can't resist the temptation to stick little hats on our Furkids! We just have a little thing about “Cats in Hats”! 🙂

Since BigSis' furkids didn't want to cooperate this year when she brought out the pirate hat, I decided to repost their photos from last Halloween when they were both witches.

I love the witch hat with braids! It looks great on Gaby!

Gaby the witch

Gaby looking handsome in his witch hat!

And it looks cute on Ashy too!

Ashy the Witch

Ashy looking not too happy about his hat!

We hope everyone has a Happy and Safe Halloween! Don't forget to set your clocks back an hour at midnight tonight!

~LilSis

Posted under Animals

This post was written by LilSis on October 31, 2009

Tags:

Texas Brisket Recipe

I'm a little late posting this brisket recipe, so you obviously won't be making it for Labor Day, but around our house, any get-together is reason enough to make this foolproof Texas Brisket. It's perfect for feeding a big crowd.

This is one of those recipes that I love, where there are no precise measurements or exact ingredients.  Our really great friends, F & K, who were neighbors of ours in Texas, loved my brisket so much that they begged me to write down my recipe for them before they moved back to Maryland. That was over ten years ago and I still make it the exact same way as I did back then.

Brisket is kind of like chili; everyone has their own way of doing it and there can be quite a debate about the best way to cook it: dry rub or marinade, grill or oven, baste or don't baste, etc..

Daddy always raved about my brisket so I would make this almost every time we had a family get-together. It's really quite simple. Here's my version of Texas Brisket.

Texas Brisket

4 oz bottle Liquid Smoke
2 pkgs. Meat Marinade
Adkins Seasoning
12 – 14 lb. beef brisket
Barbecue sauce

First, trim off almost all fat, leaving only a small layer on bottom. Mix the Meat Marinade (I used to use McCormick's Meat Marinade but can't find it any more. Just use any brand that you mix with oil, water, and a little vinegar.) Put the brisket in a roaster, cover with the marinade mixture and leave in refrigerator overnight.

The next morning, remove the brisket from the marinade, place in a clean roaster fat side down. Sprinkle the top and bottom generously with Liquid Smoke. Sometimes, I even use the entire bottle. Then, sprinkle with Adkins Seasoning.

Cover and bake in a 300 degree oven for 30-45 minutes per pound. Don't baste! You don't even need to open the oven. When there is one hour remaining to cook, turn down the oven to 275 degrees and cover the brisket with your favorite barbecue sauce, whether homemade or store bought. Sometimes we make homemade sauce and sometime we just buy KC Masterpiece; it just depends on how much time I have.

Watch carefully to make sure the sauce does not burn. If you have a hot oven, you can even turn it down to 250 degrees at this stage. After about an hour, check to make sure the brisket is nice and tender. Remove from oven, let rest for about 20-30 minutes, then slice on the diagonal against the grain.

Sometimes, we just serve it in nice big tender slices and sometimes I chop it up and add more sauce to serve as chopped beef on rolls. It turns out perfect every time!  🙂  Give this recipe a try; I promise you'll like it!

~LilSis

Posted under Food

This post was written by LilSis on September 7, 2009

Tags: ,

Salsa Showdown: Joe T vs Central Market

Do you remember that episode of Seinfeld when George and Jerry were sitting at the diner, talking about how salsa had replaced ketchup as the #1 condiment, and they mentioned how fun it is to say “salsaaahhh”?  So funny.  I think about that every time I say salsa.  And here in Texas, I say salsa a lot!  My favorite salsa has always been Joe T Garcia's, from the cult-favorite restaurant in Fort Worth.  I was at Central Market today, and it occurred to me that maybe…just maybe…there is a better salsa out there?  I'm so fickle!  I decided to conduct a little informal research to see if my favorite is indeed the best of the best, or if I'm just stuck in a closed-minded salsa rut.

First up is our challenger, Central Market's All Natural Hatch Green Chile Salsa Roja.

  • Ingredients:  Tomatoes, green chiles, diced onions, tomato paste, lime juice, fresh garlic, fresh serrano peppers, vinegar, cumin, salt, black pepper, cilantro.
  • Appearance:  Brownish brick red.  I see some dark flecks that indicate some of the ingredients were fire-roasted.  Nice!  The consistency is pretty thick, but not quite a puree.  You can still see some bits of onion throughout.
  • Flavor:  Delicious and slightly complex.  The top note I get is cumin.  The salsa is smoky and spicy, but I was expecting it to be hotter with the two chiles.  I could have used a little more heat.
  • Overall impression:  I love that there are no preservatives, chemicals or ingredients other than those I could find in my own kitchen.  It tastes fresh, and I do like it.  But would I buy it again?  Mmmm, probably not.  I think I'd like to try the green verde version of this salsa to see if  it has less cumin flavor since I'm not a huge cumin fan.  To me cumin is like cilantro or goat cheese.  Either you love it or you hate it; not many people are ambivalent about it.

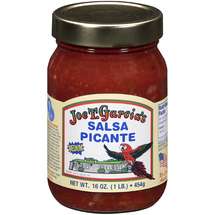
And now the defender: Joe T Garcia's Salsa Picante in Mild (there are Medium and Hot varieties, but I know they're too hot for me).

  • Ingredients:  Tomatoes, onions, green sweet peppers, green chile peppers, salt, vinegar, jalapeno peppers, garlic, cilantro and spices.
  • Appearance:  Bright red, and very chunky with visible pieces of tomato, onion and peppers.  When you open the jar, the salsa needs to be stirred to get the juice married back with the chunks.
  • Flavor:  Wow!  A burst of fresh tomato, garlic and peppers with a tangy background from the vinegar.  Even the mild has a fair amount of pepper heat.  I love it.
  • Overall Impression:  Somebody get this jar away from me!  I can't stop eating it!

joet

The Verdict:

Get in your car right now and drive to a store that carries this salsa!  If you can't do that, direct your fingers over to Joe T's web site and order yourself a case of his Salsa Picante.  You can get 12 jars for $30 plus $15 shipping, which is a bargain in my book, folks!  That' s less than $4 per jar, shipped!  You WILL thank me!  This stuff is awesome in queso instead of Rotel, or poured over a soft brick of cream cheese, or just gobbled up with chips.

Hey, LilSis, you're a fan of Joe T's Salsa, right?  Can you get any good salsa out there in Califor-knee-yah?  I know SirHoney doesn't like too much heat, so I'm wondering if you're still buying Pace brand? Now you can order from Joe T himself!  Viva la Salsa!

~BigSis

Posted under Food

This post was written by BigSis on June 10, 2009

Tags: ,

Inspiring words

~ If all you can do is crawl, start crawling. – Rumi

~ There are two mistakes one can make along the road to truth… not going all the way, and not starting. – Buddha

~ Dare to believe that something inside you is greater than your circumstances. – unknown

~ Life isn’t about finding yourself. Life is about creating yourself. – George Bernard Shaw

~ The best and most beautiful things in the world cannot be seen nor touched but are felt in the heart. – Helen Keller.

Photo credit: intent.com

~LilSis

Posted under This & That

This post was written by LilSis on April 27, 2012

Tags:

Halloween CuteOverload

Once you see everything there is to see on BigSisLilSIs today, you have to look at what CuteOverload.com posted on October 27th.  It's a pet costume extravaganza!  There are only 3 kitty-pie costumes and none of them are that full of cuteness, so come back on Friday for our Cats in Hats post.  To tide you over til then, check my favorites from CuteOverload:

Ewok Puppy

Ewok Puppy

No explanation necessary!

No explanation necessary!

We're not in Kansas any more, Toto!

We're not in Kansas any more, Toto!

These faces kill me

The donut man kills me

There are lots more of these hilarious photos.  Let me just give you a little hint of what you'll find.  A boxer with completely inappropriate cleavage, perhaps?

~BigSis

Posted under Animals

This post was written by BigSis on October 30, 2008

Tags: