L’Oreal Extra-Volume Collagen Mascara

April 12, 2010

Loreal Extra Volume Collagen MascaraHave you been seeing all the ads and hearing all the buzz about L'Oreal's Extra-Volume Collagen Mascara?  I have, including a pretty glowing positive recommendation from More Magazine, which I really like.  I'm always on the lookout for a new great mascara, just as I am for miraculous new eye creams and anti-aging skin cream.

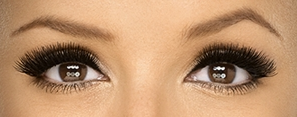
This mascara claims that their “instant-impact brush builds breathtaking volume fast.” I was intrigued and picked up a tube recently.  This shot of Eva Longoria-Parker's lashes from L'Oreal's ad sets a pretty high expectation for the Extra-Volume Collagen Mascara, don't you think?

Eva Longoria Parker Eyes

We usually don't do reviews unless we have something good to say, so let me think.  This mascara is a nice black color, it comes off easily at the end of the day with Lancome BiFacil, it doesn't smudge at all, and it doesn't flake much; no more than the L'Oreal mascaras I like.

Did it give me breathtaking volume like Eva?  No.  I had a really hard time maneuvering the ginormous brush without getting it all over my eyelid, and what I ended up with is stubby lashes.  No volume, no length, no curl.  Just stubs.  And “stubs” is not what I'm aiming for when I apply mascara!  I also got some spiky clumps, again not what I was going for.

So it's back to my usual cocktail of L'Oreal Voluminous Mascara followed by a dash of L'Oreal Lash Out Mascara.  I should have kept my sales receipt and returned L'Oreal's Extra-Volume Collagen Mascara, but I didn't so I guess I'll try to use it up on the weekends.  If you run into me at SuperTarget on a Saturday afternoon, please don't stare at my clumpy, spiky stubs!  😀

~BigSis

Sally Hansen Creme Hair Removal Kit

April 10, 2010

Those were great reviews on the eye products, BigSis!  I'm going to have to try that anti-aging Olay eye roller. I'm sure lots of other women will want to try it too since you gave it such a rave review. 🙂

And, it just so happens that I've got another great new product to tell you about, so listen up ladies!

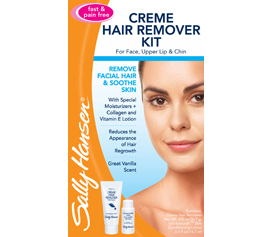
Sally Hansen Cream Hair Remover

Sally Hansen Creme Hair Remover

Guys, please don't get offended that I'm leaving you out on this one. I'm specifically speaking to the ladies about this because men have it easy when it comes to facial hair; you just shave your face every day. Easy, breezy, 1, 2, 3, and you're done.

For some reason, it's okay for us women to shave body parts all the way from our toes to our neck, but it's not so cool for us to shave our faces. (I do have a friend that admits to shaving her face every day, but I'm not goin' there.)

That being said, I guess I just admitted that I have unwanted facial hair. Yep. I said it. I hope you appreciate the fact that we're pretty honest here. We like to tell it like it is. Not only do I have the unwanted lip and chin hair, but I also happen to have some facial hair down my jawline and onto my neck. Sounds attractive, doesn't it? Luckily, mine is blonde and fuzzy, but it's still unwanted.

It's not something we love to discuss, but most of us women will admit to having our lips waxed and to plucking unwanted chin hairs, which by the way, multiply like “breeding rabbits” once you enter the “menopausal” stage of life! If you're not there yet, aren't you glad that you have something to look forward to? 🙂

So, why am I talking about this “taboo” subject?  The last time I had my face waxed was over six months ago and I broke out so bad afterward that I decided I wasn't ever going to do it again.

Since that was so long ago, it was time for me to check out my options so I spent some time at CVS one day looking over all the different hair removal products. I ended up deciding on this Sally Hansen Creme Hair Removal Kit. I don't know what persuaded me to buy this particular product, but I'd tried Nair products before and they never work very well for me so I wanted to try a different brand.

I did a test patch, as suggested, and waited 24 hours to assure that I didn't have a reaction to the product before using it on a larger area. Once I knew that I was “good to go”, I put it on my “problem areas” and waited for it to work its magic. With Nair, I usually had to repeat the process two or three times to get results but not with this Sally Hansen Creme Hair Remover!

Presto! After only eight minutes, I wiped off the creme and the hair was gone! All of it! I think I even did a little happy dance right there in my bathroom! This was really easy, not stinky, and I had great results, so I'm hair free and happy! 🙂

I know it's not a fun subject to discuss, but if you have a similar problem, you might want to try this product. How often does a product really work as well as it claims?

~LilSis

Olay Regenerist Eye Products

April 7, 2010

A couple of weeks ago, I found myself without one crumb of eye cream.  No Replenix, no Relastin, nothing.  Not even a random sample, or a dried up drop of an old cream I don't like any more.  How did it happen?  I don't know how, but I know it was bad!  Bad, bad, bad!  I wanted to try something new, but I didn't know what so I just went without any eye cream at all for several days!  Horrors!

Instead of reordering Relastin, I finally decided I wanted to try an affordable drugstore brand or two to see if there were any good ones out there.  Do you have to spend a lot of money to get an eye cream that works?  Maybe you do, but I want to know, so I'm making it my mission to investigate!

I drug my wrinkly, puffy, dark-circled self up to CVS and wandered around, hoping no one would see how scary I looked.  When I walked in the front door, there was a big ad for a new Olay Regenerist Anti-Aging Eye Roller.  Maybe it was a sign!

LilSis and I tried a similar product by Garnier last year, and it worked for her but not for me.  I generally like the Regenerist line so I thought this roller was worth a try.  I also picked up the Olay Regenerist Anti-Aging Eye Lifting Serum.  They were each around $20.

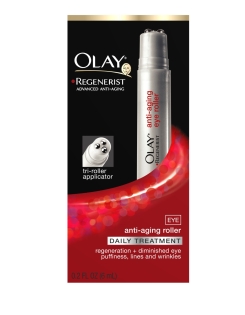
Olay Regenerist Anti-Aging Eye RollerI first tried the Anti-Aging Eye Roller.  It is supposed to diminish eye puffiness, lines and wrinkles, according to Olay's web site.

To test the roller, I used it on one eye and left the other one alone.  You just click the pen-style applicator until you see a dab of product start to peek up around the metal roller balls.  Then you just roll the balls gently under the eye for about 30 seconds.

The product went on a bit creamy, but I was shocked at how quickly it soaked into the skin.  After a few minutes, it appeared to me that the treated eye looked less puffy than the untreated eye.

The next test…would my concealer go on smoothly over this product?  Yep, no problems.  So far, so good.  I liked the roller and thought it was effective.  It definitely seems to be a morning product, so I still needed something more moisturizing for nighttime use.  Maybe it would be the eye serum!

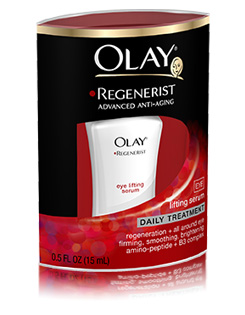
The Eye Lifting Serum is supposed Olay Regenerist Eye Lifting Serumto be an “all-around eye firming, smoothing, brightening amino-peptide + B3 complex”.  Sounds good, but did I see those results?

Mmm, not really.  The serum got good reviews at the Olay web site, but it initially didn't seem to provide enough moisture to me.  I would have given it a little more time to do its' thing, but there was a deal killer.

My concealer hated the serum.  It caked up into a big goopy mess.  Back to the store you go, Anti-Aging Eye Lifting Serum.  Eye cream is essential, and concealer is essential, so you have to play nicely together.  If one of you acts up, you're out.

It's been a couple of weeks now, and I'm still using the roller and liking it.  I picked up another inexpensive eye cream at SuperTarget last weekend, so I'll let you know how that trial's going soon!

~BigSis

Pro Surfer Jodie Nelson Gets Whale Escort

April 6, 2010

This is such a great story! I wanted to share it with you today in case you didn't hear about it last week.

Press Release Source: The Keep A Breast Foundation On Monday March 29, 2010, 5:12 pm EDT

Pro Surfer Jodie Nelson gets whale escort

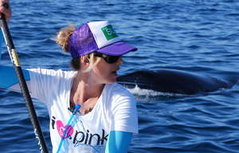
DANA POINT, CA–(Marketwire – 03/29/10) – Professional surfer and Stand Up Paddleboard (SUP) ambassador Jodie Nelson became the first woman to paddle 39.8 grueling miles from the island of Catalina to Dana Point yesterday. She finished in 9 hours, one minute and 21 seconds, all in an effort to raise awareness and funds for breast cancer research and prevention.

I hope you can take a few minutes to watch this video. It's incredible!

Jodie started her journey at 6:15 a.m. on Sunday, March 28, the only person doing a solo paddle as part of the Ohana Ocean Catalina Challenge. On the top of her paddleboard, she had printed names of loved ones close to her who were affected by breast cancer. Her mother is a breast cancer survivor, her aunt is a cancer survivor and one of her dearest friends is currently battling the disease.

“I wanted to go out there and do something big and overwhelming, something I had a good chance of failing at… I see so many people who have battled and who are beating breast cancer, they are tackling something bigger than them. They keep fighting and don't give up. I want to motivate people to keep fighting!”

18 miles into the paddle, Jodie had a close encounter with a 30-foot minke whale, which are fairly rare for the waters but are known to be friendly and docile. She dubbed him Larry and watched as he blew bubbles beneath her, fluked, and showed her his belly. The whale stayed with Jodie for about an hour and a half. “It was the most beautiful thing I've ever seen in my life,” she said.

According to Ray Hsieh from the Crow's Nest Boat Center, who was driving Jodie's support boat, “I've been boating and fishing all my life and have never seen anything like what I saw today. It was so strange, I actually called my friends at Sea World to ask them if it was normal, and they said, ‘It's your lucky day! That whale is just playing. Sit back and enjoy the show.' So I did.”

Jodie's campaign to “Paddle With Purpose” is supported by Emergen-C Pink®, which Jodie used during training to help prepare her for the endurance mission.

Jodie's goal is to raise $100,000, and so far she has reached about $8,000. All funds go toward The Keep A Breast Foundation and Boarding for Breast Cancer. To donate, go to http://www.paddlewithpurpose.com

Note: Video and still footage of Jodie's journey, the gray whale and heartfelt welcome by her family and friends is available upon request or by visiting or http://tinyurl.com/yeg48tv.

~LilSis

Can we just pretend it’s still Easter?

April 5, 2010

I know we've thrown a lot of Easter projects at you over the last week or so, but believe it or not, I have a couple more!  After this post, I promise, no more Easter talk til 2011.

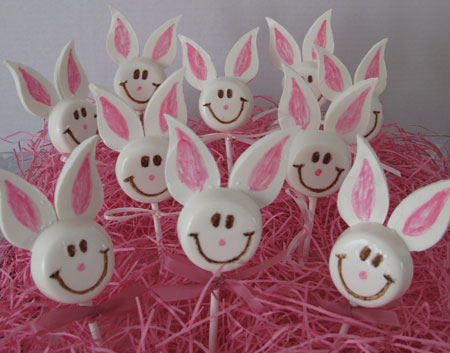
I worked on these little White Chocolate Smiley Face Easter Bunnies over a period of days, but then guess what happened when I was finally putting the post together on Saturday afternoon?  My internet went down, of course!  Ding dang Time Warner employee accidentally disconnected me when he was working on someone else's service in the hood, and they couldn't get anyone out here to fix it til Monday morning.

So call me selfish, but I am not going to let all that work go to waste without showing you the bunnies!  I don't care that Easter is over!  😀  Let's just pretend that it's still Easter!

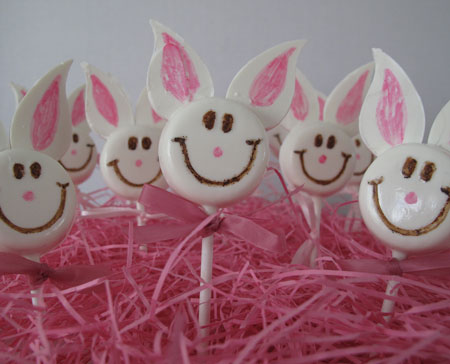
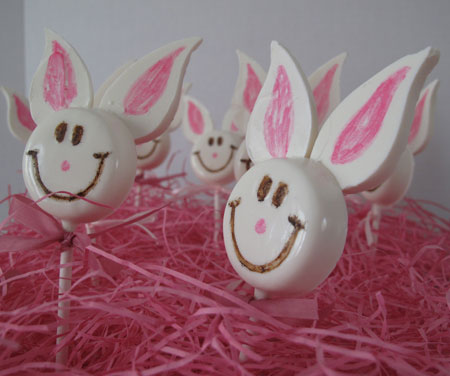
Now, on with it.  I won't bore you with instructions that you won't need til next March, but I do want to show you the photos.  These are the White Chocolate Smiley Face Easter Bunnies.

Smiley Face White Chocolate Easter Bunnies

Smiley Face White Chocolate Easter Bunnies

Smiley Face White Chocolate Easter Bunnies

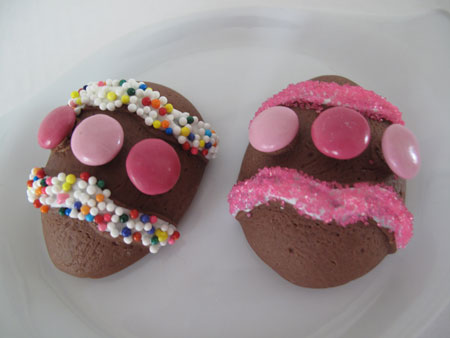
Oh, and one more thing…Chocolate Fudge Easter Eggs; molded and decorated in pink, of course!

Chocolate Fudge Easter Eggs

Now, we can all go back to our after-Easter worlds!  Thanks for indulging me!

~BigSis

Natural Dye Colored Easter Eggs

April 2, 2010

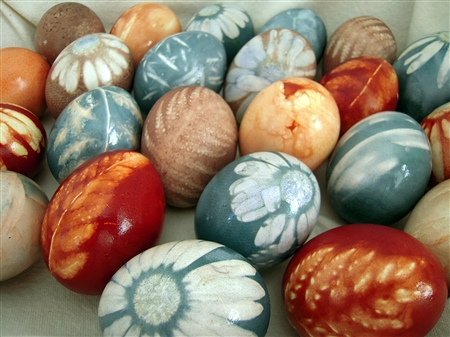
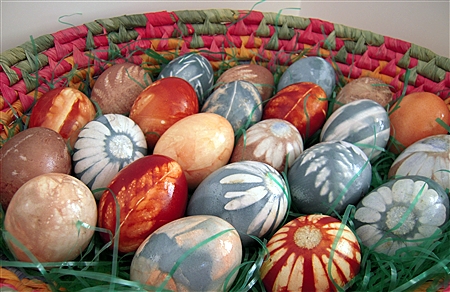
Natural Dye Colored Easter Eggs

Are you tired of coloring Easter Eggs the same old way? I am. I'm tired of just plopping a dye tablet in a cup, adding a little vinegar and water and taking turns putting the eggs into the cups. Boring!

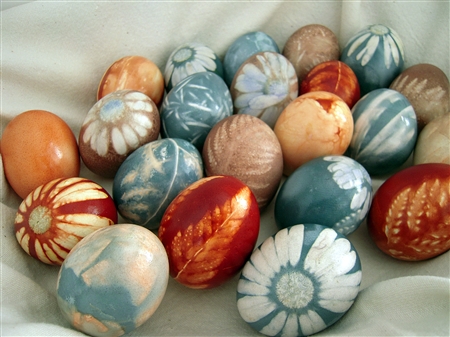
And, if you'd like to be a little more health conscious and avoid the artificial dyes, you may want to consider using one of these natural dyes to color your eggs this year!
Natural Dye Colored Easter Eggs

This was a little time consuming, but it was one of those projects that was so much fun because the end result is somewhat of a surprise. It reminded me of how I always feel when I open up my kiln after a glaze firing. It's like Christmas! The anticipation almost kills me every time. When I had more time for ceramics, I would almost always find a way to incorporate some leaf or flower impressions in most of my projects. In my wall tiles and mosaic tiles, I've used a lot of the same leaves and flowers that I used for this project.

Alright, sorry I'm rambling about ceramics; let's get back to the Easter eggs. This was my first experiment in making natural dyes so I was winging it a bit and didn't have any idea of how these would turn out. I looked over a few recipes online but didn't use one in particular, just the basic method, so let's get started.

First, gather your leaves, flowers or stickers that you plan to use for this project. Here's what I used.
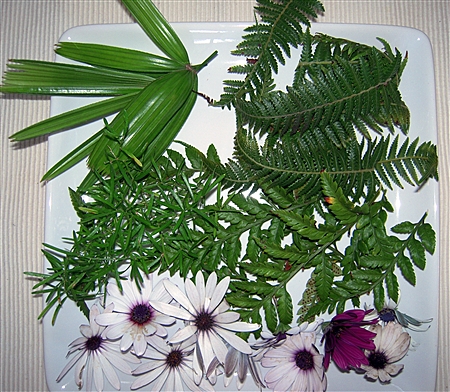
Natural Dye Colored Easter Eggs

Next, depending on which variation you want to make, you'll use one of these.

1 head of Purple cabbage (If making the blue eggs.)
Yellow onion skins (I used the skin from 3 onions for this rust color.)
1 bag of fresh cranberries (For the disappointing brownish color.)

Whichever color you decide to make will determine the size of your pan. Obviously the whole head of purple cabbage will take a larger pan than if you use one of the other two ingredients.

Once you decide which color you are going to make, use the appropriate size pan. But, before you add the vegetable or fruit to your pan, place an egg in the pan and fill it with enough water to cover the top of the egg by at least an inch. Then remove the egg. Don't add more water. If you use too much water, the color of the dye will end up being too diluted.

Place the sliced cabbage, onion skins, or cranberries into the pan and boil for thirty minutes, covered to minimize evaporation. Allow water to cool slightly, and then strain contents over a bowl, pressing pulp to remove any remaining liquid.

Rinse the pan, pour in dye water, cover, and return to low heat to keep warm while preparing eggs.

Here are the natural dyes all strained and waiting for the eggs.
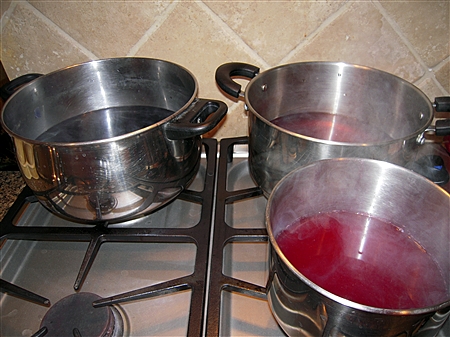

Natural Dye Colored Easter Eggs

Next, you'll want to gather a few more items.

Vinegar
Scissors
Pantyhose
Twist ties
Slotted Spoon
Paper towels
Vegetable oil

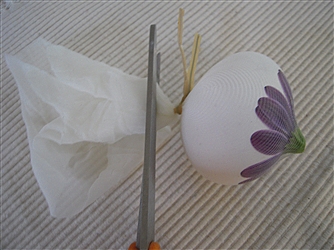
Now, cut the pantyhose into 4 inch pieces.

(Some instructions I saw said that you needed to buy several pairs of knee highs and just use the toes, but I just bought two 99 cent pair of pantyhose, cut them into pieces and it worked fine.)
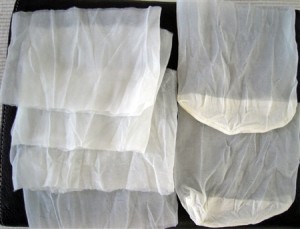
Natural Dye Colored Easter Eggs

Now for the fun part.

One at a time, place leaves, flowers, or stickers on the egg as desired. Some of the plant materials will stick better if you dip them in water first.
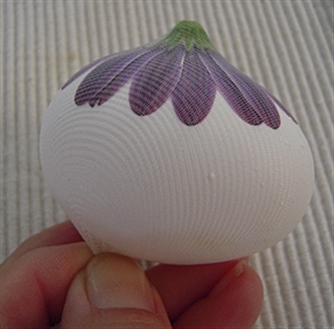

Natural Dye Colored Easter Eggs

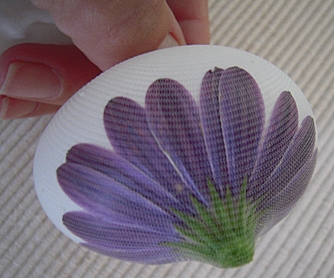
Place the egg in your hand, and gently place the egg inside the hose, make sure your design is still how you want it, and then pull the hose securely it the back and secure with a twist tie. (I thought this was easier than trying to tie in a knot while holding everything in place.)

Natural Dye Colored Easter Eggs

Trim the excess hose from the back.


Natural Dye Colored Easter Eggs

Repeat with remaining eggs.

Return dye to a gentle boil and stir in vinegar. I used 4 T. for the purple cabbage and 3 T. for the onion skins and cranberries since they were in smaller pans.

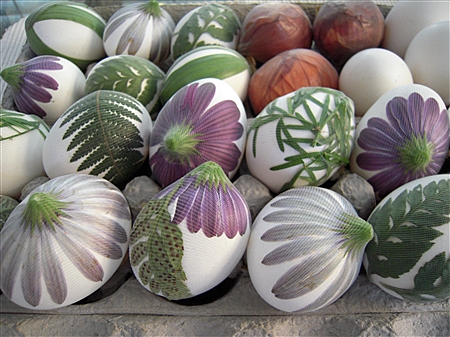
Here are all my eggs ready to go into the dye.

Natural Dye Colored Easter Eggs

Gently lower the eggs into the pan and boil for 30 minutes. Turn off heat, cover, and let stand for 2- 3 hours, or until desired color is obtained.

Remove eggs with a slotted spoon and place back on egg carton to cool slightly.

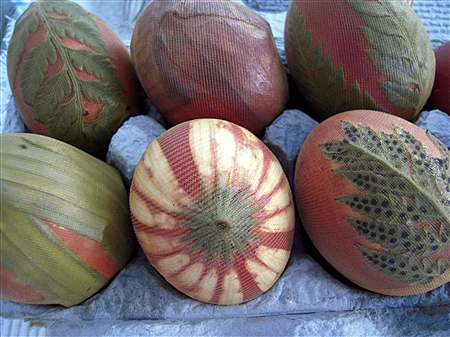
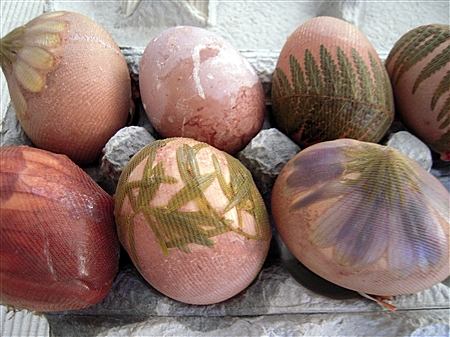
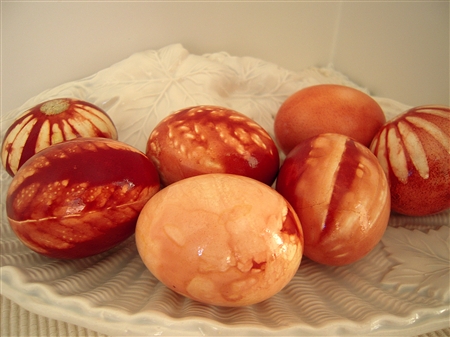
Here's what they look like after you've taken them out of the dye.

Natural Dye Colored Easter Eggs

Natural Dye Colored Easter Eggs

Carefully untie the twist tie or cut the hose and unwrap eggs. Carefully pull off and discard any remaining plant materials or stickers.

Natural Dye Colored Easter Eggs

I let mine sit for an extra 5 or 10 minutes after I unwrapped them just so they could cool a bit more.

Dampen a paper towel lightly with oil and buff eggs until shiny. Remove excess oil with clean paper towel.

Be very careful not to wipe too hard as some of the dye might come off.
Natural Dye Colored Easter Eggs
 

Natural Dye Colored Easter Eggs

Natural Dye Colored Easter Eggs

Natural Dye Colored Easter Eggs

Natural Dye Colored Easter Eggs

Natural Dye Colored Easter Eggs

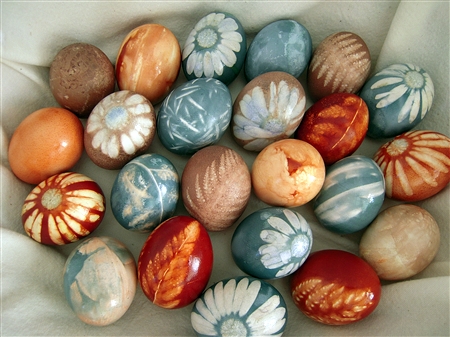
Natural Dyed Easter Eggs

Like I said before, this project was pretty time consuming, but it was so much fun for me! I feel like I got my creative juices stirring again. 🙂

A few notes:

I kept one egg without any decoration to put in each dye color and I didn't care for any of those three at all.

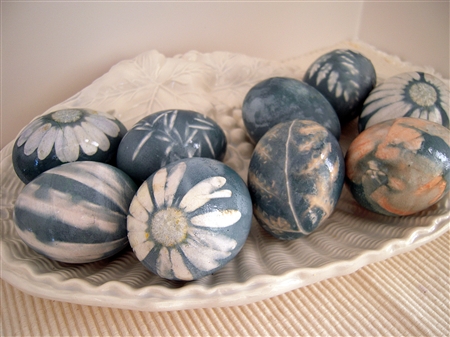
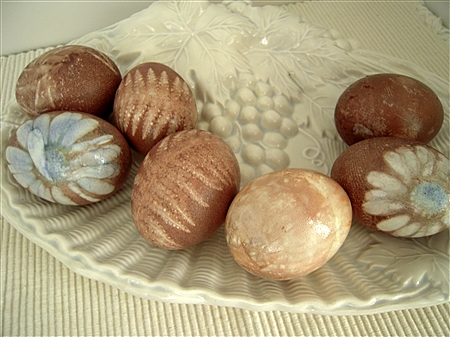
I used just plain yellow onion skin on one egg in each dye color and a couple of those made some beautiful marbling. The one with the onion skin in the purple cabbage dye was probably my favorite. It had a gorgeous brownish-blueish marbling effect.

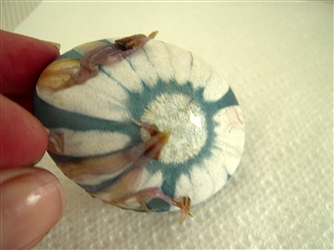
I wasdisappointed in the brownish color that I got from the cranberry dye, but on one egg where I used a purple flower, it gave off a beautiful blueish color in the center of the white flower. I don't think that I would bother using cranberry again for this project. I was expecting a purplish color, not brown.

The dark rust color from the onion skins is probably my favorite. And this dye didn't even need to sit for two hours before it intensified in color. You could probably even take these out after 30 minutes or so.

I just love this method of using the leaves and flowers for contrast in color on these eggs. I'm already thinking of ways to use this for another project.

I should have posted this sooner, but I hope you give these a try if you have a little time before Easter!

~LilSis
Marshmallow White Chocolate Easter Bunnies

April 1, 2010

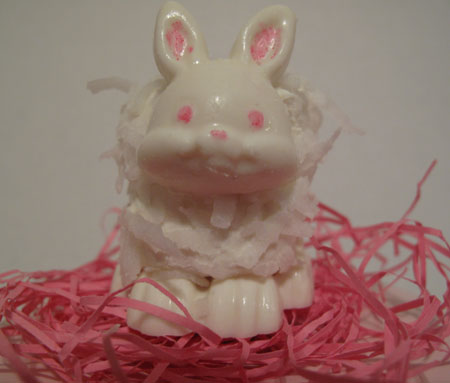
Marshmallow White Chocolate Easter Bunnies

When you hear the words “Marshmallow” and “Easter”, do you think of Peeps or maybe those super-sugary marshmallow eggs with the hard sugar shell?  I don't because I don't like either of those Easter candies.  To me, they're the Easter version of the hard-as-a-rock peanut butter taffy wrapped in black or orange paper that you got at Halloween as a kid, and tried to pawn off on your unsuspecting little brothers in exchange for their chocolate candy bars!

I have a new Easter marshmallow treat to share with you, and these also have white chocolate.  This project isn't quite as fancy and classy as the Easter Bird's Candy Nests that LilSis made yesterday, but they're pretty fun to make and I think kids would have a ball putting them together.

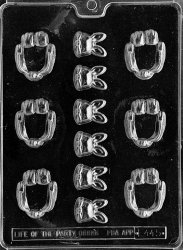
The key is to get yourself a candy mold like this.  It has bunny heads and bunny bases with feet and tails (bunny butts).

Easter Bunny Mold

I got mine at my cake supply store, but you can find them online too.  I have bunches of these kinds of molds.  They're only about $2.50 each, and you can use them for chocolate, candy melts or even soaps.  Buy just one or two, and you'll be addicted to them.  You can customize candy for any kid's party theme and color scheme.  Wrapped up in foil papers, people will be shocked that you made these cute candies yourself.  I made little green frog chocolates for a kid's party once, and the kids were thrilled!
So back to this project.  Here's what you do:

  • Melt some candy melts or chocolate wafers (I like the Guittard White Chocolate Wafers; they come in mint too).  I nuke them for 30 seconds, then stir, and repeat til all are melted.
  • Pour the melted chocolate into a squeeze bottle, and fill the cavities in the mold.  Once it's filled, tap the mold gently on the counter to bring any air bubbles to the surface.  Add more chocolate if needed.
  • Refrigerate the mold for a few minutes until the shapes are set and cold.  Unmold.
  • Now the fun part!  Use more melted chocolate to lightly coat large marshmallows, then immediately roll in shredded coconut.  Chill for a few minutes to set.
  • Decorate the bunny faces if you like.  I used food markers, but they tended to slide around a little on the chocolate, so you'll probably come up with better ideas than BigSis-in-a-hurry did!
  • Add a dab of melted chocolate to the bottom of the marshmallow and gently press onto the base.  Then, with a dab of melted chocolate, add the bunny face to the front of the marshmallow.

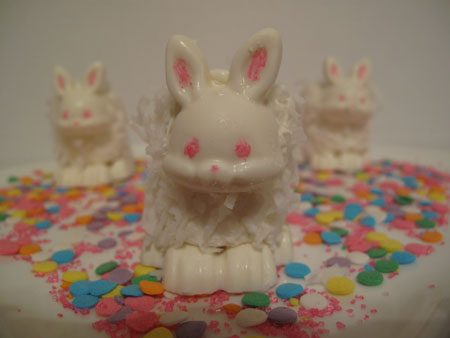
You just made a Marshmallow White Chocolate Easter Bunny!

Marshmallow White Chocolate Easter Bunny

~BigSis

Easter Bird’s Nest Candy

March 31, 2010

I can't believe Easter is just four days from today! If you're like me and don't enough time to make a cute Easter Bunny Cake or Easter Basket Cupcakes, here's a quick and easy candy treat.

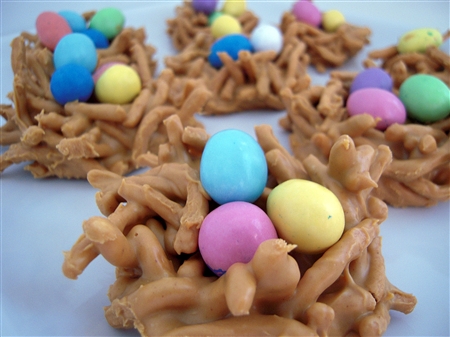
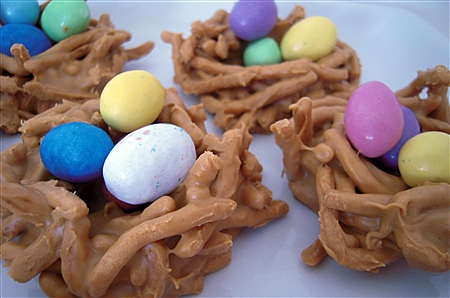
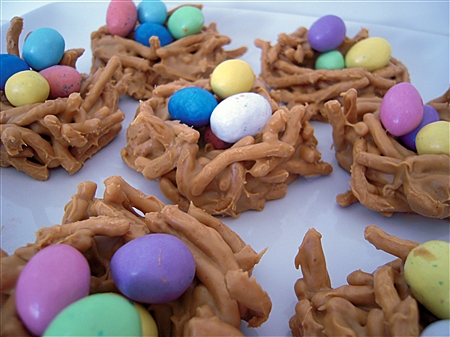
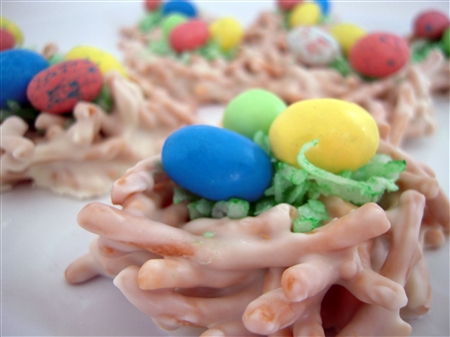
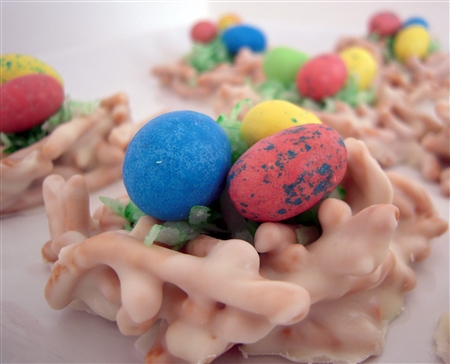
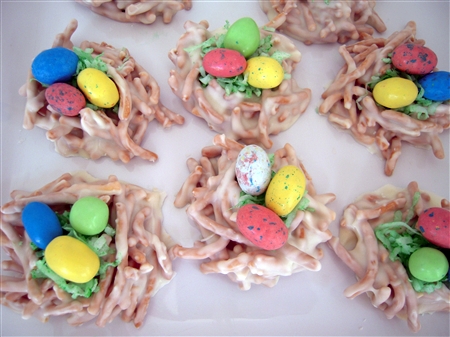
I decided to try two different versions of the Easter Bird's Nests. They're a little messy, but I think they turned out pretty cute.

For the first batch, I used this recipe that calls for butterscotch chips and peanut butter. If I made these again, I would just eliminate the peanut butter. These were more gooey and took longer to set than the ones with just the chips.

Bird's Nests

2 c. butterscotch chips
1 c. peanut butter
2 c. Chow Mein noodles
Any egg shaped Easter candy (I used Robins eggs and M&M')

Cover a baking sheet or pan with waxed or parchment paper. Either melt the butterscotch chips and peanut butter in the top of a double boiler or in the microwave (heat 1 minute, stir, continue heating in 10 second increments until melted and smooth.) Stir in Chow Mein noodles. With buttered fingers shape mixture into one big nest or individual ones. Place on prepared pan. Refrigerate until firm. Fill with jelly beans or other candy.

For the second batch, I simply melted 2 cups white chocolate chips and added 2 cups Chow Mein noodles. I thought the little white nests would look cute with some grass inside them so I made some green grass by adding a few drops of green food coloring to a little coconut and shaking it up inside a baggie.

I think that I like the white chocolate version better but I could have used an extra cup or more of Chow Mein noodles because they seemed a little runnier than they should have been. These firmed up really quickly though which makes it easier to get them decorated if you're in a hurry.

So, what's next in our Easter treat lineup? Come back tomorrow to find out! 🙂

~LilSis

Easter Basket Cupcakes!

March 30, 2010

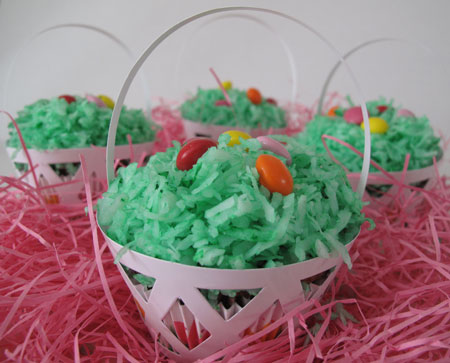
Easter Basket Cupcakes

Happy early Easter, everyone!  And happy good-excuse-to-use-pink-holiday!  I DO love me some pink, and I really love pink with green.  But actually, I love pink with any and every other color.  Pink is probably the most perfect color in the rainbow, don't you think?  Ok, BigSis, you're getting off track.  Focus, focus, focus, girl!  We're talking about Easter baking today, not your obsession with all things rosy.

Sorry…back to the program!  I love Easter, I love color, and I love baking.  Voila!  Easter Basket Cupcakes!

You can use any recipe of course.  Since I'm 3 months into doing the vegan thing, I baked up a batcheroo of my all-time favorite Pumpkin Walnut Bread.  I baked tons of it for the last couple of bake sales, more for Christmas gifts, and I'm still baking it.  I can't get enough of it, so here it is in its' cute little Easter basket outfit!

I found these super-delicious Wilton Easter Basket Cupcake Wrappers at my Michael's store, and I bet your local craft store has them too.  They may even be on sale this week like mine were!

Instructions?  I got 'em for you:

  • Bake any cupcakes you adore in a cute paper liner.
  • Let them cool, then frost or not.  I chose not.
  • Convince some coconut to pretend that it's Easter grass.  I added about 6 drops of liquid green food coloring to about half a bag of shredded coconut in a ziploc baggie.  Mush it around until the coconut/grass is all pretty green.
  • Add a pile of coconut/grass to each cupcake, and top with some jelly beans or whatever for an extra shout of faux egg color.  I didn't have jelly beans and don't really like them anywho, so I wasn't about to buy any.  I used Skittles and M&Ms.  You're the boss of these cupcakes, so you do what you want!
  • Make the little basket wrappers, and secure with tape to be sure they don't come unhinged at an inappropriate time.
  • Drop each cupcake into the Easter Basket wrapper, and add the handle.  I just tucked it into the sides so it would be easy to remove for faster cupcake access!

Easter Basket Cupcake

That's it!  Hoppy Easter!

~BigSis

Easter Candy Gifts

March 29, 2010

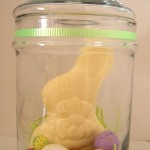
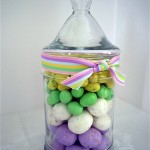
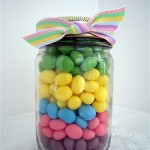
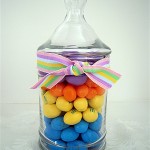
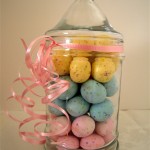
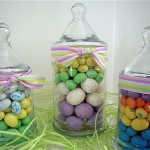
The April 2010 issue of Martha Stewart Living is loaded with creative and crafty ideas for celebrating Easter. If I had the patience, I would have attempted the adorable Easter Egg Sugar cookies, but I knew they would never have come out as beautiful as the ones in the magazine.  So when I saw the adorable Easter Candy Parade, I thought these cute little jars might be something I could put together since they didn't require any baking! 🙂

These are perfect little gifts for teachers, friends, neighbors or coworkers. I think they're a lot more fun and colorful than just giving someone a bag of candy or a chocolate bunny for a Happy Easter gift.

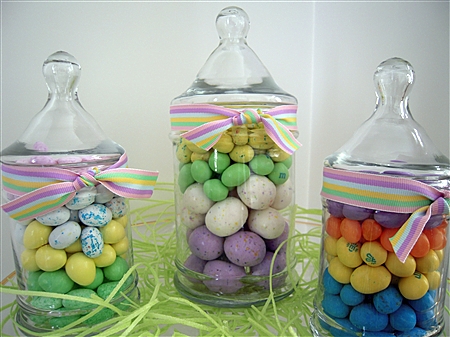
WalMart had a huge assortment of pretty, colorful Easter candy this year. I used a combination of Speckled Malted Milk Balls, Mini Robin Eggs, Pastel Peanut M&Ms, Speckled Jelly Bird Eggs, SweetTarts Jelly Beans, Reese's Pieces Pastel Eggs, the white chocolate bunny, and even some edible green apple grass. I also got the apothecary jars at WalMart for around $3.00 each.

These are so easy to make that the kids would even enjoy putting these together themselves. I went a little overboard so I've got to go get more jars so I can make more gifts or else we're going to end up with way too much Easter candy left in this house!

~LilSis