Enter Olive Garden’s Italian Sweepstakes

LilSis and I have talked about our dream trip to Italy; the only delay is the lack of funds to make this dream come true!  Well, here is a potential solution to that little problem.  I had Food Network on Saturday while I was doing weekend cleaning, and in a commercial break during  Barefoot Contessa I saw an ad for a sweepstakes to win a trip to Italy, courtesy of Olive Garden!   I just entered and wanted to share the details with you so you can enter too!

Olive Garden Italian Sweepstakes

Olive Garden Italian Sweepstakes

  • 4 grand prizes will be awarded, with a value of $7000 each
  • Winners get to take a guest, and spend 8 days in Rome, Florence and Tuscany on a guided tour
  • The contest is open to residents of the US and Canada who are at least 21 years old
  • You can enter once a day until April 12th
  • Check out the official rules, and enter Olive Garden's Sweepstakes to win a trip to Italy.  You can't win if you don't enter!
~BigSis

Posted under Travel

This post was written by BigSis on March 25, 2009

Tags: ,

Read “The Shack”

shack

I'm so glad that LilSis mentioned that she was reading “The Shack” in her last “What the L”.  Where have I been?  I hadn't heard one peep about this book, but now I know that everybody is reading it.  Some churches are reading it as a congregation and are doing studies along with it, much like they did when “The Purpose Driven Life” came out.

Back to “The Shack” though.  After LilSis mentioned it, I saw it at Sam's Club that night and read the comments on the back cover.  They sold me on the book:

  • Wynnona Judd said “Reading The Shack during a very difficult transition in my life, this story has blown the door wide open to my soul.”
  • Michael W. Smith said “The Shack is the most absorbing work of fiction I've read in many years.  My wife and I laughed, cried, and repented of our own lack of faith along the way.  The Shack will leave you craving for the presence of God.”
  • Mike Morrell said “This story reads like a prayer – like the best kind of prayer, filled with sweat and wonder and transparency and surprise. If you read one work of fiction this year, let this be it.”

There isn't much else I can add to that; those endorsements are not overstatements.  The comments got the book into my hands, but from then on the book worked its way into my head and my heart.

I won't give away one smidgen of this story.  I was fortunate to know nothing about this book when I read it, and I want you to have that same advantage.  If you know what to expect or what's coming next, your experience will be lessened, and this is truly a glorious experience that you should have without expectation.

All I want to say is READ THIS BOOK.  Read it slowly, read it thoughtfully, and then read it again.  What's it about?  It's about rage and unforgiveness and grief, and getting unstuck from those dark places that consume your life.  It's about forgiveness and love.  It's about joy, and food, and special fondness.  Just read it.  If you don't feel forever changed, let me know.  I'll eat a bug.  A big juicy crunchy bug.

Oh, and one note in case you wondered.  LilSis and I are NOT being paid to review this book – or any other item on this blog for that matter – but I want to make it absolutely clear because this book is so important.  Please read it.

~BigSis

Posted under This & That

This post was written by BigSis on May 31, 2009

Tags:

A few St. Patty’s Day favorites.

I wish that I could have a St. Patrick's Day party this year, but unfortunately I have to work on Saturday night and I'm not too happy about that. 🙁

St. Patty's Day parties are always fun and very easy to put together; all you really need is green beer and/or a festive green cocktail, corned beef and cabbage, and some potatoes.

Have everyone wear something green. pass out some silly party hats as your guests arrive and you're ready to get the party started!

Here are a couple of our favorites that you might want to try for your St. Patrick's Day celebration.

First, the cocktail.

This Glowing Green Gecko is perfect for St. Patty's Day!

Glowing Gecko

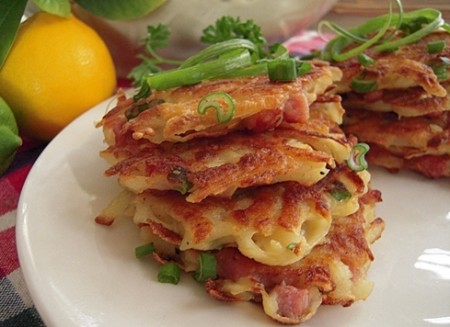
Then, here are some easy and yummy Ham and Potato Pancakes.

Ham and Potato Pancakes

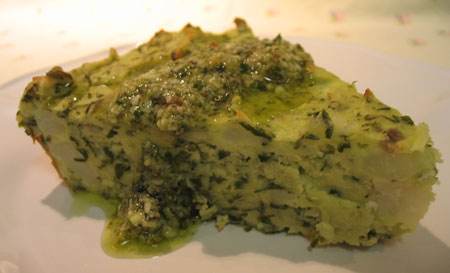
Or, if you're vegetarian, try this awesome Dilled Potato Pie that can be served with pesto or just a dab of butter on top.

Dilled Potato Pie with Pesto

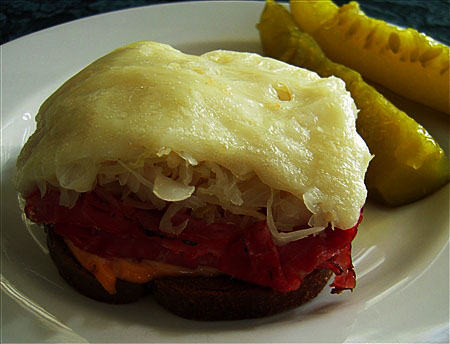
And, this open-faced Reuben Sandwich is delicious and can easily be cut into smaller pieces and served as an appetizer.

Reuben Sandwich

And, a fun green dessert is just icing on the cake.

These St. Patrick's Day Clover Cookies are fun and tasty.

St. Patrick's Day Clover Cookies

Hope everyone has a very Happy St. Patrick's Day!

(And, don't forget an Irish toast. This is a fun one.)

“May your neighbors respect you,

trouble neglect you,

the angels protect you,

and Heaven accept you.”

~LilSis

Posted under Holidays

This post was written by LilSis on March 15, 2012

Tags:

Salsa Showdown: Joe T vs Central Market

Do you remember that episode of Seinfeld when George and Jerry were sitting at the diner, talking about how salsa had replaced ketchup as the #1 condiment, and they mentioned how fun it is to say “salsaaahhh”?  So funny.  I think about that every time I say salsa.  And here in Texas, I say salsa a lot!  My favorite salsa has always been Joe T Garcia's, from the cult-favorite restaurant in Fort Worth.  I was at Central Market today, and it occurred to me that maybe…just maybe…there is a better salsa out there?  I'm so fickle!  I decided to conduct a little informal research to see if my favorite is indeed the best of the best, or if I'm just stuck in a closed-minded salsa rut.

First up is our challenger, Central Market's All Natural Hatch Green Chile Salsa Roja.

  • Ingredients:  Tomatoes, green chiles, diced onions, tomato paste, lime juice, fresh garlic, fresh serrano peppers, vinegar, cumin, salt, black pepper, cilantro.
  • Appearance:  Brownish brick red.  I see some dark flecks that indicate some of the ingredients were fire-roasted.  Nice!  The consistency is pretty thick, but not quite a puree.  You can still see some bits of onion throughout.
  • Flavor:  Delicious and slightly complex.  The top note I get is cumin.  The salsa is smoky and spicy, but I was expecting it to be hotter with the two chiles.  I could have used a little more heat.
  • Overall impression:  I love that there are no preservatives, chemicals or ingredients other than those I could find in my own kitchen.  It tastes fresh, and I do like it.  But would I buy it again?  Mmmm, probably not.  I think I'd like to try the green verde version of this salsa to see if  it has less cumin flavor since I'm not a huge cumin fan.  To me cumin is like cilantro or goat cheese.  Either you love it or you hate it; not many people are ambivalent about it.

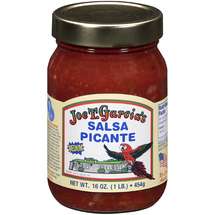
And now the defender: Joe T Garcia's Salsa Picante in Mild (there are Medium and Hot varieties, but I know they're too hot for me).

  • Ingredients:  Tomatoes, onions, green sweet peppers, green chile peppers, salt, vinegar, jalapeno peppers, garlic, cilantro and spices.
  • Appearance:  Bright red, and very chunky with visible pieces of tomato, onion and peppers.  When you open the jar, the salsa needs to be stirred to get the juice married back with the chunks.
  • Flavor:  Wow!  A burst of fresh tomato, garlic and peppers with a tangy background from the vinegar.  Even the mild has a fair amount of pepper heat.  I love it.
  • Overall Impression:  Somebody get this jar away from me!  I can't stop eating it!

joet

The Verdict:

Get in your car right now and drive to a store that carries this salsa!  If you can't do that, direct your fingers over to Joe T's web site and order yourself a case of his Salsa Picante.  You can get 12 jars for $30 plus $15 shipping, which is a bargain in my book, folks!  That' s less than $4 per jar, shipped!  You WILL thank me!  This stuff is awesome in queso instead of Rotel, or poured over a soft brick of cream cheese, or just gobbled up with chips.

Hey, LilSis, you're a fan of Joe T's Salsa, right?  Can you get any good salsa out there in Califor-knee-yah?  I know SirHoney doesn't like too much heat, so I'm wondering if you're still buying Pace brand? Now you can order from Joe T himself!  Viva la Salsa!

~BigSis

Posted under Food

This post was written by BigSis on June 10, 2009

Tags: ,

Easy and Healthy “Back to School” Breakfasts

Back to School

This time of year is really hectic for most of us moms; on top of normal chores, we're clearing our kids' closets and drawers of clothes that no longer fit, shopping for new clothes, school supplies, backpacks, and trying to stock the pantry with all the goodies needed for breakfasts, school lunches and/or after school snacks.

I do LOVE shopping for school supplies; the whole excitement of it brings back fond memories for me and I sometimes wish that I was still buying pencil boxes and crayons, but I won't delve into my obsession with school supplies today. Instead, let's talk about making sure we have what to need to assure that our kids start out each morning with a healthy breakfast.

I don't have little ones in elementary school or middle school any more and I really miss those mornings when I used to pack the kids' lunches and put little surprises or notes in their lunch sacks. Since those days are long gone for me and my high-schooler won't take a sack lunch anymore, it's more important than ever for me to make sure he has a good breakfast before he leaves every morning.

I've always tried to make sure that my kids don't start the day on an empty stomach or with something sugary. Both can lead to problems with blood sugar levels and make it hard for the child to concentrate during school.

For adults, eating a healthy breakfast also has tremendous health benefits, but specifically here's what Mayo Clinic says about the benefits for children.

Benefits for children

Breakfast is especially important for children and adolescents. According to the American Dietetic Association, children who eat a healthy breakfast are more likely to:

  • Concentrate better
  • Have better problem-solving skills
  • Have better hand-eye coordination
  • Be more alert
  • Be more creative
  • Miss fewer days of school
  • Be more physically active

My family would probably tell you that I sound like a broken record when I say “You know that breakfast is the most important meal of the day.”  I wish I had a dollar for every time I've said that. 🙂

Obviously on those early morning school days, breakfast needs to be quick, and most importantly, a healthy combination of whole grains, low fat protein, low fat dairy, and fruits and/or veggies.

Here are a few of my favorites.

  • Oatmeal with fruit and almonds. (To me, this is a perfect breakfast.) I like the McCann's Quick Cooking Irish Oatmeal but Quaker Oats Quick One Minute Oats is also a great choice. The Quaker brand actually has one more gram of fiber and protein than McCann's. After cooking the oatmeal, I add some cinnamon and top with blueberries or sliced banana and sliced almonds.
  • Scrambled eggs or egg beaters with 2% cheese in a whole wheat tortilla. It's so quick and easy to make a great breakfast burrito. If your child is open to it, add just a little fresh chopped spinach when you scramble the eggs. (This can even be done in the microwave.)  Then put a little grated cheese on top, scoop into a tortilla and roll it up. I buy a low sodium ham from Trader Joe's that I sometimes add to this.

  • Fresh fruit salad. I make fruit salads all the time and both my guys love it for breakfast. Have your berries and grapes washed ahead and if adding pineapple, it's quicker if that's cut up the night before. We like blueberries, strawberries, pineapple, bananas, grapes, mandarin oranges, and pears, but you could use any of your child's favorite fruits.
  • Whole wheat or multi-grain bagel. We are really liking the new Thomas' Bagel Thins. The Whole Wheat ones are great but the Everything Bagel Thins are our favorite. These toast great and aren't as heavy as a regular bagel. They're perfect with just cream cheese or even better as a breakfast sandwich with an egg and a piece of healthy ham and low fat cheese.
  • Yogurt with berries and granola. We also love yogurt at my house for breakfast. I mostly buy the Trader Joe's brand and instead of granola, I sometimes toss in some Kashi Heart to Heart cereal.
  • Eggo Nutri-Grain low fat waffles. It doesn't get much easier than this.  These frozen waffles are quite good; I have one most mornings after my yogurt and fruit.  I try to find something other than syrup to offer with a waffle and I've found that these are great with a little almond butter spread on top.
  • Banana and granola bar. If your child is running late and insists that he/she doesn't have time to sit down for breakfast, then stick a banana and a granola bar in their hand on the way out the door. It's definitely better than a Pop Tart. There are many nutritious choices for granola bars these days. My favorites are the Peanut Butter Nature Valley Crunchy Granola Bars.

All of these choices take five minutes or less to prepare and when served with a small glass of low fat milk and/or orange juice, it'll jump start your child's day and allow them to get through the morning with enough energy to last them until lunchtime. 🙂

~LilSis

Posted under Food

This post was written by LilSis on August 19, 2010

Tags: ,

Cats in Hats for Halloween

Happy Halloween!!

Happy Halloween from TomTom

Happy Halloween from TomTom

When I saw this little witch hat at Petco, I couldn't resist buying it for TomTom. Can you tell how much he loves it? 🙂

This is actually the only photo I was able to get with his eyes open. He gets so humiliated when I put a hat on him that he won't even look at me! It's probably a combination of humiliation and anger. (He's probably sitting here secretly plotting how he's going to get back at me for making him do this.)

If you've been reading us for a little while, you know that both BigSis and I can't resist the temptation to stick little hats on our Furkids! We just have a little thing about “Cats in Hats”! 🙂

Since BigSis' furkids didn't want to cooperate this year when she brought out the pirate hat, I decided to repost their photos from last Halloween when they were both witches.

I love the witch hat with braids! It looks great on Gaby!

Gaby the witch

Gaby looking handsome in his witch hat!

And it looks cute on Ashy too!

Ashy the Witch

Ashy looking not too happy about his hat!

We hope everyone has a Happy and Safe Halloween! Don't forget to set your clocks back an hour at midnight tonight!

~LilSis

Posted under Animals

This post was written by LilSis on October 31, 2009

Tags:

Baked Camembert

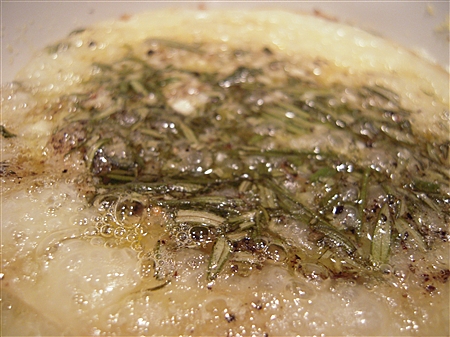
Camembert 1

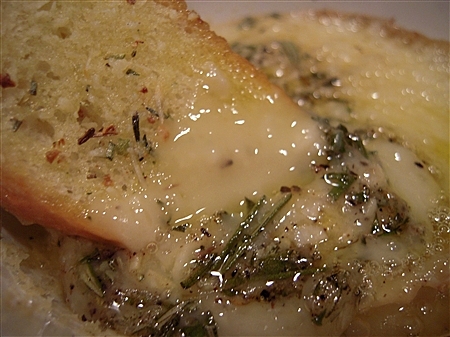
Lovely, ooey, gooey, creamy, bubbly, yummy melted cheese!

What more could you ask for?

Maybe some garlic, rosemary, and olive oil on top?

Oh yeah!

How 'bout some toasted baguette bread to spread it on?

Now you're talkin!

It doesn't get much better than this.

SirHoney & I devoured this entire wheel of cheese, just the two of us, within minutes. I'm not too proud to admit that.

Unfortunately, my habit of munching on cheese and crackers before dinner is about to come to a screeching halt after the first of the year, so I decided to just go all out on this night.

And, you know what?

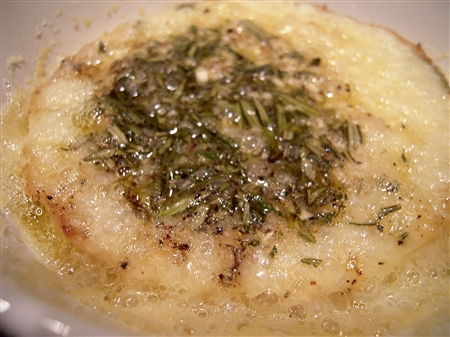
Camembert 2

It was worth it.

The minute I saw this recipe, I ripped it out of the magazine because I knew that I'd be making it soon. I found it in the November issue of Food Network Magazine recently while trying to catch up on my magazine reading.

I've always liked Jamie Oliver, and his cookbook, Cook with Jamie, is one of my absolute favorites. I love the beautiful full page photos next to each recipe in his book. I've determined over the years that I'm what you call “a visual learner” so I love this style of cookbook. I need to put his new book, Jamie's Food Revolution, on my Amazon wish list!

His recipe for the Baked Camembert was originally intended to be poured over pasta, but I decided to try it as an Appetizer instead so we could dip into it with some toasted baguette bread slices.

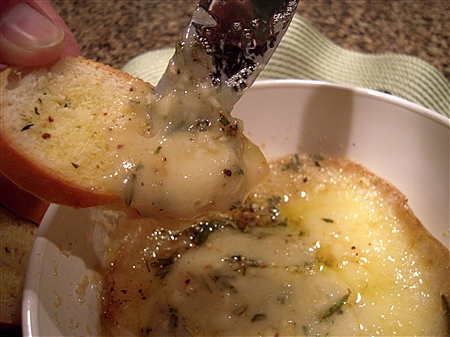
So, dip into it, we did.

Closeup cheese on toast

Then, we spread a little,

Closeup3

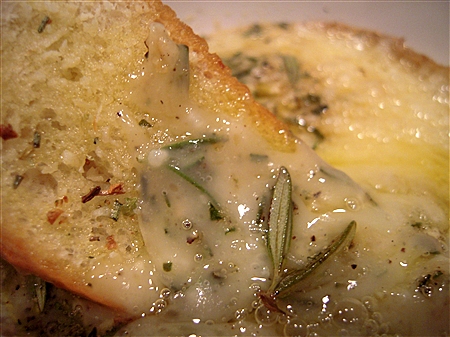
And, then, dipped some more.

Closeup2

I've baked a lot of brie but this was my first time to bake Camembert cheese so I wasn't sure about the consistency. It did seem a little thinner than brie, so next time I'll try it poured over some cooked pasta and spinach.

Baked Camembert
(adapted from Jamie Oliver via Food Network Magazine)

1 8 oz. box camembert cheese
2 cloves garlic
1 spring fresh rosemary
Fresh ground pepper
Extra-virgin olive oil
Baguette bread
Rosemary Herb Seasoning Mix (I used Pampered Chef)

Slice the baguette bread, brush each slice with a little olive oil and sprinkle with your favorite Herb seasoning. Toast in preheated oven at 350 for a few minutes then set aside. Open the box of cheese and unwrap it. Place it back in the wooden container or put in a small Corning Ware dish. Score a circle in the top of the skin, then lift it off and discard.

The original recipe called for slicing the garlic and just picking the rosemary leaves off from the stem. Since I knew that I was spreading on the toasts and not pouring over pasta, I pressed the garlic cloves and finely chopped the rosemary instead.

Just spread the garlic and rosemary on top of the cheese, sprinkle with some pepper and drizzle with a little extra virgin olive oil. Place the cheese into the preheated oven for 25 minutes. (If cooking in the box, place the box on a cookie sheet before placing in oven.)

Remove cheese from oven and let sit for a minute or two, then dig in. This makes an awesome, quick and easy appetizer perfect for serving at your next party.

~LilSis

Posted under Food

This post was written by LilSis on December 21, 2009

Tags:

Depotting MAC Eye Shadows

MAC eye shadows are like frisky little bunnies in my makeup drawer…they multiply! I knew that space in my drawer was getting pretty tight, but I was surprised to count over 50 wee shadow bunnies hiding in there.

I don't mind having that many, in fact I kind of love having a bunch to be honest. It's a fun little indulgence that isn't that expensive, and it's just good clean fun to add a new shadow to my collection.
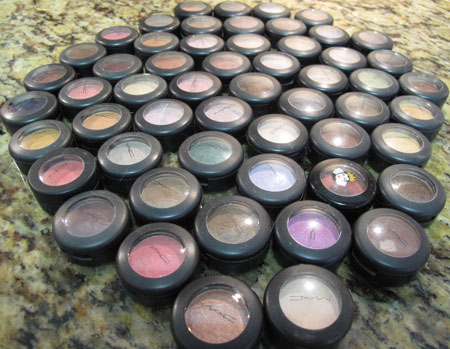
Mac Depot Stash Before

The problem is it's pretty impossible to remember what colors are hiding in the stack. And at 6 AM it takes more time than I have to dig around in the pile looking for that gray I think I have. The time had clearly come to depot my MAC eye shadow collection. To the Google we go for instruction! To the Google!

I found lots and lots of tutorials – both video and text – on depotting eye shadows of all brands, especially MAC. Some folks like to bake the pots in a low oven, some prefer waving a candle or butane lighter underneath the pot, and others use a clothing iron to toast the bottom of the pot. The method I chose was using a hair flat iron because it seemed the simplest and safest.

Before you get started, please heed my very serious warning…BE CAREFUL with this project! You're using two super dangerous weapons: a sharp knife and a hot iron. I'm a self-confessed klutz, and I just barely managed to avoid burning off a finger or all my hair.

However, I did stab myself lightly a few times and came close to really hurting myself until I figured out how to manage this process more gracefully. It reminds me of using one of those treacherous oyster knives to open an oyster shell, but you aren't wearing those big thick protective gloves to depot shadows. So please be careful!
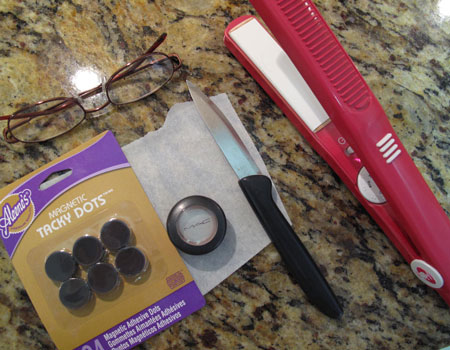
MAC Depot Tools

All you need for the flat iron method is:

  • a flat iron
  • a small piece of parchment paper to protect the iron from melty plastic
  • a sharp thin knife
  • a soft towel to use as a work surface
  • 3/4″ labels
  • 3/4″ thin magnets
  • reading glasses to see what you're doing if you're 40-plus like me

The first step is to get the plastic insert that holds the MAC pan out of the plastic case. This is the part where I was the biggest threat to my own life. What you want to do is wedge the tip of the knife in-between the plastic insert and the case, and pop the insert out. It's easiest to do that near the back hinge where the lid connects to the bottom part of the case.

Once the insert is out, place it face up on the parchment on the flat iron. I had my iron heated to around 370 degrees.
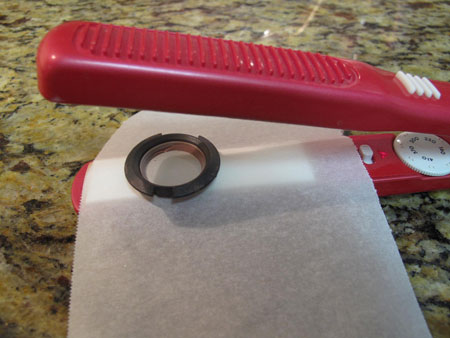
MAC Depot Iron

Once you get your rhythm going, you can do two at a time.
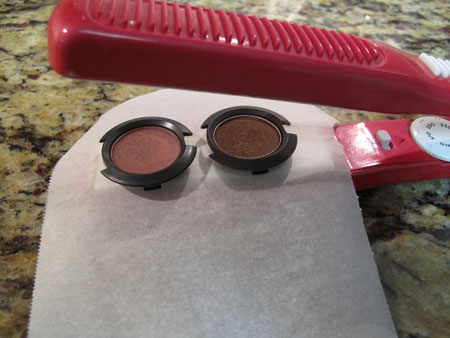
MAC Depot Iron 2

These guys are waiting their turn on the iron. That Barbie line was so awesome!
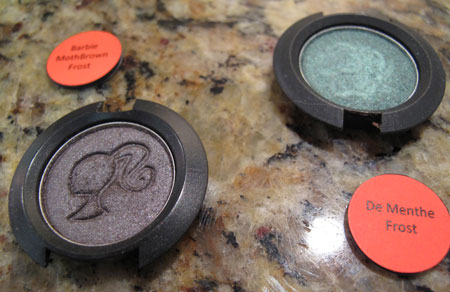
MAC Depot Waiting

Carefully lift the insert off the iron after 20 seconds or so, and check to see if the bottom of the insert is starting to soften. You're looking for a little dent in the middle of the insert.
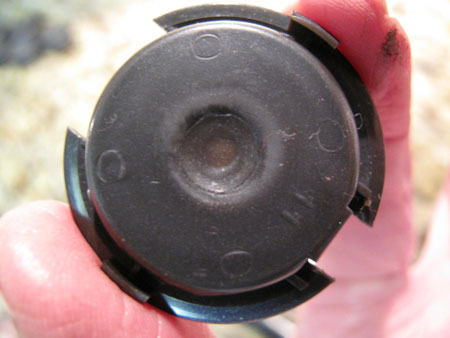
MAC Depot Bottom Dent

Once you see that, you can poke at the hole with the tip of the knife and try to gently pop out the eye shadow pan onto the towel. If the plastic is still too hard to do that, place it back onto the iron for a few more seconds. Keep checking it until the pan releases.
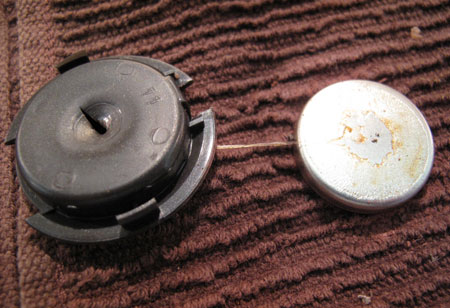
MAC Depot Pan Free

The pan is going to be really warm now, so again be careful. I snap the melty insert back into the case, and then put it aside. If you left it on the iron until it got warped, you might have a little trouble getting it snapped back into the case.

While the pan is still upside down, I like to place a self-adhesive 3/4″ magnet onto it. The warm glue on the back of the pan will also help it adhere.
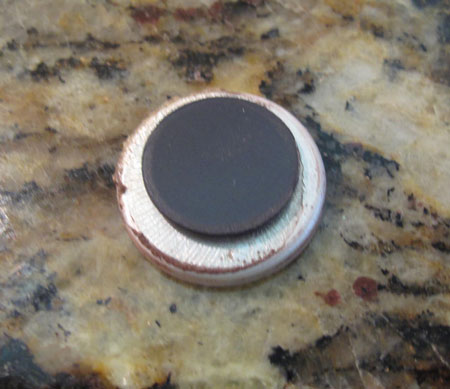
MAC Depot Magnet

Some people clean the back of the pan with q-tips and alcohol or makeup remover before adding a magnet, but I didn't think it was necessary. If there's a lot of glue and it seems like a big task to remove it all, you can rub a little baby powder over the cooled glue with your finger to neutralize the stickiness.

Some of the tutorials I read suggested removing the original MAC label from the bottom of the case and attaching it to the pan. I tried that but didn't love the result.
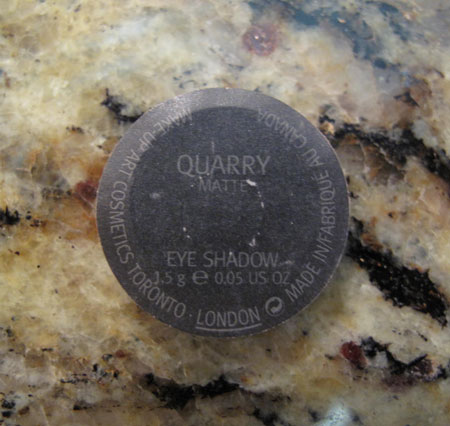
MAC Depot Black Label

The only thin magnets I found were 3/4″ and the original label is more like 1″ so there was a little awkward overhang. I also am not a huge fan of the black label because it's a bit hard to read, and if you've had the shadow for a while the label might be faded or worn, making it even harder to read.

What I used was a 3/4″ adhesive label from Avery. I had red so that's what I used. I think white would get grubby really quickly anyway.

You could hand-print the labels, but I like to laser-print them. They look really nice, but I also love that I have the label stored in my computer so if I ever want to replace a dirty label I print a clean one off in a jiffy. The Word document is also a nice little database of my shadows.  Yes, I am a little OCD, thanks for asking.
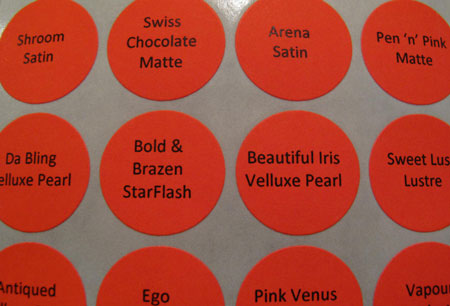
MAC Depot Label Sheet

I just peeled the laser-printed label off the sheet and attached it to the magnet on the pan.
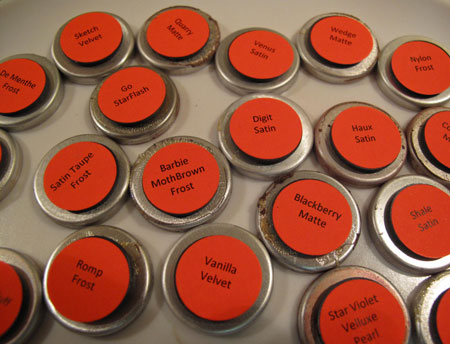
MAC Depot Backs

That's it.  Rinse and repeat a few dozen times til all the kids are depotted!

Once you have all the pans depotted and labeled, you need a palette to put them in. I bought 3 MAC palettes that were supposed to hold 15 shadows, but I pried the insert out and made room for 10 more shadows. I was a little impatient though, and just used a butter knife on my nice new palettes, and ended up scratching them a little. Oops! You'll be more careful than I was!

I since found out about another option called the Z Palette, which I might try next. The appeal of the Z Palette for me is that the lid is clear so you can easily see the colors inside. The downside is that some reviewers mentioned that the construction of the palette could be more sturdy.

After a little bit of time, my space-consuming collection was transformed into this neat compact stack that makes me very happy:
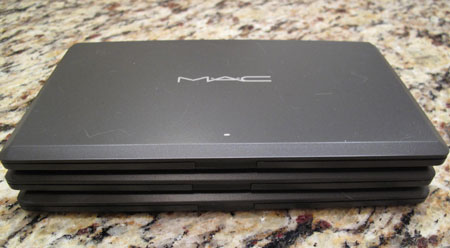
MAC Depot Palettes

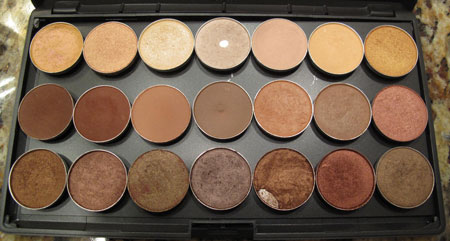
 This palette has all warm colors.

MAC Depot Warm Palette

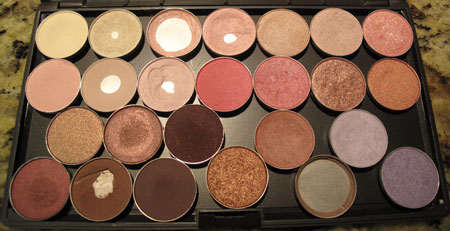
This one has all cool colors. 

MAC Depot Cool

This one has grays, duplicate backups of favorite limited edition colors, and some random brights with room to add more.
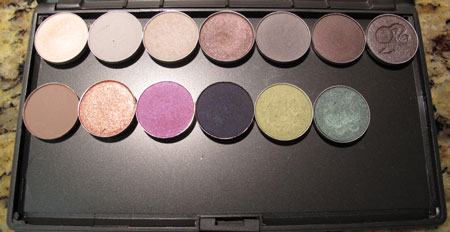
MAC Depot Spares

I had these guys leftover after the project:
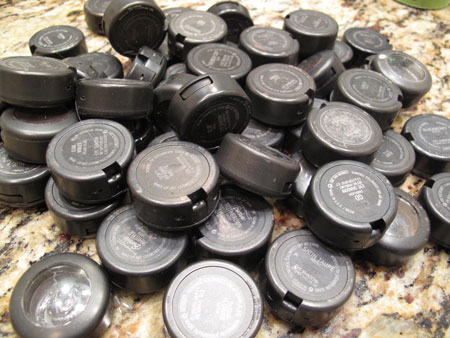
MAC Depot Empties

It might look like a pile of junk on its way to the recycling bin, but no! This pile is headed to the Back to Mac program. For every 6 empties you turn into a MAC counter or online, you get a free lipstick. If you return them to a MAC store though, you can choose an eye shadow or a lipstick. These empties will allow me to bring home 9 more new shadows for free! Wheee!!

Now I'm on a roll with a mission to depot all of my shadows. Next project: depot the few LaFemme and Stila shadows I have, and liberate all the other random pans whose packaging is taking up way too much room!

~BigSis

Posted under Beauty and Skin Care

This post was written by BigSis on February 24, 2012

Tags:

Happy petunias make me very happy!


Happy purple petunias on my front walk.

I've had to really ‘baby' these petunias that are in my front yard because they get a little more sun that they like, but they seem to be happy now, which makes me very happy!

I love how this random yellow pansy seeded right in the middle of this pot. 🙂

When BigSis was here visiting, we were talking while I was watering and we both agreed that petunias always remind us of our Grandmama. Petunias and snapdragons always bring back happy childhood memories of our visits to her house and of her beautiful flower garden.

Happy yellow petunias

And I just love these yellow petunias that I bought for the shower! They're very happy in my backyard.

~Not to be “Debbie Downer”, but this week has been a bit of a melancholy week. We've both been extremely busy with work so there hasn't been much time for a new post, but it's also been a little hard to get in the mood to talk about anything related to Father's Day.~

Last year I was able to shop for Father's Day cards for my father-in-law for the first time since Daddy passed away, but for some reason, I couldn't do it this year; four years later. I had to ask my hubby to go pick them out for his dad so I wouldn't end up a blubbering idiot in Hallmark reading sentimental Father's Day cards.

Any time I'm a little ‘down in the dumps, I make myself go for a walk by the beach or just go out into my yard and do some gardening. Both of those things always cheer me up. I take great pride in my garden and have been recommended by a friend to use trugreen, as she uses the ohio branches of trugreen and has said how much it has helped her grow and maintain her garden, so I think I'll have to take a look for myself!

We're lucky that here in Southern California we have flowers that bloom year-round and right now I've got some blooming like crazy! So, instead of talking about Father's Day today, I wanted to post some pictures of some of my very happy flowers in my yard that make me very happy! 🙂

Happy Impatiens on my front porch.

In the winter, I just cut these impatiens back and leave the pots on the front porch and they come back in full force every Spring.

Happy Blue Hydrangeas

These blue Hydrangeas that I bought for the shower are absolutely gorgeous now that they're in full bloom.

Happy Pink Hibiscus

I have a huge Hibiscus tree in our back yard that has struggled for a couple of years with some mean ole bugs, but hopefully this is a sign of some happy hibiscus this year.

Happy Orange Hibiscus starting to open.

The orange Hibiscus tree had to be trimmed all the way back a couple of years ago because of bugs, but this is my first bloom of the year so I hope it's going to provide lots of happy blooms for us this year.

Happy pink Geranium.

We have several different varieties of Geraniums in our yard, but these pink ones are very happy.

Happy Bird of Paradise

And, one of my most favorite flowers is the Bird of Paradise and I'm really lucky to have several of these happy plants in my yard.

So, whatever you do tomorrow, whether you're able to celebrate Father's Day with your father or just spend some time reflecting on happy memories, as we'll be doing, we wish you all a very Happy Father's Day!


~LilSis

Posted under This & That

This post was written by LilSis on June 18, 2011

Tags:

Texas Brisket Recipe

I'm a little late posting this brisket recipe, so you obviously won't be making it for Labor Day, but around our house, any get-together is reason enough to make this foolproof Texas Brisket. It's perfect for feeding a big crowd.

This is one of those recipes that I love, where there are no precise measurements or exact ingredients.  Our really great friends, F & K, who were neighbors of ours in Texas, loved my brisket so much that they begged me to write down my recipe for them before they moved back to Maryland. That was over ten years ago and I still make it the exact same way as I did back then.

Brisket is kind of like chili; everyone has their own way of doing it and there can be quite a debate about the best way to cook it: dry rub or marinade, grill or oven, baste or don't baste, etc..

Daddy always raved about my brisket so I would make this almost every time we had a family get-together. It's really quite simple. Here's my version of Texas Brisket.

Texas Brisket

4 oz bottle Liquid Smoke
2 pkgs. Meat Marinade
Adkins Seasoning
12 – 14 lb. beef brisket
Barbecue sauce

First, trim off almost all fat, leaving only a small layer on bottom. Mix the Meat Marinade (I used to use McCormick's Meat Marinade but can't find it any more. Just use any brand that you mix with oil, water, and a little vinegar.) Put the brisket in a roaster, cover with the marinade mixture and leave in refrigerator overnight.

The next morning, remove the brisket from the marinade, place in a clean roaster fat side down. Sprinkle the top and bottom generously with Liquid Smoke. Sometimes, I even use the entire bottle. Then, sprinkle with Adkins Seasoning.

Cover and bake in a 300 degree oven for 30-45 minutes per pound. Don't baste! You don't even need to open the oven. When there is one hour remaining to cook, turn down the oven to 275 degrees and cover the brisket with your favorite barbecue sauce, whether homemade or store bought. Sometimes we make homemade sauce and sometime we just buy KC Masterpiece; it just depends on how much time I have.

Watch carefully to make sure the sauce does not burn. If you have a hot oven, you can even turn it down to 250 degrees at this stage. After about an hour, check to make sure the brisket is nice and tender. Remove from oven, let rest for about 20-30 minutes, then slice on the diagonal against the grain.

Sometimes, we just serve it in nice big tender slices and sometimes I chop it up and add more sauce to serve as chopped beef on rolls. It turns out perfect every time!  🙂  Give this recipe a try; I promise you'll like it!

~LilSis

Posted under Food

This post was written by LilSis on September 7, 2009

Tags: ,