Friggatriskaidekaphobia

April 13, 2012

Fear of the number thirteen

Do you have friggatriskaidekaphobia? I don't. 🙂

Have you ever heard of friggatriskaidekaphobia?

I hadn't; until today.

Sounds nasty, doesn't it?

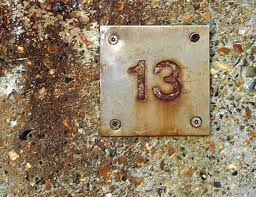
Friggatriskaidekaphobia is the actual fear of Friday the 13th. Or, maybe you just have triskaidekaphobia, which is the fear of the number 13. Nope? Me neither, but I do think it's interesting that such a phobia exists.

Fear of number thirteenIt's been reported that many notable figures suffered from triskaidekaphobia. Winston Churchill, J. Paul Getty, and President Franklin D. Roosevelt all experienced the irrational fear of 13.

Supposedly, Napoleon and Christopher Columbus also suffered from the phobia.

This is already the second Friday the 13th that we've had in 2012 and we're going to have one more in just 13 weeks.  I just realized that anytime a month begins on a Sunday, there will be a Friday the 13th in that month. So, July 13th will be the last Friday the 13th for 2012.

Well, that's the trivia for the day. I choose to consider Friday the 13th a lucky day instead of an unlucky one. I don't need to encourage bad luck; I've had my fair share of that lately.

I hope you have a very happy and lucky Friday the 13th! 🙂


~LilSis

Silk-Dyed Easter Eggs

April 7, 2012

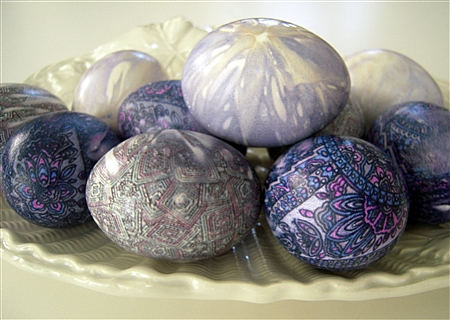
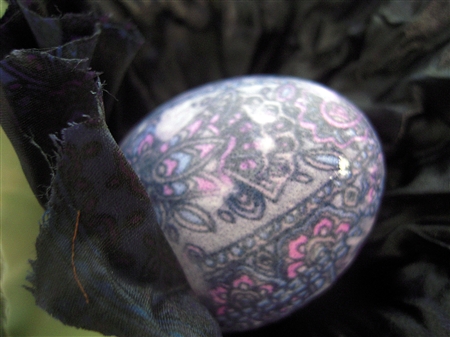
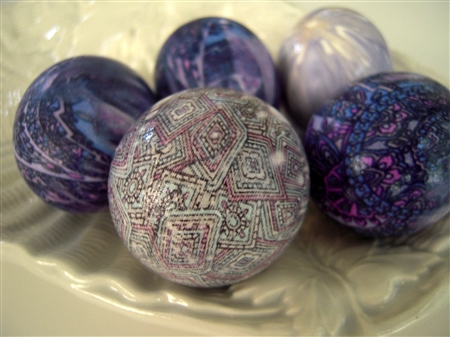
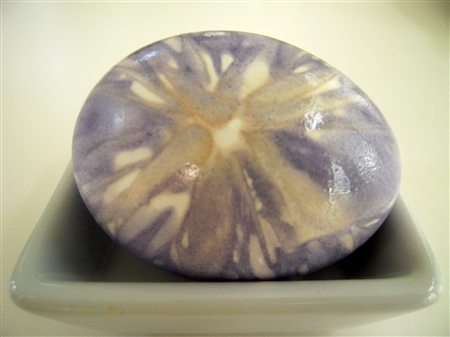
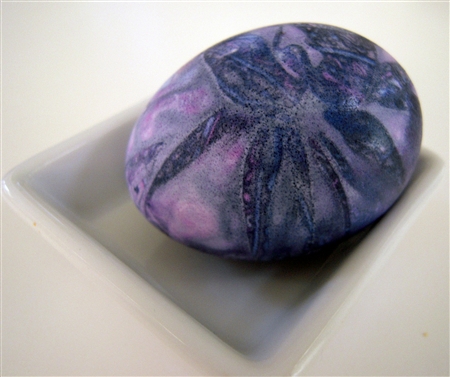
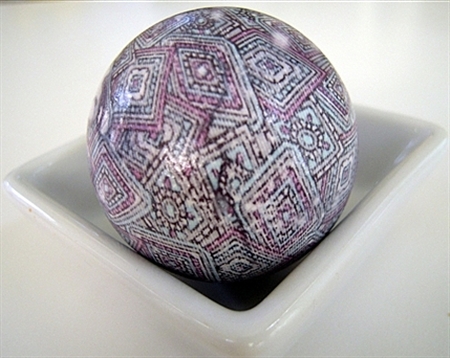
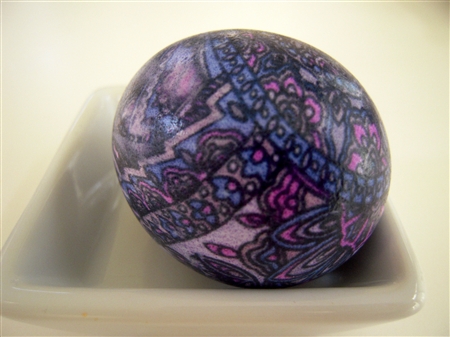
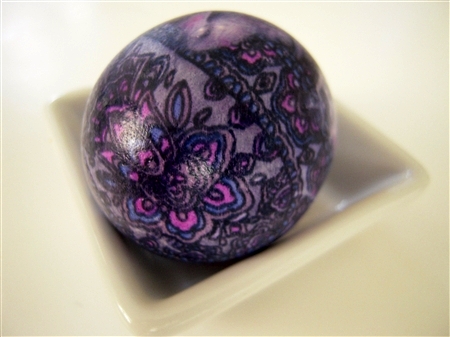
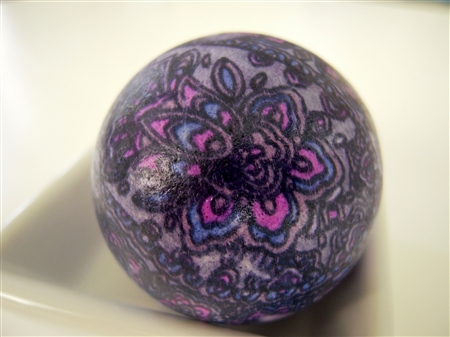
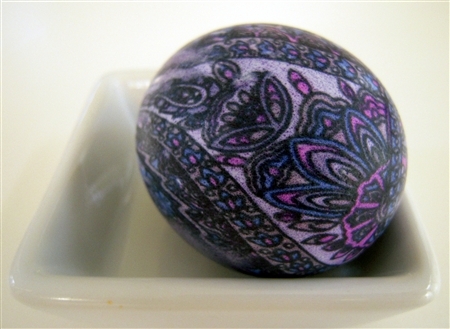
Silk Dyed Easter Eggs

I had so much fun with my Natural Dye Colored Easter Egg project  last Easter so I decided to try something different again this year.

Before I started these, I watched an instructional video on Martha Stewart and I also browsed online a little bit just checking out some other tutorials on how to make these Silk Dyed Easter Eggs.

I loved the gorgeous eggs from Our Best Bites so I suggest checking out their site for step by step instructions.  Each and every one of their eggs are beautiful! I didn't have as colorful silk as they used but I'm still pretty happy with my results.

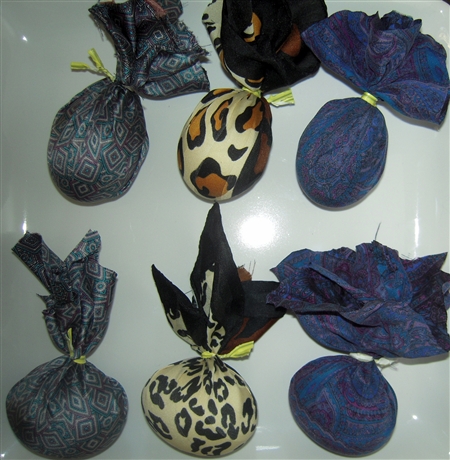
I didn't take the time to photograph each step but these are really easy to make. Here's a photos of a few of the eggs after they were wrapped in the silk squares. I tied the twist tie at the top of some and on the side of some depending on the pattern of the silk.

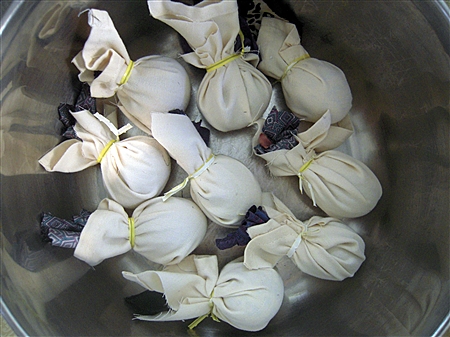
Next, wrap the eggs in some kind of white fabric; an old pillowcase or napkin works perfect. This step can be done at the same time when you wrap the silk around the egg, but I wanted to make sure the silk was really tightly wrapped around the egg, so I wrapped in the silk first, then the white fabric.

Here are the wrapped eggs in a big stock pot ready to be covered in water. Just cover with water, add 1/4 c. vinegar, then boil at a slow boil for about 20 minutes.

Silk Dyed Easter Eggs

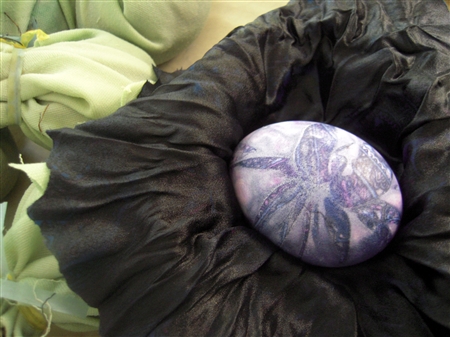
Let them cool a few minutes and then you're ready to unwrap. This was the best part; like Christmas morning. 🙂

Silk Dyed Easter Eggs

Silk Dyed Easter Eggs

A few of these have more subtle patterns because I think the scarf I used wasn't 100% silk. That's the most important part about this process. For the pattern to transfer in detail to the egg, the fabric has to be 100% silk.

Silk Dyed Easter Eggs

This was one of the subtle patterns created by the animal print scarf that I believe was not 100% silk. (the tag was missing, so I took a chance.)

Silk Dyed Easter Eggs

This was a random design that I thought was pretty; just made by the way the silk was tied.

Silk Dyed Easter Eggs

This pretty pattern was created from an old tie that I dug out of my hubby's closet.

Silk Dyed Easter Eggs

These are my favorites. They turned out the best and were actually made from an old pair of my hubby's silk boxers! (That explains why there was no ‘before' photo.)

Silk Dyed Easter Eggs

Silk Dyed Easter Eggs

Silk Dyed Easter Eggs

Silk Dyed Easter Eggs

So; be creative, have fun,

and most importantly,

have a Blessed Easter Sunday!

~LilSis

Easter Goodies Roundup

April 5, 2012

Easter sure snuck up on us this year, didn't it? Are you ready? Need a few ideas for some Easter goodies?

Both of us have had a lot going on this past month so we haven't been able to get any new Easter treats posted.

But, the good news is that we have fun recipes for cupcakes, candies, cookies, and decorated eggs that we've shared in the past that we're going to round up for you here today.

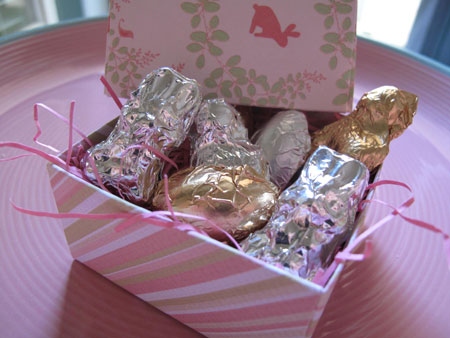
First, let's start with these adorable Homemade Easter Chocolate Candies from BigSis.

Homemade Easter Chocolate Candies

Here's a photo of the little duckies, bunnies, sheep and eggs before they were wrapped in the foil.

Easter Chocolate Candies Molded

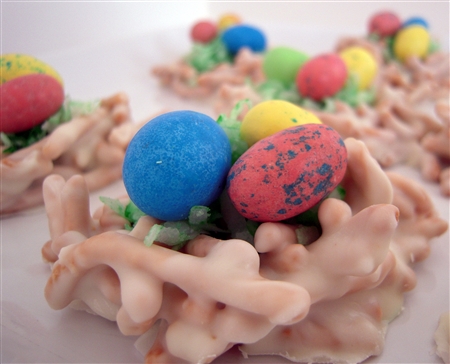
The Easter Bird's Nest Candy is an easy recipe that you can change up a bit depending on your preference. These nests were made with butterscotch chips.

Easter Bird's Nest Candy

Here are a few made with white chocolate instead of butterscotch.

Easter Bird's Nest White Chocolate Candy

If you're looking for a different way to dye your eggs, try these Natural Dye Colored Easter Eggs that I made last year.

Natural Dye Colored Easter Eggs

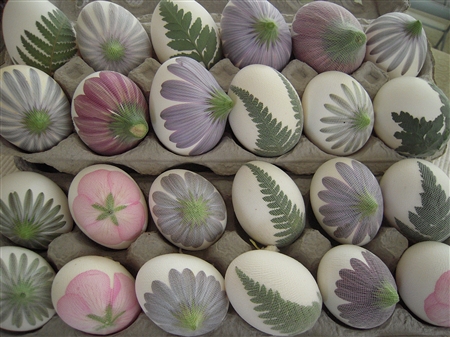
Here are some of the eggs before going into the dye.

Natural Dye Colored Easter Eggs

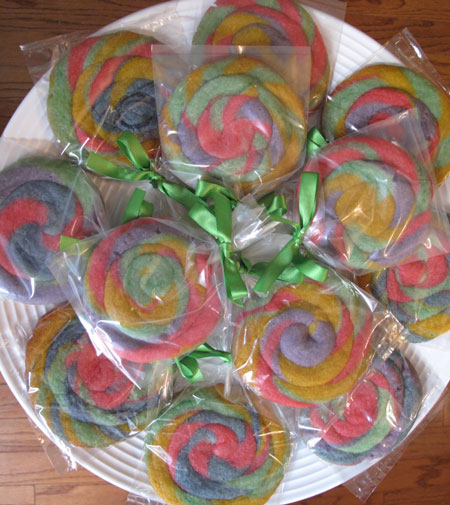
It would be fun to get the kids in the kitchen to help with these Swirled Cookie Suckers.

Swirled Cookie Suckers for Easter

These are great for wrapping in little treat bags for gifts or to add to your Easter baskets!

Swirled Cookie Suckers for Easter

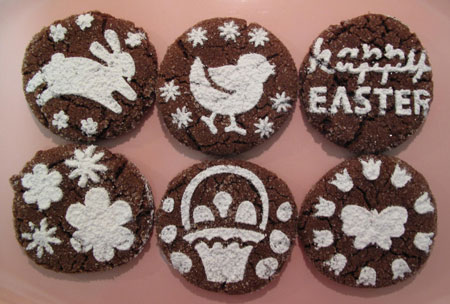
These Chocolate Snickerdoodles are perfect for making Decorated Easter Cookies.

Chocolate Snickerdoodle for Easter

Super cute and super easy with these stencils!

Chocolate Snickerdoodle for Easter

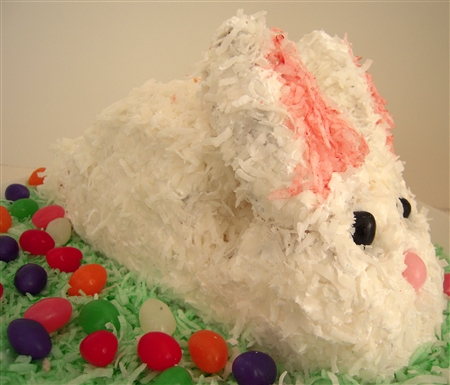
And even though my Easter Bunny Cake didn't turn out too cute, I've got step by step instructions on how to Make an Easter Bunny Cake.

Easter Bunny Cake
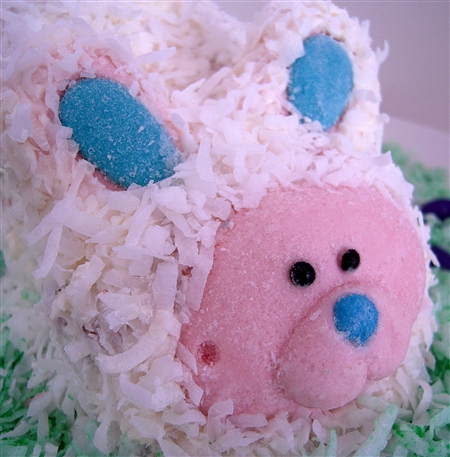
Here's Floppy with a different face and ears.

Easter Bunny Cake

If you were looking for some new ideas, I hope we've helped you find something that you want to try for Easter this year.

If all goes well, I'll be back in a few days to share my latest Easter Egg decorating project. (Fingers crossed.) 🙂

~LilSis

Hunger Games Movie Review with No Spoilers

March 25, 2012

Hunger Games Katniss Reaping

I'm not an early adopter so it's not surprising that I didn't jump on the Hunger Games bandwagon until 5 days prior to the movie's release. Thankfully, it's a quick read so I was finished with the book in under 6 hours and ready to see it come to life on the screen on Friday.

To be sure, people who read a book before the movie comes out are a huge critic of the film. But people who read the book, can't put it down and LOVE it are the biggest critics of all. That would be me. And bunches of other people.

First, let's talk about all of the things done right in the Hunger Games movie. There are a lot.

  • The movie is extremely faithful to the book; some of the dialogue is verbatim and with very few exceptions, the plot follows the book precisely.
  • I found it much easier to sympathize with and understand Haymitch in the film. You get a pretty clear sense that he became an alcoholic and sarcastically nasty because he's lost every pair of Tributes he's ever worked with. He's built up a wall of liquor and surliness to protect himself from getting too attached to these kids. I liked that we got to see his behind the scenes efforts to get sponsors and help for Katniss and Peeta.
  • The creativity behind the presentation of the Gamemakers' control room was incredible. It was a futuristic, sci-fi-NASA hotbed of brilliantly twisted manipulators. It was a little hard to imagine how the Gamemakers worked their evil madness in the book, but it really came to life on the screen.
Hunger Games Katniss Interview
  • The movie kept my attention, and the 2-1/2 hours flew by. The pace was fast, the action was relentless, and the tension was high for much of the film, as it should have been.
  • The performances and casting choices were all on target: Katniss, Peeta, Haymitch, Effie, President Snow, Seneca and Caesar were all perfect. Rue couldn't have been more precious and precocious. But I would have liked even more Cinna!

Hunger Games Rue

  • The makeup and special effects were well done, the cinematography was beautiful, and the depiction of the Capitol was fascinating. We saw how horrendous life was in the Districts, and how ridiculously extravagant life was in the Capitol.
  • The costumes were perfection. The District attire was muted depressed grays and blues, while Capitol garb was over the top in the craziest way imaginable. Effie's matching makeup, nails and clothing were very creepy Alice-In-Wonderland-ish. And the flaming costumes Peeta and Katniss wore into the Games were stunning.
Hunger Games Katniss Effie

I do have some criticisms though, and once again, as a book-lover I'm uber-sensitive to things that a non-book-reader would probably not even notice.

  • I think they would notice the camera gimmicks though. I found the shaky camera work to be very distracting and it actually made my eyes hurt. I can see that the gimmicks make sense in some scenes, showing the frenzy of the moment, as in the Tracker Jacker attack. But for me they were generally annoying, and detracted from my theater experience overall.
Hunger Games Fire Costumes
  • My biggest complaint is that the edge was taken off the story; I suppose to maintain the PG-13 rating and to allow kids to see the film since it started out as a teen book. In my opinion, anyone younger than 13 or 14 shouldn't read the book anyway, much less see the movie because of the violent subject matter. An R rating would have been easy to achieve, but I think the raw quality of the story could have been maintained without heading into R territory.

We didn't get a sense of how truly brutal the Games were, how beaten up the Tributes were, how intense the final cornucopia arena scene was, how tender the cave scenes were, or how heartbreaking the final train scene was. I think the key themes of the book were a little glossed over, and that the director was afraid to “go there”. We didn't see the main characters starving, freezing cold, burning hot, panic-stricken and near death.

Hunger Games Katniss Bow

For example, when Katniss suffered a serious knife wound to the head, it barely bled. In the real world, a head cut will bleed profusely, and hers didn't even dribble into her eyebrow. I once had a cut over my eyebrow, and even my shoes were ruined from the amount of blood that I lost. I think this kind of missed detail just detracted from the realism of the story.

And call me gruesome, but I really wanted to see the haunted human eyes of the Muttations, and a little more detail in the Tracker Jackers.

  • The characters weren't developed deeply enough for me, other than Haymitch. I don't think we saw just how good Peeta was or how tough and distrustful Katniss was, or how much disdain she had for the angle of the star-crossed lovers. I know we don't have the benefit of knowing Katniss' thoughts as we did in first-person print, but I think we could have been shown more of who they were without that and without adding a lot of scenes to the already lengthy running time.
Hunger Games Katniss Tube
  • One personal little nitpick: I imagined that music would be featured as a beautiful, magical and stark contrast to a ruthlessly brutal environment. In the book, music was a continuing theme: with Katniss' father, with Prim and Katniss, and in Rue's love of music and how the Mockingjays played into that. I think that highlighting that theme more prominently would have been stunning. Perhaps it will be in one of the future movies?
  • And one last minor note, Gale seemed way too clean and fancy among the dirty downtrodden swarm of District folks. Where'd he get that nice haircut?

Overall, I would give the film a score of a “B+”. If the camera hadn't been so irritating, and if the highs were a bit higher and the lows a touch lower, I would definitely give it an “A”.

In spite of my criticisms, I actually did love the movie, and would see it again. I'm looking forward to reading the next two books and seeing the other movies when they come out. To anyone older than 12, I highly recommend reading these books!

* All photos are the property of LionsGate Films.

~BigSis

I’ve been Visual.ly Twitterized!

March 18, 2012

Have you heard about Visual.ly? According to their web site, I'm a geeky, grinning, skateboard-riding foodie!

Twitterized Visual.ly

I'll accept that! At least, all of it except for the skateboard-riding. We all know that I'd break a hip, at my advanced age.

I also have a slight question about bacon and bullfighting. Where in the world did those topics come from?  I haven't tasted bacon in 18+ years and never talk about it.  And bullfighting? Let's not even go there!

Oh, and while I'm wondering about Visual.ly's ways, I have to ponder the mention of “adam”. Could the “adam” actually be the Adam Richman, who ripped me on Twitter and asked me to stop watching his show? Thanks for reminding me of that debacle, Visual.ly! I had almost forgotten it. Almost.

What Visual.ly does with this little graphic is look at your twitter account (your info isn't made public or anything weird like that), and make a funny assessment of who you are. It's based on your tweets, your followers and who you follow. And from my experience, they toss in a bit of their own randomness, just to keep it lively!

To twitterize yourself, just go to visual.ly/labs/twitter and have fun!

~BigSis

A few St. Patty’s Day favorites.

March 15, 2012

I wish that I could have a St. Patrick's Day party this year, but unfortunately I have to work on Saturday night and I'm not too happy about that. 🙁

St. Patty's Day parties are always fun and very easy to put together; all you really need is green beer and/or a festive green cocktail, corned beef and cabbage, and some potatoes.

Have everyone wear something green. pass out some silly party hats as your guests arrive and you're ready to get the party started!

Here are a couple of our favorites that you might want to try for your St. Patrick's Day celebration.

First, the cocktail.

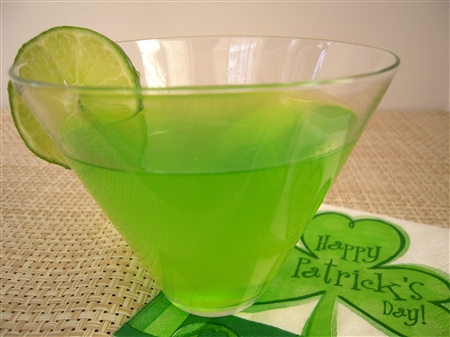
This Glowing Green Gecko is perfect for St. Patty's Day!

Glowing Gecko

Then, here are some easy and yummy Ham and Potato Pancakes.

Ham and Potato Pancakes

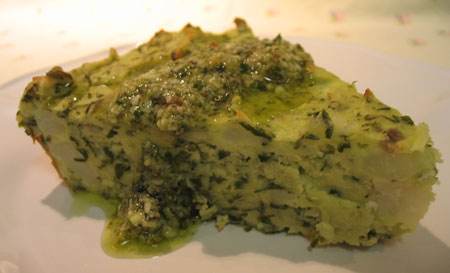
Or, if you're vegetarian, try this awesome Dilled Potato Pie that can be served with pesto or just a dab of butter on top.

Dilled Potato Pie with Pesto

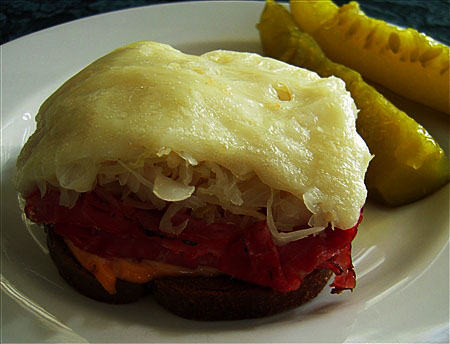
And, this open-faced Reuben Sandwich is delicious and can easily be cut into smaller pieces and served as an appetizer.

Reuben Sandwich

And, a fun green dessert is just icing on the cake.

These St. Patrick's Day Clover Cookies are fun and tasty.

St. Patrick's Day Clover Cookies

Hope everyone has a very Happy St. Patrick's Day!

(And, don't forget an Irish toast. This is a fun one.)

“May your neighbors respect you,

trouble neglect you,

the angels protect you,

and Heaven accept you.”

~LilSis

A couple of new favorite MAC products.

March 3, 2012

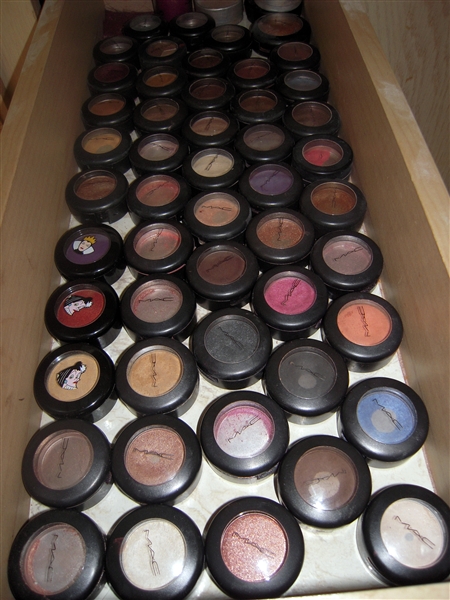
I love BigSis' tutorial on Depotting the MAC Eye Shadows! Since my shadow collection is very similar to hers, with just over 50 of the adorable little pots, I'm going to try to find some time to depot mine soon.

My makeup drawers have become annoyingly messy, so I'm working on a little reorganizing project that I'll be sharing with you soon.

Here's what my MAC shadow drawer looks like now.

MAC Eye Shadows

As long as we're talking about MAC, I thought it would be fun to share with everyone a couple of my new favorite MAC products.

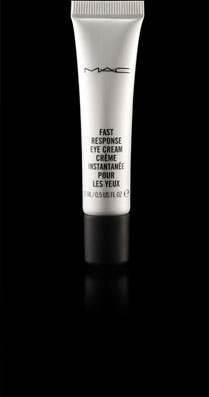
BigSis gave me a MAC gift certificate for Christmas and I had just run completely out of my eye cream, so I decided to give MAC's Fast Response Eye Cream a try.

MAC Fast Response Eye Cream

Here's what MAC says about their Fast Response Eye Cream:

The super-charged, caffeinated cream with instant effects. De-puffs, erases the look of dark circles, firms, soothes and softens skin around the eye. Special optics act like magic to fade away lines.

Sounds good, huh? Since this eye cream is caffeinated, I use it first thing in the morning and I use a different one at night. So far, I'm happy with the results I see from this Fast Response Eye Creme.

I've noticed some firming around the outside of my eyes and it definitely helps with the morning puffiness, which I seem to have almost every morning these days. And, most importantly, this eye cream doesn't leave my under eye area dry so my concealer still glides on nicely on top of it.

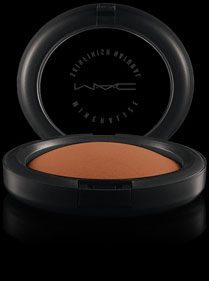
Another MAC product that I've been using for awhile that I really love is MAC Mineralize SkinFinish Natural.

MAC Skinfinish Natural

I used MAC's loose powder for years and besides the fact that it didn't last long enough, they made the container smaller so I stopped buying it.  For $29.00 versus the $23.00 for the loose powder, the Mineralize SkinFinish Natural compact is a much better bargain because it lasts so much longer.

It doesn't take much of this product to get nice coverage. I just swipe my big powder brush over it a couple of times and the powder goes on in a really nice matte finish. It evens out my skin tone so much better than the loose powder. There are about nine shades to choose from so there's something for everyone. My shade right now is Medium Dark and I love it! If you aren't happy with what you're using now, I would highly recommend giving this a try!

Even though I don't have quite the collection of empties that BigSis has now, I just discovered that I have six empties so it's time to head to the MAC counter to pick out a new lipstick. 🙂

If there are any other MAC fanatics out there that have a new favorite product or a favorite eyeshadow or lipstick shade that they'd like to share, we would love to hear from you!

~LilSis

Depotting MAC Eye Shadows

February 24, 2012

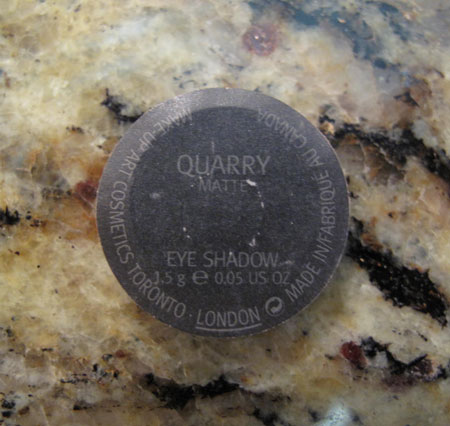
MAC eye shadows are like frisky little bunnies in my makeup drawer…they multiply! I knew that space in my drawer was getting pretty tight, but I was surprised to count over 50 wee shadow bunnies hiding in there.

I don't mind having that many, in fact I kind of love having a bunch to be honest. It's a fun little indulgence that isn't that expensive, and it's just good clean fun to add a new shadow to my collection.
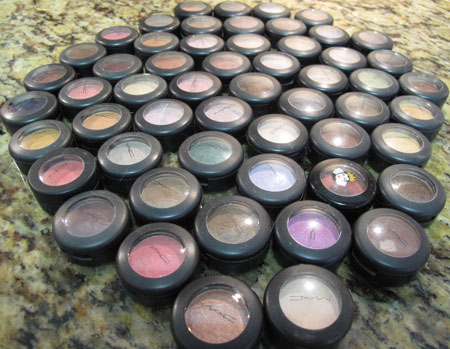
Mac Depot Stash Before

The problem is it's pretty impossible to remember what colors are hiding in the stack. And at 6 AM it takes more time than I have to dig around in the pile looking for that gray I think I have. The time had clearly come to depot my MAC eye shadow collection. To the Google we go for instruction! To the Google!

I found lots and lots of tutorials – both video and text – on depotting eye shadows of all brands, especially MAC. Some folks like to bake the pots in a low oven, some prefer waving a candle or butane lighter underneath the pot, and others use a clothing iron to toast the bottom of the pot. The method I chose was using a hair flat iron because it seemed the simplest and safest.

Before you get started, please heed my very serious warning…BE CAREFUL with this project! You're using two super dangerous weapons: a sharp knife and a hot iron. I'm a self-confessed klutz, and I just barely managed to avoid burning off a finger or all my hair.

However, I did stab myself lightly a few times and came close to really hurting myself until I figured out how to manage this process more gracefully. It reminds me of using one of those treacherous oyster knives to open an oyster shell, but you aren't wearing those big thick protective gloves to depot shadows. So please be careful!
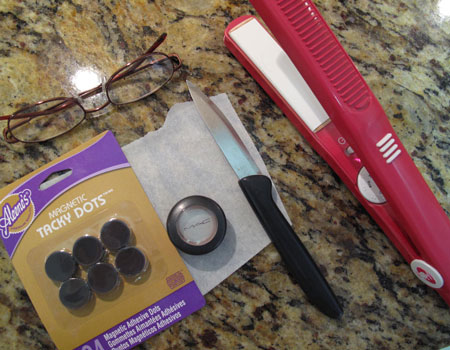
MAC Depot Tools

All you need for the flat iron method is:

  • a flat iron
  • a small piece of parchment paper to protect the iron from melty plastic
  • a sharp thin knife
  • a soft towel to use as a work surface
  • 3/4″ labels
  • 3/4″ thin magnets
  • reading glasses to see what you're doing if you're 40-plus like me

The first step is to get the plastic insert that holds the MAC pan out of the plastic case. This is the part where I was the biggest threat to my own life. What you want to do is wedge the tip of the knife in-between the plastic insert and the case, and pop the insert out. It's easiest to do that near the back hinge where the lid connects to the bottom part of the case.

Once the insert is out, place it face up on the parchment on the flat iron. I had my iron heated to around 370 degrees.
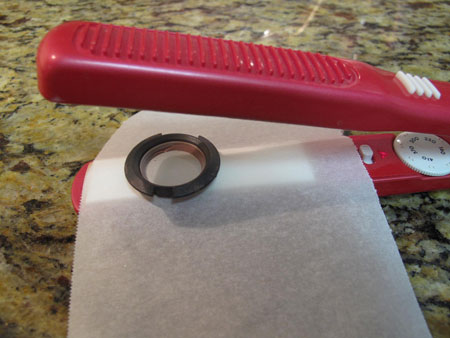
MAC Depot Iron

Once you get your rhythm going, you can do two at a time.
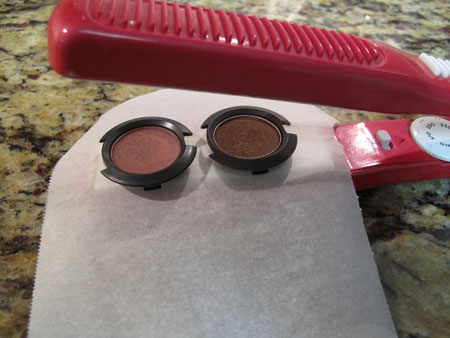
MAC Depot Iron 2

These guys are waiting their turn on the iron. That Barbie line was so awesome!
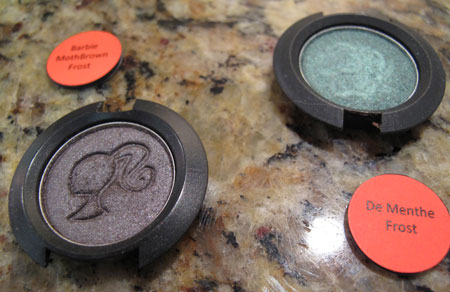
MAC Depot Waiting

Carefully lift the insert off the iron after 20 seconds or so, and check to see if the bottom of the insert is starting to soften. You're looking for a little dent in the middle of the insert.
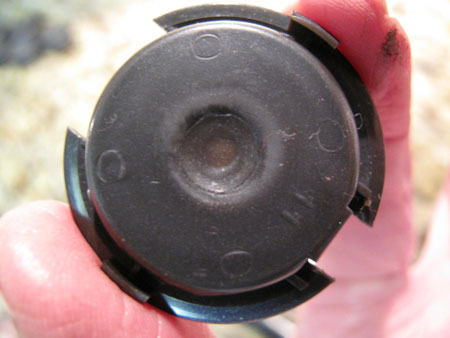
MAC Depot Bottom Dent

Once you see that, you can poke at the hole with the tip of the knife and try to gently pop out the eye shadow pan onto the towel. If the plastic is still too hard to do that, place it back onto the iron for a few more seconds. Keep checking it until the pan releases.
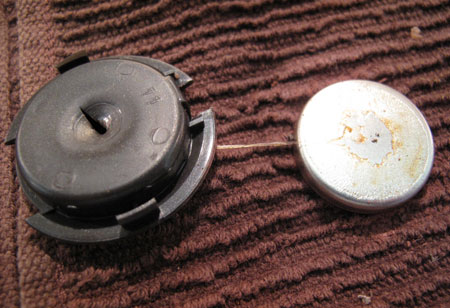
MAC Depot Pan Free

The pan is going to be really warm now, so again be careful. I snap the melty insert back into the case, and then put it aside. If you left it on the iron until it got warped, you might have a little trouble getting it snapped back into the case.

While the pan is still upside down, I like to place a self-adhesive 3/4″ magnet onto it. The warm glue on the back of the pan will also help it adhere.
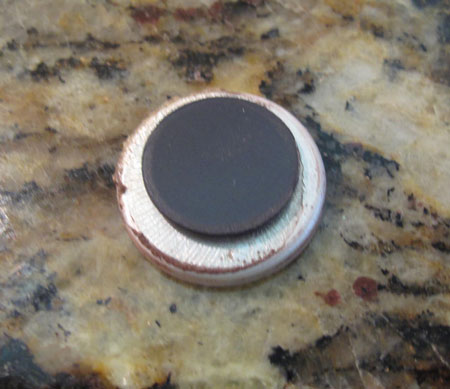
MAC Depot Magnet

Some people clean the back of the pan with q-tips and alcohol or makeup remover before adding a magnet, but I didn't think it was necessary. If there's a lot of glue and it seems like a big task to remove it all, you can rub a little baby powder over the cooled glue with your finger to neutralize the stickiness.

Some of the tutorials I read suggested removing the original MAC label from the bottom of the case and attaching it to the pan. I tried that but didn't love the result.

MAC Depot Black Label

The only thin magnets I found were 3/4″ and the original label is more like 1″ so there was a little awkward overhang. I also am not a huge fan of the black label because it's a bit hard to read, and if you've had the shadow for a while the label might be faded or worn, making it even harder to read.

What I used was a 3/4″ adhesive label from Avery. I had red so that's what I used. I think white would get grubby really quickly anyway.

You could hand-print the labels, but I like to laser-print them. They look really nice, but I also love that I have the label stored in my computer so if I ever want to replace a dirty label I print a clean one off in a jiffy. The Word document is also a nice little database of my shadows.  Yes, I am a little OCD, thanks for asking.
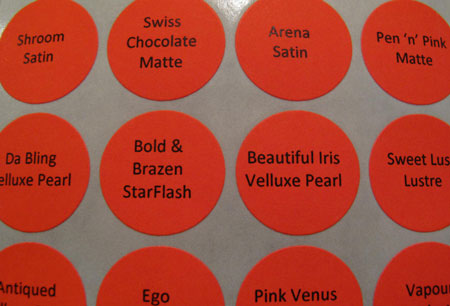
MAC Depot Label Sheet

I just peeled the laser-printed label off the sheet and attached it to the magnet on the pan.
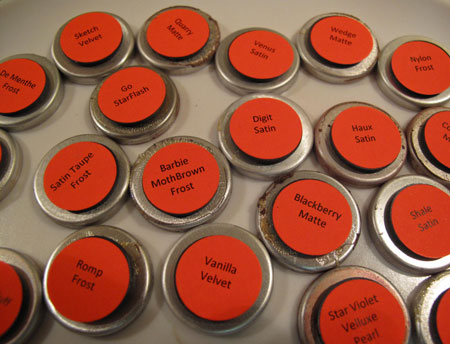
MAC Depot Backs

That's it.  Rinse and repeat a few dozen times til all the kids are depotted!

Once you have all the pans depotted and labeled, you need a palette to put them in. I bought 3 MAC palettes that were supposed to hold 15 shadows, but I pried the insert out and made room for 10 more shadows. I was a little impatient though, and just used a butter knife on my nice new palettes, and ended up scratching them a little. Oops! You'll be more careful than I was!

I since found out about another option called the Z Palette, which I might try next. The appeal of the Z Palette for me is that the lid is clear so you can easily see the colors inside. The downside is that some reviewers mentioned that the construction of the palette could be more sturdy.

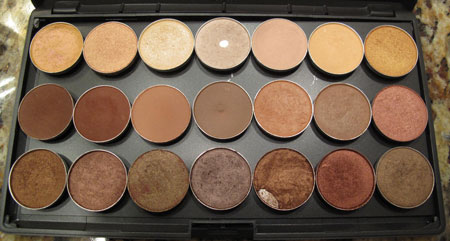
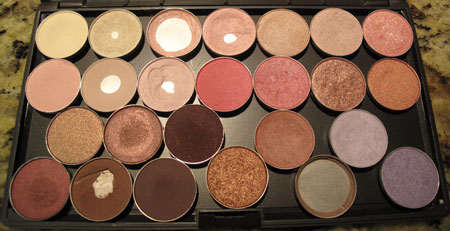
After a little bit of time, my space-consuming collection was transformed into this neat compact stack that makes me very happy:
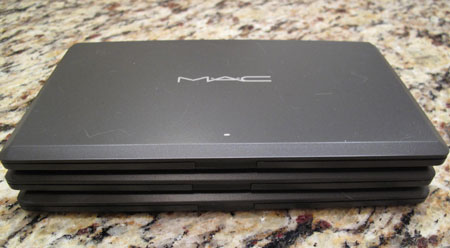
MAC Depot Palettes

 This palette has all warm colors.

MAC Depot Warm Palette

This one has all cool colors. 

MAC Depot Cool

This one has grays, duplicate backups of favorite limited edition colors, and some random brights with room to add more.
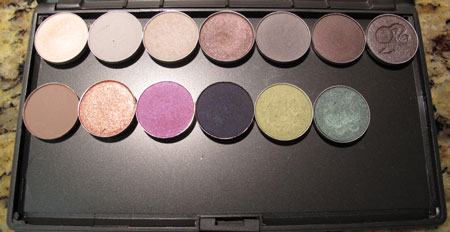
MAC Depot Spares

I had these guys leftover after the project:
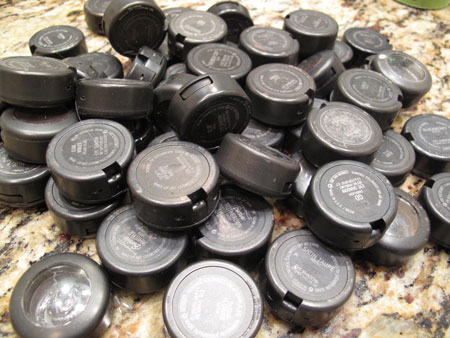
MAC Depot Empties

It might look like a pile of junk on its way to the recycling bin, but no! This pile is headed to the Back to Mac program. For every 6 empties you turn into a MAC counter or online, you get a free lipstick. If you return them to a MAC store though, you can choose an eye shadow or a lipstick. These empties will allow me to bring home 9 more new shadows for free! Wheee!!

Now I'm on a roll with a mission to depot all of my shadows. Next project: depot the few LaFemme and Stila shadows I have, and liberate all the other random pans whose packaging is taking up way too much room!

~BigSis
Sunday Supper: Hearty Dal Soup

February 19, 2012

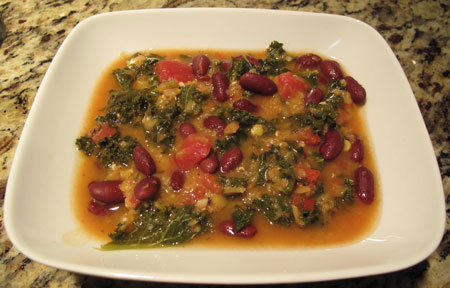
Vegan Hearty Dal Soup

I'd never even tasted kale until a couple of years ago, and when I finally did try it, I was convinced that avoiding it all those years had been a wise plan.
My first experience was a raw kale salad from a local natural food store's prepared food bar. It was bitter with very little flavor otherwise, but the worst part was the texture…kind of like shredded up brillo pad. It was nearly impossible to chew, and I certainly didn't want to swallow it.

I decided I didn't like kale. No worries; there are plenty of other nutritious things for a vegan girl to eat, right?

Fast forward to the first time I ever tried kale chips. What? They're delicious? How can that be? I don't like kale. Aha, that's where I was wrong.

Turns out I love kale, in fact, I can't get enough of it, and I seldom eat it in baked chip form. Right now I'm going through two bunches a week…red kale, curly kale, lacinato kale. Got kale? I'll eat it.

Since I finished the Clean Program 21-Day Cleanse about a month ago, I've stuck with the program pretty closely. Ok, ok, I did have that one major fall off the wagon with the vegan queso and blue corn chips episode a couple of weeks ago. But other than that…I'm eating pretty clean. It's what my body demands now. And I'm happy to comply.

I have two or three go-to kale recipes in regular rotation, and after today I have a new one to add. This Sunday Supper recipe for Hearty Dal Soup is from Forks Over Knives: The Plant-Based Way to Health, and was contributed by Mary McDougall of the McDougall program fame.

Please do yourself a favor and go to their web site and check out the McDougall recipes. I just found the Hearty Dal Soup recipe there, and can't believe I've never known about this treasure trove of wonderful sounding and easy recipes before.

Vegan Hearty Dal Soup Close

Besides being easy, this recipe is endlessly customizable to what you have on hand. Since I have this little love affair with kale going on right now, I used a whole bunch of curly kale in place of the 2 cups of chard (I needed a little extra water because of that). I was out of cumin, so I substituted a bit of Penzeys Southwest Seasoning which contains some cumin.

I – of course – used 4 or 5 cloves of garlic instead of 2, and added kidney beans since all of my garbanzos made their way into hummus last week. I left out the potatoes altogether since my body screams out “CANDY!” in glee when it sees a potato coming my way, and you know that's going to mean excess poundage on my derriere. I was out of onion, so I added chopped chives at the end.

See what I mean? Use what you have. One last note. The instructions say to cook for 50 minutes or until the lentils are soft. When I checked on mine about halfway through, they were already falling apart. That actually turned out to be a good thing though, since most of the lentils turned into a wonderful creamy sauce for the kale, tomatoes and kidney beans to swim around in.

I highly recommend this recipe, for Sunday Supper or any time. The flavor was out of this world! I sprinkled on some Frank's Red Hot and a bit of Daiya PepperJack, and it was perfection. Just what I needed to wrap up a nice weekend and prepare for another week. And I have lunch for a few days too!

Have a wonderful week everyone!

~BigSis

Roundup: Super Bowl Snacks, Soups, and more

February 4, 2012

BigSis and I have both mentioned more than once that neither of us are big football fans. Yes, we know that all Texans are supposed to be huge Dallas Cowboy fanatics and there was a time when we did cheer on our Cowboys, but not so much now.

We still can't let the Super Bowl come and go without mentioning what's most important; the food, the commercials and the half-time show.

I wasn't even planning on being near a television during Super Bowl but I'm a little curious to see Madonna's performance and, if my guys are around, you can be sure that I'll be cooking up some “football watchin” grub. Here are some of our favorites from past years!

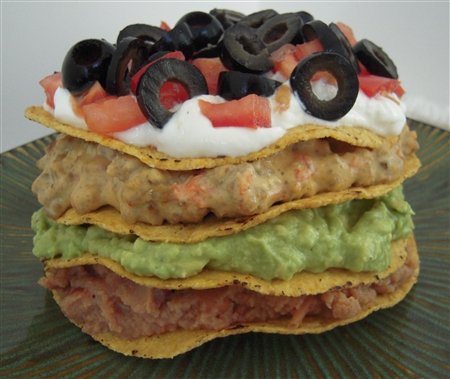
I put together this Super Bowl Super Tostada for my hungry guys last year using their favorite Velveeta and Rotel dip.

This Super Bowl Snack Attack that BigSis posted in 2009 includes some of our all-time favorite appetizers and snack food and dozens of other recipes from some of our favorite sites.  The photo above is our pasta salad which is always a hit! BigSis veganizes her version now, and it's still just as delicious!

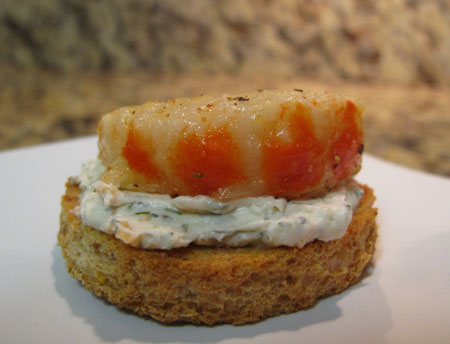
Super Bowl ShrimpToast

Here's a yummy vegan Shrimp toast from BigSis' 1 Quick Recipe: 4 Super Bowl Party Snacks from last year.

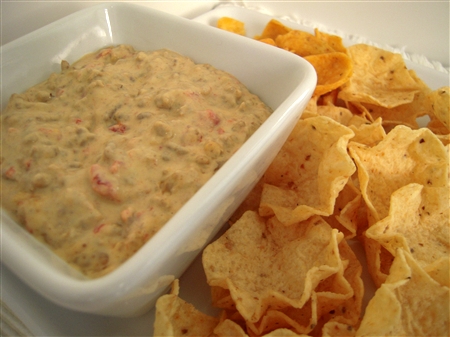
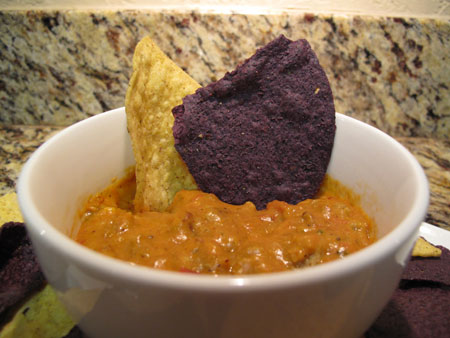
Super Bowl Vegan Queso

And here's BigSis' Vegan Queso with Seitan Crumbles, her version of a famous Bob Armstrong dip.

You can see all our favorite soups in this SOUPER Bowl for Super Bowl post from 2010.

Super Bowl Chili

Three years ago, I entered my chili recipe in the Ultimate Super Bowl Party Smackdown that was hosted by The Recipe Girl.

We hope this gives you a few ideas for your Super Bowl crowd. Have a great weekend and a safe and fun Super Bowl Sunday! 🙂  If you're like us, you don't care who wins the game as long as the football food is awesome!


~LilSis