A couple of new favorite MAC products.

March 3, 2012

I love BigSis' tutorial on Depotting the MAC Eye Shadows! Since my shadow collection is very similar to hers, with just over 50 of the adorable little pots, I'm going to try to find some time to depot mine soon.

My makeup drawers have become annoyingly messy, so I'm working on a little reorganizing project that I'll be sharing with you soon.

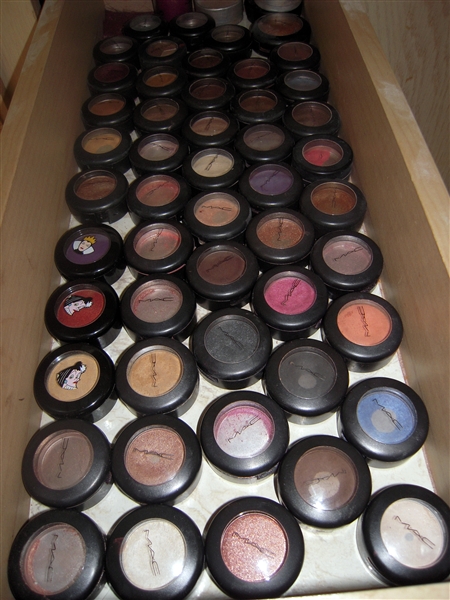
Here's what my MAC shadow drawer looks like now.

MAC Eye Shadows

As long as we're talking about MAC, I thought it would be fun to share with everyone a couple of my new favorite MAC products.

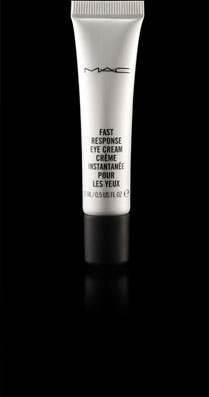
BigSis gave me a MAC gift certificate for Christmas and I had just run completely out of my eye cream, so I decided to give MAC's Fast Response Eye Cream a try.

MAC Fast Response Eye Cream

Here's what MAC says about their Fast Response Eye Cream:

The super-charged, caffeinated cream with instant effects. De-puffs, erases the look of dark circles, firms, soothes and softens skin around the eye. Special optics act like magic to fade away lines.

Sounds good, huh? Since this eye cream is caffeinated, I use it first thing in the morning and I use a different one at night. So far, I'm happy with the results I see from this Fast Response Eye Creme.

I've noticed some firming around the outside of my eyes and it definitely helps with the morning puffiness, which I seem to have almost every morning these days. And, most importantly, this eye cream doesn't leave my under eye area dry so my concealer still glides on nicely on top of it.

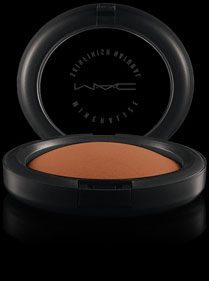
Another MAC product that I've been using for awhile that I really love is MAC Mineralize SkinFinish Natural.

MAC Skinfinish Natural

I used MAC's loose powder for years and besides the fact that it didn't last long enough, they made the container smaller so I stopped buying it.  For $29.00 versus the $23.00 for the loose powder, the Mineralize SkinFinish Natural compact is a much better bargain because it lasts so much longer.

It doesn't take much of this product to get nice coverage. I just swipe my big powder brush over it a couple of times and the powder goes on in a really nice matte finish. It evens out my skin tone so much better than the loose powder. There are about nine shades to choose from so there's something for everyone. My shade right now is Medium Dark and I love it! If you aren't happy with what you're using now, I would highly recommend giving this a try!

Even though I don't have quite the collection of empties that BigSis has now, I just discovered that I have six empties so it's time to head to the MAC counter to pick out a new lipstick. 🙂

If there are any other MAC fanatics out there that have a new favorite product or a favorite eyeshadow or lipstick shade that they'd like to share, we would love to hear from you!

~LilSis

Depotting MAC Eye Shadows

February 24, 2012

MAC eye shadows are like frisky little bunnies in my makeup drawer…they multiply! I knew that space in my drawer was getting pretty tight, but I was surprised to count over 50 wee shadow bunnies hiding in there.

I don't mind having that many, in fact I kind of love having a bunch to be honest. It's a fun little indulgence that isn't that expensive, and it's just good clean fun to add a new shadow to my collection.
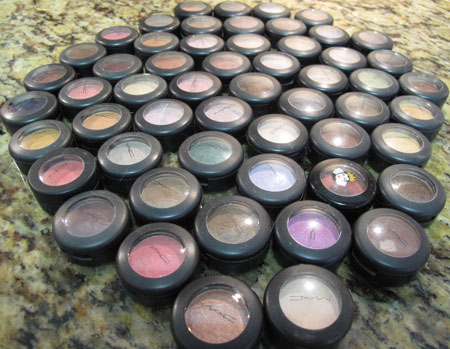
Mac Depot Stash Before

The problem is it's pretty impossible to remember what colors are hiding in the stack. And at 6 AM it takes more time than I have to dig around in the pile looking for that gray I think I have. The time had clearly come to depot my MAC eye shadow collection. To the Google we go for instruction! To the Google!

I found lots and lots of tutorials – both video and text – on depotting eye shadows of all brands, especially MAC. Some folks like to bake the pots in a low oven, some prefer waving a candle or butane lighter underneath the pot, and others use a clothing iron to toast the bottom of the pot. The method I chose was using a hair flat iron because it seemed the simplest and safest.

Before you get started, please heed my very serious warning…BE CAREFUL with this project! You're using two super dangerous weapons: a sharp knife and a hot iron. I'm a self-confessed klutz, and I just barely managed to avoid burning off a finger or all my hair.

However, I did stab myself lightly a few times and came close to really hurting myself until I figured out how to manage this process more gracefully. It reminds me of using one of those treacherous oyster knives to open an oyster shell, but you aren't wearing those big thick protective gloves to depot shadows. So please be careful!
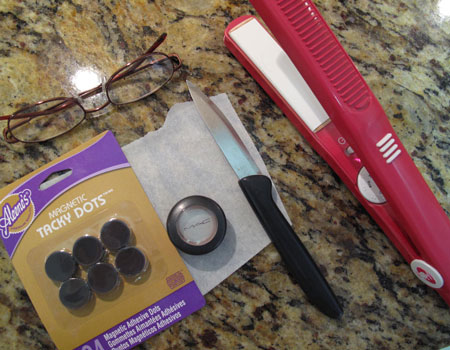
MAC Depot Tools

All you need for the flat iron method is:

  • a flat iron
  • a small piece of parchment paper to protect the iron from melty plastic
  • a sharp thin knife
  • a soft towel to use as a work surface
  • 3/4″ labels
  • 3/4″ thin magnets
  • reading glasses to see what you're doing if you're 40-plus like me

The first step is to get the plastic insert that holds the MAC pan out of the plastic case. This is the part where I was the biggest threat to my own life. What you want to do is wedge the tip of the knife in-between the plastic insert and the case, and pop the insert out. It's easiest to do that near the back hinge where the lid connects to the bottom part of the case.

Once the insert is out, place it face up on the parchment on the flat iron. I had my iron heated to around 370 degrees.
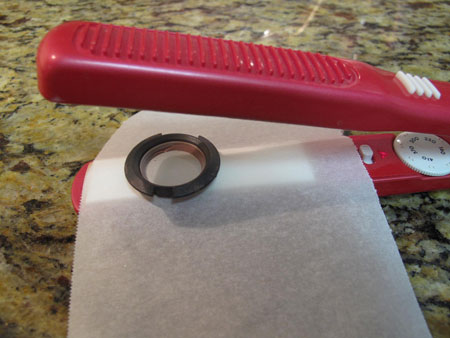
MAC Depot Iron

Once you get your rhythm going, you can do two at a time.
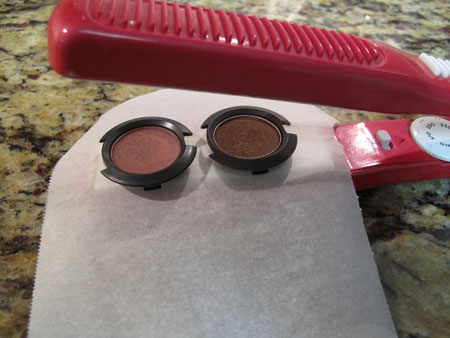
MAC Depot Iron 2

These guys are waiting their turn on the iron. That Barbie line was so awesome!
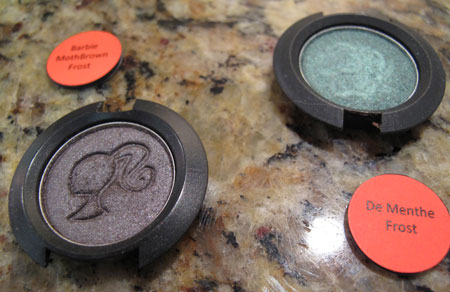
MAC Depot Waiting

Carefully lift the insert off the iron after 20 seconds or so, and check to see if the bottom of the insert is starting to soften. You're looking for a little dent in the middle of the insert.
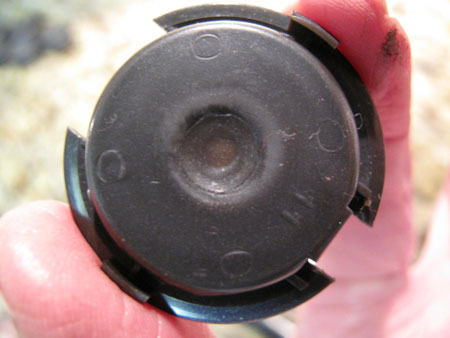
MAC Depot Bottom Dent

Once you see that, you can poke at the hole with the tip of the knife and try to gently pop out the eye shadow pan onto the towel. If the plastic is still too hard to do that, place it back onto the iron for a few more seconds. Keep checking it until the pan releases.
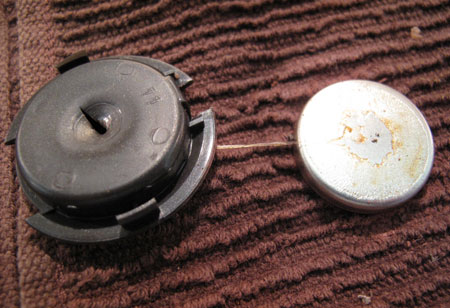
MAC Depot Pan Free

The pan is going to be really warm now, so again be careful. I snap the melty insert back into the case, and then put it aside. If you left it on the iron until it got warped, you might have a little trouble getting it snapped back into the case.

While the pan is still upside down, I like to place a self-adhesive 3/4″ magnet onto it. The warm glue on the back of the pan will also help it adhere.
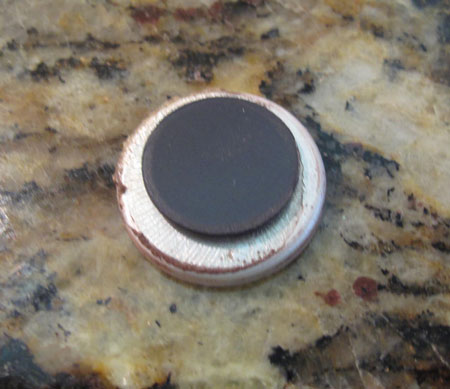
MAC Depot Magnet

Some people clean the back of the pan with q-tips and alcohol or makeup remover before adding a magnet, but I didn't think it was necessary. If there's a lot of glue and it seems like a big task to remove it all, you can rub a little baby powder over the cooled glue with your finger to neutralize the stickiness.

Some of the tutorials I read suggested removing the original MAC label from the bottom of the case and attaching it to the pan. I tried that but didn't love the result.

MAC Depot Black Label

The only thin magnets I found were 3/4″ and the original label is more like 1″ so there was a little awkward overhang. I also am not a huge fan of the black label because it's a bit hard to read, and if you've had the shadow for a while the label might be faded or worn, making it even harder to read.

What I used was a 3/4″ adhesive label from Avery. I had red so that's what I used. I think white would get grubby really quickly anyway.

You could hand-print the labels, but I like to laser-print them. They look really nice, but I also love that I have the label stored in my computer so if I ever want to replace a dirty label I print a clean one off in a jiffy. The Word document is also a nice little database of my shadows.  Yes, I am a little OCD, thanks for asking.
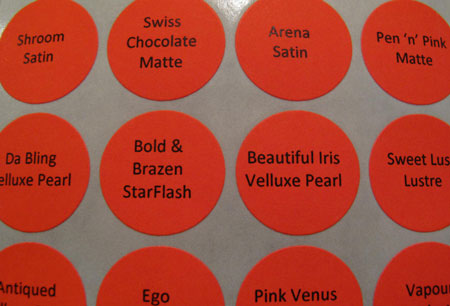
MAC Depot Label Sheet

I just peeled the laser-printed label off the sheet and attached it to the magnet on the pan.
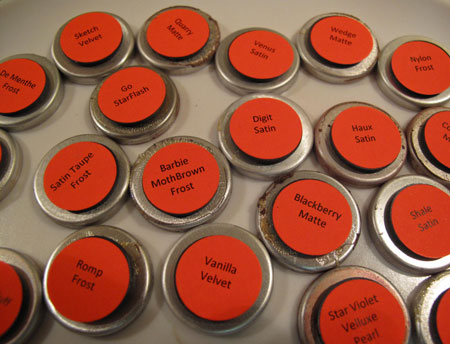
MAC Depot Backs

That's it.  Rinse and repeat a few dozen times til all the kids are depotted!

Once you have all the pans depotted and labeled, you need a palette to put them in. I bought 3 MAC palettes that were supposed to hold 15 shadows, but I pried the insert out and made room for 10 more shadows. I was a little impatient though, and just used a butter knife on my nice new palettes, and ended up scratching them a little. Oops! You'll be more careful than I was!

I since found out about another option called the Z Palette, which I might try next. The appeal of the Z Palette for me is that the lid is clear so you can easily see the colors inside. The downside is that some reviewers mentioned that the construction of the palette could be more sturdy.

After a little bit of time, my space-consuming collection was transformed into this neat compact stack that makes me very happy:
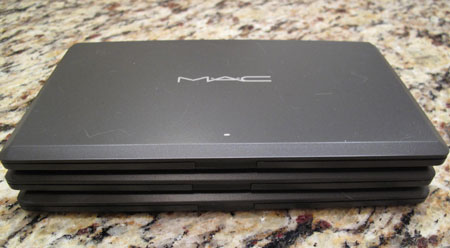
MAC Depot Palettes

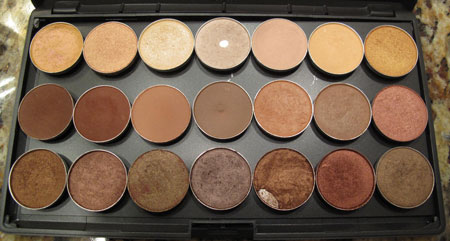
 This palette has all warm colors.

MAC Depot Warm Palette

This one has all cool colors. 

MAC Depot Cool

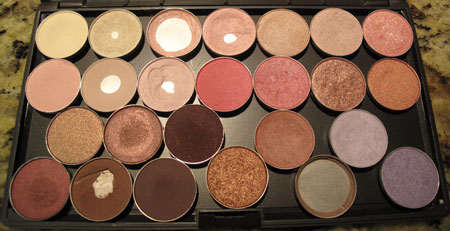
This one has grays, duplicate backups of favorite limited edition colors, and some random brights with room to add more.
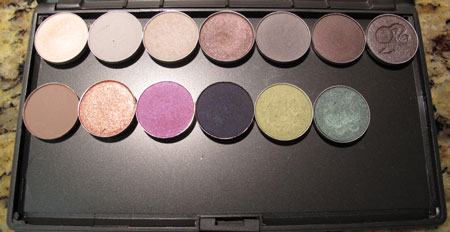
MAC Depot Spares

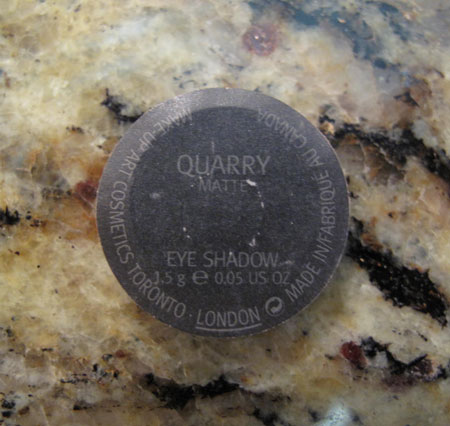
I had these guys leftover after the project:
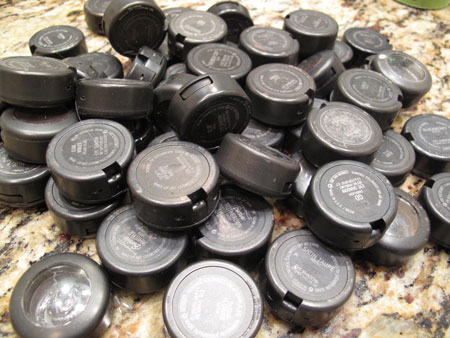
MAC Depot Empties

It might look like a pile of junk on its way to the recycling bin, but no! This pile is headed to the Back to Mac program. For every 6 empties you turn into a MAC counter or online, you get a free lipstick. If you return them to a MAC store though, you can choose an eye shadow or a lipstick. These empties will allow me to bring home 9 more new shadows for free! Wheee!!

Now I'm on a roll with a mission to depot all of my shadows. Next project: depot the few LaFemme and Stila shadows I have, and liberate all the other random pans whose packaging is taking up way too much room!

~BigSis

MAC Venomous Villians Mean & Green Nail Lacquer

October 23, 2010

I'm known for wearing some unusual colors on my toes but I haven't worn color on my fingernails in years. I usually just keep a clear coat on or maybe a pale, pale pink or an occasional french manicure for a special occasion.

We mentioned the launch of the MAC Venomous Villians Collection last month and luckily both of us got our orders in the day the collection was available online. If you wanted any of the awesome products in this collection you had to act fast because there were items already sold out on the very first day.

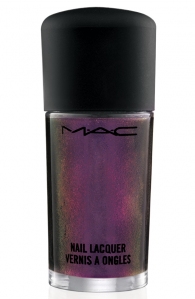
MAC Venomous Villians Mean & Green Nail Lacquer

MAC Venomous Villians Mean & Green Nail Lacquer

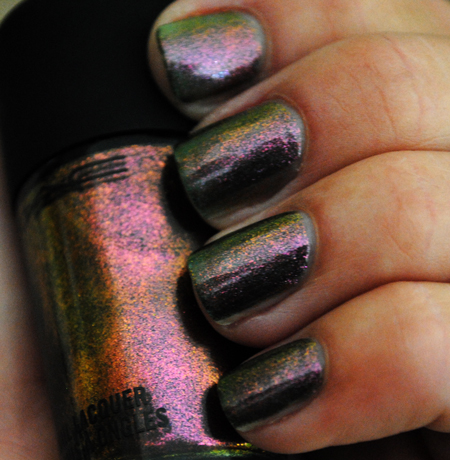
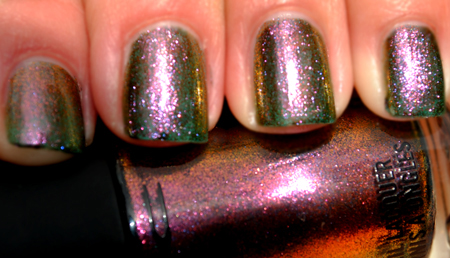
For some reason, I could not resist this Mean Green Nail Lacquer. The photos just don't do justice to this color. This duochrome polish has a green base filled with a shimmer that flashes rose, gold, copper and pink depending on how the light hits it.  The base color adds a greenish glow at the edges.

I definitely stepped outside my comfort zone when I put this color on my fingers, but I'm so glad that I did. 🙂

This one was taken outside in the sun so it really shows the sparkles!

(Thanks to my budding photographer, HayHay for helping with this photo shoot.)

~LilSis

MAC Cosmetics Venomous Villians

September 20, 2010

Listen up all you MAC lovers! Just in case you haven't already heard about the release of the new MAC Venomous Villains Collection, inspired by four favorite Disney villains, it's scheduled to be available in stores on September 30th in the U.S. and on October 10th internationally.

This YouTube video from temptalia's channel gives a great overview of all the products and the fabulous colors in this collection, not to mention the ADORABLE containers.

I just CANNOT wait to get my hands on some of these eye shadow containers! I think even after they're empty, I may have to hoard these cute little pots instead of turning them in to MAC for their recycling program. And, even though I'm a loyal OPI nail polish user, I'm going to have to try some of these nail polishes on my toes! They are some of the most amazing and unique colors!

I heard through the grapevine that sometimes MAC releases the products online a few days before the debut in the stores. It's probably safe to say that most of these products will sell out quickly, just like the ones from the Barbie and Hello Kitty collections!

So, if you love MAC products as much as we sisters do and if you've already got a little wish list from this collection, like we do, you may want to mark your calendar for September 28th to see if they're available online. 🙂

~LilSis

Fabulous Friday

May 7, 2010

I LOVE Fridays! Is there anyone out there that doesn't love Friday? For most of us, Friday marks the end of a hard work week and the beginning of a relaxing weekend! Right?

BigSis and I were talking the other day and we decided that since we both love our Fridays, we're going to try something new. We're going to take this day to share with you something that we find to be fabulous. And if it's something extraordinarily fabulous, we may have to call it Fantabulous Friday!
So, to kick it off today, here are a couple of things that I find to be quite fabulous!

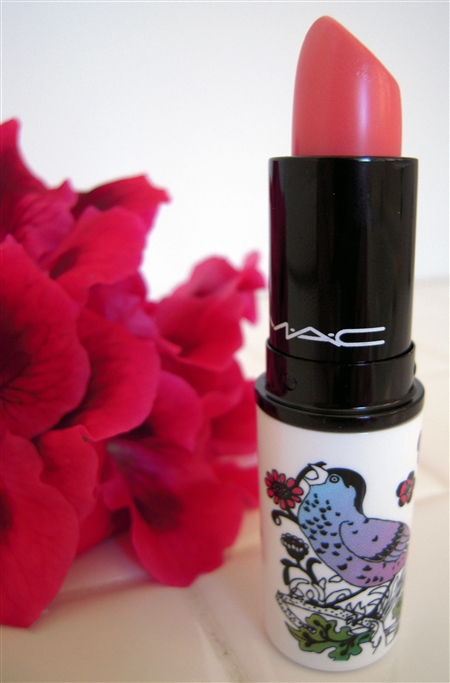
Ever Hip Creme Sheen from MAC Give Me Liberty of London Collection

Ever Hip Creme Sheen from MAC Give Me Liberty of London Collection

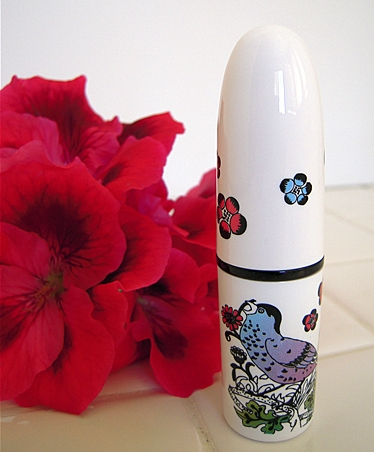
Not only is this limited-edition shade, Ever Hip, a perfectly fabulous color for me, but I find the glossy white case to be equally fabulous.

Ever Hip Creme Sheen from MAC Liberty of London Collection

Fabulously decorated case!

The case is decorated with an exclusively created flower and bird pattern for the MAC Give Me Liberty of London Collection. I don't know what I'll do with the case when the lipstick is gone, but I won't be recycling this one.

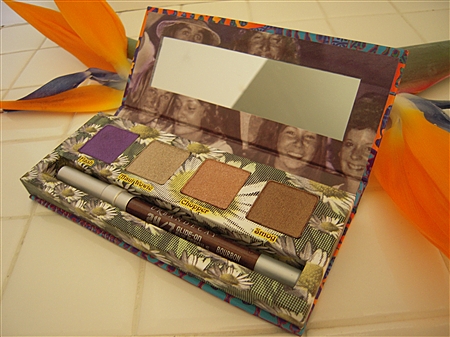
Urban Decay Summer of Love Shadow Palette

Urban Decay Summer of Love Shadow Palette

This Urban Decay Summer of Love Shadow Palette is nothing less than fabulous! This gorgeous palette was a surprise Mother's Day gift from BigSis that I just received in the mail two days ago and I'm already madly in love with it!
Urban Decay Summer of Love Shadow Palette

Sexy, Shimmery, Silky-Soft Shadows!

I tried one of these shadows when we went out Wednesday night and I can tell you that this eyeshadow is going to give MAC some competition! This lovely palette came with a fabulous 24/7 Glide On Pencil and travel size Sin Eyeshadow Primer Potion. The mirror and the magnetic cover are also fabulous, so what more can I say?

Borrego Spring Resort Pool

FABULOUS!!

And lastly, today is an especially fabulous Friday for me because this is where I will be today. 🙂

We'll be in the desert for a Father Son Golf Tournament and I will be by the pool in the fabulous ‘almost 100 degree' weather catching up on some magazine reading while the guys are golfing. I couldn't ask for a better way to spend two days! 🙂

I hope you have a Fabulous Friday!

~LilSis
MAC Cosmetics Free Shipping & Free Gift Wrap

December 10, 2009

mac-holiday1

If you LOVE, LOVE, LOVE MAC products like we do, you've probably already visited the nearest MAC store or gone online to check out their 2009 Holiday Collection. MAC never disappoints! Once again, they have some beautiful products that are only available for a limited time.

mac_holiday_collection

If you still have someone on your Christmas list that you'd love to surprise with a sparkly, shiny gift from MAC, you'll want to hurry to take advantage of this deal!
MAC Cosmetics is offering free standard shipping on any purchase AND free gift wrap until 11:59 p.m. EST on Sunday, December 13th.  To take advantage of the free gift wrap, use code GIFTABLE09 at checkout.
Happy Shopping! 🙂

~LilSis

Help! I need a lipstick with some staying power!

November 4, 2009

I've said it before, but I'll say it again, I don't like wasting a bunch of money trying out new beauty products unless something is highly recommended to me by someone who has actually used the product and has had proven results.

That's the main reason I buy my hair products at my hair salon instead of wasting money at the drug store. You can try out a new shampoo, conditioner or styling product and know that you like it before you buy it.

When I find a beauty product or a brand that works for me, I'm a very loyal customer! I'll stick with it for years, like I have with all these:

But, one thing I CANNOT seem to find is a lipstick that stays on for more than half an hour!  I still buy MAC lipsticks and MAC glosses because I love the colors but I need something that will last!

A few weeks ago, before our trip to Vegas for BlogWorld, I popped in Ulta as a last ditch effort to try to find a long lasting lip product. I ended up walking out of the store with two new products.

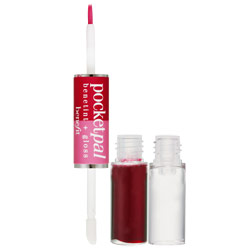
Benetint Pocket Pal

Benetint Pocket Pal

After listening to the sales person at the Benefit counter rave about this product, I end up buying this Benetint pocket pal. This product receives great reviews on Sephora and the salesperson went on and on about it.

Benefit claims that this is the original and still the best lip tint and cheek tint available. This stuff didn't work for me and it wasn't cheap! I'm still trying to decide whether or not to return it to Ulta.

It was okay on the cheeks, but not that noticeable and not what I had intended on using it for when I bought it. It appears very dark red in the bottle and is a very thin liquid so it goes on more like a light pink, not red. The sales person told me that you can apply one coat, let it dry, apply another, and another, and keep repeating until you get the desired shade.

I probably tried it on four or five occasions when I applied three or more coats of the tint, then applied the gloss and within a very short time, all that was left was a slight tint remaining in all those little lines in your lips. (Not the look I was going for.)

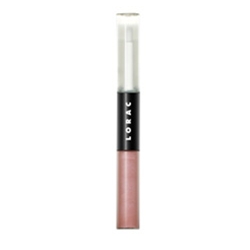
Lorac 8 Hour Long-Wearing Lip Color

Lorac 8 Hour Long-Wearing Lip Color

The second product I ended up buying was this Lorac 8 Hour Long-Wearing Lip Color and Ultra Glossy Top Coat.

I'm not as disappointed in this product as I am with the Benetint, but it's just okay. It goes on smoothly and I like the top coat that goes on with a brush instead of a sponge, but it did NOT last 8 hours on me.

So, back to square one!  I actually know women who have had lip liner and lip color tattooed on their lips! Ouch!! I don't think I'm willing to go to that extreme!

So, here's my plea for help!  If anyone reading this has found a great lipstick with some real staying power, please share it with us! Pretty, please? 🙂

~LilSis

Three Beauty Products that I can’t live without.

October 7, 2009

I was originally going to call this post “The one beauty product that I can't live without”, but as it turns out, I actually have three. To qualify as a product that I absolutely cannot live without, it has to be one that I NEVER EVER go without using, not even for just one day. Here are my three.

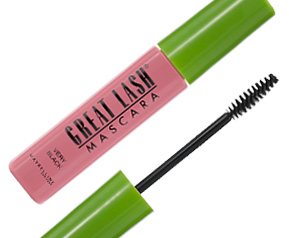
Mabelline Great Lash Mascara

Mabelline Great Lash Mascara

In number one position is my Mabelline Great Lash Mascara.  If I had to narrow it down to just one product, this would be it. I don't care if I don't have on another stitch of makeup, but I CANNOT leave my house without my mascara.

MAC Select Sheer/Loose Powder

MAC Select Sheer/Loose Powder

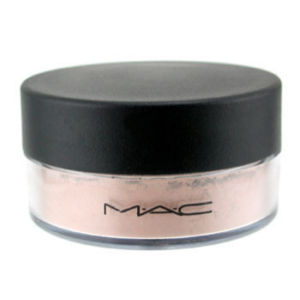
And in second place is my MAC Select Sheer/Loose Powder. I should have gone to Macys days ago when I noticed that my powder was running low but I thought I could stretch it a few more days until I could make it over to the mall.  When I took the lid off of the container to try to get the last few flecks of powder from the bottom, it was already gone! I did have a little meltdown but I managed to survive until I could get to Macys later that day.

Donna Karan Cashmere Mist Deodorant

Donna Karan Cashmere Mist Deodorant

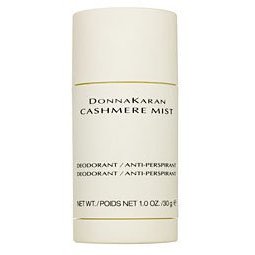
And the third product that I can't go without for even one day is Donna Karan Cashmere Mist Deodorant.  I recently talked about how much I LOVE this deodorant.  I ran out a few weeks ago and had to use something else that morning before my walk and it was such a noticeable difference. I can't live without this deodorant!

By narrowing this list down to three, I had to be very choosy. If I wanted to make this a list of five, I would add Relastin Eye Silk and Borba Firming Diamond Shimmer Contour Creme to the list. Oh, and I really couldn't live without my Origins No Puffery. I probably should have made this a Top Ten list!

Are there one or two or ten products that you can't live without? I'd love to hear about yours!

~LilSis

How to Shampoo your Makeup Brushes

September 2, 2009

When was the last time you shampooed your makeup brushes?

I was recently at a MAC counter picking up my favorite loose powder when I decided to ask the Sales Person a quick question about my powder brush. The brief conversation went something like this:

Me: “Do you think that it's time for me to get a new powder brush if I'm noticing that bristles are falling out and ending up all over my face when I'm applying my powder?”

Sales Person: “No, not necessarily.  When was the last time you gave your brushes a good shampoo?”

Me: “Hmmm… I guess it would be bad if I said never?”

Sales Person: “Yeah. That could be the problem.”

Me: “Oops.” (as I lower my head in shame.)

I proceeded to tell her that I do occasionally use the MAC Brush Cleanser but that no one ever told me that I needed to shampoo my brushes. I asked her a few more questions and bought a few more items so she wouldn't be so disgusted with me, then I headed home, with my tail between my legs, to shampoo my brushes.

Apparently, most experts suggest cleaning them once a week, but every couple of weeks is better than not at all. Cleaning your brushes more regularly will not only extend the life of the brush but also could prevent some skin problems. Dirty makeup brushes can harbor lots of dirt and bacteria, but frequent washing of your brushes can keep them, and your face, clean and healthy.

It really is simple. Let's do this step by step, shall we?

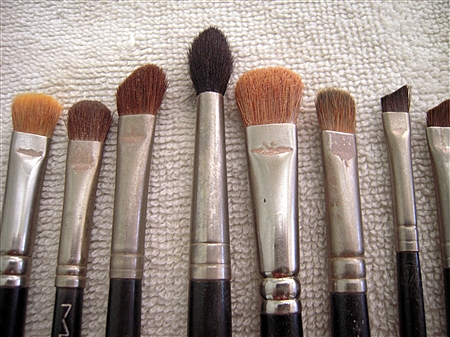
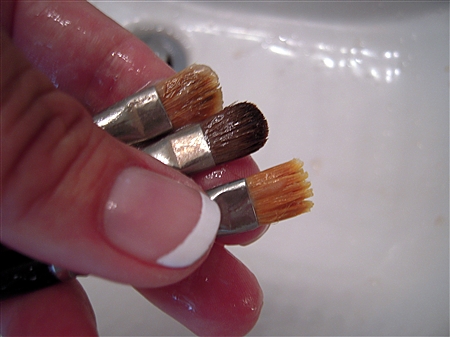
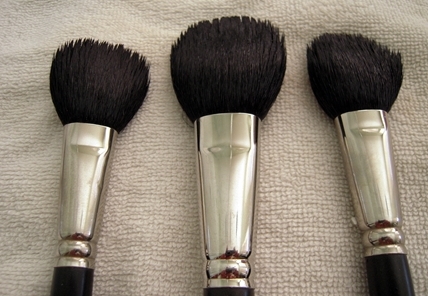
Dirty Brushes

Dirty Blush Brushes

First, gather your dirty brushes.

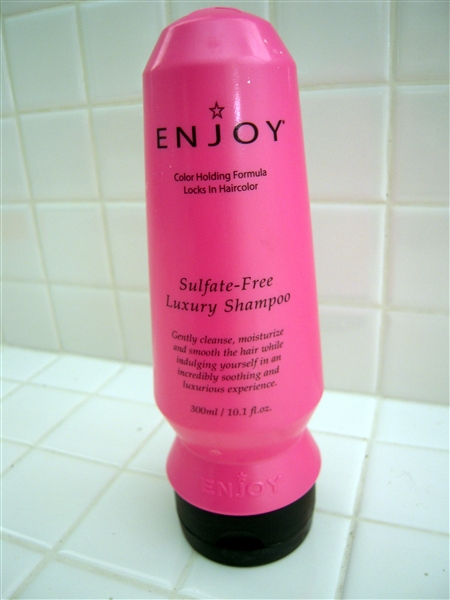
Enjoy Shampoo

And your favorite shampoo.

Wet brush

To get started, wet each brush thoroughly.

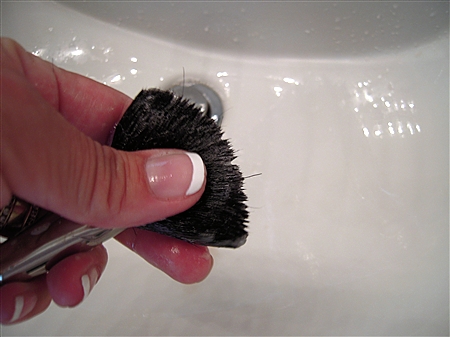
Shampoo Large brush

Then, apply one to two drops of shampoo directly to each brush and gently massage the brush in between your fingers or in the palm of your hand. Do this for at least a minute or two to get all the makeup and dirt out of the brush. The bigger brushes should be cleaned one at a time.

Shampoo Small Brushes

But, you can wash a few of the smaller brushes at the same time.

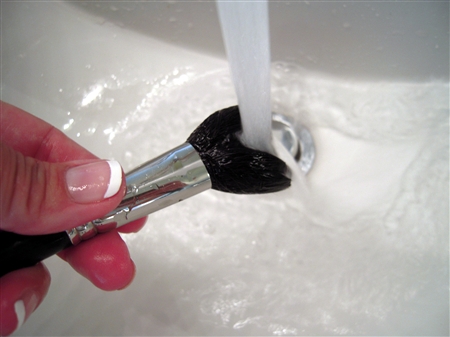
Rinse

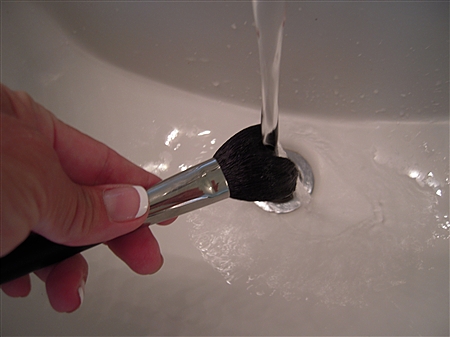
Rinse each brush thoroughly. It's very important that you rinse each brush well so you don't leave behind soap residue, dirt, or bacteria. You can gently massage the bristles if needed, but be careful not to pull on the hairs.

Pat dry

Remove excess water and pat dry on clean towel. You can gently squeeze the brush in between the towel, if needed.

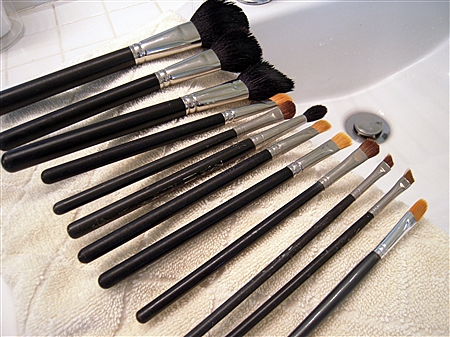
Drying Brushes

Lay the brushes on a towel to dry overnight. It's important to lay the wet brushes flat or even pointed down at an angle. Don't ever stand them up to dry. Some of the water could run into the bottom of the bristles and damage your brush.

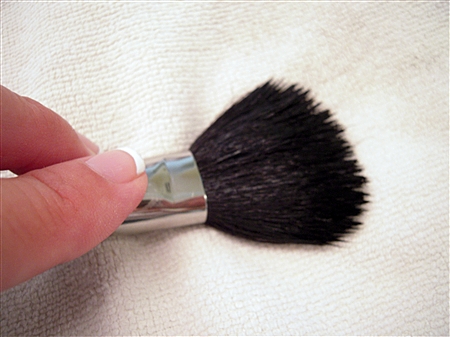
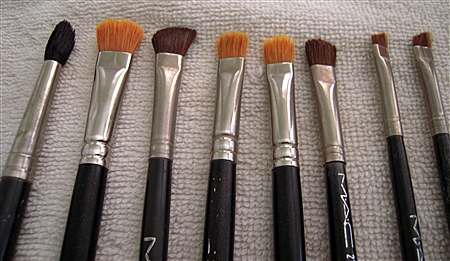
Clean big brushes

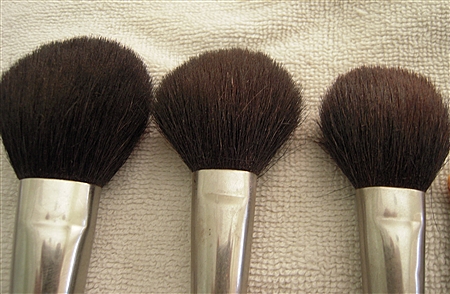
Take a closer look at these after they were shampooed.

Clean brushes

They look 100% better than the ‘before' photo!

Check each brush before you use it to make sure that it is completely dry. If the brush is still damp, then don't use it, and whatever you do, do not use a hair dryer to dry it.

Now, wasn't that easy? I sure wish that I had known to do this sooner. I can't wait to use my clean brushes in the morning!

~LilSis

Free Shipping on MAC

July 22, 2009

Colour Craft Collection Look

Colour Craft Collection Look

I really don't know many people that could pull this ‘Look' off without ending up looking like a clown, but when you go to the MAC website, you can see what it actually looks like on their model. It must have been a very creative makeup artist that came up with this idea.  The ‘Look' is showcasing some of their summer Colour Craft Collection, which has some awesome new shadow and lip colors.  I'm sure there are more subtle ways that you can wear these same colors!

While I was on their site, I discovered their adorable new Summer Trend Bags! I love animal prints and I've never had an animal print make-up bag so I might have to buy myself a little treat.  And guess what? MAC happens to be offering free standard shipping right now! Score!

To make sure you don't miss out on this offer, you have to make your purchases online by 11:59 p.m. EST on July 24th!  There is no minimum purchase and no offer code required.

And if you have a hard time waiting days to receive your order, like I do, you can upgrade to 2nd Day Shipping for $5.00 or Overnight Shipping for $10.00!

~LilSis