Loving Hut Vegan Cafe Review

April 1, 2011

Loving Hut

Do I have a surprising food find to share with you!  And guess what, LilSis?  There’s one in your hood!

I’m talking about Loving Hut, a casual and inexpensive vegan cafe. They don’t use any MSG, dairy, eggs, or any animal products at all.

So if food is super-affordable, fast, full of veggies and protein, and cruelty-free, is it doomed to taste like an old shoe?  An old stinky shoe?

Absolutely NOT, if you eat at Loving Hut!

I just spent a week in Houston on business with a couple of my girls from the office: one pescatarian and one omnivore.  Plus me: 99% vegan for 15 months so far and vegetarian for 17 years.  We stumbled upon Loving Hut (thanks to UrbanSpoon) and decided we were all up for a food adventure; for better or worse!

We ordered a feast of dishes to share, and actually had to put some of our food on another table.  Here’s what we ordered and devoured:

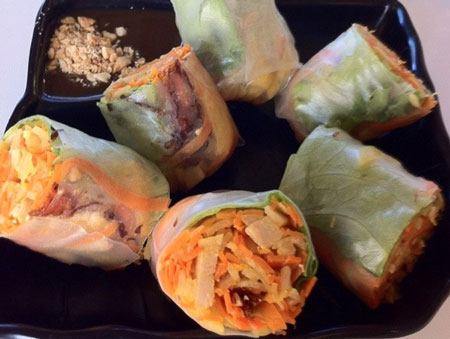
Loving Hut Spring Roll

Spring Rolls: Good, but fairly ordinary and a bit bland.  Very carroty!  The jicama was unexpected, and the tofu unnecessary.

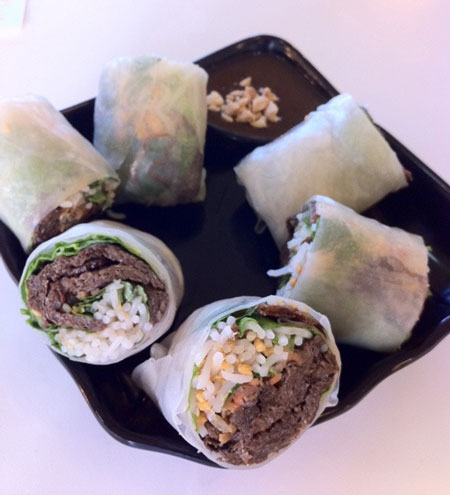
Loving Hut BBQ Roll

BBQ Roll: Love love love these!  Wow!  This subtle little combo of vermicelli, peanut, lettuce and BBQ soy protein blew all three of us away.  I don’t know what that orange stuff is, and I don’t care.  I just want more of it.  Maybe it’s carrot?  All I know is it isn’t cheese and that’s all I need to know.  When I get to Arlington’s Loving Hut, they better have these. I mean it.

Loving Hut Fabulous Pho

Fabulous Pho: Our least favorite dish of the night, but pretty! The broth was a little too perfumey for us.  It seemed to be a well-done dish, just not to our taste.  The flavor tasted strongly of cinnamon basil to me, and was a little more enjoyable when the spicy condiments were added, but we still didn’t love it.

Loving Hut Sweet Sour Divine

Sweet and Sour Divine: Delicious!  I wished for more soy protein and pineapple, with less carrots, onions and peppers, but the flavor was great.  I’m not usually a sweet and sour fan, but we all liked this.  I suspect it was pretty high in calories though, so this wouldn’t be my go-to dish.  Our pescatarian was crazy about this dish.

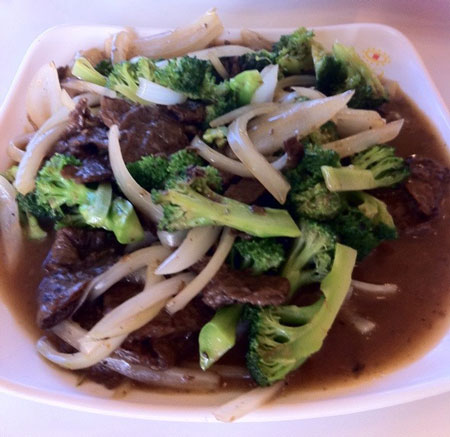
Loving Hut Noble Broccoli

Noble Broccoli: Who could tell this wasn’t beef and broccoli? Certainly not our omnivore who always orders it in Asian restaurants!  I loved that the broccoli was cooked perfectly: not too crunchy but not overdone.

Loving Hut Mongolian Wonder

Mongolian Wonder: I ordered this really spicy, but light on the ginger since I think it can dominate.  I would order this again.  The flavors were perfect over a little pile of brown rice.  The rice was a touch sticky, but it didn’t slow us down.

Carrot and Apple Juice: I’m not a fan of raw carrots at all, so it was a big step outside my comfort zone to order carrot juice.  This was an adventure though, so I went for it.  The carrot and apple blend was actually tasty and I finished the whole glass.  I think I would have loved it even more if it had been colder.

Jasmine Iced Tea: We all agreed this drink was a little bitter. Maybe a touch of sugar would have helped, but it might have just been transformed into bitter sweet tea.

Sunny Forest: What a light refreshing summer drink this was! We’re still not sure about what the “zesty petals” were, but we loved this blend of orange juice, mint and sparkling water.

Out of all these dishes, the only things we weren’t in love with and wouldn’t order again are the Pho and Jasmine Tea.  The good news?  We have a Loving Hut in Arlington, which is where both the girls live.  We don’t have one in Big D yet, so for now I’ll have to make a small road trip to A-Town.  To get another order of those BBQ rolls that I can’t stop thinking about, it’s worth it!

There are bunches of Loving Hut locations in the United States. Look for them in Arizona, California, Florida, Georgia, Hawaii, Illinois, Ohio, Massachusetts, New Jersey, New York, Pennsylvania, Texas, Virginia and Washington.

There are also locations internationally.  Each location has their own menu, so check out the web site for your local Loving Hut menu, if you’re lucky enough to have one nearby.

LilSis, you have a few Loving Hut locations to choose from in Southern California.  Take your meat-eatin’ boys there and see if they like it!

I know that this kind of food isn’t without some downside: it usually has high sodium content and can be high in fat due to the oil used.  But for a vegetarian or a vegan, it’s a fantabulous thing to have a quick meal option that actually contains a vegetable or two, and not just beans, bread and lettuce. If you’re grabbing an occasional fast meal as opposed to making it a daily habit, I think Loving Hut is a great option!

~BigSis

Origami Gift Packaging for Painted Glass Marble Magnets

March 23, 2011

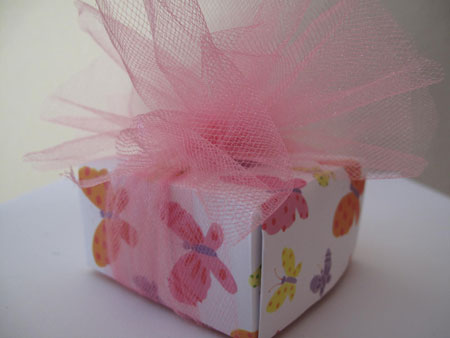
Origami Box Tulle Done

Last time, I showed you how to make painted glass marble magnets, and I promised to show you how I package them for gifting, so let’s get started.  We have a lot of cute stuff to do!

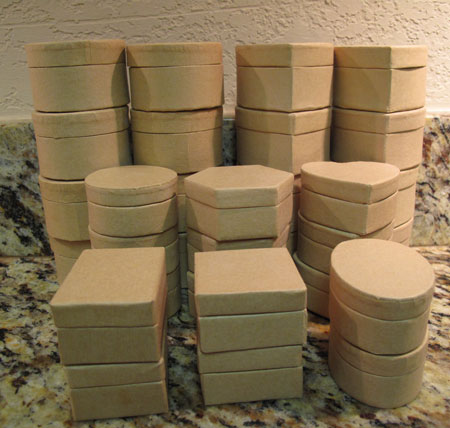
The first component is the paper mache boxes.  Here’s what you need:

Glass Marble Paper Mache Boxes

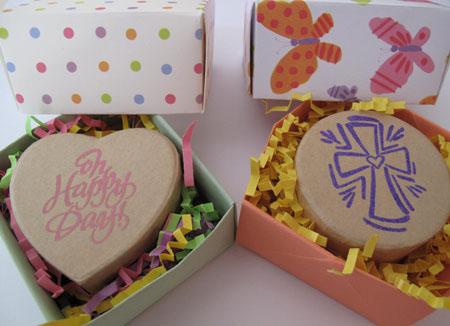
  • Paper mache boxes: I like the smooth paper wrapped ones that you can find at most craft stores.  They usually come in a couple of small sizes, and if you’re lucky you might find them packaged in lots of 6 including a heart, circle, oval, square, octagon and rectangle.
  • Parchment paper or round labels, and laser printer
  • Glue: Any glue suitable for paper, like Sobo or Elmer’s

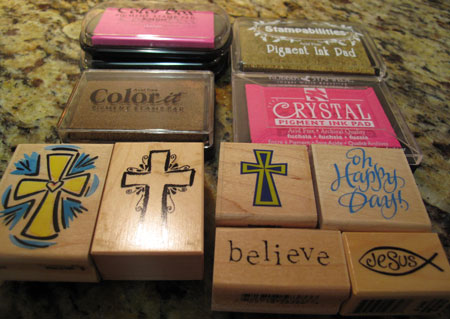
Glass Marble Stamps

  • Stamps: I painted crosses on my marble magnets, so I’m keeping with that theme with my stamp choices.
  • Pigment ink pads
  • Embossing powders
  • Embossing heat tool
  • Tongs

Make the scripture circles:

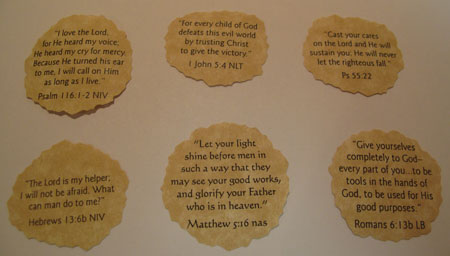
Choose any scripture (or quote) that you like and type it up.  You can do it two ways.  You can buy a sheet of laser-safe Avery round labels and use the formatting template that comes with them in order to line the text up with the labels.

I like to go another way.  I print my scriptures on tan parchment paper to coordinate with the natural color of the paper mache boxes. I think I’ve seen kraft-colored round labels online, but I’ve never ordered them.

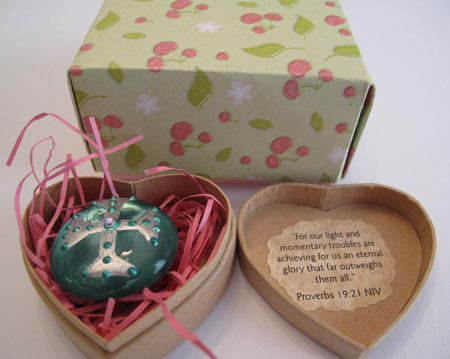
Glass Marble Scriptures

Use software that will allow you to draw circles; I use an old copy of Adobe PageMaker, but PowerPoint or a drawing program will work. Draw a bunch of circles on your page (check the size of your box lid to determine the circle size), fitting as many as you can on one sheet of paper.  Then type your scriptures into the circles, and print them out.  Carefully cut out the circles just inside the lines with scissors.  I like to use deckle-edge scissors for an uneven shape.

Add a bit of glue to the back of the parchment circle, smear it around evenly, and place it on the inside lid of your box.  Smooth it down so all edges will adhere.  Allow to dry completely.

Glass Marble Paper Mache Box Msg

Decorate the top of your boxes:

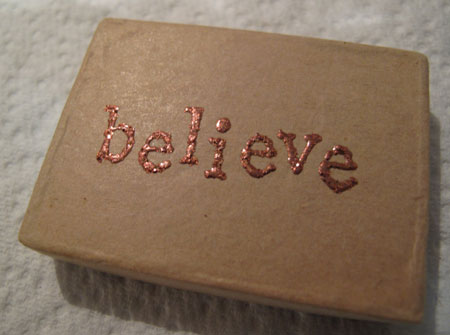
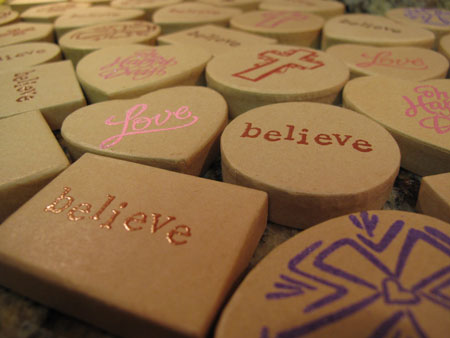
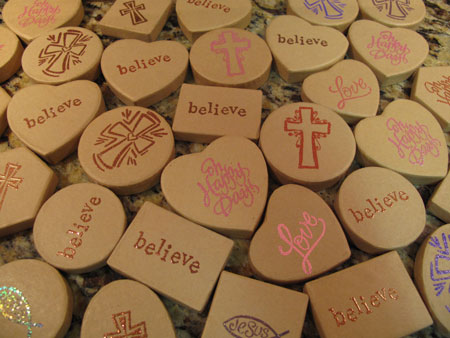
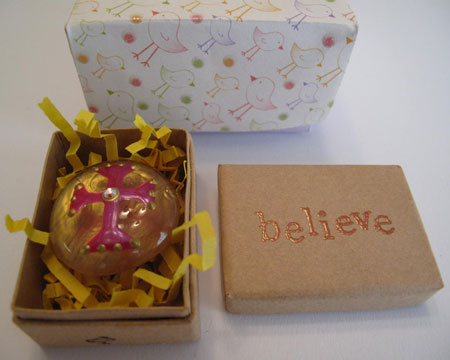
Glass Marble Believe

Choose a stamp that will fit the size and shape of your box.  I’m in love with this “believe” stamp.  if I ever got a tattoo, it would probably look like this “believe”!

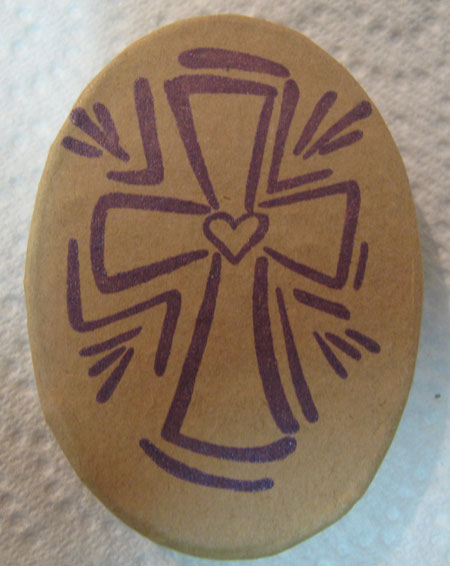
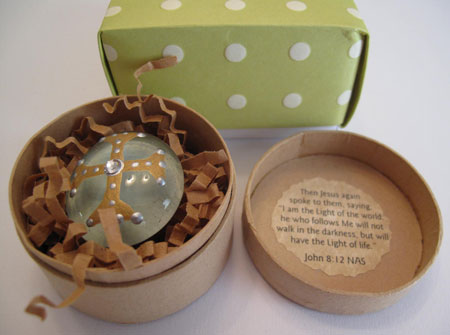
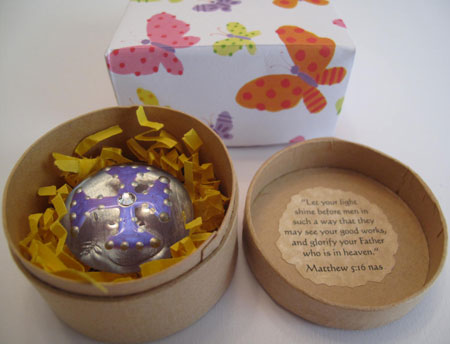
Glass Marble Purple Cross

Apply the pigment ink to the stamp and then apply the stamp to the box with even pressure, but don’t press down too hard or you’ll crush the box.  Try not to rock the stamp back and forth. Lift the stamp carefully off the box.

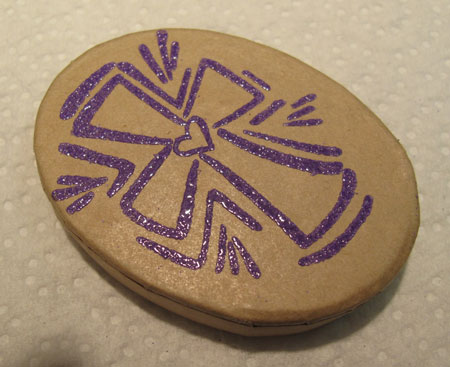
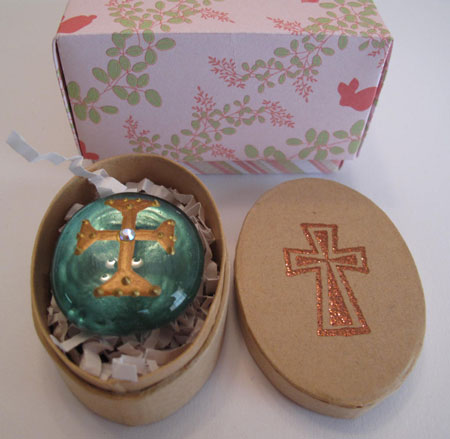
Glass Marble Purple Cross Embossed

Sprinkle a generous amount of embossing powder all over your stamped design.  I like to do this over a paper plate to catch the excess.  Use a different plate for each color of embossing powder. When you’re finished, just bend the paper plate into a pointy little funnel and pour the powder back into the jar.

I’m crazy about a couple of embossing powders from Stampendous: Pearlized Carnelian (it turns all gold and gorgeous when heated) and Copper Tinsel (it goes all shimmery glittery).  I love how they look on the paper mache.

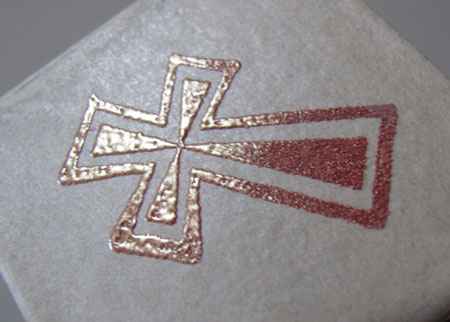
Glass Marble Emboss Color Change

Holding the box top with tongs, turn on the embossing heat tool. Hold it a few inches away from the stamped image, and move it back and forth until you can see the embossing powder has melted evenly all over the image.  It won’t take very long;  maybe 10 seconds, depending on the stamped image.

Some powders – like the Pearlized Carnelian ad Copper Tinsel – will magically change color.  Be aware that some powders are very susceptible to scorching if they are heated too long, especially the glittery ones.  I’ve done it, so learn from my mistake!

Glass Marble Paper Mache Box

Your paper mache box is finished! The bottom of your box is still blank at this point, so you can write something there (“Love, BigSis”), or glue on another parchment circle with a message on it (“Merry Christmas 2011”).

Now for the origami box you’ll snuggle the paper mache box into!

All you’ll need for the origami box is cardstock, a paper trimmer, a bone folder, two-sided tape, a ruler and a pencil.  Easy enough, right?  If you’re a scrapbooker or a cardmaker, you already have these supplies on hand.

You’ll need two pieces of cardstock for each box.  You can use solid colors, coordinate a printed top with a solid bottom, or use two coordinating prints.  With the paper trimmer, cut one 8-1/2″ square for the top, and one 8″ square for the bottom.  This will give you a finished box top that is about 3″ square, and a bottom that is about 2-13/16″ square.  I’ve seen some stacks of cardstock at the craft store that are already 8-1/2″ square, and that would be perfect for this project.

Origami Box How 1

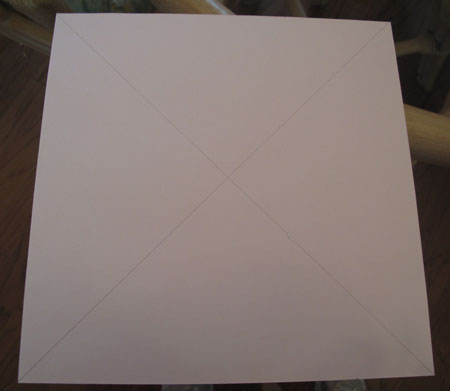
With a ruler, lightly draw a diagonal line in pencil from corner to corner.  Some tutorials for this box will have you fold the paper corner to corner, but that will leave an “X” shaped crease on the top of your box, and I like for my box to be smooth, smooth, smooth on all 6 sides.

Origami Box How 2

Working on the wrong side of the sheet, take one corner and fold it up to the place where the two pencil lines meet in the middle of the page.  Unfold.  We’re going to call that fold you made the “first crease”.  Do the same thing for the other 3 corners, so you’ll have a “first crease” for all 4 corners.

Origami Box How 4

Next, take a corner and fold it up past the middle of the page to meet the “first crease” at the pencil line.  Unfold.  Do the same thing for the other 3 corners. Each time you make a fold, crease it down sharply with the bone folder or the edge of a pen.  Doing this will make the shape of your box more crisp.

Origami Box How 6

For your last fold, take a corner, and fold it down to meet the “first crease” that is closest to it.  Unfold.  You’re not going across the middle of the page for this fold.  Do the same thing for the other 3 corners.

Origami Box How 7

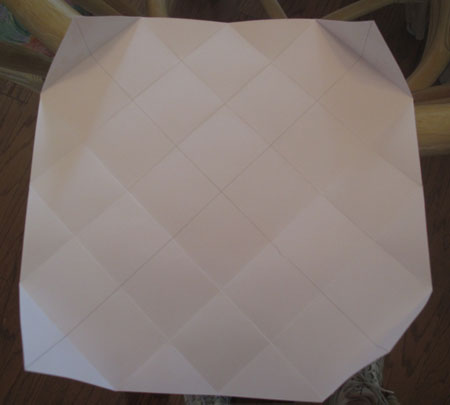
So, you made 3 folds with all 4 corners:  up to the middle of the sheet, across the sheet to the “first crease”, and then down a tiny bit to it’s own “first crease”.  Your page should look like this.  You have a nice grid of even squares, with a bigger square in the middle.  This is your box top or bottom.

Origami Box How 8

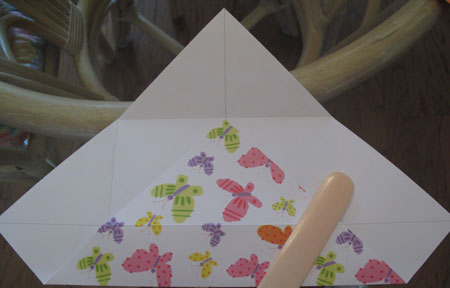
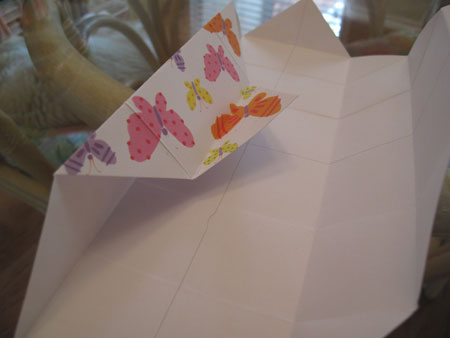
Now we’ll take this creased piece of paper and turn it into a box. You’re going to fold two opposing sides of the page into a little valley shape, as you see in the photo.

Origami Box How 9

Add a tiny bit of double-sided tape to the bottom of the point, so it will stay in place on the bottom of the box.  Do that for both sides. Do you see the box taking shape?

Origami Box How 10

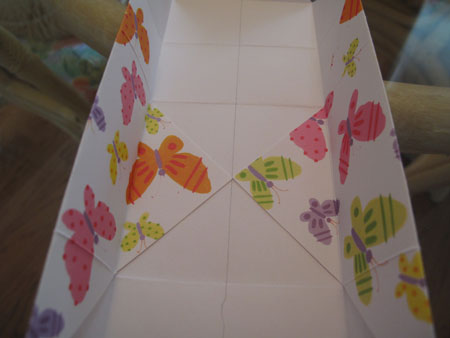
On the ends, you want to have a smooth finish so you need to make a “valley fold”, tucking the end pieces under.  This is hard to describe in words, so please see the photo below.

Origami Box How 11

Attach tape to the bottom of these points on each end, and adhere to the bottom of the box.  It might help to run the bone folder along the top edge of the box, to get a nice sharp edge there.

Origami Box How 12

Voila!  You just made a box out of nothing but paper and a bit of tape!  All you had to invest was about 8 minutes of your time per box!

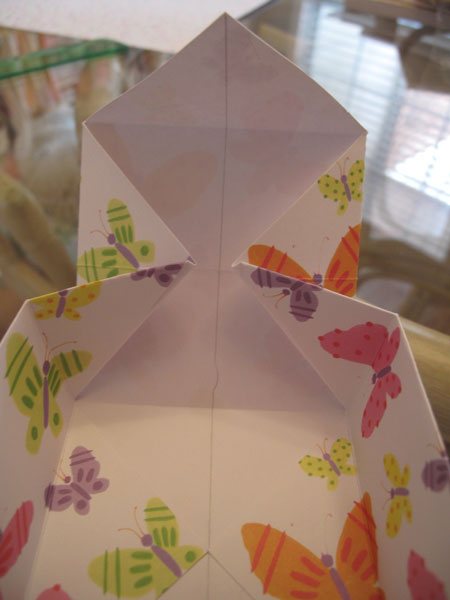
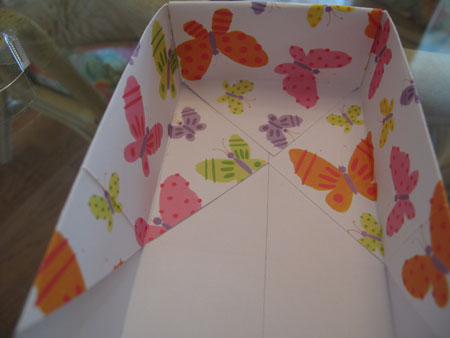
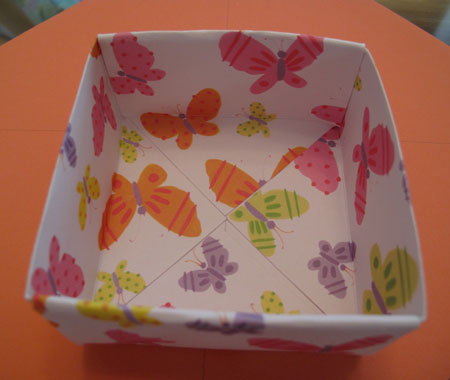
Origami Box Butterfly Inside

This is the inside of your box…

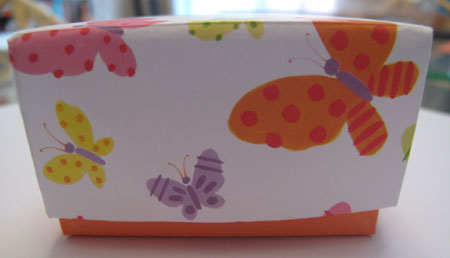
Origami Box Butterfly Done

one side of your completed box with it’s solid orange bottom…

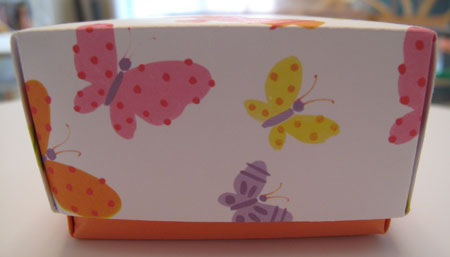
Origami Box Butterfly Done Side

and the other side.

You have all of these cool components; what do you do with them all?

You have painted glass marble magnets…

Glass Marble Done Group 2

paper mache boxes…

Glass Marble Paper Mache Boxes

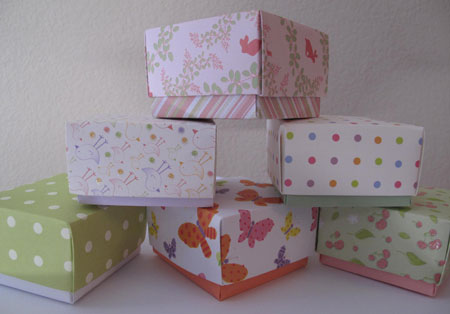
and origami boxes.

Origami Boxes Done

Let’s put them together into a beautiful little gift that some lucky person will adore!

Origami Paper Mache Open 1

Origami Paper Mache Open 3

Origami Paper Mache Open 4

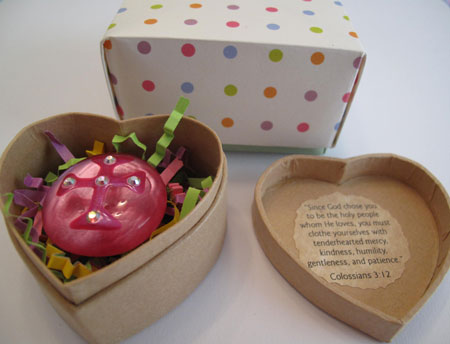
Take a paper mache box, add a little paper shred, and choose a marble.

Origami Paper Mache Open 5

Origami Paper Mache Open 6

Origami Paper Mache Open 7

Tuck your paper mache box into a drawstring bag.  Some of the bigger boxes won’t fit, but that’s ok.

Origami Paper Mache Closed 1

Origami Paper Mache Closed 2

Origami Paper Mache Closed 4

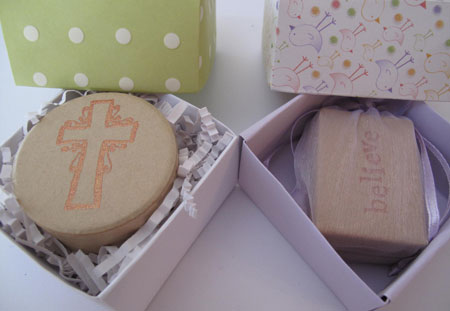
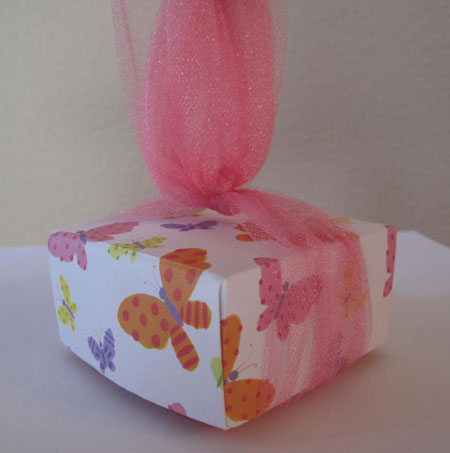
Place the paper mache box into the origami box, adding a little more shred around it if you want to.  Put the top on, and add a tulle bow.

Cut a piece of tulle that coordinates with your box color.  For this 3″ box, I used a piece around 6″ x 30″.  You want plenty of it to get a pretty full effect.

Origami Box Tulle Up

Tie the bow on as you normally would, and then cut the loops. Pull the cut loops and the loose ends straight up, and cut them straight across to be even. Pull each of the 6 ends out to open them up, and arrange into a poofy bow. Ends cut shorter will make a tighter looking “poof”, while longer ends will look fluffier.

Origami Box Tulle Done

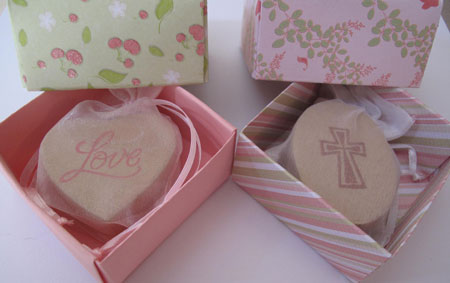
There you have it!  Your pretty painted glass marble magnet is nestled in shred inside a box with a message inside a box with a bow!

Before I go, I want to give you some ideas on what you can do with these.  Of course, you could sell them.  I sold several hundred to an organization for their annual meeting a while back. Each participant got their own as a thank you gift for attending. I’ve also sold them a few at a time for Christmas gifts; they make awesome stocking stuffers and gifts for pet sitters, hairdressers, coworkers, or your kids’ friends.  They’re also great little non-edible treats to tuck into Easter baskets.

My favorite thing to do with these is to randomly give them away. One year on Valentine’s Day, I took a whole bag of  them to the cancer floor in a local hospital, and let the nurses distribute them. I’ve also given one to the person working the drive-through at a fast food restaurant who seemed to be having a bad day. I’ve given them out to employees of a drugstore who were having to work on Christmas Eve, and I’ve also given them to the volunteers on my team at the church preschool.

I don’t tell you about these things to boast or to glorify myself; I just want to give you some ideas and start you thinking.  I bet you can come up with many more ideas.  If you keep a few in your purse or in your car, you’ll be surprised at the occasions that arise when a little gift of encouragement is needed.  I bet you’ll be glad you have them, as I have been!  One little note: when I’m putting them in my purse or car, I just put the paper mache box in a drawstring bag, and skip the rest of the packaging.

I hope you enjoy this little craft project as much as I have enjoyed sharing it with you!  If you make any of these items, please send me a photo!

~BigSis

How to Make Painted Glass Marble Magnets

March 20, 2011

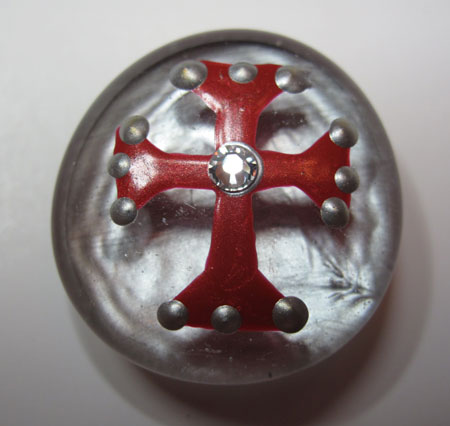
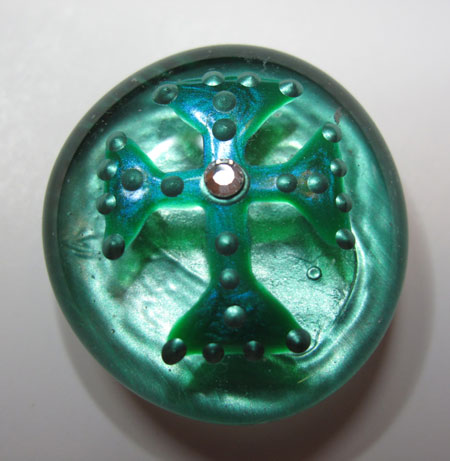
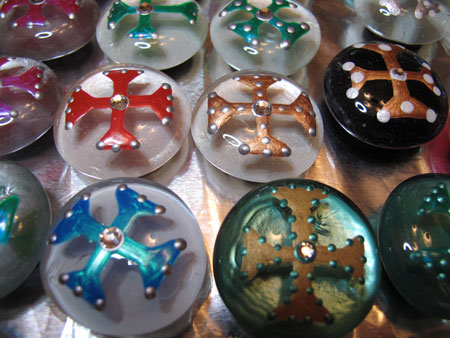
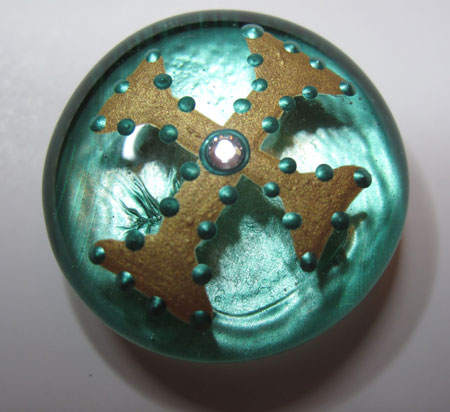
Glass Marble Done Fav Green

You’ve probably seen tutorials for making adorable magnets from the flat glass marbles that are used as filler in vases of flowers. Most of the instructions I’ve seen involve gluing paper of some kind to the back of the marble: scrapbook paper, gift wrap, newsprint, hand-drawn images, whatever.
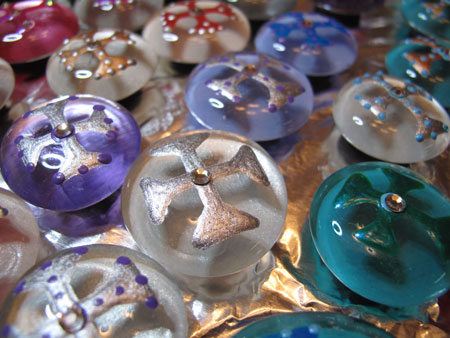
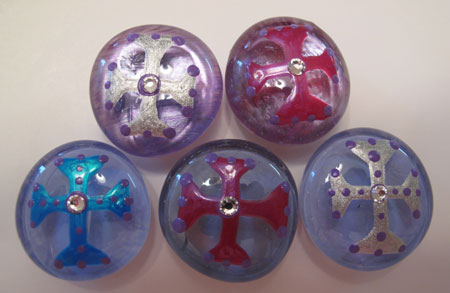
Glass Marble Done Group1

I think those marble magnets are really cute and easy to make, but I like to do mine in a different way.  I like to paint them!

There are probably lots of ways to do this, and you can absolutely inject your own creativity.  I’ll show you the method I came up with, and then you can take off with your own ideas.
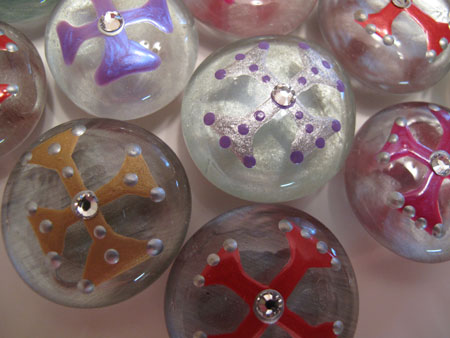
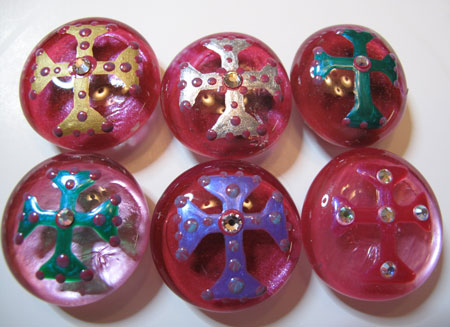
Glass Marble Done Group4

Let’s start with the supplies you need:

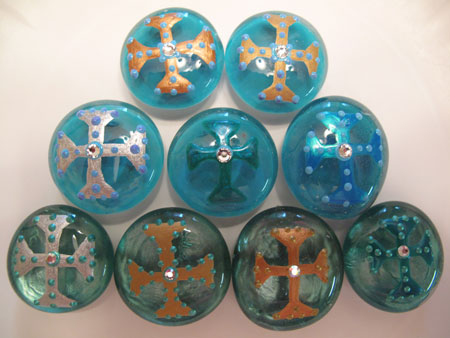
  • Flat glass marbles: Available at craft stores, discount stores, pretty much everywhere. I buy the clear ones because I can see my template through them, but you can also find really pretty blue, green and amber colored ones.
Glass Marble Paint

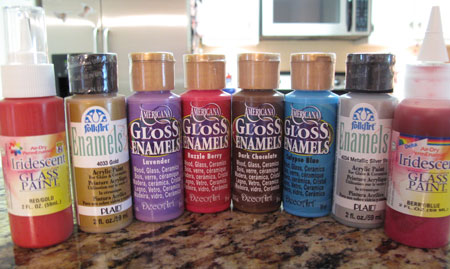
  • Glass paint: I prefer the air-dry kind that doesn’t require baking.  I use FolkArt Enamels, Americana Gloss Enamels, DecoArt Ultra Gloss Metallics (these might be discontinued), and Delta PermEnamel.  My favorites are PermEnamel Shimmers and their Iridescent Glass Paint.  Delta PermEnamel is the glass paint equivalent of MAC eyeshadows: they come in jillions of colors, have great textures, apply well and look beautiful!
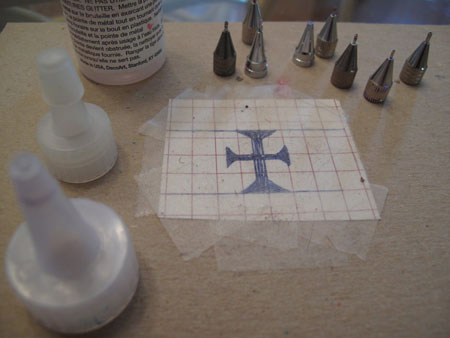
  • Glass painting kit with tips, adapter caps and plastic bottles.
Glass Marble Tip Kit

  • Grid paper:  To make your painting template.
  • Swarovsky crystals: Find them in the jewelry-making aisle at your craft store.
  • Tweezers: To apply the crystals.  Just raid your bathroom drawer, don’t buy special jewelry-making ones.
Glass Marble Magnets Glue

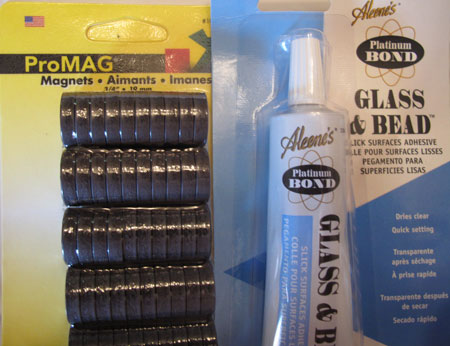
  • Magnet “buttons”
  • Glue: Strong glue for slick surfaces, like Aleene’s Glass & Bead Adhesive, E6000 or Bond 527.
  • Magnifying craft light: If your eyes are “mature” like mine.  This is close work, so don’t be too proud to use it!

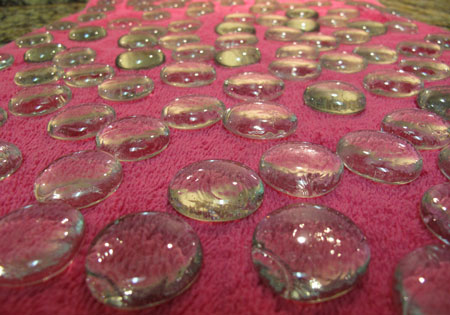
The first step is to create a clean painting surface, and sometimes these marbles are a little dirty.  I give mine a quick rinse in straight white vinegar, but you could also use alcohol.  I use a large plastic container, and fill it with the marbles.  As you remove the marbles from the bag, be very careful.  They’re glass, of course, and it isn’t unusual to find a broken or badly-chipped marble.

You’ll notice that I’m working with a lot of marbles.  It makes sense to me to paint a large batch at one time, since I already have all the stuff out.  Changing paint colors requires washing supplies, so I might as well do several marbles of each color while I’m at it. For this tutorial, I painted 7 dozen marbles.

Add vinegar or alcohol to cover the marbles, and let them sit for a few minutes.  Scoop them out with a slotted spoon, and lay them out on a thick towel in a single layer.
Glass Marble Magnet Wash

You can blot them a little or just let them naturally dry.  I’ve never had a problem with spots forming, so air drying is usually fine. You definitely want the marbles to be completely dry before you start painting.  Try not to touch the surface of the marbles from this point on, since the natural oils in your fingers could interfere with the paint adhering.

Once they’re dry, remove the marbles from the towel and place them on an old foil-lined cookie sheet or tray.  I also cover another tray or sheet with foil to have a place for the marbles as I finish working on each one.  This 7 dozen is all lined up, ready to get dolled up!
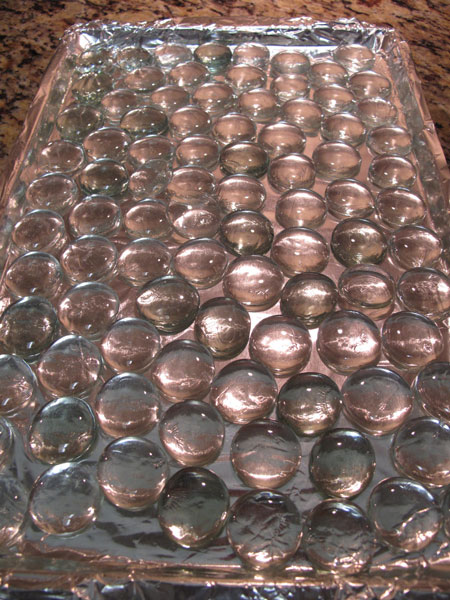
Glass Marble Magnet Dry

You may be able to freehand your design, but I can’t.  Years ago, when I came up with the idea of painting these, I tried freehanding and it wasn’t pretty.  I’m crafty, but not artsy, so I need a template.  I like to paint crosses, so it was very easy to draw a cross template on a piece of gridpaper.  Can you tell how well used/loved this template is? 🙂
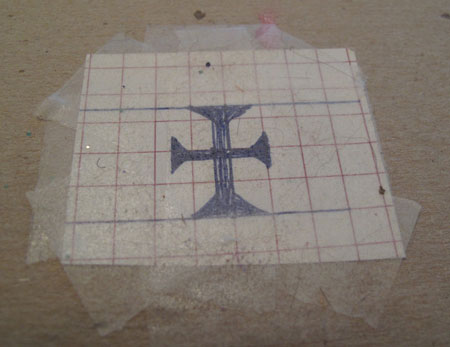
Glass Marble Magnet Template

Once you get your design drawn out, attach it to a piece of cardboard so it’s sturdy.  Here’s a trick for you.  Cover the design with a few pieces of removable two-sided tape.  This semi-sticky surface will hold onto the marble just enough to keep it stable and in place while you’re painting on it.  When the tape eventually gets covered with cat hair (or dog hair or lint) you can easily peel it off and replace it with fresh tape.  It really makes a big difference.

If you need the magnifying light, now is the time to pull it out. Place your template on your work surface, and choose a marble, any marble.  Imperfections are common in these guys, so don’t expect a perfect flawless one.  That’s part of their appeal.  Discard chipped ones or any that just aren’t pretty to you.  Center your marble on top of the sticky template.

Here comes the fun part…painting!  Select the color you want to paint your crosses.  I love metallics: gold, silver and bronze.  I also love the gorgeous shimmery opalescent colors from Delta PermEnamels.  You can customize the color of your marbles for the occasion or the season, or just use the colors you like.
Glass Marble Magnet Tips

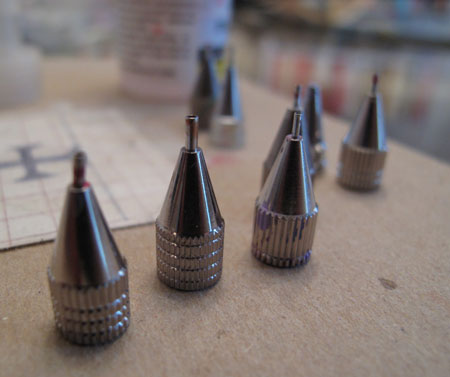
So how do you get the paint on the marbles?  Using a brush is too tricky for non-artist me, so I went looking for an easier solution. What I found are these brilliant metal glass painting tips that look like little ballpoint pen tips.  I’ve seen a couple of different kits at the craft store, and the tips may vary a smidge, but they always include the tips, small plastic bottles, and the adapter caps that screw onto the paint bottle.

The little metal tips snuggly screw onto the plastic adapter caps. I find that they also fit perfectly on the caps of some paint bottles.  If you’re using paint that comes in a chubby jar like the Delta PermEnamel, you’ll need to pour a bit of it into a small paint bottle that fits the adapter cap.
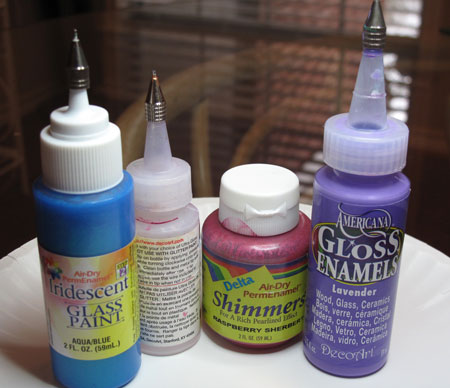
Glass Marble Tips on Caps

Once you have the tip securely on the paint bottle, test it out before you paint.  I keep a paper plate and a paper towel nearby for this purpose. Draw a line of paint on the paper plate to make sure the paint is flowing smoothly, and then wipe off the tip cleanly.

These painting kits also come with a little piece of wire that you can use to dislodge any clogs that might form in the tips, so keep this little jewel on your paper plate too.  Some paints are really bad about clogging, but others don’t clog at all.

And a word to the wise, when you change paint colors and switch to a new tip, be sure to drop the used tip and cap into a cup of water.  If you let it sit and dry out, you’ll pretty much be up a creek and have to toss those pieces.  You’ll never get dried paint out of that skinny little tip.

Now, back to painting.  I start at one end of the marble, and just follow the template, filling in the design.  You don’t want to squeeze the paint bottle really, just hold the bottle like you were holding a marker or pen, and guide the paint around the template.  The paint shouldn’t be so thick that it will drip or ooze, but you do want good even coverage after two coats.
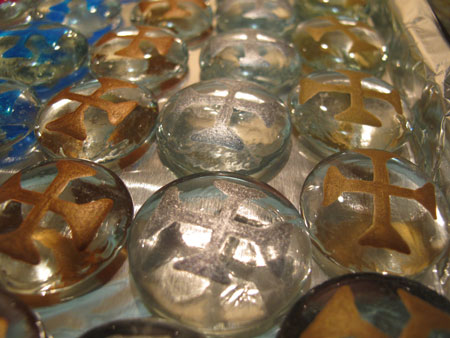
Glass Marble Magnet 1 Coat Metallic

Don’t drive yourself crazy by striving for perfection, especially with this first coat. After the second coat, you’ll be happy with what you see, so don’t worry.  The main thing is to keep within the lines, and have fun!  If you make a mistake, you can try to clean it up with a toothpick.  If it’s a doozie of a boo boo, just toss the marble and move on to the next one!

Tada!  First coat complete!
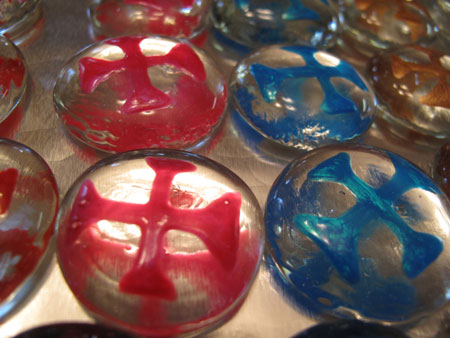
Glass Marble Magnet 1 Coat Close

Let the first coat dry thoroughly; I prefer overnight.  For the second coat, you won’t need the template, so just make sure you stash it in a safe place for next time.

Take the same color paint, and add your second coat.  You can smooth out any rough edges and fill in any sparse areas.  Once you’re finished, allow the second coat to dry overnight again.
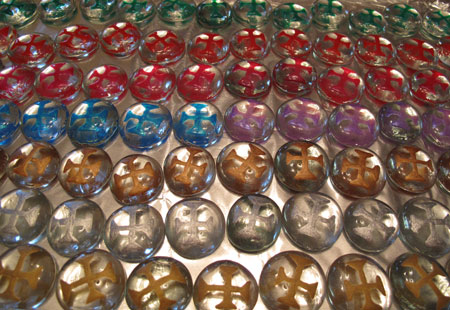
Glass Marble Magnet 1 Coat Wide

Did you think we were finished?  Oh, heck no.  The fun’s just starting!  We’re going to add a background color to the BACK of your marble.  You can skip this step if you want to, and sometimes I do, but I think it really adds a lot.  It gives dimension and depth to the marble, adds a contrasting or complementary color, AND hides the magnet you’re going to glue on the back. Go a little crazy with your background color, or just let the design color be the star.
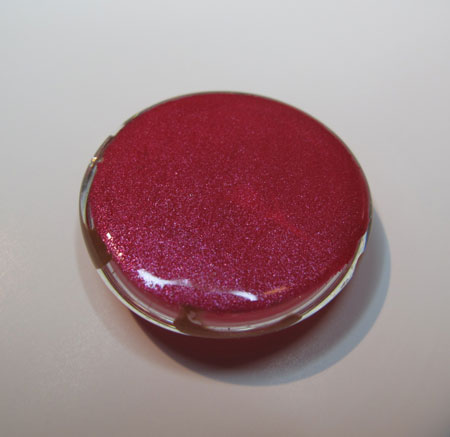
Glass Marble Magnet Back1

For this step, I use a small flat paintbrush.  And…you got it, let it dry overnight.
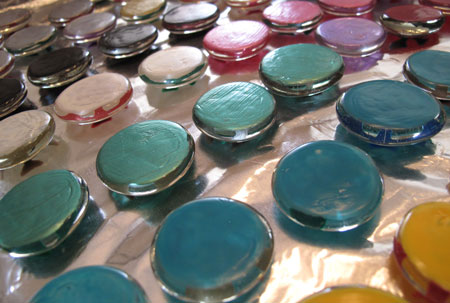
Glass Marble Magnet Back All

If you’ve chosen a sheer color, like my pearly white, you might want to add a second coat after the first sets up, but it isn’t necessary.  It’s up to you!  If you want to see how a color might look behind your cross, just hold up your marble to the bottom of the paint bottle, like this.
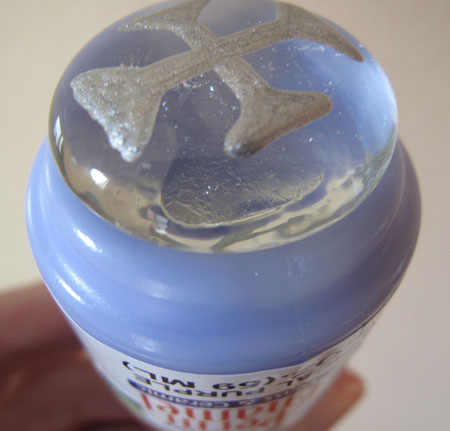
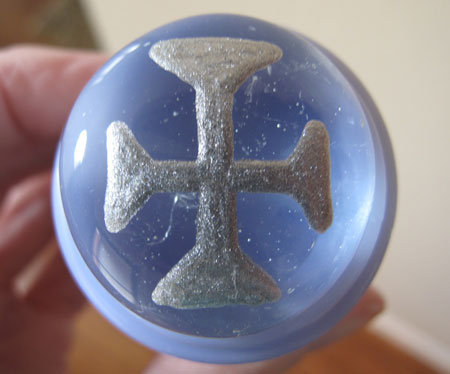
Glass Marble Magnet on Paint2

Glass Marble Magnet on Paint1

We’re coming down the home stretch, so stay with me.  You have two coats of color on your cross, plus a coat or two of background color on the back of the marble.  I like to add a magnet at this point.  If I do it now, I don’t have to rest the marble on it’s frontside after the delicate little dots are applied, and risk smushing them down a bit.  I like for the decorations to be as dimensional as possible.
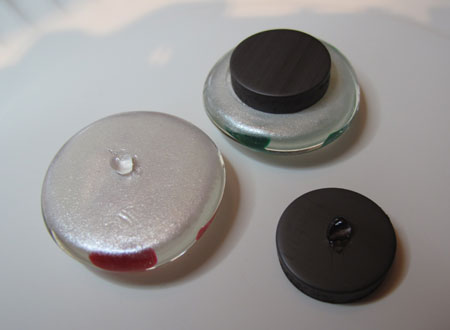
Glass Marble Magnet Glue

To attach the magnet, add a tiny dot of glue to the magnet and to the back of the marble, and allow it to sit for a minute or two (check your particular adhesive for directions).  Any longer and the glue may dry too much.  Attach the magnet, and set aside to dry… overnight.
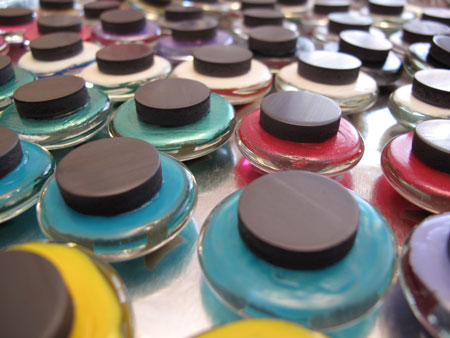
Glass Marble Magnets All

Now the last steps!  It’s time to decorate the front of the marbles.  I do dots because they’re easy and I like how they look, but you could do squiggles or lines or anything else your imagination can conceive of.  Choose any color!  I really like adding a dot color that coordinates with the background color, but other times, the dot color just comes out of the blue.

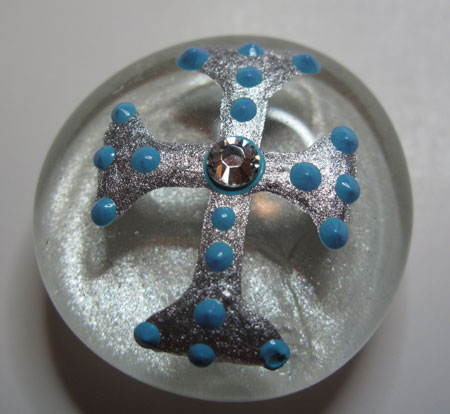
Before I add the decorative dots, I add one teensy tiny dot of paint (you could use glue, but you already have paint in your hand) to the center of the cross and carefully place a swarovsky crystal with the tweezers.  Press it down very gently.  Then just add dots here and there all over the marble, in any pattern you like.
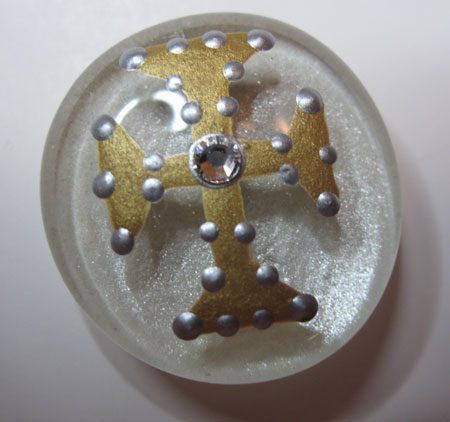
Glass Marble  Magnet Done Fav Gold

Voila!  Your marble magnet is finished! Do you love it?
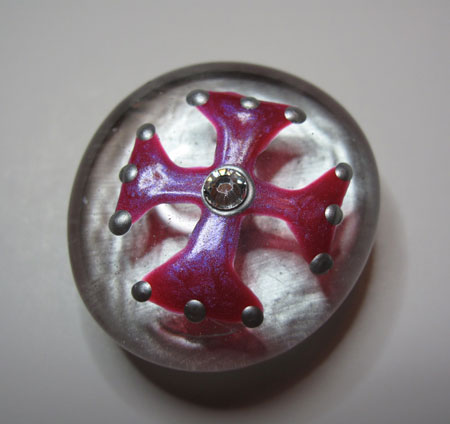
Glass Marble Magnet Done Fav Pink

I love to give these painted marble magnets as little gifts, so they need to be packaged up cute.  I’ve seen people put the paper-backed magnets in Altoid tins, and it’s kind of cool that they stick in place and don’t rattle around.  You’d have to decorate the tin though, and you have to deal with the raised logo on the front of the tin unless you buy flat new ones.
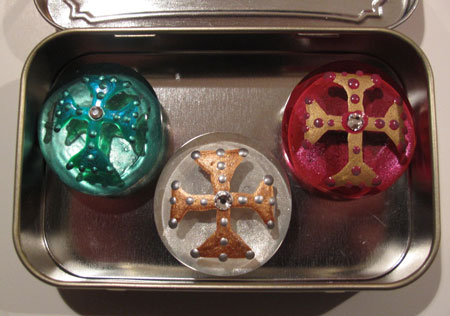
Glass Marble Magnet in Altoid Tin

You could also put the marble magnet in a little drawstring bag with a bit of pretty shred.  This is kind of sweet and Eastery-baskety.
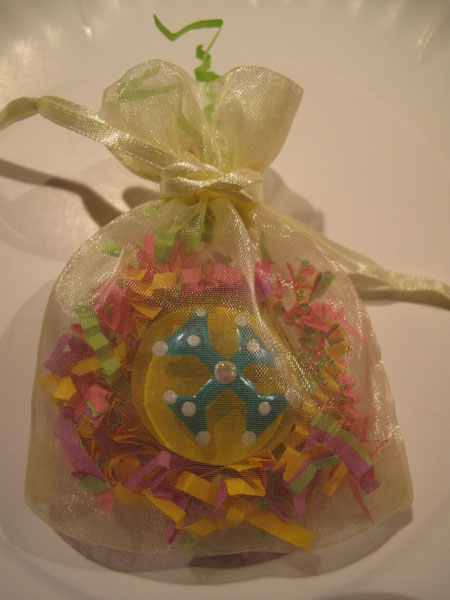
Glass Marble Magnet Favor Bag

What I like to do though is to take this beautiful marble to the next level by customizing a little paper mache box for it, with stamping, embossing and a scripture hidden inside.  Then it goes into the drawstring bag, and then into a handmade origami box. And if that isn’t enough, we’ll then wrap up the whole thing with a tulle bow.  Overkill?  Nah!  There’s no such thing as overkill when it comes to giving gifties!

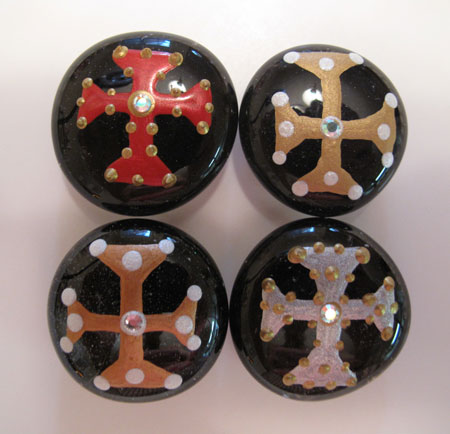
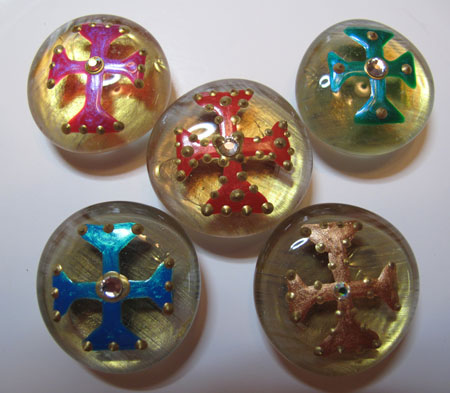
I’ll show you how to do all of that next time, and share some of my favorite ways to give these away!  Til then, here are a few more of my favorite marble magnets from this big batch.  See you soon!
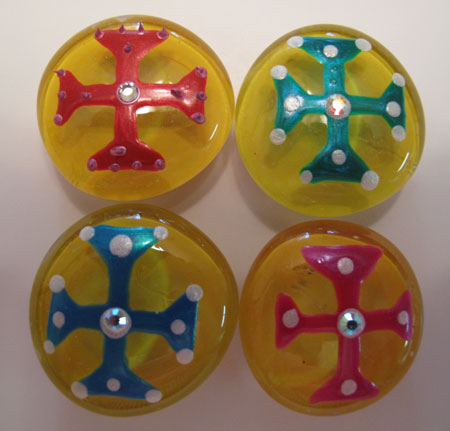
Glass Marble Magnet Done Yellow

Glass Marble Magnets Done Blue

Glass Marble Magnet Done Fav Silver

Glass Marble Magnet Done Black

Glass Marble Magnet Done Gold

Glass Marble Magnet Done Fav Red

Glass Marble Magnet Done Purple

Glass Marble Magnet Done Fav Green2

Glass Marble Magnet Done Pink

~BigSis

Does Latisse Grow Eyelashes? Does Botox Reduce Wrinkles?

February 26, 2011

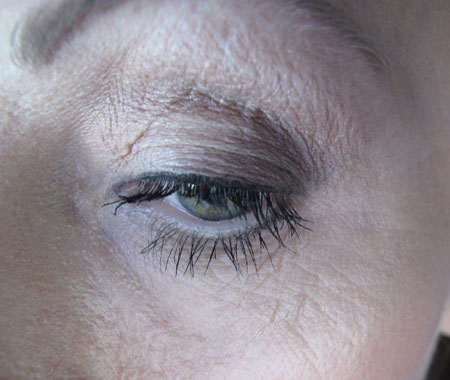
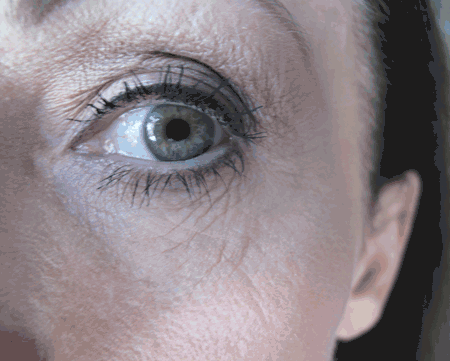
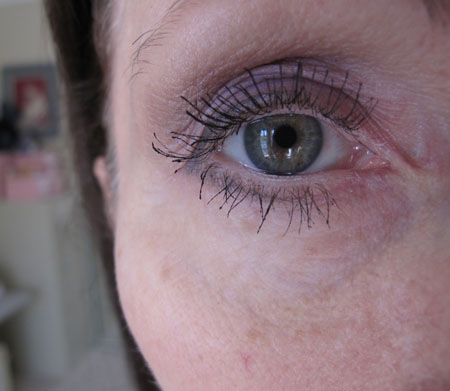
At age 52, I finally got my first Botox. I had needed it for a long time, since my crows feet were pretty bad. I was procrastinating because…well, I don’t know why I put it off. I obviously shouldn’t have! Just take a look for yourself.

Sagginess…

Eyes Bad 1 Before Botox Latisse

crepiness…
Eyes Bad 3 Before Botox Latisse

and wrinkles. Oh, my!

Eyes Bad 2 Before Botox Latisse

Wow! I skerd myself! In defense of my poor eyes though, I do have to say these “before” photos were taken after I got a makeover from a makeup artist. I had masses of concealer and powder piled up under my eyes which accentuated the wrinkles. They were still my wrinkles – I have to own up to them – but they were looking especially heinous with all that makeup gooped upon them.

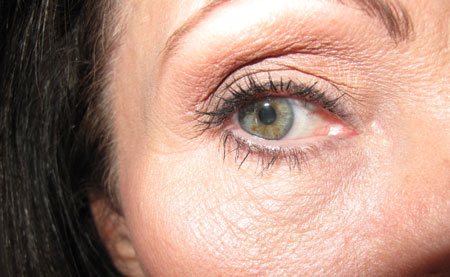
Also notice the skimpy eyelashes. My lashes aren’t uber-short, but they definitely lacked fullness, and a little extra length would be nice.

I absolutely noticed the wrinkles, sags, bags and crepey skin every time I looked in the mirror, and finally addressed it with a very conservative bit of Botox in early December. I actually wished my doctor had been slightly more aggressive with it, but it’s a start and I think it absolutely helped. That’s not to say that other women might not have success with some of the Best Face Oils For Anti Aging and other products like it, they do! For me personally, I felt like this was my best option.

If I had it to do over again, I wouldn’t have waited so long for my first foray into Botoxland. It was relatively inexpensive, and the procedure was a piece of cake.

There were 3 tiny – I mean tiny little needle pricks around each eye. I’m not freaked out by needles, but even if you are, I still think this process is really non-threatening. Just don’t look when the needles come out to play. 😀 It was totally worth it to me, and I’ll keep doing it as long as there is no revelation about Botox causing cancer or something equally disturbing.

While I was at the doctor’s office, I also talked to a rep for Allergan, the company who makes Latisse. They were offering a $100 rebate on the product, which pretty much paid to fill the first prescription. Insurance doesn’t cover Latisse, of course, since it’s a cosmetic item.

My first prescription for Latisse cost me about $114, and was supposed to cover 30 days’ application of the product. Instead of one drop per eye per night though, the nurse in my doctor’s office suggested that one drop shared between both eyes is plenty. That’s how I’ve been using it, and that first round of Latisse is just now almost gone nearly 3 months later. That works out to less than $1 a day.

I’m not a doctor so I can’t recommend that you use Latisse as I did, but I can tell you what I did and that the shared drop per night seemed to be adequate for me. I think that using one drop per eye would have been wasteful overkill with dripping excess to wipe away.

I haven’t had any side effects from Latisse, but you should consider them before you try it. The most-publicized potential issue is that light brown, green or hazel eyes can permanently change to a darker brown. From what I understand, that is only a rare risk when Latisse is used to treat glaucoma, which involves using the product in the eye, not on the skin around it.

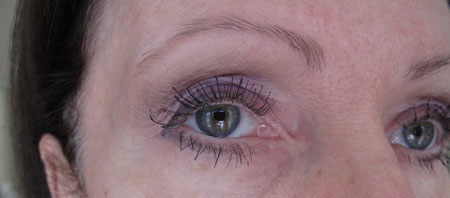
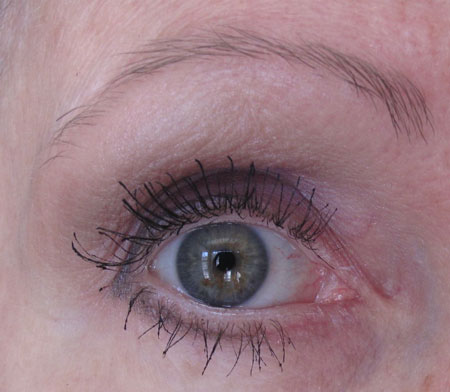
That explains what I did. So how do those scary eyes look now after a little Botox here…

Eyes Good 1 After Botox Latisse

and there…

Eyes Good 2 After Botox Latisse

and some Latisse each night?

Eyes Good 3 After Botox Latisse

These aren’t 20 year old eyes, but I’m not 20. These eyes have seen things and been through things, and they’re entitled to a few earned war wounds. Maturity isn’t an easy road, and getting there can leave a little evidence of the journey, right?

They’re still my 52 year old eyes, but they’re not quite as scary as before. These “after” photos were taken with no concealer, foundation or powder, so you can still see little imperfections like brown spots, but you don’t see the previous horror. Hurray! As the years pass, it seems that it is deemed more acceptable for the average person to undertake such treatments. Trends in cosmetic surgery have evolved with more people improving on what they have. In fact, this source here shows the statistics of cosmetic surgery throughout the world in recent years.

In these photos I had about 8 weeks of Latisse behind me, and the full effect is supposedly reached at 16 weeks. At 4 weeks, I could already see longer lashes, and now they are thicker as well.

If you ask me if Botox reduces wrinkles, I say absolutely ‘yes’. And if you wonder if Latisse really works and grows longer and thicker eyelashes, I say ‘yes’ again. I don’t foresee ever getting a facelift, but I’ll keep doing these little tweaks because they work. To me they’re no-brainers. There’s no cutting, no downtime, and the expense isn’t prohibitive. It feels good to be doing a little something to fend off the ravages of time, but still look like me.

Now I need to tweak those brown spots…

Monthly sale items.

~BigSis

Cruelty-Free Shopping: 2nd Update

February 20, 2011

Animal Testing Cartoon

Back in July, LilSis and I made a commitment to ourselves and to the animals in testing labs that we would eliminate animal-tested products from our worlds.  We’ve had some easy instant successes and some challenges.

I talked about one of the biggest challenges in my first shopping update in September.  The problem?  Paper products!

I dare say most of us are UBER picky about the toilet tissue, paper towels and napkins that we buy.  I certainly am. I was completely loyal to Charmin toilet tissue, Puffs tissues, Viva paper towels and Bounty napkins…all animal tested.  Viva is a Kimberly-Clark brand, while Charmin, Puffs, and Bounty are part of the Procter & Gamble empire.

I first tried paper products from Seventh Generation; a brand that I really love because of their dedication to green cruelty-free products.  On a side note, their Free & Clear Natural 2X Concentrated Laundry Liquid is actually less expensive than Tide and is just as effective, in my opinion.  Plus it is non-toxic, biodegradable,  and is free of phosphates.

I also love their Automatic Dishwasher Gel.  I tried another natural dishwasher gel that did a horrible job.  Even after thoroughly rinsing dirty dishes, they still didn’t come clean with that product. Seventh Generation’s gel is just as effective as the animal-tested, chemical-filled products I used to use.

Now back to the paper problem.  I’m sorry to say that I didn’t fall in love with Seventh Generation’s line of paper goods.  I wanted to!  I really, really wanted to.  They were just a bit too natural, if you know what I mean.  I tried a few other natural brands and Whole Foods’ store brand, and had the same experience with them.  For me, they were just a little too rough and scratchy, and didn’t have the strength I was looking for.

I can haz TPNever fear though!  I have a solution that I’m happy about, and it comes from an unexpected source.  Did you know that Safeway products are not animal-tested?  I didn’t until I found that bit of news on PETA’s Caring Consumers site.

To my happy surprise, Safeway paper products are pretty good, and I’m now purchasing them regularly instead of experimenting with other brands.

In Texas, Safeway products are the store brand for Tom Thumb stores.  In other states, you may find them at Von’s, Genuardi’s, Carrs, Casa Ley, Dominick’s, Pak’n’Save, Randall’s, Pavilions, and Safeway stores.

If you don’t have one of these stores in your area, you might try the store brands for Trader Joe’s and Food Lion, since they are not animal-tested either.  I don’t have access to those stores, so I can’t vouch for their paper goods, but if you do, please let me know how it goes.

The bottom line for me…if I can find a more-than-ok replacement for Charmin, then this endeavor is totally doable.  Safeway is obviously not a vegan company, and they don’t have the same focus and natural-dedication as Seventh Generation and some other companies like Method.  But they do make a lot of products that give us options, and allow us to enjoy quality products without supporting animal testers like Procter & Gamble.

I just noticed that Safeway makes a duster refill that fits the Swiffer duster handle!  Swiffer is another Procter & Gamble product, so I was dreading the day that my last box of duster refills was depleted.  Worry no more, me!  Safeway to the rescue!

Animal Testing photo credit: AlBakker’s Flickr photostream

I can haz TP photo credit: ixmati’s Flickr photostream

10% Monthly Coupon Code Banner DENTAL10

~BigSis

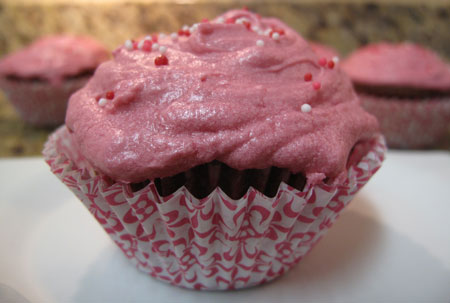
Valentine’s Day Red Velvet Cupcakes

February 12, 2011

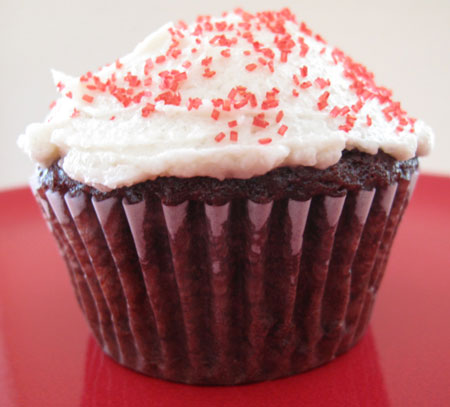
Red Velvet Crimson Velveteen Cupcake Iced

How about another colorful cupcake for Valentines Day?  By the way, have you made the Pomeranian Pomegranate Cupcakes that I talked about a few days ago?  If not, here’s option #2 for your Valentine’s Day, and it’s another vegan one!

These are actually called Crimson Velveteen Cupcakes (I love the name!) and they’re from Isa Chandra Moskowitz’s book Vegan Cupcakes Take Over the World: 75 Dairy-Free Recipes for Cupcakes that Rule. I have several of Isa’s other cookbooks, but I just got this one and these cupcakes are the first thing I’ve baked from it.  This cute little cookbook was named the “Cookbook of the Year” by VegNews.

So, back to the baking.  There was nothing weird in this recipe that required an emergency trip to my favorite little hippie health food store (although that would be dandy with me since I love it there).  Just flour, sugar, cocoa, baking powder and soda, soy milk (I used almond), canola oil and flavorings.  It was super easy to whip up, so the recipe wins kudos for that too.

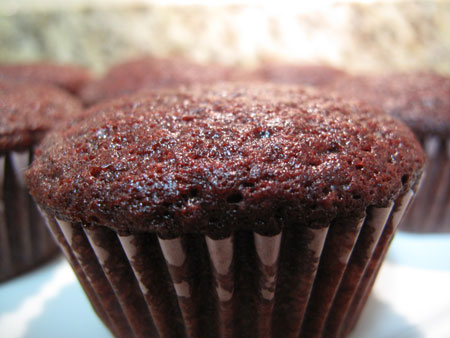
Red Velvet Crimson Velveteen Cupcake Nekkid

I also made the icing recommended for this cupcake, Old Fashioned Velvet Icing.  I can’t say that I’m a fan of it though.  I thought I followed the instructions to the letter, but my icing came out grainy, and I hate to say, it was just a tad weird for me.  Sorry, Isa.  I only iced one cupcake for the photo, and just left the other eleven nekkid.  I’d rather have a nice traditional cream cheese icing on my red velvet cupcakes, so I’ll try that the next time I bake these.

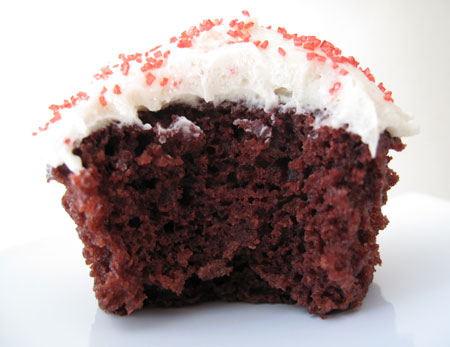
And I will bake these again.  They were easy, inexpensive, pretty, and most important of all: delicious and moist!  Run out and buy Vegan Cupcakes Take Over the World, or use the Crimson Velveteen Cupcakes recipe I found online, but do make these cupcakes!

Red Velvet Crimson Velveteen Cupcake Bite

Happy Valentine’s Day!


~BigSis

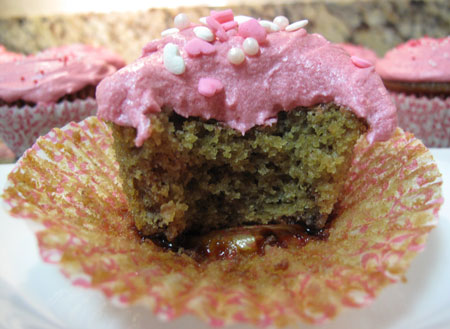
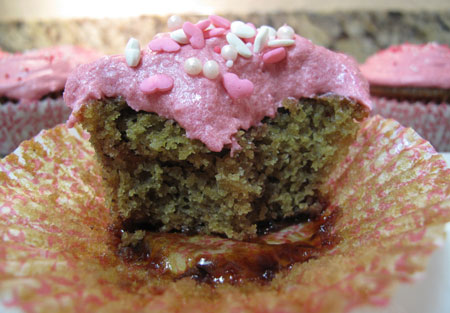
Valentine’s Day Pomeranian Pomegranate Cupcakes

February 8, 2011

Valentine's Day Pomegranate Cupcake

You know that age-related memory loss that some of us get?  We forget names and appointments, and sometimes, even simple everyday words evade us.  For some reason, I can’t remember the word Pomegranate to save my life these days.

99% of the time I try to come up with Pomegranate, what my brain gives me is Pomeranian.  It makes no logical sense, but in my mind, these little pink guys have been called Pomeranian Cupcakes more often than they’ve been called Pomegranate Cupcakes.  Sorry cute little yappy doggies, you know I’d never make cupcakes out of you!

But forget what I call these; you should call them delicious! Hannah Kaminsky calls them Pomegranate Ginger Cupcakes in her book My Sweet Vegan.  I successfully baked a bunch of things from this book for our SPCA Bake Sale last December, so I thought it would be a great source for a Valentine’s Day treat.  I’m not a fan of crystallized ginger so I left it out of the cupcake batter, and I also omitted the ground ginger in the icing.  I didn’t miss it a bit.

Valentine's Day Pomegranate Cupcake 1 Bite

One bite missing...

This was a super-easy recipe, and I loved that it used 2 cups of the uber-healthy Pomeranian juice.  I mean Pomegranate juice, of course!  Everybody knows you can’t juice a Pomeranian! 😀

The color of the cupcake looks a bit off in the photo, but these were really tasty so don’t let that discourage you from making them.  They were moist and really flavorful!  Half of the POM juice was reduced to a syrup and drizzled over the unbaked batter, and it turned into a nice gooey tangy unexpected treat at the bottom of the cupcake.

I ad-libbed the icing with a stick of Earth Balance and powdered sugar and a bit of tart cherry juice, since I’d exhausted my supply of POM juice.  With a dash of good vanilla and some pink food coloring, the icing was finished.

Valentine's Day Pomegranate Cupcake 2 Bite

2 bites gone now...

Make these for your sweetie this Valentine’s Day!  And remember, they’re Pomegranate Cupcakes!


~BigSis

1 Quick Recipe: 4 Super Bowl Party Snacks

February 5, 2011

You don’t want to spend all day Sunday preparing for your Super Bowl party, do ya?  Me neither!

I already talked about vegan Bob Armstrong dip, which is now my go-to football snack.  What else could could I serve along with Bob, without spending a bunch of time or money?

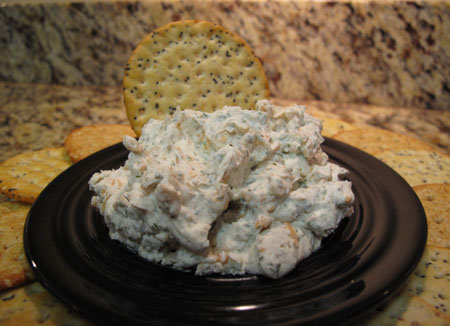
I was noodling around some ideas, and I found this recipe for a Ranch Cheese Ball.  I thought it would be really cool to start with one basic cheesy spread recipe, and then use it in a bunch of different quick ways on Super Bowl Sunday!  Let’s do it!

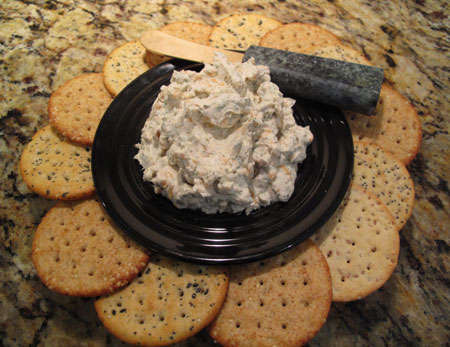
Super Bowl Vegan Cheese Appetizer Dip

The basic cheese spread can be customized with your favorite flavors.  I started with a tub of Tofutti Cream Cheese, a handful (around 1/2 cup) of Daiya Cheddar and a touch of Veganaise to thin it out a bit.  Then I added garlic powder, onion powder, dried onion, dill weed, pepper and Beau Monde seasoning.  You add what you like: hot sauce, olives, cumin, lemon pepper, whatever.  Allow the spread to chill in the fridge for a couple of hours to marry all the flavors.

Now, here’s where it gets fun.  Take that spread and go crazy!

Super Bowl Vegan Cheese Appetizer Dip

  • Serve the spread at room temperature with crackers
  • Heat the spread up (nuking is fine) and serve with crackers or toasted bread rounds

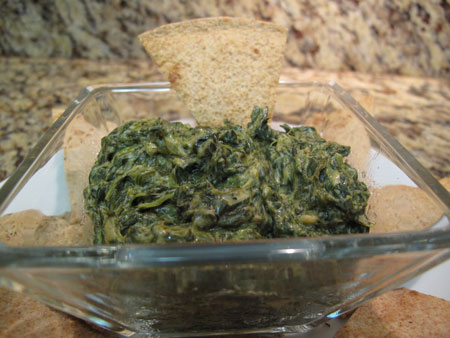
Super Bowl Vegan Spinach Dip Appetizer

  • Create a healthier spinach dip.  Thaw frozen chopped spinach or use leftover sauteed spinach if you have it.  Squeeze it as dry as you can.  Mix it with an equal amount of cheese spread and a few good dashes of hot sauce.  Bake at 350 degrees until hot throughout.  Serve with toasted pita or tortilla triangles.  I like to cut up whole wheat tortillas and bake them until they’re crispy.  A little spritz of cooking spray on both sides help crisp them up with almost no added fat.  I don’t think you even need to salt them, but it’s fun to sprinkle on salt-free spices before they bake.

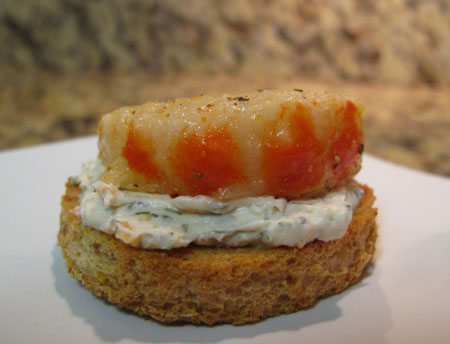
Super Bowl Vegan Shrimp Toast Appetizer

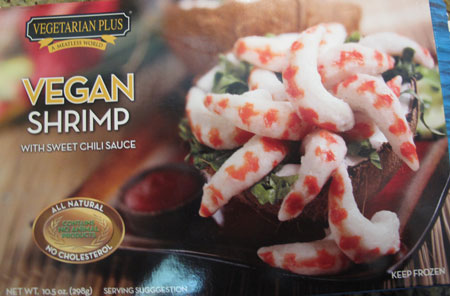
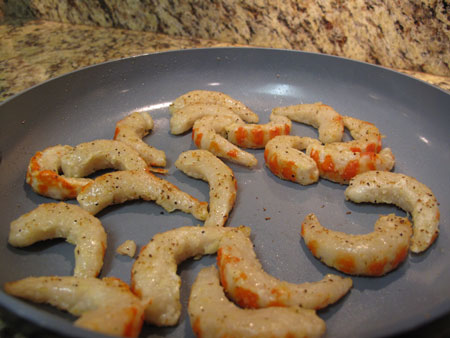
  • Make vegan shrimp toast.  Have you tried this Vegan Shrimp product from Vegetarian Plus?  I hadn’t before, but they were a fun little experiment!  There are about 22 shrimp in a package, and the entire box is 280 calories and 8 grams of fat, but no protein.  To me, the texture is very shrimpy!  They don’t have a fishy flavor as I expected, but instead they pretty much take on the flavors you add to it, kind of like mushrooms do, so season these guys up.

Super Bowl Vegan Shrimp Appetizer

For your toast, saute the thawed shrimp in a pan with a touch of olive oil over medium heat for about 4 or 5 minutes, just until heated through.  I added lemon pepper and garlic salt while they were warming.  Kind of cute, aren’t they?

Super Bowl Vegan Shrimp Appetizer

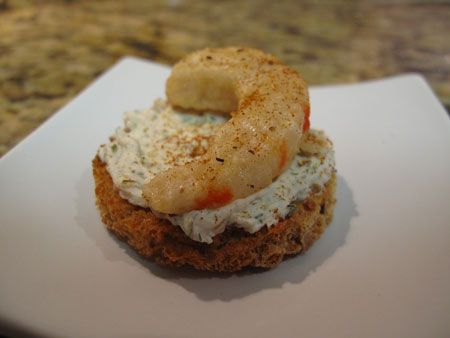
You could use crackers, but I like toasted whole grain bread as a base for the shrimp toasts.  Just brush the bread rounds with a bit of olive oil and bake until golden.

Super Bowl Vegan Shrimp Toast Appetizer

Add a smear of your cheese spread to the toast, and top with a warm shrimp and a sprinkle of paprika.  Ta da!

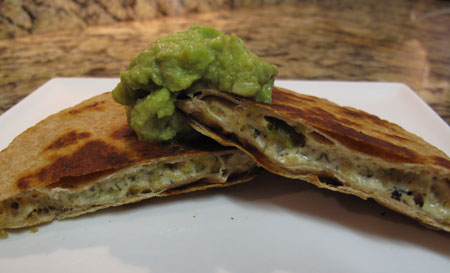
Super Bowl Vegan Shrimp Quesadilla Appetizer

  • Toast up cheesy shrimp quesadillas.  Do you still have shrimp and cheese spread left?  Use it all up with this dish.  Roughly chop your shrimp and add to the cheese spread, along with some Daiya Cheddar and/or Mozzarella.  Don’t worry about quantities; just add these ingredients to your taste.

I’m a spicy Texas girl, so I have to add peppers too.  I have a stash of roasted Hatch chilis in my freezer, so I thawed out one of those little babies, chopped him up very finely since he’s a hot little bugger, and mixed him into the shrimp/cheese concoction.  You could use mild canned green chilis if you wish, and you could also add onions.

Spread a generous layer of the mixture onto one side of a tortilla (I like whole wheat), and fold over.  Cook in a little olive oil or vegan butter on medium low heat until toasty on both sides.  Make sure your heat is low enough to heat the filling throughout without burning the tortillas.

Cut into halves or quarters and serve with your choice of guacamole, sour cream, or salsa.

There you have it…one easy cheesy spread that very quickly becomes a variety of savory snacks.  If you’re going to have a crowd or you’re going to do several of these options, be sure to double, triple or quadruple the basic recipe.  Above all, have fun!

~BigSis
Super Bowl Dip: Bob Armstrong Goes Vegan

February 3, 2011

I wish I could take the credit for inventing this dip, because it’s greatness. You have to understand; I love chips and dips more than almost anything so when I tell you a dip is greatness, I mean it’s G-R-E-A-T-N-E-S-S!

I hear that Bob Armstrong dip originated with a Mexican food chain called Mattito’s.  It’s one of those off-the-menu items that everyone knows about and orders, so you know it has to be good.  Mattito’s version starts with their cheese queso with a blob of ground beef plopped on top, along with a scoop of guacamole and a dollop of sour cream.  Then it’s stirred all around and gobbled up with tortilla chips.

It sounds weird, but trust me, it’s scrumptious.  At least the vegan version I make is, since I’ve never tasted the meaty original.

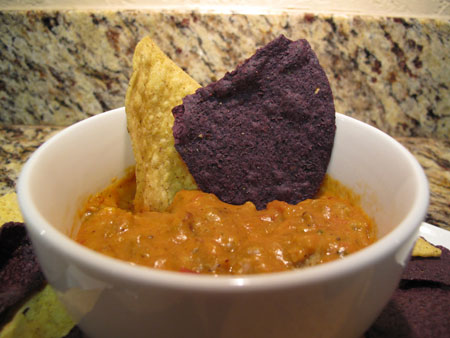
Let me give credit where credit is due…I found the recipe for vegan Bob Armstrong dip on the Dallas Vegan blog.  You start with a batch of vegan queso, which can be the tricky part.  There are a couple of good ones available online and at stores like Whole Foods, but I’m a me-do-it kind of a girl, so I follow the suggestions from DallasVegan.com and make my own.  It actually comes out fabulous; beyond what I ever expected.  But it gets even better…

Vegan Queso

Vegan Queso with Seitan Crumbles

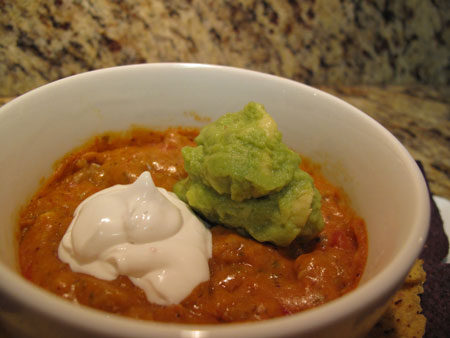
Next, add a whole package of sauteed Upton’s Naturals Ground Beef Style Seitan into it.  You can stop there, and be perfectly happy with an excellent vegan version of that Velveeta dip that is required at any Super Bowl party.  But don’t stop!  Add a scoop of Tofutti Sour Cream and your favorite guacamole, either homemade or store-bought.  Stay with me!

Vegan Queso with Sour Cream and Guacamole

Vegan Queso with Sour Cream and Guacamole

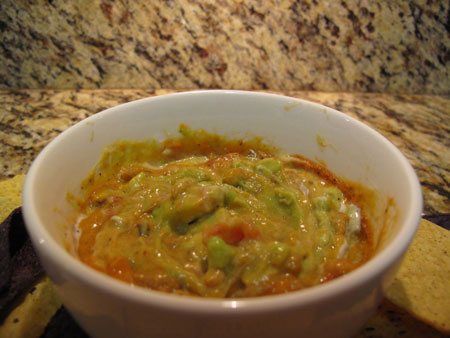
Something magical happens when you stir in the sour cream and guacamole.  You get an unbelievable creamy texture that makes the whole thing sing!  It’s creamy and spicy and cool and hot and tangy and cheesy; all in perfect dippy balance!

The first time I made this concoction, I literally inhaled the whole bowl by myself, and I have to admit I was making the “nom nom” sounds that my cats make when they’re really relishing their food.

Vegan Bob Armstrong Queso Dip

Vegan Bob Armstrong Queso Dip

Bob isn’t photogenic, but he’s delicious!  I do have to confess that I could have taken a little more care in setting up these photos, but I was in too big of a hurry to eat Bob!

I conducted a highly-scientific experiment and took a batch of this to my carnivorous office, and guess what?  Voila, Bob vanished!  Try your own experiment at this year’s Super Bowl Party, and take vegan Bob Armstrong dip along.  There’s no reason to tell people that Bob’s vegan now…until after he’s in their happy little full bellies!  🙂

~BigSis
Sunday Supper: Scrambled Tofu

January 30, 2011

I can’t believe that I’ve been vegetarian for almost 16-1/2 years to the day, and I’ve never even tasted Scrambled Tofu.  It always sounds and looks unappetizing to me: it’s usually neon yellow from the turmeric, and it frequently involves green bell peppers.  Bleh.

I do love tofu though, and I’m making an effort to get more variety into my diet so it’s time.  It’s time to be brave and do this thing.  I think breakfast foods are awesome for supper, so this week’s Sunday Supper is Scrambled Tofu!
I have several of Isa Chandra Moskowitz’s cookbooks…Appetite for Reduction, Veganomicon, Vegan Cookies Invade Your Cookie Jar, Vegan with a Vengeance, and Vegan Brunch.  Isa hasn’t let me down yet, so she had to be the source of my foray into all things tofu and scrambly.

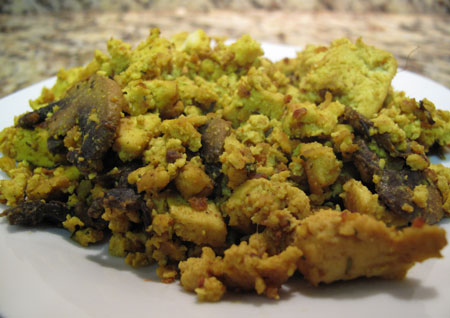
I pulled out Vegan Brunch and followed her recipe for Scrambled Tofu.  It’s essentially tofu with, garlic, cumin, thyme, turmeric and nutritional yeast.  The only add-in I used was a big blob of mushrooms that I’d already sauteed with lots of garlic.

Scrambled Tofu

I have to say I was VERY pleasantly surprised to discover that I love Scrambled Tofu!  I do!  It was savory and a bit spicy, and not mushy and bland as I had imagined it to be.  The only change I would make next time is to back off the salt a tad.  I love salt, but I think half the amount in the seasoning mix would be plenty.

I used Wildwood Sproutofu extra firm (sprouted tofu) that had been frozen, thawed and squeezed, which I think really contributed to the great texture.  I did add about half a cup of water at the end after the nutritional yeast went in, since it seemed a touch dry at that point.

Overall…delicious!  I will absolutely be making Scrambled Tofu again and again; for breakfast, brunch and supper!  I’m imagining it now with olives, spinach, Daiya cheese, asparagus, Upton’s Naturals Seitan…

~BigSis