Crockpot Apple Butter for Daddy

October 14, 2009

I made apple butter at Christmas for several years because Daddy liked it.  I'm not sure if he especially loved my version as much as his favorite store-bought brand, but he always acted like he did.  Apple butter still reminds me of him whenever I think about it or smell it or taste it.  I haven't made it in a long time, and it's kind of bittersweet to make it now knowing I can't take him a jar of it.

But I did make apple butter again for the first time since he's been gone.  I had 6 giant Fuji apples left after the Gooey Apple Cake/Cobbler stuff, and didn't want them to go to waste.  I was super busy on Sunday getting ready for our BlogWorld trip, so I didn't have time to fuss around with a boiling, spitting, scorching pot of apples on the stove.  The solution?  My underutilized crockpot, of course!

I added a cup of water to the apples to get them started, but I've seen crockpot apple butter recipes that don't use any water at all, and I suppose they might  take slightly less cooking time.  My apple butter was in the crockpot on high heat for 10 hours, and then the next day I still wanted it a little thicker so I simmered it on really low heat on the stove for another hour.  Just cook it til it looks the way you want.

The flavor in this is exactly the way I wanted it.  I love that it's not very sweet, and has the zip of the lemon and the perfect blend of incredibly flavorful spices from Penzeys.  I think Daddy might like it too.

Crockpot Apple Butter

6 large Fuji apples: peeled, cored and chopped
Juice of 1 lemon
1 cup water
1 cup brown sugar
2 tsp cinnamon
1/2 tsp allspice
1/2 tsp cloves
Healthy dash of salt

Place all ingredients into crockpot, and mix together. Cook on high heat until desired thickness is reached; probably 10-12 hours.  Use a stick blender for a smoother consistency if you wish (I wished).  Best served on a big steaming buttered homemade biscuit!

Note:  I plan on finishing this up within the next few weeks and keeping it chilled, so I didn't worry about the whole canning/processing procedure.

~BigSis

Gooey Apple Cake

October 12, 2009

I made the grievous error of going to Sam's Club the other day when I was really hungry.  You know how that goes…you buy everything you see.  Weird thing is that this time I was just buying massive quantities of produce instead of the junk that usually calls your name when you're shopping hungry.  So I ended up with – among other things – a nice big bag of 8 Fuji apples.  Could I ever in my life eat 8 apples before they went bad?  Heck, no.  I don't know what I was thinking.

I did have to get thinking about how to use all those apples when it became clear their number wasn't diminishing on the counter.  The first thing that came to mind was an apple cake since it's fall now.  I grabbed my King Arthur Flour Baker's Companion and chose their Apple Cake.  Bad thing is it only took 2 of the apples; good thing is they didn't have to be peeled!

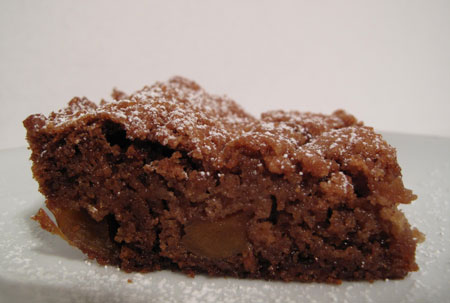
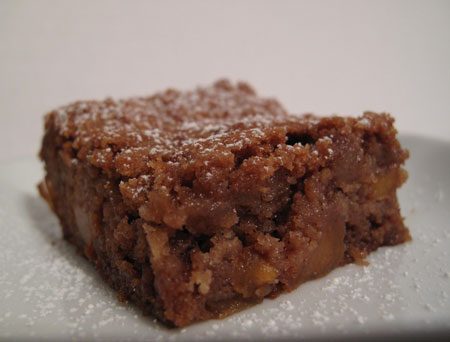
The cake is gone now, and I'm still not sure if it came out right or not.  I really need to email the folks at KAF.  The recipe called for a little over two cups of flour and a couple of sugar, but the only moisture was from 2 eggs and a soft stick of butter.  When the recipe said to turn the batter into the pan, I didn't have batter.  I had a sandy sugar/flour mixture that looked more like a shortbread crust than a cake batter.

I scoured the internet, looking for a clue as to what might have gone wrong, if it did.  I couldn't find any online recipe corrections, or anyone discussing any issues with this recipe.  So, not knowing what else to do, I went ahead and baked the apple sand, hoping for the best but expecting a mess.

Apple Cake

Apple Cake…as it should be?

I baked it for 45 minutes as directed since I had no idea of what it should look like once it was done.  As the apples cooked, they gave off some moisture of course, and the pan did start to look a bit like a cake.

In the end, when it was done and cooled, the cake was gooey and I presented it to my coworkers as an “Apple Cake/Cobbler/Sort of a Thing” that should be nuked for a few seconds and eaten warm.  The flavor was really good, but the appearance was a little…ummm…rustic?  The whole cake was eaten, but in all honesty, some of my coworkers would eat cat food on a cracker.

I'm still wondering what happened.  I did leave out the crystallized ginger since I don't like it, the raisins since I'm allergic, and the nuts since I was out, but I don't think any of those changes could have caused the weirdness I experienced.  Other than that, I'm 100% sure that I followed the recipe exactly.  If I messed this up, or if it's supposed to be this way, that's ok.  I just want to know!  Have any of you tried this recipe?  If so, how'd it come out?

Gooey Apple Cake

Super Gooey Apple Cake

BTW, if you do the math, I still had 6 apples to deal with so I made a batch of crockpot apple butter last weekend.  Guess how that came out…

~BigSis

Vegan Bacon Challenge Part 2: Jerky

October 10, 2009

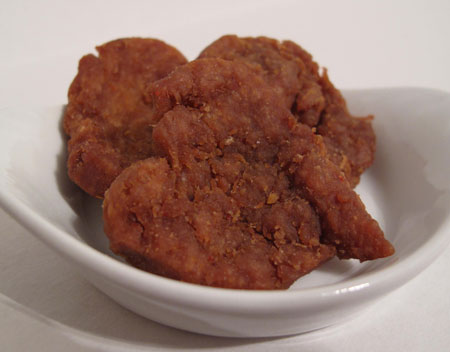
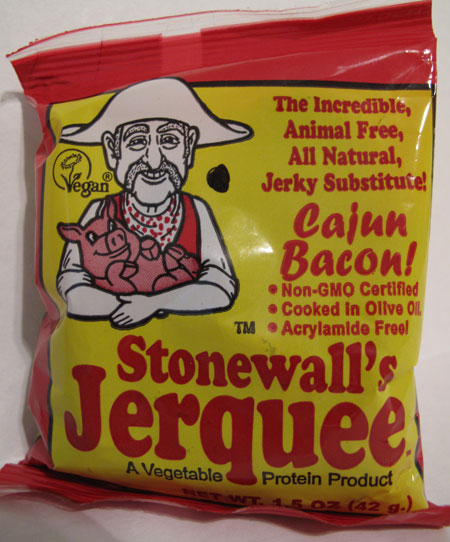
I happened to find this random product at my favorite natural foods store, Natural Grocers/Vitamin Cottage.  It's called Stonewall's Jerquee, A Vegetable Protein Product.  I bought the Cajun Bacon flavor honestly expecting that it would be horrible, and when I opened the package, I had one thought…cat treat.  It looks like cat treats.  And it smells kind of like smoky cat treats.  😀

Cat treats or People snack?

Cat treats or People snack?

So far, my expectations were not very high.  How about the ingredient list?  Defatted soy flour, water, yeast, extra virgin olive oil, soy sauce, garlic, onion, cayenne, and sorbic acid.  Not a bunch of junk that I can't pronounce or decipher.  Ok, so maybe this won't be so bad?

Now for a bite.  The texture is very chewy; a texture I can't remember getting in a meatless product.  I like it!  And the taste?  Very spicy and peppery with a little smoke and saltiness.  I'm surprised that I'm enjoying this odd little snack, but I really am!

Stonewall's Cajun Bacon Jerquee

Stonewall's Cajun Bacon Jerquee

I've bought Stonewall's Jerquee twice now, and I still like it. I'd like to try some of the other varieties next time. And guess who else likes them?  Gabriel!  The cat who won't even touch the Thanksgiving turkey doggie bag that SisMama sends to Ashy Poo begs for a taste of this spicy soy bacon treat!

Overall rating: 4 stars out of 5 on the Sister Scale.  Stonewall's Jerquee doesn't really remind me of bacon, but I like the originality, the chewy texture and the spicy flavor as a little tidbit.  Nice job, Stonewall!

If you can't find these snacks locally, you can order them on Lumen Foods web site.  Next time I'll give you the veggie scoop on Morningstar Farm's faux bacon strips.

~BigSis

Vegan Bacon Challenge Part 1: Bacon Salt

October 6, 2009

When was a meat-eater, I loved the aroma and the flavor of bacon but almost never ate it because of the high fat content.  Now that it's been over 15 years since I ate anything with a face or parents, I have to admit that I still like the smell of it.  I can't stand the odor of barbecue or any other meat item, but bacon is the exception.  I don't eat it, but I do enjoy smelling it. I'm a little bit ashamed to confess that, but I have to be honest.

I know that lots of vegetarians are disgusted by the meat analog products that some of us eat, because they're too similar to real meat.  I totally understand and appreciate that viewpoint, but soy, wheat and mushroom burgers, patties, etc., don't personally offend me.

Back to the bacon.  I don't think it's the pig itself that smells so good; my theory is that it's the smokiness of the spices.  If it's true that the spice combo creates the aroma, then is there a product out there that would fill the bacon-shaped hole in a vegetarian's or vegan's diet?  And even if you're not a veggie, perhaps a bacon-flavor substitute would appeal to you for health reasons because of a lower fat content?

So I proposed a challenge to myself.  Try to find a delicious vegan bacon-flavored item.  Sounds simple, right?  Let's see!

The first contender is Bacon Salt.  I've been hearing buzz about it for months and months, but never ordered it.  In addition to online availability, you can now buy Bacon Salt in some retail stores.  I got my 2 oz jar of the Original Bacon Salt at Kroger for $4.99.

Bacon Salt

Bacon Salt

First off, there are lots of ingredients in Bacon Salt.  The first is sea salt, then garlic, paprika, onion, and corn syrup.  It also contains corn cereal (?), natural hickory smoke flavor, natural butter flavor, partially hydrogenated vegetable oil, artificial flavors and some other things that I'm not familiar with.  So, my initial reaction is: too much stuff, some of it not good for us.

Secondly, there's the aroma.  Sniffing the jar, I wasn't bowled over.  It smells a little weird and fake-ish, with a mostly smoky odor.

Lastly, how does it taste?

  • Tasting it plain out of the jar, it definitely tastes artificial to me.  I get the salt, garlic, paprika, onion and a little sweetness, but mostly I taste smoke and not in a great way.  Even faux bacon bits taste better alone than this.
  • I also tried it sprinkled on some raw almonds that I had sauteed in a little butter for a few minutes.  The flavor of the salt was better on the almonds than it was on its own.  It reminded me a little of the smoked almonds you can buy in a can, but not as good.  The smoke flavor wasn't offensive on the almonds, but I wasn't really reminded of bacon either.
  • The final taste test on a faux BLT was the most successful for Bacon Salt.  I spread a little mayo on some whole grain bread (you could use vegan mayo, of course), and added fresh tomato slices and shredded lettuce.  The Bacon Salt was sprinkled fairly generously over the veggies.  Dare I say it?  It was pretty darn tasty!  I almost got a touch of bacon-iness, without any of the odd artificial flavors.

The verdict:  2 stars out of 5 on the Sister Scale.  I wouldn't buy Bacon Salt again because I just don't think it's good for me since I try not to eat things I can't pronounce.  It is horrible?  Absolutely not.  Is it as great as the hype?  Nope.

So, the search continues for a great vegan bacon-flavored item.  I truly hope you find some value in this challenge, because tomorrow morning I'm going to have salt bags under my eyes like crazy!

Next time…vegan bacon jerky!

~BigSis

Super Easy Chicken Stew

October 5, 2009

It's finally cooling off a little bit here in Southern California. For the past few weeks we've had record high temperatures, which I happen to love, but I guess I have to realize that Summer is officially over.  🙁

Some people say that they use the crock pot in the Summer to avoid turning on the oven but in the Summer, I'm not in the mood for most of the recipes that are usually made in the crock pot: stews, soups, chili, etc.  In the Summer, we grill something almost every night and just serve with a veggie or two and a salad.

But now that it's cooler at night and will be getting dark earlier, I won't be grilling as much. I'm already starting to get the urge to make some huge pots of chili and homemade soups. I don't make a lot of recipes in the crock pot but I really like the convenience of it so I'm on the lookout for some good, healthy, one-pot recipes that can be put on in the morning to be ready at the end of a busy day.

I have the Fix It and Forget It Lightly cookbook and I've found some recipes in there that are pretty healthy which don't contain all the cream soups, but I still usually end up modifying most of the recipes a little bit.

I threw this one together one day last week when I had a really busy day planned so dinner would be all ready when we got home. And when I say that I threw it together, I mean that literally. I was so busy that morning that I didn't even feel like chopping anything. My inspiration for this stew was a bag of Teeny Tiny Potatoes that I found at Trader Joe's. (Yes, it really said Teeny Tiny Potatoes on the label; I wished I had taken a picture of the label because I had never seen these before.)

The quantities and the ingredients in this recipe can be changed to suit your taste. Afterwards, I wished that I had added corn. Here's what I did.

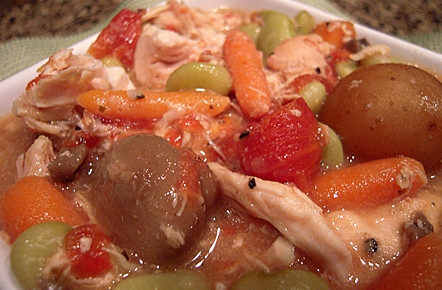
Chicken Stew

Super Easy Chicken Stew

2 pounds chicken tenders
1 bag teeny tiny whole potatoes (maybe 1/2 lb.)
1/2 bag petite baby carrots
1 bag frozen lima beans
1 can diced tomatoes
1 jar whole mushrooms
2-3 c. low sodium chicken broth
1 can Healthy Request Cream of Mushroom Soup
1/2 envelope Lipton Onion Soup mix
fresh ground pepper
garlic powder

Place chicken tenders in bottom of crock pot. Sprinkle with garlic powder and fresh ground pepper. On top of chicken, layer the potatoes, carrots, lima beans, tomatoes, and mushrooms. Pour in some chicken broth to almost cover vegetables. Mix together 1/2 cup or so of chicken broth with the one can of mushroom soup and the Lipton onion soup mix and pour over the top of the vegetables. Cook on low for six or seven hours or until the veggies are soft. Stir to combine the veggies. Serve alone or on top of your favorite noodles for a heartier meal. I served on top of Fusilli noodles.

That's it! It doesn't get any easier than that. I didn't even chop up the chicken tenders, they were so tender that they just fell into pieces. My guys loved this super duper Easy Chicken Stew so I'll definitely be making it again!

~LilSis

Chocolate Coconut M&M Cookies

October 2, 2009

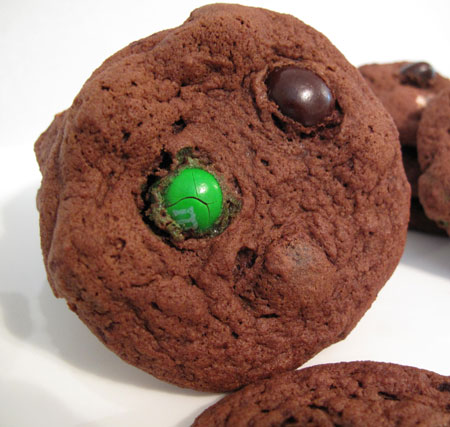
Chocolate Coconut M&M CookiesI happened to find a bag of Coconut M&Ms at a random Kroger a couple of weeks ago, and decided to make cookies out of them.  I love M&M cookies!  I think it's because our grandmother in west Texas would make a batch whenever we came for a visit, and I just have warm memories of her with M&M cookies.  We only had one grandmother, and she was a good one!  😀

For an excellent cookie recipe, I looked to Anna the Queen of All Cookie Madness, of course!  She didn't let me down.  She recently did an M&M Cookie Roundup, and linked to a chocolate M&M cookie recipe from One Ordinary Day.  I made a few changes to that recipe, and came up with these beauties.

Chocolate Coconut M&M Cookies

Chocolate Coconut M&M Cookies

(Adapted from One Ordinary Day)

2 c flour
3/4 c unsweetened cocoa powder (I used Penzeys Natural Cocoa)
1 tsp baking soda
1/2 tsp salt
1/2 c butter, softened
1/2 c shortening, at room temperature
2/3 c granulated sugar
2/3 c packed light brown sugar
1 tsp mexican vanilla extract (Penzeys Mexican Vanilla, of course!)
2 large eggs
1 bag Coconut M&Ms (1 cup for the batter plus the rest for the cookie tops)

Preheat oven to 350 degrees.  Combine flour, cocoa powder, baking soda and salt in a small bowl.  Whisk to combine.

In a large bowl, beat butter and shortening with sugars and vanilla until creamy.  Add eggs, one at a time, beating well after each one.  Beat flour mixture into butter/sugar mixture, in 2 or 3 additions.  Stir in M&Ms with a wooden spoon.  Drop by tablespoons (I used a tablespoon-size cookie scoop) onto ungreased cookie sheets.  Add a couple of M&Ms to each cookie.  Bake for 9 or 10 minutes.  Cool on cookie sheet for a minute or two, then remove to wire rack to finish cooling.

Makes 3 dozen cookies.

Chocolate Coconut M&M Cookies

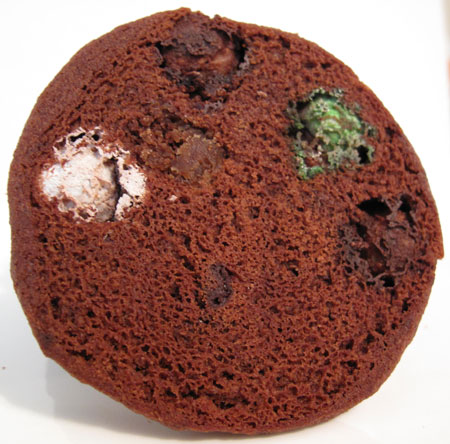
These were delicious, chocolatey, almost fudgy cookies.  The flavor of the mexican vanilla was awesome with the cocoa and the coconut.  The Coconut M&Ms worked beautifully!  Everyone gave them a big thumbs-up!  The cookies were best the first two days; after that they started to dry out a little bit.  Now there are only crumbs left and a couple of empty cookie containers…

One of the things I adore about M&M cookies is how the M&Ms that touched the cookie sheet have gotten all crispy-ish and kind of caramelized on the backs of the cookies.

Chocolate Coconut M&M Cookies

If you see Coconut M&Ms, grab a bag and turn them into these scrumptious cookies!

Chocolate Coconut M&M Cookies

PS:  We're going pink for the whole month of October for Breast Cancer Awareness, so enjoy the pink type!

~BigSis

Why Do You Bake?

September 28, 2009

I had a thousand things to do last night.  You know how it is on Sunday night.  There are things left to do and the weekend is running out.  I know that people think single people have oodles of spare time on their hands, but it doesn't work out that way for me.  Besides a stressful full-time day job, the bills have to be paid, the animals need care, the house needs cleaning, the laundry needs tending to, the car needs maintaining, meals needs preparing, and errands need to be done.  Oh, yeah, and then there is BigSisLilSis, exercising, and maybe a tiny bit of a social life, if I'm lucky.  But, that's just life, right?  We're all busy.

So with all of that going on, what did I do last night?  I baked cookies, of course!  😀  What the heck!  As I was stirring up a big mess in my kitchen, I started thinking.  Why do people bake?  Why am I baking?  Now I'm wondering…why do you bake?

  • To alleviate stress? Some people, like LilSis, would say that baking is a stress-inducer, rather than a stress-reducer.
  • To fill a need to fill tummies? Do you bake because your family needs food, and whipping something up is the easiest way to feed them?
  • To save money? Depending on the ingredients, it definitely can be more economical to bake a batch of cookies or a loaf of bread from scratch than it is to buy something at the grocery store.
  • To carry on a family tradition? Lots of families have vintage recipes that have been passed down for generations, so baking them and teaching them to children and grandchildren keeps the tradition alive.
  • To have fun? Baking can be fun, when things work out right, and mastering a challenging recipe is really rewarding.  Spending time in the kitchen to me is just plain fun!
  • To show your love for people? Lots of people, me included, love to bake something that pleases people.  For me, baking isn't just a task, it's something I put my heart into.  I want it to be perfect, and for people to know I did it for them because I care about them.

So, now that you know I bake for fun and love, please tell me.  Why do you bake?

~BigSis

Easy Multigrain Sandwich Bread

September 23, 2009

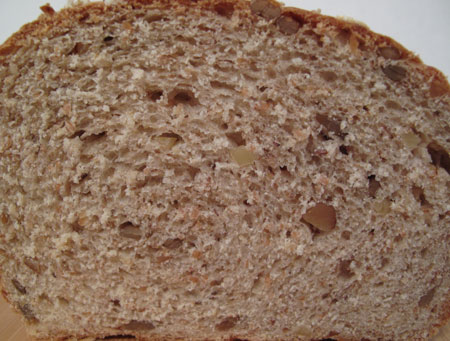
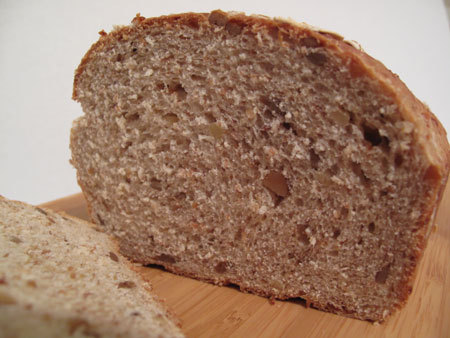
Multigrain Sandwich Bread Up Close and Personal

Multigrain Sandwich Bread Up Close and Personal

I'm not a Wonder Bread kind of a girl. I like my bread grainy and seedy and nutty, but not too dense or clunky.  Sometimes those heavy breads can make fabulous toast; Ezekiel Bread is a perfect example. But in sandwiches they're just a little too much, you know?

I usually buy Sprouts' delicious whole grain bread, but I thought it would be fun to make my own.  Months ago, I saw a recipe for a multigrain bread that used Bob's Red Mill 7 Grain Cereal, and I bought the cereal in anticipation of making the bread.  I never got around to making it though…til now! Ta da!

Multigrain Sandwich Bread

Multigrain Sandwich Bread

This is the best bread!  I absolutely love the way it came out.  It's light enough for sammies, but it's still a substantial whole grain bread.  It's not too sweet or too bitter as some multigrain breads can be.  This is Goldilock's multigrain bread…it's just right.

Was it easy to make?  Ummm, yeah, I guess, but it took all day to make 2 loaves (without a bread making machine).  I actually enjoyed the process, but it was a process so be prepared to tend to it off and on all day.

You can find the recipe on Bob's Red Mill site.  I followed it exactly except for adding 1/2 cup chopped almonds, and using salted roasted sunflower seeds instead of raw ones.  I'll definitely make this again.  Do any of you have a favorite multigrain bread recipe I should try?  Think about it while I go make some toast and find some butter.

~BigSis

How to Organize Your Online Recipes in a Delicious Cookbook

September 21, 2009

One of the things I love about blogging is the community.  We share a common interest, and it seems to me that most bloggers are very supportive of each other and encourage each others' success.  And if you're lucky, at some point you might get to meet your online friends in person.

The other thing I really like is that bloggers know food!  If I see a recipe posted by Anna, Peabody, Grace, Cathy, Susan, Michelle, Susan, Lisa, or  Heather (among many, many other incredible cooks and bakers), I am confident that I can make that recipe and it'll turn out great.  If I have any questions or problems, or successes I want to share, then I know who to go to.  I can't do that with the cookbooks on my shelves.

The only problem with online recipes though is how to organize them.  I used to highlight the recipe and paste it into Microsoft Word, then print it out and save it to my hard drive.  But then I had all of these hard copies to sort and file, and who ever goes back through all of those?  There's too much paper in our lives to deal with already.  And invariably I save a recipe to my laptop at home, and then later need to access the recipe at work so I can pick up the ingredients on my way home.

What if you could save an online cookbook of all your favorite recipes, sorted the way you want it?  Well, you can do just that and it's super duper easy!  Are you using Delicious bookmarks?  If you are, then you can tweak it to organize your online recipes, and if you're not, then think about getting on board!

Delicious is awesome because you just sign up for a free account, and then you use it to bookmark your favorite pages.  It doesn't matter which computer you're on.  Your bookmarks are on Delicious, not on one particular computer.  The other cool thing is that you can choose to share your bookmarks and your personalized cookbook with other people that you specify.

So, let's set up your online cookbook!

  • First, access your account at http://delicious.com or set up a new account.
  • In the right sidebar, click on Tag Options and choose Manage Tag Bundles.
  • A new window opens. Click on Create to make a new tag bundle.
  • In #1, enter the Tag Bundle Name, something like “Emma's Cookbook”.  In #2, enter the tags that you want to use to sort your cookbook.  Separate your tags with spaces.  You could use broad categories like appetizers, vegetables, meat, and dessert, or you could use more specific tags like cookies, chocolate, soup, potatoes, quiche, candy, fruit, etc.  You get the idea.  It's totally up to you and how you want to organize your recipes.
  • Click on the green Save button, and you're done!  Voila!

Now, when you go back to your Delicious home page, you'll see your tag bundle listed on the right sidebar under Tag Bundles.  To place a recipe into your cookbook, just add your tags to it before you save the bookmark.  Delicious will sort it into your cookbook bundle, and you just have to click on the tags in your cookbook to show all of the recipes with that tag.

If you decide later that you want to add more tags to your cookbook, just choose Tag Options and Manage Tag Bundles again. Then click on Edit next to your Tag Bundle's name.  Add, change or delete your tags as you wish, then Save.

That's it!  You have your own online cookbook, wherever you are!  I hope that you give this a try and enjoy it as much as I do!

~BigSis

Shrimp with Garlic and Chili Pepper

September 20, 2009

Shrimp with Garlic

I'm so glad that I was reading Kahakai Kitchen the other day when Deb mentioned the new weekly cooking event, I Heart Cooking Clubs. Luckily, I found out about it just in time to join the fun!

IHCC

The Cooking Club is presently featuring the recipes of Nigella Lawson and the first weeks' challenge is Party Treats. Yay!! My favorite course!

You all know that I LOVE appetizers!  I've mentioned more than once or twice how much I prefer hosting Hors D'Oeuvres & Cocktail Parties versus hosting a formal sit-down dinner. Most of the time when we have friends over, we end up standing around the kitchen bar and island talking, eating, having a few cocktails, and we never sit down. (It sounds rude, I know, but no one ever wants to sit, including myself!)

So, for this first week on IHCC, I decided to make Nigella's Shrimp with Garlic and Chili Pepper.  The original recipe can be found online at Food Network. I thought these would be a perfect little party treat to take to a get-together we had planned for last night; and, yes, they were a hit!

I changed it up a bit, like I always do when I cook!  I have three hungry men in my house, so I started with a pound of shrimp instead of a half of a pound. (I did want to have some left to take to my friends after the guys did their little taste test.) Since I started with twice as much shrimp as the original recipe called for, I used 3 T. of olive oil instead of 2 T. and 3 large garlic cloves instead of two. Also, my local store didn't have red chili peppers, (which ticked me off) so I used a half of a Serrano instead. And, I wanted some red color so I added 1/2 t. crushed red pepper flakes. The combination of the two turned out great!

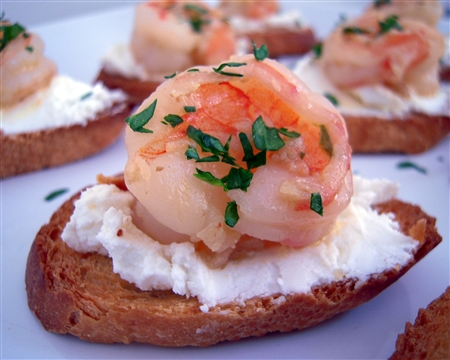
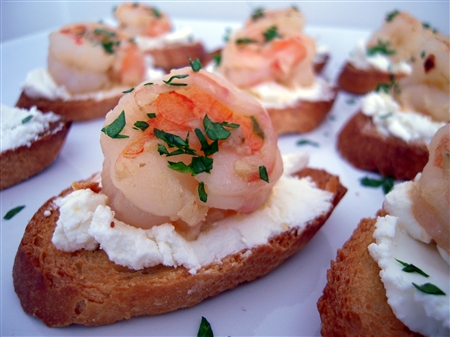
Nigella's recipe called for unshelled shrimp but since I wanted to serve these individually on toasted baguette slices, I shelled the shrimp before I cooked it. I also decided to spread a little goat cheese on the toasted bread before sitting the pretty little shrimps on top.  Everyone loved these little party treats!

Shrimp Closeup #1

Shrimp with Garlic and Chili Pepper
(adapted from Nigella Lawson's Nigella Bites online at Food Network)

3 T. olive oil
1/2 serrano pepper
3 large garlic cloves, minced
1/2 t. crushed red pepper flakes
1 lb. medium to large shelled shrimp
1/2 c. white wine
Pinch of salt
5 oz. package of soft goat cheese
1 baguette bread, sliced diagonally
1 T. chopped Italian parsley

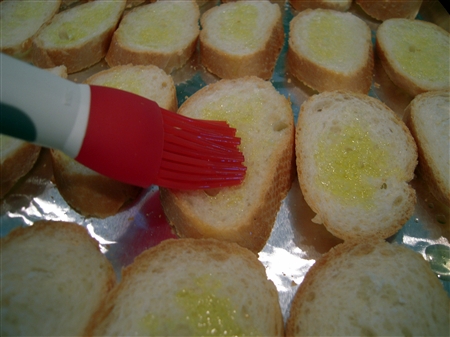
To begin, lightly brush the baguette bread slices with olive oil and toast at 400 degrees for ten minutes or so. Set aside to cool.

Oil the bread

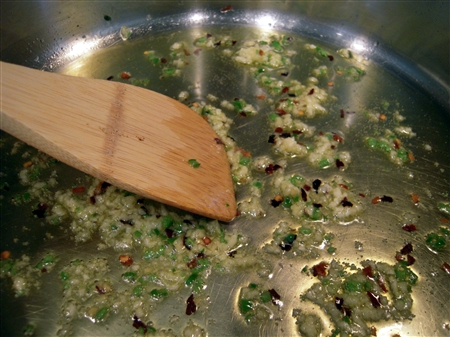
Pour the olive oil into a wide, heavy-bottomed frying pan. Then add the pepper and garlic and, over moderate to low heat, to infuse rather than to color, fry for 2 minutes, stirring all the time.

Garlic and Pepper

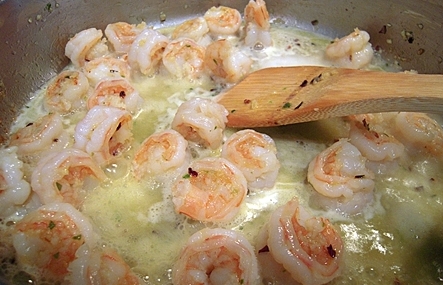
Then turn the heat to high, add the shrimp, and stir-fry them for another 2 minutes or until they turn pink and are just delicately cooked. Pour in the white wine and let it bubble up. Cook for just another minute or so. Season with salt, if necessary.

Stir Fry

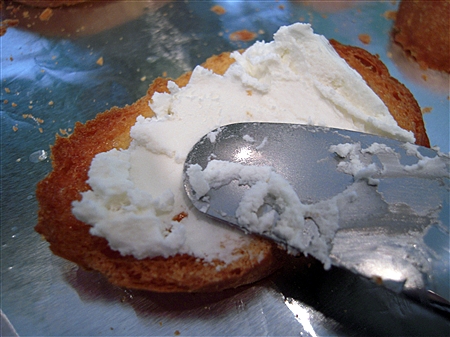
Spread some goat cheese on each bread slice.

Spread on toast

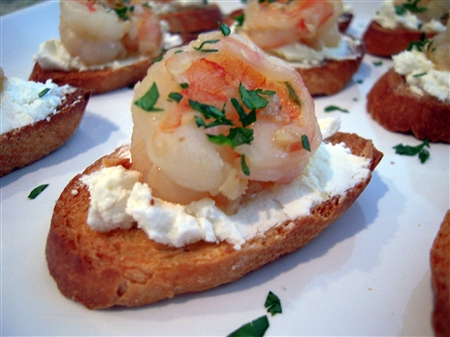
Place a nice juicy shrimp on top, sprinkle with some parsley and serve immediately.

Shrimp Closeup

Enjoy! And, don't forget to check out I Heart Cooking Clubs today for the full roundup of awesome party treats!

~LilSis