Candy Corn Martini

October 31, 2011

Candy Corn Martini

Like sweet drinks?

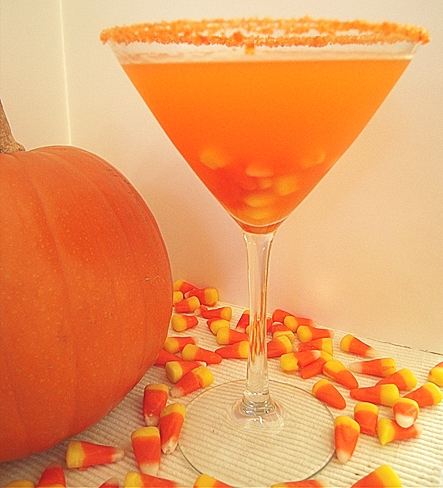
If you do, then I think you'll really enjoy this drink, but, if you also love candy corn like I do, then you're going to love this drink! But, beware! It's super sweet!  🙂

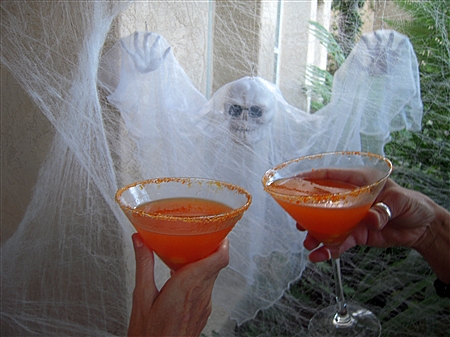
We're celebrating Halloween here at Lil Sis' house with a festive Candy Corn Martini. There are several different recipes floating around for this martini, but I started with Food Network's Candy Corn Cordial Recipe and adapted it a little. Almost all of the recipes for this drink call for an egg white to create some froth on top, but I chose to leave that out.

I decided that the martini would look even more festive with some orange sugar around the rim, so I just made my own by mixing a few drops of red and yellow food color with several tablespoons of sugar.

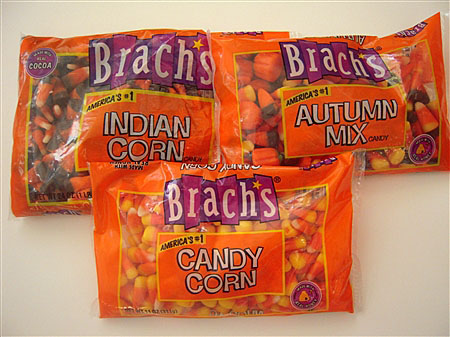
Let me start by saying that I don't have a sweet tooth and normally don't eat candy or drink sweet drinks, but due to my obsession with candy corn, I had to try this one. I started out this Halloween season only buying one bag of candy corn to make these martinis, but on my last couple of trips to the store, I couldn't resist when I saw the Indian Corn and the Autumn Mix.

I'm going to have to take all of this to work just to get it out of my pantry or I'll be eating candy corn for months.

Brach's Candy

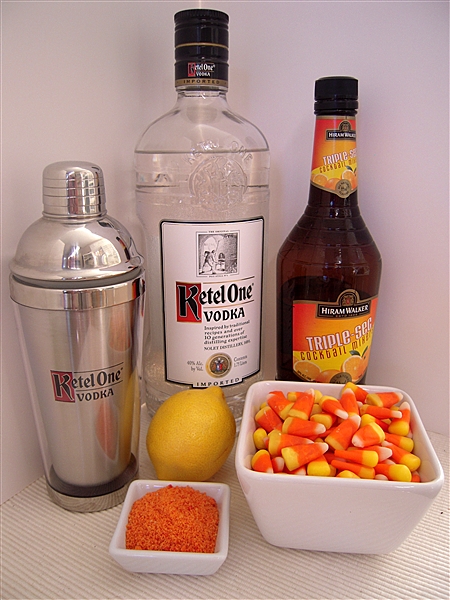
Now, let's get to the Candy Corn Martini. This is a very simple cocktail to make; you just have to allow a few hours to infuse the vodka with the candy corn. Here's all you need:

Candy Corn Martini Ingredients

Candy Corn Martini
(adapted from Food Network)

1/2 c. candy corn
1 c. vodka
2 oz. orange liqueur (I used Triple Sec)
Juice of 1/2 lemon
Candy corn for garnish
Sugar
Red and yellow food coloring

Infuse the vodka: Combine the candy corn and vodka in an airtight container; set aside for at least 3 hours, then strain.

Make the martinis: Rub some lemon juice on the rim of the glass and turn the glass upside down into a plate of the orange colored sugar. Add 4 ounces of the candy corn vodka, the orange liqueur, and the lemon juice to a shaker filled with ice. Shake vigorously for at least 30 seconds. Strain into 2 chilled martini glasses and garnish with candy corn.

Candy Corn Martini's

Enjoy!

HAPPY, HAPPY HALLOWEEN!

~LilSis

Hearty Chicken Italian Sausage Soup

October 24, 2011


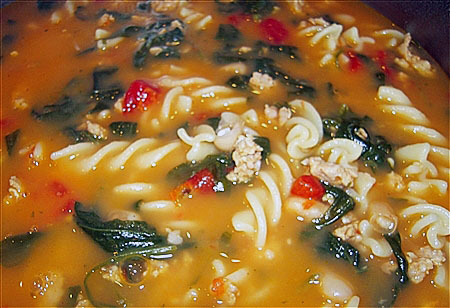
(Once again, I didn't have time to ladle any of my soup into a pretty bowl to photograph it because I had two hungry guys hovering over me with bowls and spoons in hand. One of these days, I'll plan better so I can take photos without my guys around.)

For any of you working women or busy moms driving kids to and from activities all afternoon, here's a super easy and healthy soup that I think your families will love.

I first got the idea for this sausage soup from a recipe I saw on the side of a Premium cracker box but I altered it so much, it doesn't even slightly resemble the original recipe. Here's my version.

Hearty Chicken Italian Sausage Soup

1 lb. chicken Italian sausage (I use Trader Joe's.)
1 shallot
3 or 4 cloves of garlic (I love a lot of garlic, you can use less.)
1 tsp olive oil
32 oz. low sodium chicken broth
1 – 2 cups water (Increase amount of water if you want to increase quantity of pasta.)
2 cans cannellini beans, rinsed
1 can (14.5 oz.) diced tomatoes
2 c. fusilli pasta (I prefer this pasta over rotini.)
1 bag baby spinach leaves, washed

Cook sausage, shallot and garlic in olive oil in large saucepan for about 10 minutes, or until no longer pink, stirring frequently. Add the broth, the water, and the tomatoes and bring to a boil. Stir in pasta and cook 8 minutes or until tender. Stir in the beans and the spinach and cover. Let stand 5 or 10 minutes and serve with crackers or toasted baguette bread.

(Note: one thing that HayHay mentioned is that he would like this better if it had less beans. He didn't like the texture of too many beans with the pasta and I did agree. The original recipe called for one can of beans for 1 c. of pasta but I since I used 2 c. of pasta, I used 2 cans of beans; but it wasn't necessary. Next time, I'll use two pounds of sausage to make it a little heartier and only one can of beans.)

Like I said, this is a super quick and easy soup, perfect for a busy week night, and my family loved it! 🙂

~LilSis

Cocktails and Concoctions

August 2, 2011


On the "Rocks"
On the “Rocks”

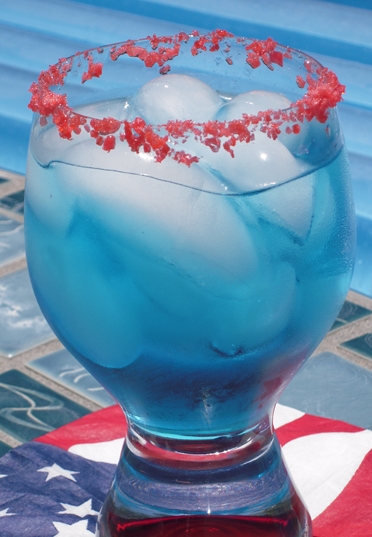
Doesn't this look refreshing? I wish that I was sitting out by my pool with one of these in hand right now. 🙂

I talked about this drink about this time last year after experimenting with the idea of putting pop rocks around the rim of a cocktail glass. This drink is something a little different and fun to make for a cookout or ‘get together' with friends. This doesn't have to be made in red and blue, you could use any color of mixer and/or pop rocks.

I'm sharing this again today to let everyone know that we've just added a Cocktails and Concoctions category to our Recipe page. We've started with a few of our favorites, including our Overnight Bloody Marys, which are perfect to make ahead for a brunch or a ‘get together' with friends.  So, check it out and keep reading because we'll be adding more concoctions very soon.

If anyone has a favorite summer-time cocktail or beverage that you think we should try, we'd love to hear from you!

~LilSis

Stuffed Mushrooms Italian

July 6, 2011

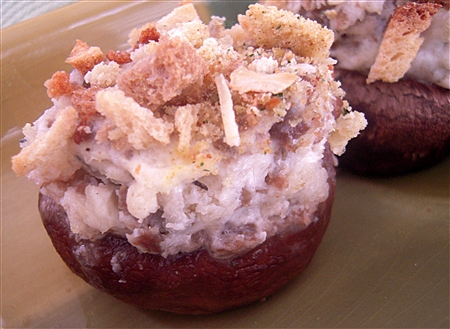
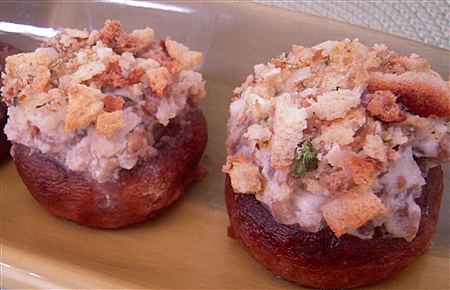
I mentioned this family favorite recipe for Stuffed Mushrooms Italian a couple of years ago around Christmas time and BigSis shared her veganized version with us last New Year's Eve.

It's always been a tradition of ours to make these yummy mushrooms for Thanksgiving, Christmas, or New Years Eve, but these are also perfect for a summer cookout or barbeque. When I made these for our Father's Day cookout, I decided to try to get a couple of photos before they were all gobbled up since I wasn't able to get photos the first time around.

Try these the next time you need to take an appetizer to a ‘get-together' with friends or family and I promise you won't be disappointed. They're easy enough to make ahead and then just put on the grill on some foil to stay warm until ready to serve.

Stuffed Mushrooms Italian

24 large mushrooms
1 pound hot Italian sausage
8 ounces cream cheese, softened
2 shallots, minced
1/4 c. Progresso Italian Breadcrumbs
1/2 stick plus 1 T. butter
1 c. or so seasoned dry stuffing mix (any flavor)

Wipe mushrooms clean, and remove stems. Saute very lightly (only about 30 seconds on each side) in 1/2 stick butter.

Remove sausage from casings and cook in skillet until brown. Drain. Saute shallot in 1 T. of butter until translucent. (I cheat sometimes and just saute the shallot with the sausage.)  In mixing bowl, combine cooked sausage, shallot, cream cheese, and breadcrumbs. Stuff generously into mushroom caps.

At some point after making these for years, we added this one ‘secret ingredient’ that wasn’t in the original recipe. After stuffed, turn the mushrooms upside down and gently press into the dry stuffing mix, just until the top is covered with a layer of stuffing mix. (The dry stuffing mix on top adds a nice crunch and wonderful texture to these mushrooms.) Put in a 13 x 9 casserole dish and bake at 350 degrees until hot. I like to keep them in a few extra minutes until the tops are browned a little.

~LilSis

Beach Break Cafe Review

June 25, 2011

It's been a couple of weeks since I've been back home from my extended weekend trip to California, and I'm still thinking about Beach Break Cafe! On our way to take me to the airport, we stopped in for a late breakfast/early lunch and we can't believe it took us so long to eat there!

We happened to be at Beach Break Cafe on the last day of school, and this was apparently THE go-to spot for happy high schoolers who were eager to celebrate their freedom with an awesome California-style meal. HayHay saw oodles of kids he knew. We had to wait for a table for 15 or 20 minutes, but it was well worth the wait.

Even before our food came, we were loving the cafe. All of the staff were so friendly and our server told us that they were experimenting with new restaurant POS systems to try and make their service even more efficient. The decor and vibe was very beachy-cool, and fun. We sat out on the patio and enjoyed the fresh air and people watching. This is our kind of place! You can keep your fancy fah-fah-fah restaurants. Give us a laid back hole in the wall cafe and we're happy girls!

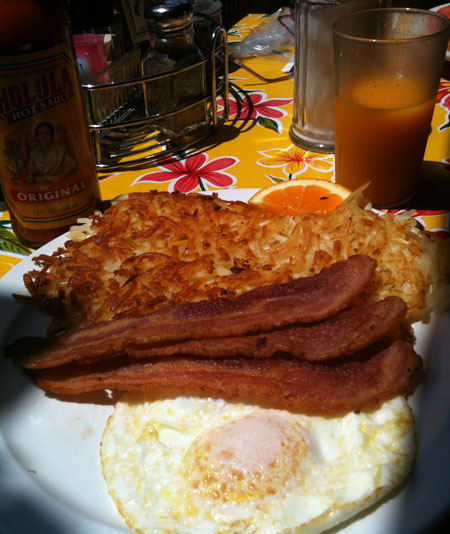
Being vegan 99% of the time, my food choices were somewhat limited as usual, but I did have options. Take a look at the menu. I was dying to try the legendary crispy hashbrowns, so that's what I had, along with sliced tomatoes, biscuits and coffee. There was no way I was going to be virtuous with oatmeal or fresh fruit on this trip! I wish I'd gotten the fresh-squeezed tangerine juice that LilSis tried. It was pure California gold in a glass! Beach Break also offers fresh-squeezed grapefruit and orange juice.

Here's LilSis' meal before she tore into it. Check out those crispy golden hashbrowns!

Beach Break LilSis

LilSis' plate at Beach Break Cafe

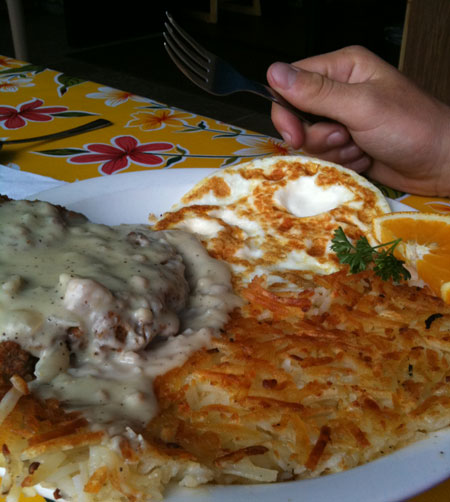
Check out HayHay's plate. You can't even see the 2 ginormous slabs of sourdough toast on the side!

Beach Break Chicken Fried Steak

Beach Break Chicken Fried Steak

You see that hand on the right of the photo? It belongs to a 17 year old surfer and it's holding a fork. You know what that means? It means in 10 minutes flat you have this situation:

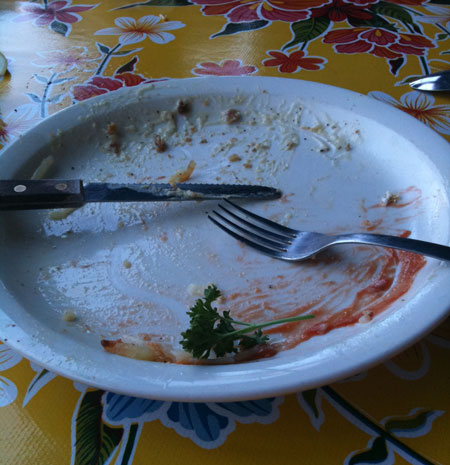
Beach Break Empty Plate

Beach Break plate after HayHay attack!

I guess he was too full or the garnish would have been history too!

We'll definitely make breakfast at the Beach Break Cafe a regular stop when I'm visiting. The whole fam damily is hearding out to Californie later this summer after my new great nephew is born, so Beach Break better get ready! We'll need lots of those delicious hashbrowns!


~BigSis

Cheese and Chive Crisps

June 11, 2011

We had a great time last week while BigSis was here in California visiting and helping me prepare for the big baby shower! We ate Mexican food every single day during BigSis' visit and may have over-indulged just a little bit, but that's just what we do. It's tradition.

Now, it's back to the grindstone and the gym for both of us. BigSis is back to work in Texas and today was my first day back to work after several days off.

We shared a ‘sneak peak' photo of these crackers the other day when we talked about the shower and we promised that we'd be back to share the recipe with you.

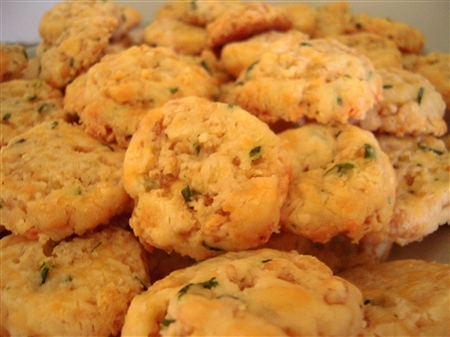
Crispy Cheese Crackers

Crispy, Cheesy, Yummy, Chive Crisps

This recipe is similar to one that SisMama has made for years; with only slight variations like the chives and the rice krispies. You can find this recipe for Cheese and Chive Crisps on allrecipes.com.

Cheese and Chive Crisps

These crackers were absolutely “melt in your mouth' delicious and each and every one of them disappeared long before the end of the day.

I was a little skeptical about the rice krispies at first because I had always made the original recipe that didn't include the cereal, but BigSis convinced me that they would be yummy and now I couldn't imagine making them without the cereal. And the fresh chives made these cheesy crackers even more special.

The only thing that we both agreed on is that the next time we make these, we would at least double the amount of Frank's Red Hot to give them just a little more kick!  🙂

These tasty little crackers would be great for any get-together – especially a cocktail party – so give them a try!

~LilSis

What to Eat for Cinco de Mayo

May 5, 2011

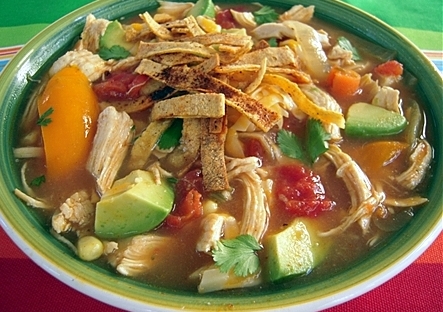
Classic Tortilla Soup

Classic Tortilla Soup

Like most of our Texas sisters from other misters and brothers from other mothers, we sisters love our Mexican food!  Give us a reason to eat it.  Please!

Or don't give us a reason.  We'll still eat it.

Morning, noon and night.  We'll eat it 3 times a day.  Or more.  Girls need snacks sometimes, you know.

Cinco de Mayo is the official Mexican food eating holiday though, so bring it on!  Check out the recap we put together last year with some of our favorite Cinco de Mayo dishes.

My new favorite Mexican food snack is veganized Bob Armstrong Dip, so that's what I'll be making.

Vegan Bob Armstrong Queso Dip

Vegan Bob Armstrong Queso Dip

Whatever you feast on, enjoy your Cinco de Mayo!

~BigSis

Swirled Cookie Suckers for Easter

April 22, 2011

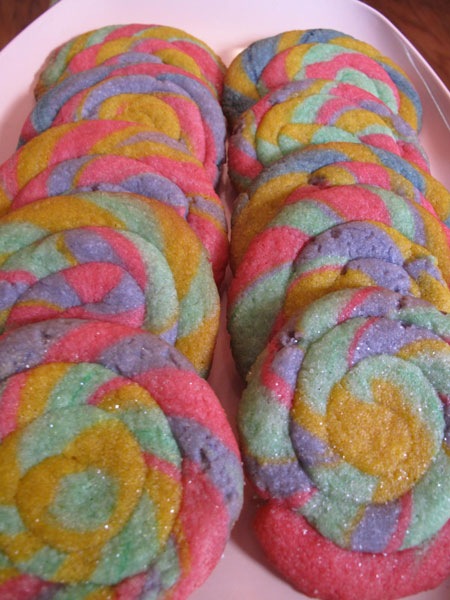
Cookie Suckers Plate Rows

We've got one more fun project for you before Easter hops on in, and it's another one you can get your little bunnies and chickies involved with!

Several years ago, I made 3oo to 400 of these fun cookie suckers for the volunteers who were serving on Easter weekend in my church preschool.  Yeah, it was a pretty big church with LOTS of preschoolers!

I can still vividly remember staying up until 3 am, swirling and twirling the dough into cookie suckers on sticks, wrapped up in a treat bag and tied with a ribbon.  Even though it was exhausting, my main memory is that it was a really fun project!

Let me show you how to make these so you can enjoy them too!  I used a vegan cookie dough recipe this time, but the recipe I used to use is a rich one with cream cheese that's usually called play doh cookie dough.

Cookie Suckers Plate

I want to experiment with other vegan cookie recipes, since this one spread a tiny bit more than I would have liked, but it held up surprisingly well.  You just need a basic sugar cookie dough that will stay together and be pliable while you're rolling it out into a snake.  If it's too soft, it'll fall apart, but if it's too stiff it will crack instead of roll.

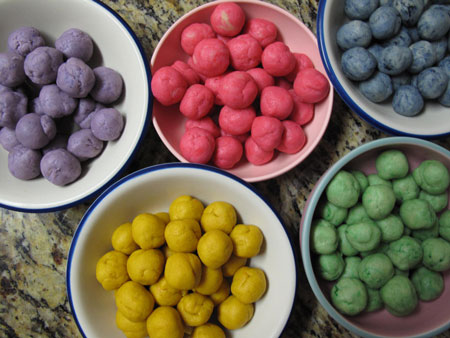
Whatever cookie recipe you prefer, make a couple of batches, then divide it up and mix in your favorite paste food colorings.  I like to use 4 different colors of  dough for each cookie, but you could use more or less.  That's the beauty of this project: you can use your imagination and do whatever you feel like!

Cookie Suckers Colored Balls

After the dough is made, refrigerate it overnight or until very cold, then start rolling!  This is where you call in the kids to help.

I use the bigger end of my melon baller to scoop out the dough, and then roll it lightly in my hands until it's semi-round.  My balls were probably close to 1″ in diameter, but I didn't measure.  The key is to make the balls the same size and use the same number of balls per cookie so that they all bake evenly.

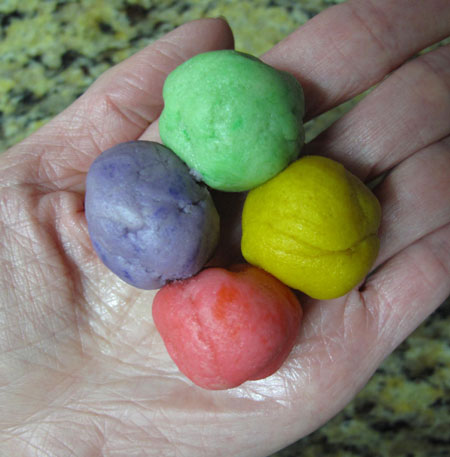
Once you have the balls made, chill them again.  If you start out with soft warm dough, you'll have a hard time rolling it out.  When the dough is cold, take 4 balls of any color and line them up in your hand.

Cookie Suckers 4 Balls

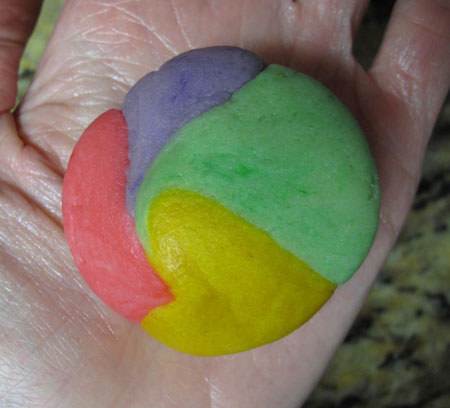
Gently roll the  balls together between your palms so they start to mingle and get happy with each other.

Cookie Suckers Balls Mingle

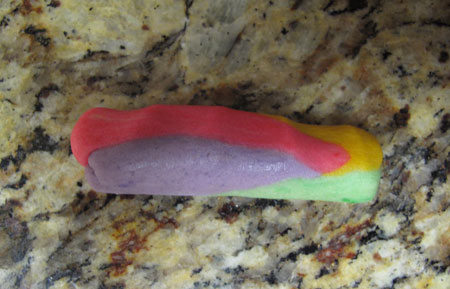
Then lay the dough onto your work surface and gently form it into a snake.  I thoroughly cleaned my granite counter, and it worked great for rolling.

Cookie Suckers Log

Keep gently rolling until you have a dough snake about a foot long, more or less.

Cookie Suckers Snake

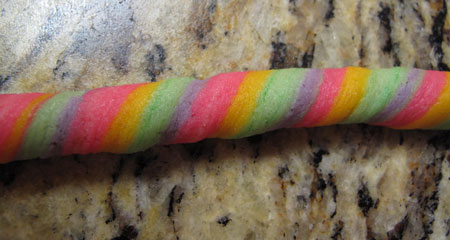
As I'm rolling it, I like to roll one end one way, and the other end the other way.  That's how you get the swirled candy cane effect.

Cookie Suckers Swirled

If the dough breaks, just mash it back together.  No one will ever know!  Now start coiling the snake around itself until you get to the end.

Cookie Suckers Coil

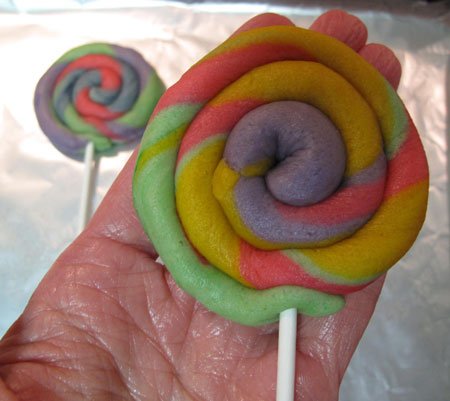
Add a sucker stick, and you have a finished cookie sucker ready to bake.

Cookie Suckers Bake

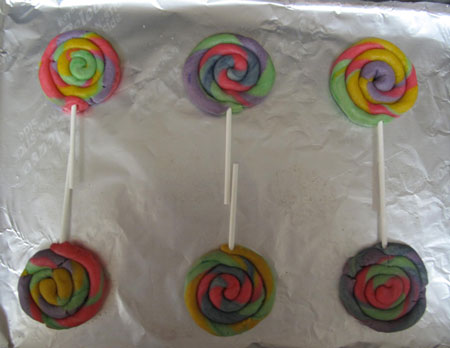
Repeat with the rest of the balls.  If you don't have cookie sticks, just bake the cookies as is.

Cookie Suckers 6 Bake

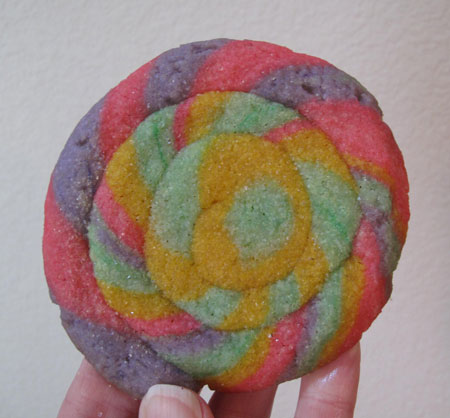
If you want to, you can add a sprinkle of colored sparkly sugar before you bake, like I did in the cookie below.

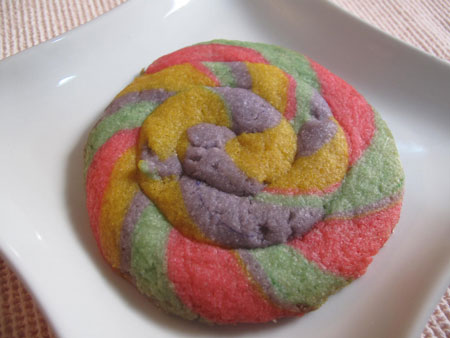
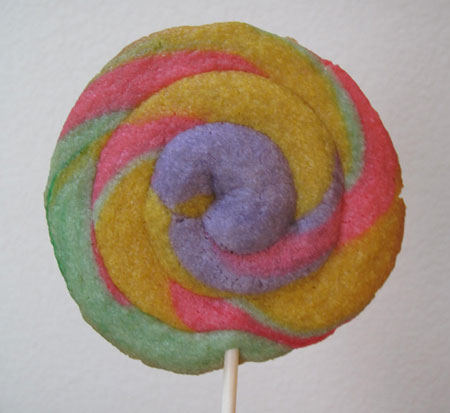
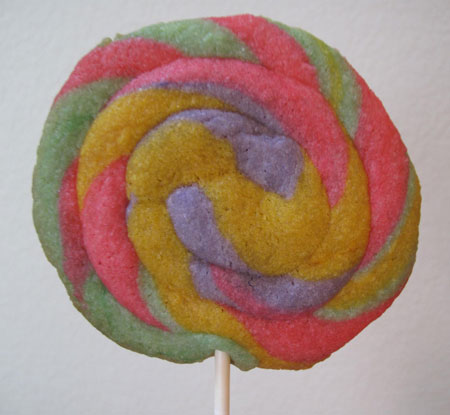
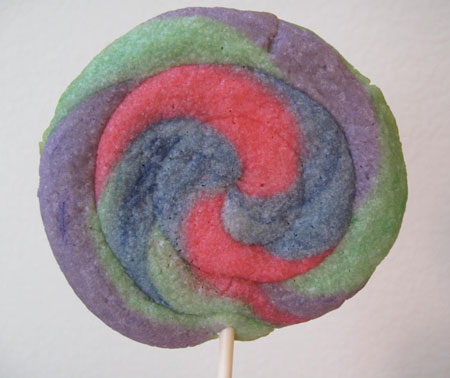
Cookie Suckers Baked

Cookie Suckers 1

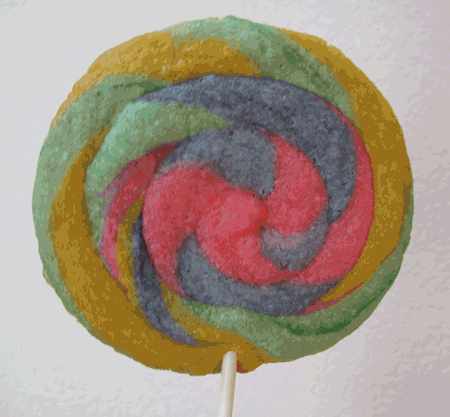
Cookie Suckers 2

Cookie Suckers 3

Cookie Suckers 4

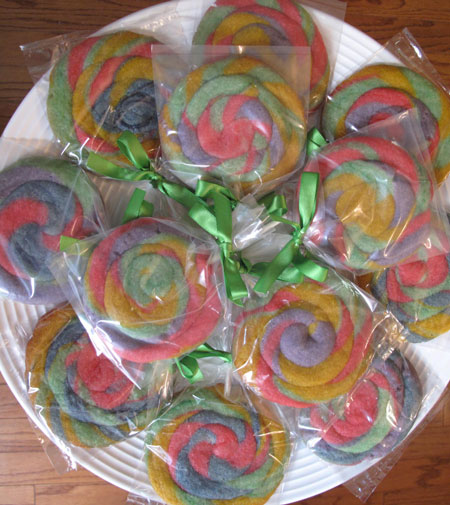
I like to insert the cooled cookie suckers into a treat bag that will fit, and tie on a little ribbon bow.  These make great gifts for your friends, neighbors and coworkers, and would be a really cute addition to your Easter table or to a special someone's Easter basket!

Cookie Suckers Platter

Happy Easter!

~BigSis

My 1st Easter Bunny Cake. Floppy, the flop.

April 18, 2011

Easter Bunny Cake

Let's see. Where do I begin?

First of all, if you're new here on BigSisLilSis, I should probably start by saying that I'm not a baker; and for those of you that have been reading for a while, I know that you've heard me say it over, and over, and over again. (But, it's true.)

Secondly, I didn't purposely set out to make my own birthday cake, but it just worked out that way. Yep. Today is my birthday and it's kind of a scary number for me so I won't mention how many candles should be on my cake. My hubby is really good about buying me wonderful birthday cakes from a local French Bakery, but I told him not to buy me one this year since I was making my first Easter Bunny Cake and we could just consider it my birthday cake.

One more thing before we get to the cake. I've always loved Duff and his show, Ace of Cakes and I love watching the cake decorating contests on Food Network, but after attempting this Easter Bunny Cake, I have a new-found respect and admiration for all cake decorators.

Here's a little conversation that happened when HayHay, my 17 yr old son, walked in after school on Friday after I had just finished my cake.

Me: “HayHay, did you see my Easter Bunny Cake?”

Hay: “No.”

Me: “Will you please look at it and tell me what you think? I'm really disappointed because I made it just like the photo from the recipe and she's not very cute.”

(This is what Floppy looked like when he first saw her.)
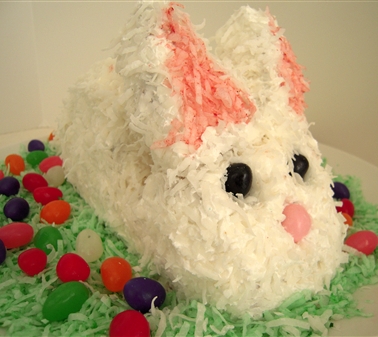
Easter Bunny Cake

Hay: “I think it looks pretty good considering you're not a baker.”

(I think he really did intend for that to be a compliment.)

So, let's back up and start with the construction of the cake. I used this Betty Crocker Easter Bunny Cake recipe and to begin, bake the cake according to directions for the 8″ or 9″ round pans and let the cake cool.

Cut one of the cake layers in half.
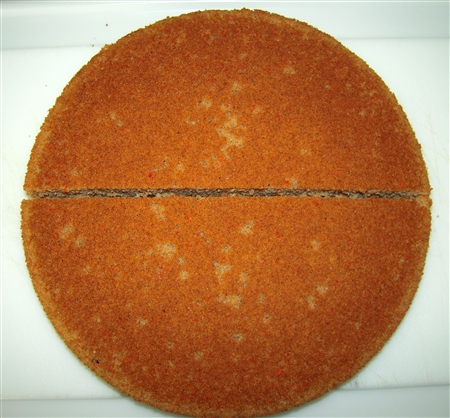
Easter Bunny Cake

Put halves together with frosting to form body. Place cake upright on plate or tray. Cut out a notch about one-third of the way up on one end of body to form head.
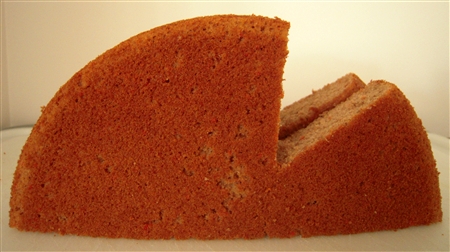
Easter Bunny Cake

Attach half of cutout piece to end of cake with a toothpick to form tail.
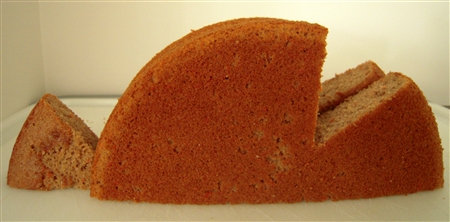
Easter Bunny Cake

I didn't want the ears made of construction paper, so I decided to cut the edges off of the other cake layer to form the ears.

(The crack down the middle of the cake was an accident. It happened when I took the cake off the parchment paper. I didn't even consider that the warm cake would stick to the parchment paper. DUH! A real baker would know not to do that. A real baker would have a cooling rack.)
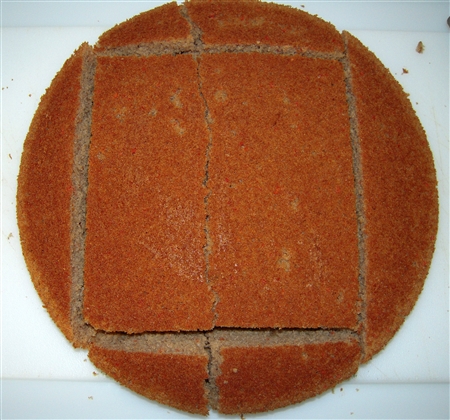
Easter Bunny Cake

I forgot to take a photo, but for the ears, I just took the two edges that weren't broken and put them together and then cut that piece in half to form the two ears.

Now, time to frost the cake.
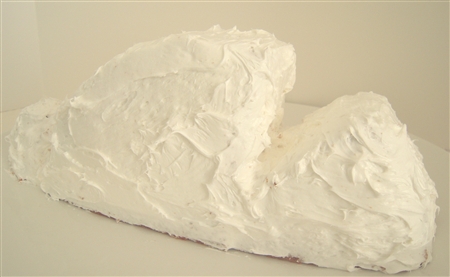
Easter Bunny Cake

Betty Crocker recommends using the Carrot Cake for this Easter Bunny Cake, but even though carrot cake seems Easter-ish, I would not suggest it at all. IF, and that's a BIG IF, I ever made this cake again, I would use a white cake. Even though the recipe says that if you put the cut pieces of the cake in the freezer for an hour before frosting, you won't have a problem with crumbs, that wasn't the case for me. With the carrot cake and the white icing, any time crumbs got in the icing, it was extremely obvious, and a big mess to fix, so why not use a white cake so if crumbs did get in the icing, you couldn't see them?

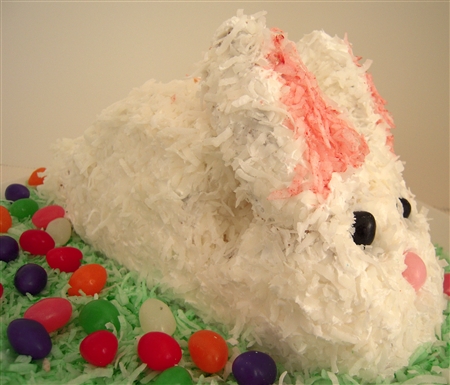
Next, sprinkle with coconut.
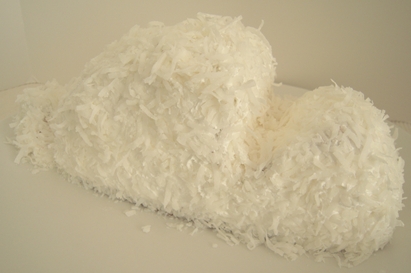
Easter Bunny CakeIs it starting to look like a bunny yet?

Next, I attached the ears with toothpicks.

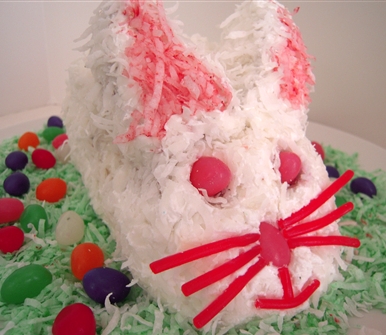
Then, just color some coconut green, sprinkle on the platter and scatter some jelly beans. I also colored some coconut pink for the inside of the ears. Just use jelly beans for the eyes and nose and your done.

Cute, huh? Not so much.
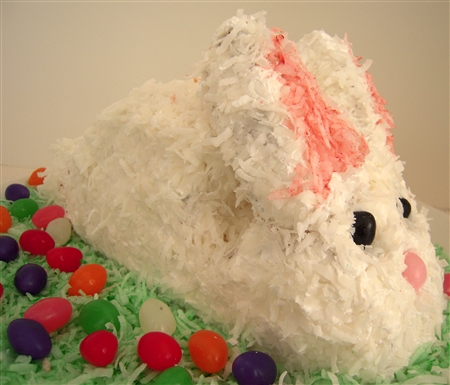
Easter Bunny Cake

I'm sure this cake would be fine for a kid's birthday party or Easter gathering, but I was disappointed. I didn't think it was cute at all and much smaller than what I expected.

Since I wasn't happy with Floppy's face, I decided to sleep on it and play around with it a little bit more yesterday. I never have liked sticking to any original recipe, so I don't know why I thought I had to when it came to decorating Floppy's face.

First, I decided to try pink eyes instead of the black.
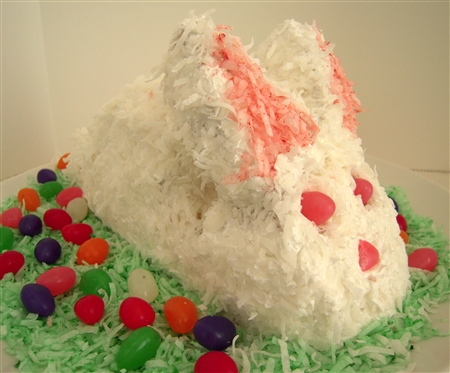
Easter Bunny Cake

That's a little bit cuter, but how about some whiskers?
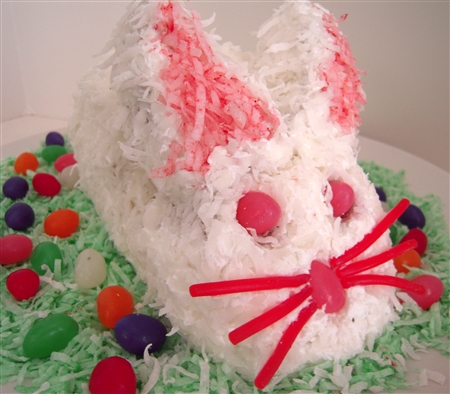
Easter Bunny Cake

I don't know. How about adding a mouth?

Easter Bunny Cake

Not. That looks even more goofy!

Why don't we just change the face completely?

Easter Bunny Cake

I found this little marshmallow Easter Bunny while at the drug store the other day and decided to try using it's face on my Easter Bunny Cake.

Now the face is definitely too small or maybe the ears are just too big.
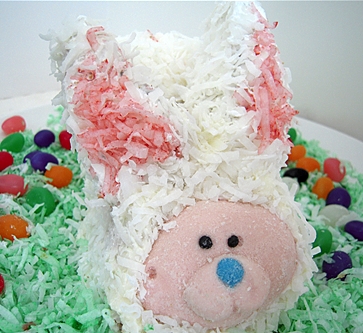
Easter Bunny Cake

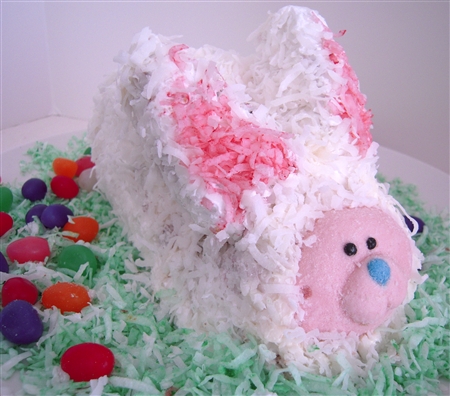
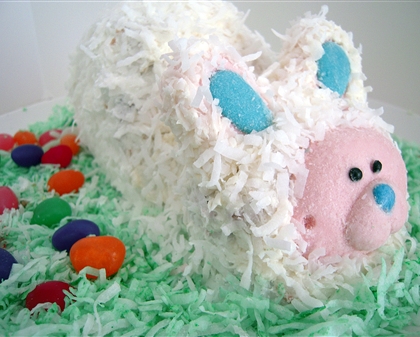
Let's try the ears from the marshmallow bunny.
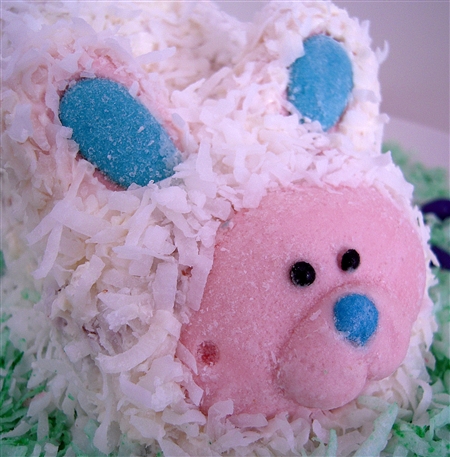
Easter Bunny Cake

That's a little better, don't ya think?

Meet Floppy, the flop.

Easter Bunny Cake

Not exactly what I had planned on, but I guess it'll have to do. I think Floppy was my first and last Easter Bunny Cake.

I'm glad my hubby had a Plan B for my birthday cake.
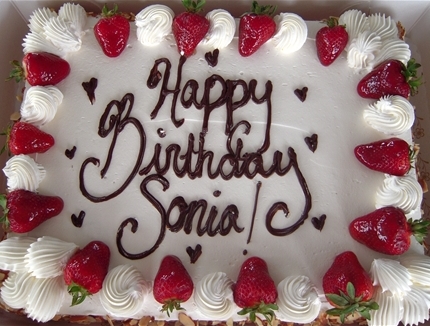
He surprised me with this gorgeous cake!

~LilSis

Easter Cake Pops

April 14, 2011

I'm not much of a sweet eater but there's something about Easter that brings out a little bit of a sweet tooth in me. Maybe it's all those years of eating the Reese's peanut butter eggs and Cadbury cream eggs that makes me crave sugar at this time of year?  🙂

If you're in the mood to make some festive sweet treats for Easter and are interested in trying something a little different this year, you might want to consider making some of these adorable Easter Cake Pops.

Easter Cake Pops

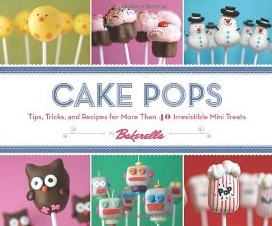
Cake Pops: Tips, Tricks, and Recipes for More Than 40 Irresistible Mini Treats

Just in case you've never seen or heard of Bakerella, she has become quite infamous for creating the most adorably decorated, fun, and festive Cake Pops. Last year she came out with her own gorgeous book that shows you how you can make them yourself.

It's not too late to order this book from Amazon and have it in plenty of time to make some of these for Easter!

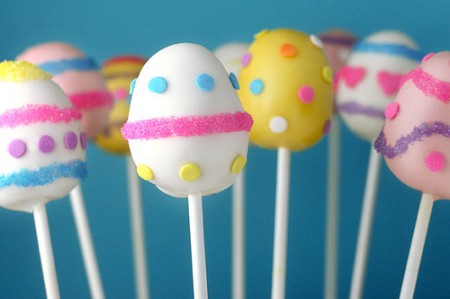
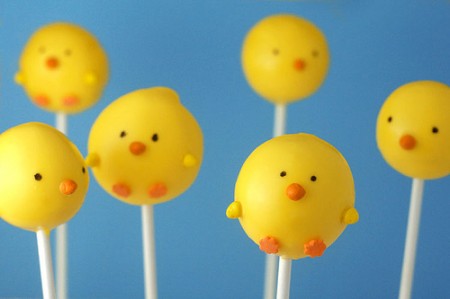
Here are just a few of the Easter Cake Pops featured in her book.

Easter Bunny Cake PopsEaster Bunny Cake Pops

Easter Egg Cake PopsEaster Egg Cake Pops

Easter Spring Chicks Cake PopsEaster Spring Chicks Cake Pops

I just love each of every one of these adorable little creations!

I'm actually stepping outside my comfort zone this year and am going to attempt to make my first Easter Bunny Cake! If it's not a total flop, I'll be posting photos here in just a few days, so be sure to check back with us.  🙂

(Images from Bakerella)

~LilSis