Spinach and Orzo Salad

May 29, 2010

Spinach and Orzo Salad

Spinach and Orzo Salad

Still need a quick and easy idea for a side salad to include in your Memorial Day menu?

This is the perfect salad to take to an outdoor cookout or to pack up individually for a nice Summer picnic.  Since there's no mayo in this herb vinaigrette-dressed pasta salad, it lasts up to two hours at room temperature and up to four hours on ice packs.

I just made this salad and am taking it tomorrow to serve at our Memorial Day cookout. It turned out awesome and I think it'll be even better tomorrow after the flavors have a chance to meld together overnight.

If you saw my Toasted Orzo soup recipe that I made recently, you know that I'm a huge fan of orzo pasta. And even though you could make this same recipe with different pasta noodles, the orzo was perfect in this salad. The only thing I changed in this recipe is that I used fresh basil instead of dried.

Spinach and Orzo Salad
(Sunset Magazine May 2010)

1 c. orzo pasta
3 T. each olive oil and red wine vinegar
1 tsp. fresh basil, roughly chopped
1/2 t. kosher salt
1/4 t. fresh ground pepper
1 qt. lightly packed baby spinach leaves, roughly chopped
1/4 c. slivered sun dried tomatoes packed in oil
12 pitted kalamata olives, sliced

Cook orzo according to package directions. Meanwhile, in a large bowl, whisk together oil, vinegar, basil, salt, and pepper and reserve.

Drain pasta, rinse with water until cool and drain again. Add to bowl with dressing and gently mix in spinach, tomatoes, and olives to combine. Add more salt, if desired.

(Photo credit: Sunset Magazine, May 2010 issue)

~LilSis

Toasted Orzo Chicken Soup

May 18, 2010

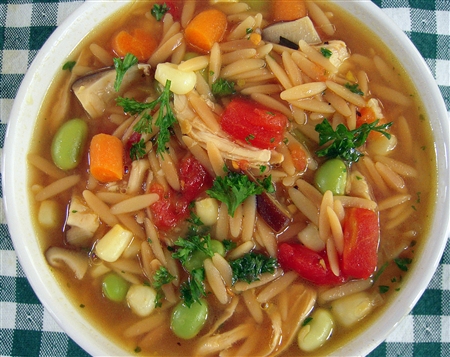
Toasted Orzo Chicken Soup

Around this time of the year, there are usually signs of Spring in the air, right? I guess it all depends on where you live because May can bring some strange weather in some parts of the country.  I remember our last year in Upstate New York, it actually snowed on Mother's Day and I had already planted my herb garden. I was not a happy camper. That had obviously never happened to me in Texas. Not that Texas has fantastic Spring weather either; humidity, thunderstorms, hail, tornadoes, you name it.

For us here in Southern California, May and June are the only two dreary months of the entire year. We call it May Gray/June Gloom because for most of the day we're covered in the infamous Southern California “marine layer.” So far this month, we've had our fair share of foggy, gray days. We haven't see the sun at all for about four days now.

I'm not complaining, though, I promise! 🙂

You don't have to tell me how spoiled we San Diegans are when it comes to weather; I know it. I consider us extremely lucky to be able to live here where it's perfect weather almost year round.

So, are you wondering why the heck I'm talking about the weather instead of the soup? Well, with no sunshine during the days, we are still having some pretty cool nights here; in the low 50s. That's why I'm still in the “soup making” mode instead of in my Summertime salad mode.

I don't make too many Rachel Ray recipes, but yesterday I was in the mood to make homemade soup for dinner and I didn't want to spend hours making my usual chicken vegetable soup. The dreary gray days can put me in a little bit of a funk and yesterday, I wasn't in an energetic enough mood to start with a whole chicken and have to deal with de-boning it.

I bookmarked this recipe when I first saw it on Taste and Tell because I knew it would come in handy on a night when I wanted to make homemade soup but something a little quicker and easier than some of my recipes.
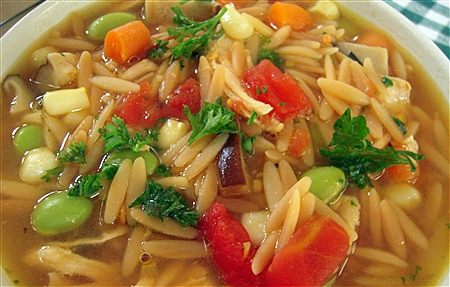
Toasted Orzo Chicken Soup

Toasted Orzo Chicken Soup
(adapted from Every Day with Rachael Ray February 2010)

Two 32-ounce containers low sodium chicken stock
1 pound skinless, boneless chicken breast (I used chicken tenders)
2 tablespoons butter
1 1/2 cup orzo pasta
2 tablespoons extra virgin olive oil
1 1/2 c. baby carrots, finely chopped
1 cup sliced Shitake mushrooms
1 shallot, finely chopped
3 cloves garlic, finely chopped
salt and pepper
1 cup frozen edamame
1 cup frozen corn
1 can petite diced tomato
1 tsp. Penzeys Shallot Pepper
1 tsp. low sodium Spike
1/4 cup finely chopped flat-leaf parsley
2 teaspoons grated lemon peel

In a medium pot, bring the chicken stock and chicken to a simmer. Lower the heat and poach the chicken for approximately 12 minutes. (The chicken tenders take a little less time.)

Heat a soup pot over medium heat. Add the butter to melt. Add the orzo and cook, stirring, until deeply toasted, 3 to 5 minutes. Transfer to a plate.

Add the olive oil to the soup pan. Add the carrots, mushrooms, shallot, and garlic; season with salt and pepper. Cook, stirring occasionally, until the vegetables are softened, 7 to 8 minutes. Return the orzo to the pot.

Remove the chicken from the stock. Skim and discard the fat from the stock; transfer the stock to the soup pot. Chop, dice or shred the chicken and add to the soup with 2 cups water. Bring the soup to a boil and cook until the orzo is just tender, 5 minutes. Add the edamame, corn, and tomatoes during the last minute of cooking. Turn off the heat; stir in the parsley and lemon peel. Serve immediately.

Notes: I made several changes to the original recipe, but that's why I love soups, they're easy to adjust according to your own taste. I doubled the liquid and the orzo because I knew the original recipe would not be enough for my big eaters. I also added some extra garlic, eliminated the zucchini and used edamame instead of peas and added some diced tomatoes and mushrooms. And I had to add Shallot Pepper and Spike like I do in every soup recipe that I make.

My version didn't turn out very soupy because the orzo really absorbs most of the liquid, but it didn't matter, we all loved it anyway. It was more like a big bowl of pasta instead of a bowl of soup! And, I'm so glad that I decided to leave in the lemon zest. I've never added lemon zest to a soup before and I almost eliminated it, but it really did add such a fresh, great flavor to this soup!

~LilSis

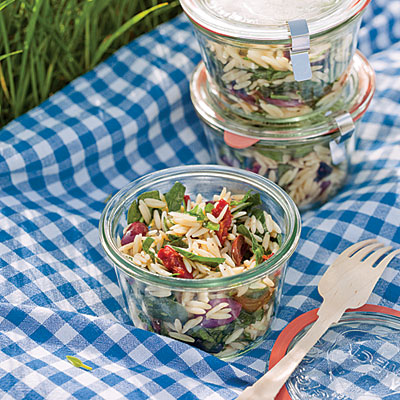
Kale Chips: Your New Favorite Healthy Snack!

May 6, 2010

It's a leafy green vegetable.

No!  It's a yummy crunchy chip.

Actually, you're both right.  We're talking about kale chips!

I know, you're skeptical.  Even though I KNOW the health benefits of eating kale, I just don't like it much.  It's bitter and pretty tough, especially when it's raw.  I never really had a kale dish I liked much. Until now!

You can drive to Whole Foods and buy a small bag of kale chips.  They're delicious, but they're $7 or $8.  No joke.

Or you can make you own.  Now, pay close attention because this is pretty darn complicated.  To make kale chips, you go to the store and buy a couple of bunches of kale (organic if you can get it).  You come home and wash it, dry it and tear it into pieces.  Then you spray it with a touch of oil, season it, and bake it til it's crunchy.  Then you eat it and feel very, very virtuous.   😀

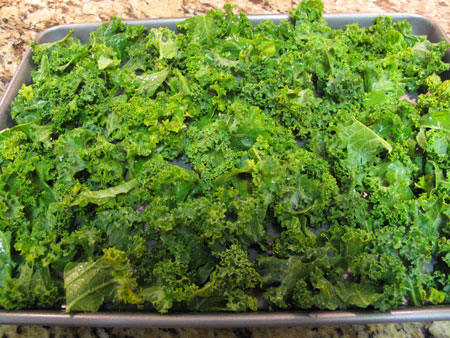
Kale Chips Pan Before Baking

Kale Chips: before baking

Kale Chips

2 bunches kale (I like the curly kind)
Nonstick cooking spray (olive oil or canola)
Your favorite seasoning to taste

Preheat your oven to 375 degrees.  Wash the kale and dry thoroughly.  Pull off the tough center rib and tear each leaf into medium-size pieces.  Place onto a baking sheet and spritz with a touch of oil.  Sprinkle with whatever seasonings you like and toss the kale to evenly coat with oil and seasonings.  Be careful with the salt; it will intensify as the kale shrinks and your chips will be way too salty.

Bake until the kale is dried out and crispy, 20 to 23 minutes.  I like mine lightly browned and pretty crispy.  Enjoy as a snack, or as a garnish on soup.

Note: I seasoned with very little salt, plus a big dash of lemon pepper and a salt-free Penzeys spice blend called Mural of Flavor.

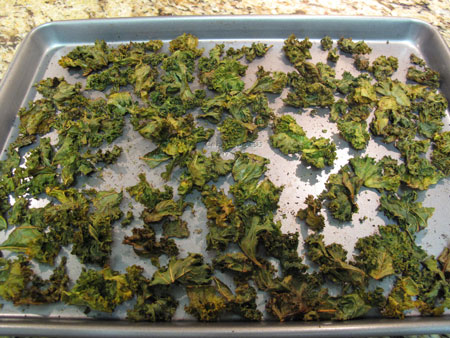
Kale Chips Pan After Baking

Kale Chips: after baking. Not pretty, but delicious!

~BigSis

Roasted Garlic Dressing with Green Chili

April 27, 2010

Frontera Grill Roasted Garlic Dressing with Chile

When we were on our tour of downtown Chicago last week, we happened to pass Rick Bayless' Frontera Grill on North Clark Street. We all wished that we could stop and eat lunch there but we knew that we didn't have time so we'll have to plan that for another visit. Passing Frontera Grill reminded me that I bought Rick Bayless' Mexican Everyday cookbook sometime last year and have yet to cook a recipe from it.

I decided to browse through his cookbook yesterday to find something to make as a side to go along with the Chicken Enchilada Casserole that I had planned for dinner. And since Cinco de Mayo is only a week away, I thought this would be a great time to try one of his recipes.

I ended up making the Roasted Garlic Dressing with Green Chili. Rick Bayless says that this is one of the most versatile dressings that he makes and that grilled onions and radishes have gone into the roasted garlic-dressed romaine salad at Frontera Grill since the day they opened. He also suggests that it's great on top of a salad of sliced tomatoes and cilantro, which is what I decided to do. This recipe makes about one cup.

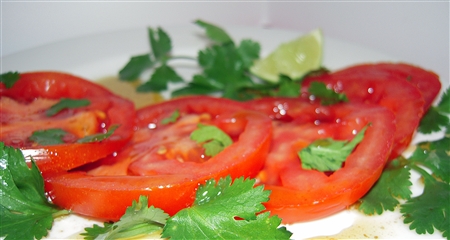
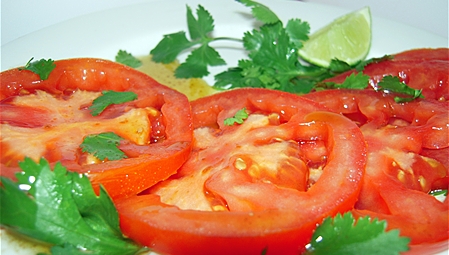
This recipe was quick and easy yet had a terrific flavor because of the roasted garlic and chiles. Salad dressing is not the best recipe for photographing, but this dressing was perfect drizzled on top of this tomato and cilantro salad.

Frontera Grill Roasted Garlic Dressing with Chile

Roasted Garlic Dressing with Green Chile
(from Mexican Everyday)

4 garlic cloves, unpeeled
Fresh hot green chiles to taste (I only used 1 serrano)
3/4 c. olive oil
1/4 c. balsamic vinegar
Salt

Set a small dry skillet over medium heat. Lay in the unpeeled garlic cloves and the chiles. Roast, turning frequently, until soft and blotchy brown in spots, about 10 minutes for the chiles, 15 minutes for the garlic. Cool until able to handle, then slip the skins off the garlic and roughly chop the chiles (no need to remove the seeds).

Combine the garlic, chiles, oil, vinegar and a scant teaspoon of salt into a blender jar or food processor. Process until smooth. Taste and season highly with additional salt if necessary. Pour into a jar and secure the lid. Refrigerate until ready to use. Shake well immediately before pouring out.

~LilSis

Easter Candy Gifts

March 29, 2010

The April 2010 issue of Martha Stewart Living is loaded with creative and crafty ideas for celebrating Easter. If I had the patience, I would have attempted the adorable Easter Egg Sugar cookies, but I knew they would never have come out as beautiful as the ones in the magazine.  So when I saw the adorable Easter Candy Parade, I thought these cute little jars might be something I could put together since they didn't require any baking! 🙂

These are perfect little gifts for teachers, friends, neighbors or coworkers. I think they're a lot more fun and colorful than just giving someone a bag of candy or a chocolate bunny for a Happy Easter gift.

WalMart had a huge assortment of pretty, colorful Easter candy this year. I used a combination of Speckled Malted Milk Balls, Mini Robin Eggs, Pastel Peanut M&Ms, Speckled Jelly Bird Eggs, SweetTarts Jelly Beans, Reese's Pieces Pastel Eggs, the white chocolate bunny, and even some edible green apple grass. I also got the apothecary jars at WalMart for around $3.00 each.

These are so easy to make that the kids would even enjoy putting these together themselves. I went a little overboard so I've got to go get more jars so I can make more gifts or else we're going to end up with way too much Easter candy left in this house!

~LilSis
Cooking Light way to cook Winner!

March 28, 2010

Cooking Light way to cook

The cookbook giveaway officially ended at midnight last night so this morning I have the pleasure of announcing the winner! The winner was chosen by Random.org and out of the 35 comments, the lucky winner is Kelly who left comment #14.

The Winner is No. 14!

Kelly, be sure to email me your contact information so I can get this beautiful book in the mail to you as soon as possible. Congratulations to Kelly and thanks to everyone who entered! 🙂

~LilSis

Cookbook Giveaway: Cooking Light way to cook

March 22, 2010

Spring is in full bloom here in sunny Southern California and ya know what? That makes me really, really happy! 🙂

I know BigSis just shared some photos of the crazy snow that hit Dallas on the first full day of Spring, but things couldn't be more different here. Not only am I happy, but all the rain that we got here in January and February produced some very happy flowers in my yard.

So, what does the weather have to do with a cookbook giveaway?

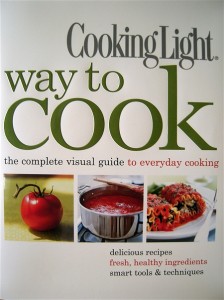
The sun's shining, the flowers are blooming, and I'm in a good mood so I thought this would be as good a time as any to give away a copy of one of my favorite cookbooks, “Cooking Light way to cook”.

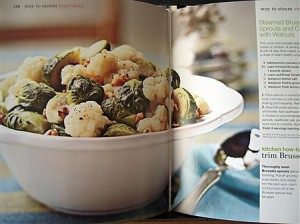
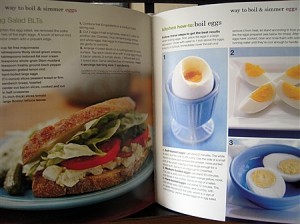
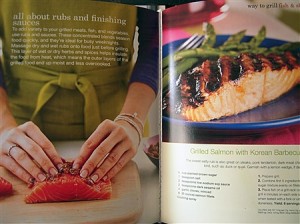
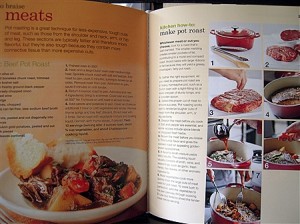
This hardcover, almost 500 page cookbook has over 850 photos that show you how to prepare more than 200 recipes. I'm a “visual learner” so this cookbook is “right up my alley”. Cooking Light describes this cookbook as a highly visual book and that's no exaggeration.

Here's just a little peek inside this book. There's a ton of “How To” step-by-step instructions in this book; from the simple “Way to Steam Veggies” and “How to Boil an Egg” to “How to Grill Fish” and “How to Braise Meat.”

There's also a whole section devoted to “How To” baking instructions that I will definitely be reading when I decide that it's time for me to work on my baking skills. If you're like me and love cookbooks loaded with beautiful photos, I really think you'll love this book!

So, here's how the giveaway is going to work.

  • If you'd like to enter to win this cookbook, just leave us a comment here on this post.
  • If you follow LilSis on Twitter, let us know by leaving another comment on this post.
  • If you follow BigSis on Twitter, let us know by leaving another comment on this post.
  • If you're already a Fan of BigSisLilSis on Facebook or you Become a Fan, you can let us know by leaving another comment here. (Notice our new badge in the right sidebar!)
  • Stumble this post then come back here and leave another comment to let us know that it's stumbled. (We'll be getting a new stumble button soon, but, for now, the “stumble this” link is next to “Share” under the post.)

So, that's five chances to win this cookbook.

Wait.

Let's add one more chance to win to make it a nice even number.

  • Tweet about this giveaway and come back to this post to let us know you tweeted and you can leave one more comment.

That's six chances you have to win this cookbook!

Since there are six chances to win, I decided to give everyone six days to enter. The contest will officially end at midnight March 28th.  The winner will be randomly chosen and will be announced on Monday, March 29th.

Ready. Set. GO!

Good luck!

(I'll let ya in on a little secret. If you follow me on Twitter or are a Fan of BigSisLilSis on Facebook, I'll be giving you some bonus chances to win during these six days.)

~LilSis

Egg White Salad with Spinach, Feta Cheese and Parmesan

March 18, 2010

Since we just celebrated St. Patrick's Day, I figured this would be a good time to talk about how much I love the color green. If you've ever been to my house, then you already know that. Between my family room, kitchen, master bedroom and master bath, I've got seven different shades of green on the walls. It sounds weird, but it works. It's not offensive baby poop green, just more outdoorsy “plant like shades” of green.

So what does that have to do with Egg White Salad? Not much, but in addition to loving the color green on my walls, I have a little obsession with green vegetables. I have to eat at least one green veggie for lunch and dinner every day or I feel like I haven't eaten a well balanced meal. My favorite green veggies would have to be asparagus, broccoli, spinach, edamame, brussells sprouts, green beans, and green peas; and we include one of these with dinner almost every night. Luckily, my guys love the green veggies too!

A couple of weeks ago I bought an Egg White Salad with Spinach, Feta Cheese, and Parmesan from Trader Joe's. The spinach in the salad is what initially got my attention. It was good but I was a little disappointed that it had green onion in it. Green onion happens to be one green veggie that I'm not in love with.

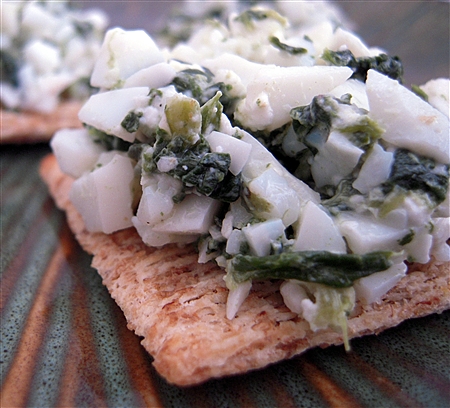
I didn't save the container to make note of all the exact ingredients so I just made this up as I went along in an attempt to duplicate the salad, minus the onion. Luckily, this is not the kind of recipe where you have to worry about the quantity of each ingredient. I probably could have used one less egg white or a little more spinach, but for my first try, I thought it turned out really good.

This would have been great on top of some romaine or butter lettuce and sandwiched in-between an Oroweat Multi-Grain Sandwich Thin, but I had it for lunch on a few Reduced Fat Triscuits.

Egg White Salad with Spinach, Feta Cheese, and Parmesan

4 boiled eggs, yolks removed and whites chopped
1/4 c. cooked and drained frozen spinach
2 T. Feta cheese
1 T. Parmesan
1 T. Light Sour Cream
Salt and pepper to taste

No need for any fancy directions. Just mix all ingredients in a bowl and season to taste. Serve on toasted bread or crackers.

~LilSis

This Muffin has a Secret

March 14, 2010

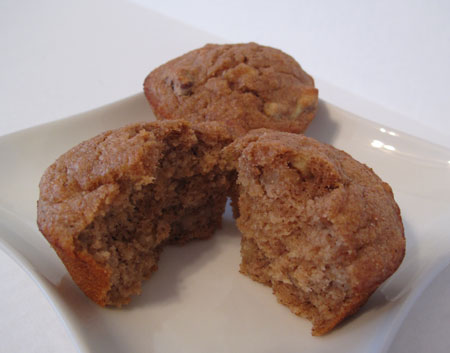
Banana Wheat Germ Muffin

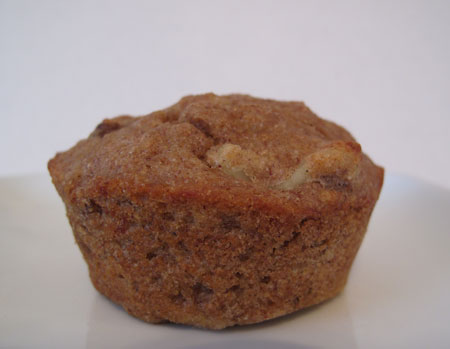
This humble muffin is a muffin with a secret.  He's not very flashy; lots of other muffins are turbo-size, or chock full of fruit and even chocolate chips.  He's not real pretty either; just a modest little tan guy with a few glimpses of nut here and there.  And he's not a sweet-fluffy-puffy-light-as-air muffin.  He's a substantial guy, moist and dense.  But his secret is what makes him more special than the flashy or pretty muffins.  This muffin is healthy AND tasty.

This guy's given name is Banana-Wheat Germ Muffins, and he was born in the cookbook called Veganomicon by Isa Chandra Moskowitz and Terry Hope Romero.  Yep, you guessed it!  This muffin's middle name is Vegan!

Banana Wheat Germ Muffin Top

I made these muffins a couple of times when Bry was here, and we polished the dozen off between us in only a couple of days.  It is true that Bry is my nephew, and a sweet one at that, so even if these muffins were craptastic, he would probably still gobble them up and declare them delicious.  I've had my share of baking disasters though, and I don't count these muffins among them.

This recipe was my first foray into vegan baking, and I was nervous to say the least.  How could I make a delicious baked good with no eggs and no dairy?  The first thing I needed to do was find a reliable and creative vegan cookbook, and Veganomicon fits the bill.

These muffins use baking powder for leavening, with a bit of canola oil added to the mashed banana for tenderness and moisture.  I made just a couple of changes to the original recipe.  I added about a cup of toasted, roughly chopped walnuts, and used my homemade almond milk instead of soy milk.  I also added a dash of good nutmeg, along with the cinnamon.  You can find the recipe for Banana-Wheat Germ Muffins on RecipeZaar.

Banana Wheat Germ Muffin Split

There's a lot to love about these muffins.  They are:

  • Low in sugar: only 1/3 cup for the whole dozen.
  • Full of whole grains from the whole wheat pastry flour and wheat germ.
  • Low in fat: only 1/3 cup canola oil.  No butter, no eggs, no sour cream, nothing to clog your arteries!
  • Easy to customize by adding your favorite nuts, seeds or spices.
  • Filling and do a great job of keeping you satisfied til lunchtime.

One note:  I think these are better the second day.  The first day, they have a very slight bitter aftertaste that I suspect may come from the wheat germ, but it mellows and dissipates by the second day.

Hey, LilSis! Don't give up on baking, even if you weren't happy with your Low Fat Fruity Breakfast Muffins.  Any time you try a modification, you run the risk of a boo-boo, but keep trying!  I wonder if maybe you weren't totally pleased with these muffins because there was a pretty high ratio of goodies to batter?  And don't be intimidated by the fact that SisMama and I like to bake; we both have our failures and we both always use a recipe!  Don't quit!  For the love of HayHay and SirHoney's sweet tooth, don't quit! 🙂

~BigSis

Low fat fruity breakfast muffins

March 12, 2010

You know the old saying, “looks can be deceiving”?


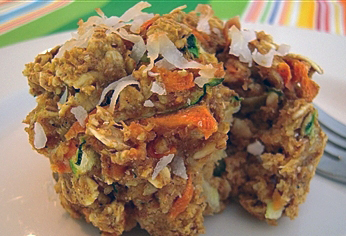
This muffin almost looks tasty, doesn't it?

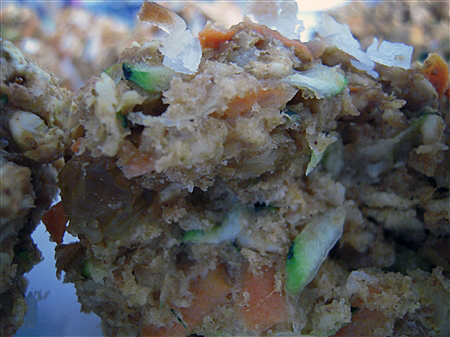
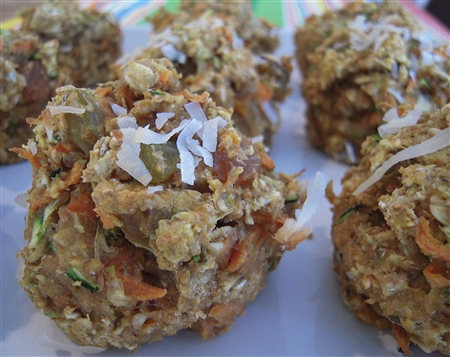
In the close up, you can see all the yummy fruit. These were loaded with carrots, zucchini, raisins, and even some canned pumpkin with some coconut on top.

But these glompy, globs of fruit didn't turn out quite the way I had planned.  They look more like a preschooler's art project gone wrong! I decided to suck it up and show this photo. Aren't they horrid?

Yesterday I was disappointed and pissed off, but today I just think it's pretty funny. I wasted about two hours yesterday morning making these and cleaning up. I did try one and I'm not saying that they are inedible, but I won't eat another one. Way, way too heavy and glompy, or as HayHay called them; groddy! (I don't even think that's a real word but it did describe them pretty well.) Each muffin weighed about the same as a hockey puck.

Hmmm. That just gave me an idea. I could probably let the kids down the street use these as hockey pucks. I haven't thrown them out yet but I know that no one in this house is going to eat them! Not even HayHay, my 16 yr old garbage disposal. 🙂

I was trying so hard to come up with a really healthy breakfast muffin that I got a little overzealous and made too many changes. I could ramble on and on about what I did wrong, what I shouldn't have substituted, and what I would do if I ever tried this recipe again, but it would just be a waste of time. I'm not going to try them again.

There are several reasons why I'm not a good baker and why I don't enjoy baking BUT I've finally narrowed it down to only one reason.

  • I don't like to follow any recipe to the tee.
  • Never.
  • Ever.

That's my problem and I can't really ever see myself changing. I can't do it. I love the creative part of cooking and not the precise measuring and science that is a requirement to be a good baker.

When I cook, if a recipe calls for one garlic clove, I'll use three. Or if it calls for an onion, I'll use shallots instead. Or maybe I'll throw in capers or artichokes in a recipe just for a little something extra. Whatever. You just don't have that freedom with baking unless you REALLY know what you're doing.

I know that there are very experienced bakers out there that know exactly how to adapt a baking recipe. Some of my favorite blogs are written by some amazing bakers and I totally enjoy reading them and am always amazed at the talent it takes to be a good baker. I admire those of you that know “your stuff”! I really think you've either got it or you don't. And, I don't.

I'm not saying that I'm giving up forever, but I'm going to put myself out on a limb and say that, for now, I'm leaving the baking up to BigSis. And, I wish that someday we could get SisMama to do a guest post here on BigSisLilSis. Our Mom is an amazing baker and can whip up a cake, cookies or pie from scratch without even thinking twice or looking at a recipe. BigSis got lucky and got the baking gene from SisMama, not me.

Anybody know of a great healthy breakfast muffin that I can buy at the store? 🙂

~LilSis