Baked Camembert

December 21, 2009

Camembert 1

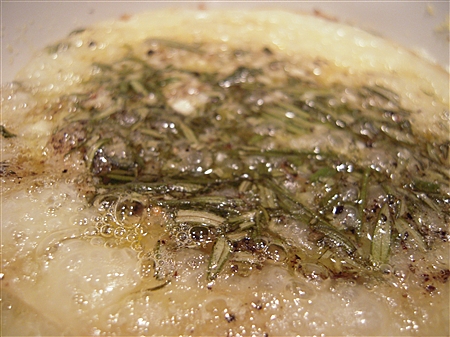
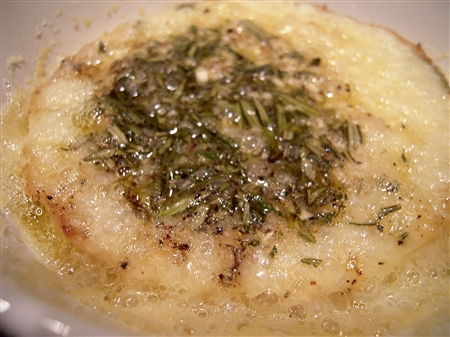
Lovely, ooey, gooey, creamy, bubbly, yummy melted cheese!

What more could you ask for?

Maybe some garlic, rosemary, and olive oil on top?

Oh yeah!

How 'bout some toasted baguette bread to spread it on?

Now you're talkin!

It doesn't get much better than this.

SirHoney & I devoured this entire wheel of cheese, just the two of us, within minutes. I'm not too proud to admit that.

Unfortunately, my habit of munching on cheese and crackers before dinner is about to come to a screeching halt after the first of the year, so I decided to just go all out on this night.

And, you know what?
Camembert 2

It was worth it.

The minute I saw this recipe, I ripped it out of the magazine because I knew that I'd be making it soon. I found it in the November issue of Food Network Magazine recently while trying to catch up on my magazine reading.

I've always liked Jamie Oliver, and his cookbook, Cook with Jamie, is one of my absolute favorites. I love the beautiful full page photos next to each recipe in his book. I've determined over the years that I'm what you call “a visual learner” so I love this style of cookbook. I need to put his new book, Jamie's Food Revolution, on my Amazon wish list!

His recipe for the Baked Camembert was originally intended to be poured over pasta, but I decided to try it as an Appetizer instead so we could dip into it with some toasted baguette bread slices.

So, dip into it, we did.
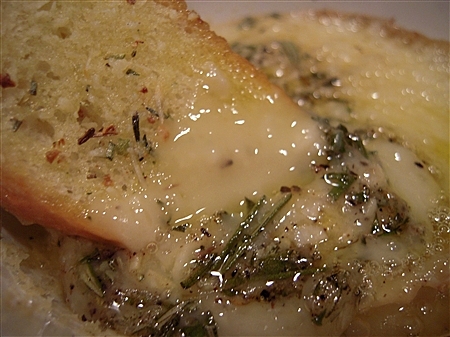
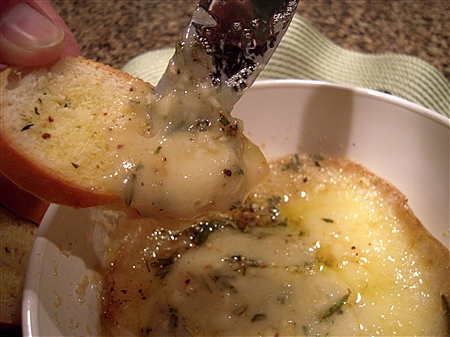
Closeup cheese on toast

Then, we spread a little,

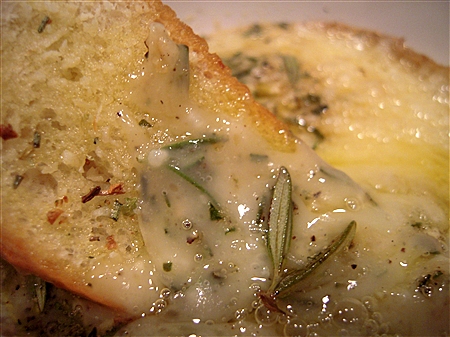
Closeup3

And, then, dipped some more.

Closeup2

I've baked a lot of brie but this was my first time to bake Camembert cheese so I wasn't sure about the consistency. It did seem a little thinner than brie, so next time I'll try it poured over some cooked pasta and spinach.

Baked Camembert
(adapted from Jamie Oliver via Food Network Magazine)

1 8 oz. box camembert cheese
2 cloves garlic
1 spring fresh rosemary
Fresh ground pepper
Extra-virgin olive oil
Baguette bread
Rosemary Herb Seasoning Mix (I used Pampered Chef)

Slice the baguette bread, brush each slice with a little olive oil and sprinkle with your favorite Herb seasoning. Toast in preheated oven at 350 for a few minutes then set aside. Open the box of cheese and unwrap it. Place it back in the wooden container or put in a small Corning Ware dish. Score a circle in the top of the skin, then lift it off and discard.

The original recipe called for slicing the garlic and just picking the rosemary leaves off from the stem. Since I knew that I was spreading on the toasts and not pouring over pasta, I pressed the garlic cloves and finely chopped the rosemary instead.

Just spread the garlic and rosemary on top of the cheese, sprinkle with some pepper and drizzle with a little extra virgin olive oil. Place the cheese into the preheated oven for 25 minutes. (If cooking in the box, place the box on a cookie sheet before placing in oven.)

Remove cheese from oven and let sit for a minute or two, then dig in. This makes an awesome, quick and easy appetizer perfect for serving at your next party.

~LilSis

Shrimp with Garlic and Chili Pepper

September 20, 2009

Shrimp with Garlic

I'm so glad that I was reading Kahakai Kitchen the other day when Deb mentioned the new weekly cooking event, I Heart Cooking Clubs. Luckily, I found out about it just in time to join the fun!

IHCC

The Cooking Club is presently featuring the recipes of Nigella Lawson and the first weeks' challenge is Party Treats. Yay!! My favorite course!

You all know that I LOVE appetizers!  I've mentioned more than once or twice how much I prefer hosting Hors D'Oeuvres & Cocktail Parties versus hosting a formal sit-down dinner. Most of the time when we have friends over, we end up standing around the kitchen bar and island talking, eating, having a few cocktails, and we never sit down. (It sounds rude, I know, but no one ever wants to sit, including myself!)

So, for this first week on IHCC, I decided to make Nigella's Shrimp with Garlic and Chili Pepper.  The original recipe can be found online at Food Network. I thought these would be a perfect little party treat to take to a get-together we had planned for last night; and, yes, they were a hit!

I changed it up a bit, like I always do when I cook!  I have three hungry men in my house, so I started with a pound of shrimp instead of a half of a pound. (I did want to have some left to take to my friends after the guys did their little taste test.) Since I started with twice as much shrimp as the original recipe called for, I used 3 T. of olive oil instead of 2 T. and 3 large garlic cloves instead of two. Also, my local store didn't have red chili peppers, (which ticked me off) so I used a half of a Serrano instead. And, I wanted some red color so I added 1/2 t. crushed red pepper flakes. The combination of the two turned out great!

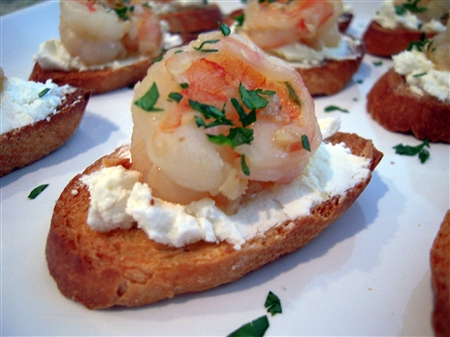
Nigella's recipe called for unshelled shrimp but since I wanted to serve these individually on toasted baguette slices, I shelled the shrimp before I cooked it. I also decided to spread a little goat cheese on the toasted bread before sitting the pretty little shrimps on top.  Everyone loved these little party treats!

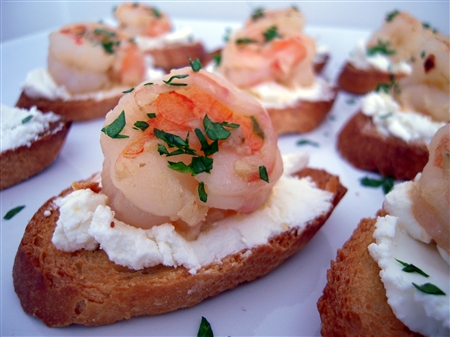
Shrimp Closeup #1

Shrimp with Garlic and Chili Pepper
(adapted from Nigella Lawson's Nigella Bites online at Food Network)

3 T. olive oil
1/2 serrano pepper
3 large garlic cloves, minced
1/2 t. crushed red pepper flakes
1 lb. medium to large shelled shrimp
1/2 c. white wine
Pinch of salt
5 oz. package of soft goat cheese
1 baguette bread, sliced diagonally
1 T. chopped Italian parsley

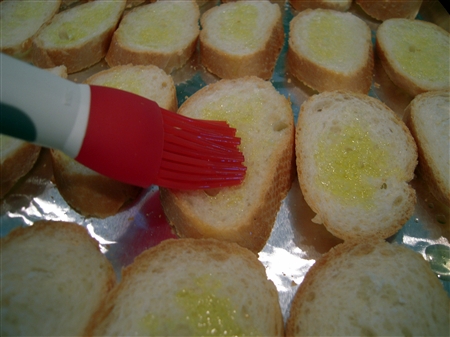
To begin, lightly brush the baguette bread slices with olive oil and toast at 400 degrees for ten minutes or so. Set aside to cool.

Oil the bread

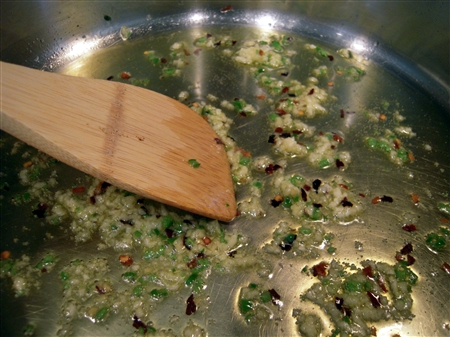
Pour the olive oil into a wide, heavy-bottomed frying pan. Then add the pepper and garlic and, over moderate to low heat, to infuse rather than to color, fry for 2 minutes, stirring all the time.

Garlic and Pepper

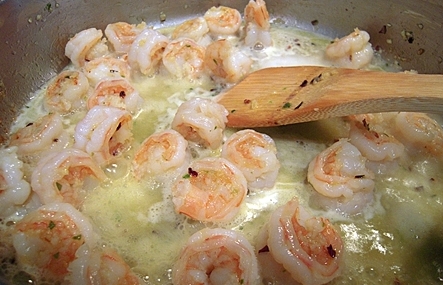
Then turn the heat to high, add the shrimp, and stir-fry them for another 2 minutes or until they turn pink and are just delicately cooked. Pour in the white wine and let it bubble up. Cook for just another minute or so. Season with salt, if necessary.

Stir Fry

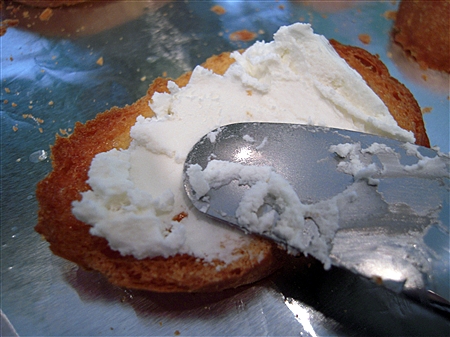
Spread some goat cheese on each bread slice.

Spread on toast

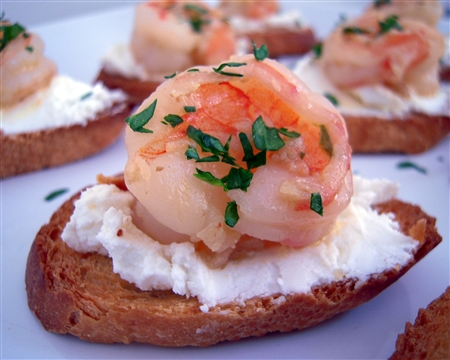
Place a nice juicy shrimp on top, sprinkle with some parsley and serve immediately.

Shrimp Closeup

Enjoy! And, don't forget to check out I Heart Cooking Clubs today for the full roundup of awesome party treats!

~LilSis

Fried Tomato Sandwiches with Pesto and Goat Cheese

August 26, 2009

Being vegetarian, a tomato sandwich in the summertime is one of my staple meals.  Great whole grain bread with mayo, and locally grown tomatoes.  Plus a good dash of salt and Penzeys shallot pepper.  Avocado, pickles and lettuce are optional.  Ah, but there's another kind of tomato sandwich out there. Let me explain.

Take a nice thick slice of GOOD tomato…do NOT use the crummy pinkish faux tomatoes that the grocery stores try to pass off on us.

Add a thick schmear of goat cheese with a spoonful of pesto mixed in.

Top with another thick slice of tomato.

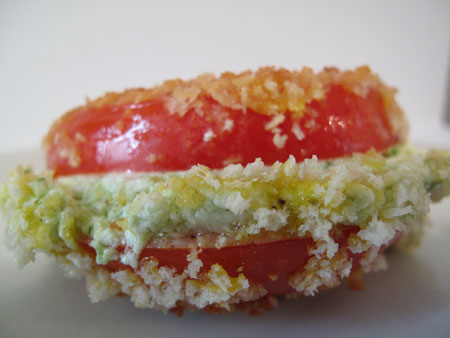
Roll in seasoned flour, then egg, then panko breadcrumbs and saute til golden brown.

Sprinkle with salt.

Gobble down.

Rinse and repeat.

Are you with me?

I heard about this idea from a tomato recipe contest the Washington Post conducted.  Last year's winner used this method, but included bacon (I don't eat Babe), Boursin cheese instead of the goat cheese and pesto, and Italian breadcrumbs instead of the panko.  Besides my pesto version, you could also use a dollop of the Hatch Green Chile and Garlic Goat Cheese that I did a couple of days ago.

Fried Tomato Sandwich with Pesto and Goat Cheese 1

Helllooo, my darling Sammie.

Fried Tomato Sandwiches with Pesto and Goat Cheese
(adapted from Mary Joe Sweeney's winning recipe)

1 large ripe tomato
1 nice thick chunk of goat cheese
1 Tblsp pesto
Flour, well seasoned with salt and pepper
1 egg, lightly beaten
Panko breadcrumbs
Olive oil or canola oil for sauteing

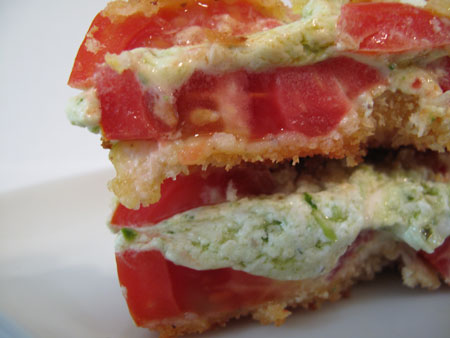
Core the tomato and slice it into 4 even slices.  Mix the pesto into the goat cheese.  Add half of it to one slice of tomato, and top with another to make a sandwich.  Repeat with the rest of the goat cheese and the 2 remaining tomato slices.  Dredge in the flour, then the egg, and then the breadcrumbs.  Saute in oil until golden brown, then carefully flip and lightly brown the other side. Remove from heat and immediately salt the sandwiches. Drain briefly on paper towels, and serve hot.  Makes 2 sandwiches.

Like LilSis' little baby quiches yesterday, this is a recipe that allows you to do whatever you want with it.  Use any soft cheese you like, but remember that if it's not soft and gooey, it won't get melty before the tomatoes get yukky.  Add in olives, herbs (chives would be good), garlic, scallions, anything you can think of.  A little shredded parmesan would be good mixed in with the breadcrumbs too.

Fried Tomato Sandwich with Pesto and Goat Cheese

Fried Tomato Sandwich with Pesto and Goat Cheese

~BigSis

Mini Asparagus Tomato Quiche Cups

August 25, 2009

Quiche1

Have you ever bought the little frozen mini quiches for a party when you're in a real pinch for an appetizer and don't have any time to make them from scratch? Actually, I've had to do that a couple of times, but I would much rather serve homemade appetizers. I guess I could compare myself to a baking from scratch snob that doesn't like cake mixes; I don't really like store bought appetizers.

If I think back to my childhood days, I may love appetizers as much as I do because SisMama and D always had cheese, crackers, and sardines or chips and dip out for us to snack on before dinner. I always loved that and still do! SirHoney's mother doesn't believe in appetizers before dinner because it could spoil your appetite. (Party Pooper!) You might even get your hand slapped if you try to steal an olive off of the relish tray before you sit down to dinner.

To this day, I prefer to go out and share a couple of appetizers for dinner versus ordering a full entree. And, I'd much rather host an Cocktail & Hors D'Oeuvres Party instead of a sit-down dinner party.

For some reason, I've never made mini quiches myself.  Yesterday, I was in the mood to do something a little different, plus I was hungry and didn't want to wait almost an hour for a full size quiche to bake, so I decided to make these. And, I always make my quiche crustless, so the mini cups were also crustless.

Since I wanted these quiche cups to be bite size, I used the mini muffin pan instead of the regular size muffin pan. I browsed the Internet a little bit to peek at some recipes, but I didn't find anything that ‘blew my socks off', so I ended up just throwing this together. I saw that a lot of the quiche cup recipes used muffin baking cups but I didn't see a reason to use those. I just wanted to pop them in my mouth right out of the tin instead of having to remove them from a baking cup.

And, since I was hungry, I got in too big of a hurry and forgot the Frank's Red Hot that I had intended on adding. (I even had it sitting out on the counter.) I was also going to add some cracked pepper and maybe some shallot pepper but I totally spaced and forgot that too.  🙁

You could vary these ingredients and add ham, bacon bits, spinach or broccoli instead of asparagus, onions, chives, basil, etc.  This is EXACTLY the kind of recipe that I LOVE! You can make it your own and use whatever you happen to be in the mood for that day without worrying that you'll screw it up! The quantities are not exact and luckily, it doesn't matter!

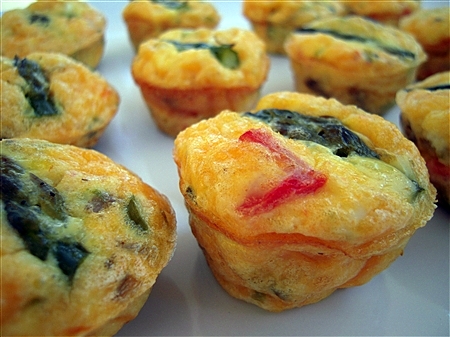
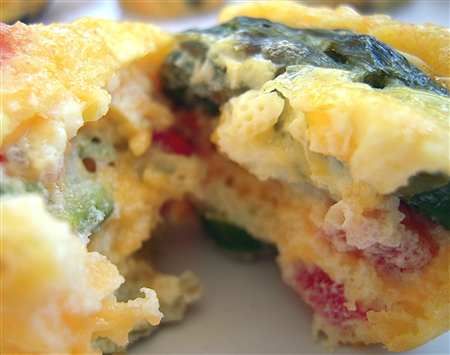
These got the ‘thumbs up' from BigT and HayHay, who both happened to be standing by waiting for them to come out of the oven! You could actually pop the whole little cup in your mouth, but if you happened to bite it in half, here's what you would find!

Closeup Quiche2 (1)

Mini Asparagus Tomato Quiche Cups

3 eggs, beaten
3/4 c. grated cheddar cheese
1 small tomato, peeled, seeded, and chopped
12 stalks grilled asparagus (tips cut off and the stalks chopped)
1/4 c. or so of chopped leftover sauteed mushrooms
Pam Cooking Spray

Spray the muffin tin with Pam. Beat the eggs in a small bowl and add the cheese, tomato, chopped asparagus and mushrooms. Stir until blended well. Ladle the quiche into the muffin tins. (I used an ice cream scoop to prevent a mess.) This quantity perfectly filled up the 12 mini cups. Place an asparagus tip on top of each filled cup. Bake at 350 degrees for 15-20 minutes.

It doesn't get much easier than that, does it?

~LilSis

Hatch Green Chile and Garlic Goat Cheese

August 24, 2009

The Hatch Green Chile Festival is in full swing! If you haven't gone “Hatch Crazy” before, now is the time! What's the big deal about the Hatch Green Chiles? They are green chiles that are only grown in Hatch, New Mexico. They are delicious, and they're only available for a short time each year. Here in Texas, we're already hot and spicy so when Hatch time rolls around, we go nuts!

You can do a million things with these flavorful peppers. I wandered through Central Market the other night amidst the Hatch Green Chile frenzy, and they were sampling these things in the store:

  • Hatch Green Chile Monterrey Jack Cheese grilled in sourdough bread (unbelievably scrumptious)
  • Hatch Green Chile Pesto wrapped up in a tortilla with mild sliced roasted peppers
  • Hatch Green Chile Cheese Bread

They also had these items all made with Hatch Green Chiles: tortillas, tortilla chips, sausages, hamburger patties, hamburger and hot dog buns, chili con queso, popcorn, twice-baked potatoes, and meatloaf!  So apparently there isn't anything that a Hatch Chile can't do!

I decided to use some of my roasted pepper stash in a goat cheese spread. I've been buying a Hatch Green Chile Goat Cheese from a little local goat farm for the last couple of years, but sadly they recently went out of business so I made my own easy version.  I used the mild variety of the peppers, so please check the heat level of your peppers and adjust the quantity you use in this recipe if yours are hot.  Trust me!  The hot ones are hotter than heck, and if you use a whole 1/4 cup of them in this recipe, your hair will absolutely be on fire!  Not to mention other parts of your body!

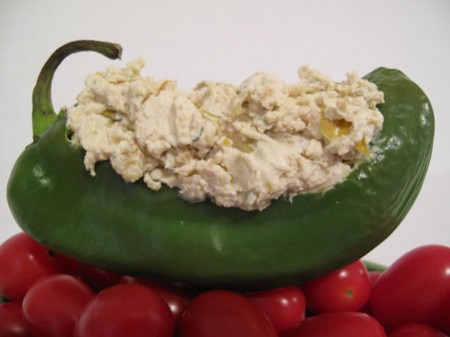
Hatch Green Chile and Garlic Goat Cheese

Hatch Green Chile and Garlic Goat Cheese

Hatch Green Chile and Garlic Goat Cheese

4 garlic cloves, crushed (I used 6 cloves cause that's how I roll)
1/4 cup roasted and chopped mild Hatch Green Chiles
Olive oil for sauteing
8 ounces goat cheese
Dash of Frank's Red Hot Sauce
Pepper to taste

Saute the crushed garlic in the olive oil over low heat for a minute or two, but do not brown.  Add the chopped chiles and saute for another 30 seconds.  Add to the goat cheese, and mix to blend well.  Add the Frank's Red Hot and pepper to taste.  Serve with crackers or crudite.

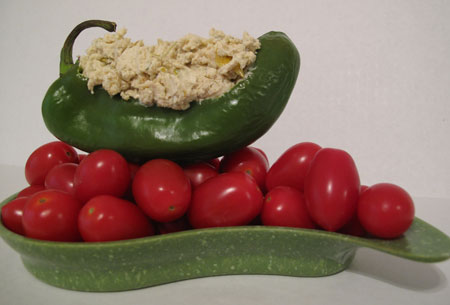
Hatch Green Chile and Garlic Goat Cheese with Tomatoes

Hatch Green Chile and Garlic Goat Cheese with Tomato Dippers

Whatever your pepper pleasure is, make sure to take advantage of these peppers while they're in season!

~BigSis

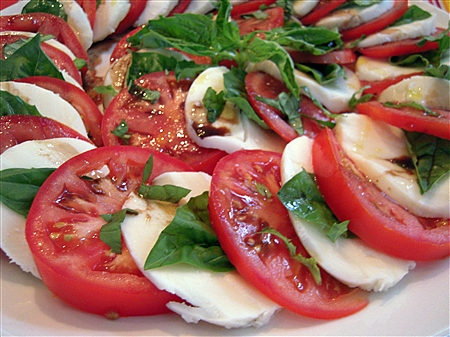
Insalata ala Caprese

June 3, 2009

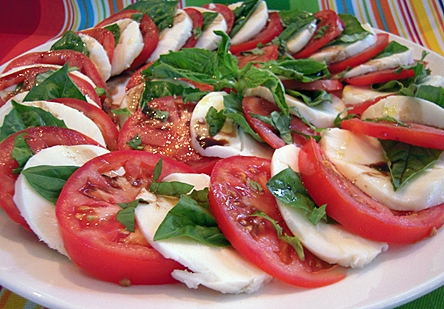
insalata-ala-caprese

One of the many things I love about this time of the year is the amazing fresh produce. One of my most favorite salads to serve either as an appetizer or as a side salad is this Insalata ala Caprese.

We had a few friends over for dinner this past Friday night and I had some great tomatoes and loads of fresh basil, so it was a ‘no brainer' when deciding what to serve as an appetizer. This is always a real crowd-pleaser! But, seriously, how can you go wrong with fresh tomatoes, fresh mozzarella, and fresh basil?

I just can't get enough of this salad! Unfortunately, this is a little bit of a splurge when you use the full fat fresh mozzarella. (Unless you're disciplined enough to keep it to a slice or two of cheese, which I am NOT.) I've made it using the lower fat mozzarella and it's fine, but not quite as good, so I always use the fresh mozzarella when we have guests.

We had eight people and these were the quantities that I used, but obviously, you can modify easily enough for more or less servings.

closeup-insalata-ala-caprese

Insalata ala Caprese

5 medium size fresh tomatoes, sliced
1 1/2 lbs. fresh mozzarella, drained and sliced
fresh basil leaves
1-2 T olive oil
1-2 T. balsamic vinegar
Dash of sea salt

Layer the tomatoes, basil leaves, and mozzarella on a serving platter. Drizzle with the olive oil and the balsamic vinegar, to taste. I also julienne a few basil leaves to sprinkle on the top and put a sprig in the center. Top off with a grind or two of sea salt, if desired.

I've made several different versions of this recipe. It's excellent if you have a variety of tomatoes. I've made it with a combination of yellow, orange, and red tomatoes and it turns out gorgeous. Also, if you don't care for the balsamic vinegar, just use a little lemon juice instead.

Buon appetito!

~LilSis

Homemade Pita Chips

March 27, 2009

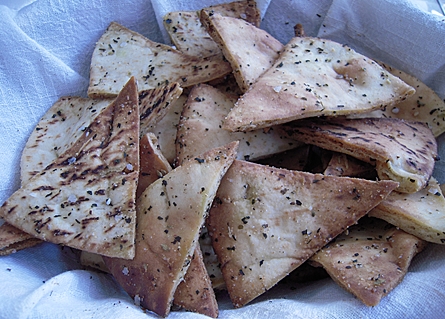
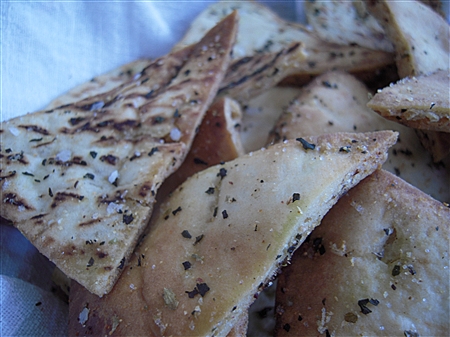
Hey BigSis! I bet you wish you had some of BigT's homemade Pita Chips to go along with that hummus! I normally buy my pita chips from Trader Joe's but these were really good! I'll definitely be making this recipe myself!

homemade-pita-chips

BigT just started the P90X Workout Regime a couple of weeks ago so he's being very disciplined with his meal planning. (If all goes according to plan, maybe we'll have him do a guest post in the near future about his progress.)

The last couple of mornings that I've been up at 5:30, the same fitness expert, Tony Horton, that does the P90X videos has a new program called The 10 Minute Trainer. I've actually gotten sucked into that infomercial! The guy is good! I'm actually considering getting the videos.

Healthy snacks are a part of the daily plan, so BigT decided to make a big batch of these pita chips to take to work. I'm not sure where the original recipe came from but he got it from his stepmom, C.

pita-chips

Pita Chips

1 T. Kosher Salt
1 T. Dried Basil
1 t. Garlic Powder
1 t. Onion Powder
1 t. Dried Oregano
1/2 t. Black Pepper
1/4 t. Celery Salt
1/2 c. Olive Oil
8 Pitas (he used Western Bakery Alternative Pita Bread)

Mix all spices and oil in a large bowl. Cut the pita bread into eighths. Toss the pita pieces into the spice & oil mixture, then place on a single layer onto two cookie sheets. Cook in a preheated 350 degree oven for 20 minutes.

When these were done, I was wishing that I had some of your Healthy Hummus to dip them in!

~LilSis

Giada’s Fried Olives

March 23, 2009

I'm not a huge fan of all of the folks on the Food Network because I feel like lots of them are just television personalities, not real live chefs or even great cooks.  You know who you are!  I do like Ina Garten (Barefoot Contessa) because her food always looks easy to do, and anything I've made of hers has worked.  And we know that Bobby Flay is a great chef, has been since he was a very young man, and his Goat Cheese Enchiladas are on my Cooking Bucket List.  I also have had good luck with a few of Giada De Laurentiis' recipes.  I just wish we didn't have to see so much cleavage when she's cooking!  I'm sure she's a lovely woman, I just think the prosciutto ravioli or nutella bruschetta would come out just as well if the “girls” were covered up a tad.  That's just my opinion; I'm sure the guys out in TV Land disagree!

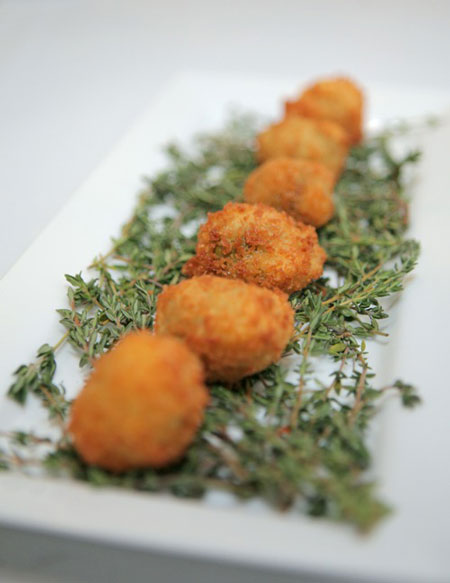
Anyway.  I don't need to get off on a rant.  I had Food Network on over the last weekend while I was cleaning, and happened to hear Giada talking about this fried olive recipe.  Since I have a deep love for all things olive, I dropped my vacuum cleaner and ran to the TV.  This recipe for Italian Fried Olives looks scrumptious and I would SO make them ASAP if I didn't know that I would eat every last ding dang one of them as soon as they came out of the hot oil.

Giada's Italian Fried Olives

Giada's Italian Fried Olives

Green olives are filled with a mixture of gorgonzola and ricotta cheeses, thyme and lemon zest. They are then tossed in flour, rolled in egg and then rolled around in bread crumbs before being briefly fried.  How good does that sound!!??   Oh my gravy.  These are on my “must try” list, even though I had to tolerate eyefuls of cleavage to see how they were made!

Hey, Giada!  Thanks for the awesome appetizer recipe!  Now how 'bout breaking out a turtleneck, sister?

~BigSis

Super Bowl Snack Attack

January 31, 2009

I'm not a football fan.  There, I've said it.  Out loud!  Please don't hate on me, but I really do not like football.   I used to watch the local team, but I'm just done with the whole ding dang sport (don't ask).  I'm single so I don't have “The Hubs” forcing me to watch football, and I'd much rather spend 3 hours baking or walking or shopping or organizing something.  Just about the only sport I like to watch on TV is hockey, and then only if the Dallas Stars are playing.

This weekend is about the Super Bowl though, and not the Stanley Cup, whether I'm watching it or not (not).  And what goes with the Super Bowl?  Snacks of course!  Appetizers, football food, dips, chips!  Woo hoo…my favorite kind of food!  There's a flurry of activity in blogdom this week about what to serve for the Big Game, and since I'm not actively participating, the least I can do is provide a little recap for your snacking pleasure!  Ready…settie…kick-off!  Or something like that.

BigSisLilSis party favorites:

Savories from some tasty sites:

You have to have some sweets too! How about these?

If that isn't enough, check out the Super Bowl Smackdown on RecipeGirl for a bunch of other great recipes with photos!

Since LilSis and I both want to laugh more this year, let me leave you with some photos of bad Super Bowl cakes from Cake Wrecks.  There are bad Super Bowl cakes and there are really bad Super Bowl cakes!  Have a fun weekend, whatever you do!

~BigSis

New Year’s Eve Salty Snack: “IT”

December 30, 2008

New Year's Eve will be here within a matter of hours, and you may be thinking about what to serve your hungry crowd.  Plain chips? Mixed nuts? Chex Mix?  How about something as easy as those options but tastier?

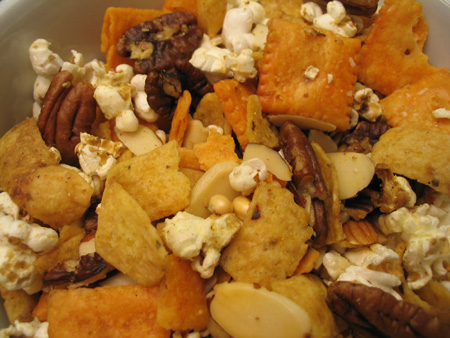
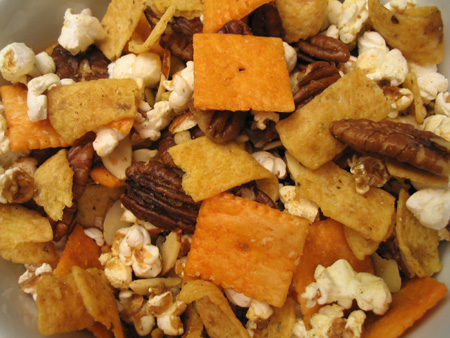
Salty...savory...slightly spicy...delicious!

Salty...savory...slightly spicy...delicious!

I work with G, whose husband C is a great cook.  His family has a recipe for a snack mix they call “IT”. IT is really simple, but IT is so delicious that you can't stop eating IT!  Fortunately, IT makes a HUGE batch!  You can see that you have lots of leeway in the amounts of dry ingredients to use.  Just use what you like and IT will turn out great!  Don't leave the curry powder out though.  I don't usually like curry, but the small amount of it in this recipe gives it a great subtle flavor.  There's something about the combination of the curry, fresh garlic and butter with the salty ingredients that's just yummy!  Thanks for this recipe, G and C!

IT rocks!

IT rocks!

IT

Mix together in large roasting pan:
2 bags Fritos
1 box CheezIts
Pecans
Walnuts
Sliced Almonds
Popped Popcorn

Mix in saucepan:
1 tsp curry powder
3 dashes Tabasco
1 Tblsp Worcestershire
1/2 tsp garlic salt
1 or 2 cloves crushed garlic
1 tsp salt
2 sticks melted butter

Pour heated mixture over dry ingredients and toss to coat evenly.  Cook in slow oven at 250 degrees for 1 hour.  Stir occasionally.  Dump into brown paper bag to drain.  Store in tightly sealed container when cool.

~BigSis