This year; it’s a Snowball Fight!

December 24, 2011

We couldn't let this holiday season sneak by us without a silly little video from JibJab, now could we?

Last year, BigSis and LilSis did a little Disco and the year before, we were Dancing Elves. We get a kick out of these videos just because they make us laugh and hopefully make some of you laugh too!

This year; it's a Snowball Fight, girls against the guys!


Personalize funny videos and birthday eCards at JibJab!

From our family to yours; have a very Merry Christmas!

~LilSis

How to Make Glittered Paper Mache Gift Boxes

December 18, 2011

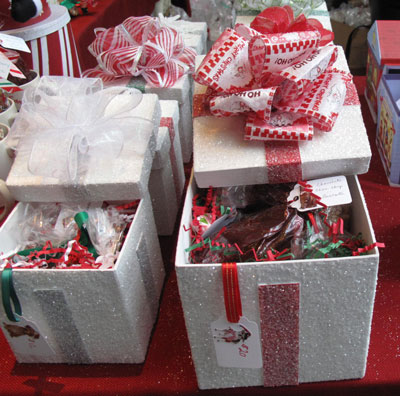
One of the things I made for the Charity Bake Sale for In-Sync Exotics was a set of glittered paper mache gift boxes.  After they were finished, I filled them with paper shred and loaded them up with cookies.

Glitter Paper Mache Box 6

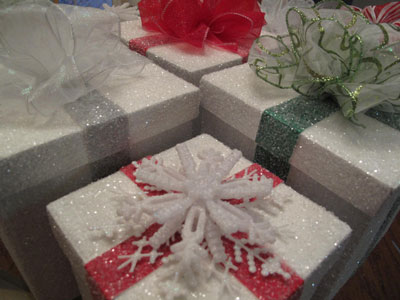
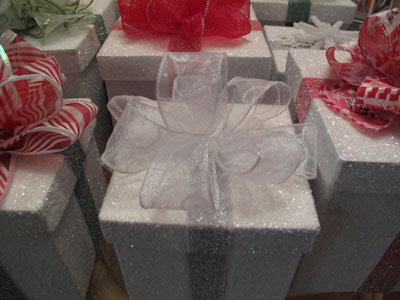
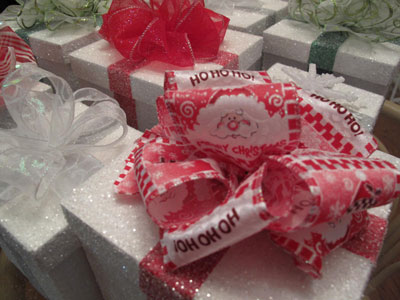
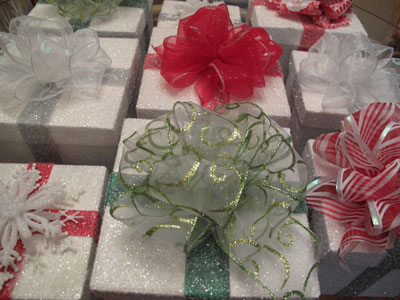
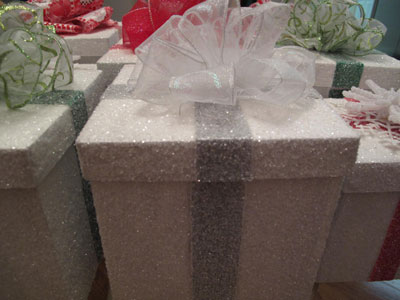
They look like they're covered in sugar or snow, don't they?  There is still time for you to make them for Christmas, so let me show you how easy they are to do.

Glitter Paper Mache Box 3

First, make a quick trip to the craft store for the paper mache boxes.  Mine happened to have the ribbon design as part of the paper mache, but if you can't find this style, a plain box would work fine too.  I found 3 sizes of this same style.  The largest one was a bit bigger than I wanted so I got the smaller 2.

You will also need craft paint in white and colors, white craft glue, glitter and ribbon.  You probably already have those items laying around from other projects.

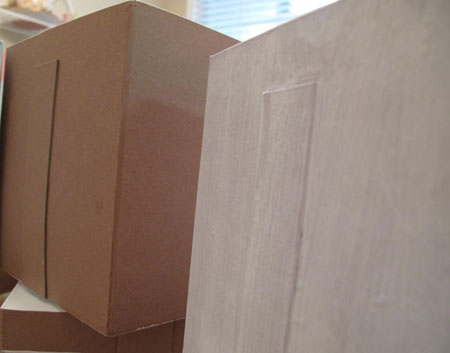
The first step is to remove any price tags or other labels that might be on your box.  Mine also had a hideous cardboard bow on the top that I pulled off.  Once you have a smooth surface to work with, cover the entire box and lid – inside and outside – in a base coat of white paint.  You don't want that cardboard brown color showing through your sparkly glitter.

Glitter Paper Mache Box 2

I added a second coat of white to the inside of the box and lid, and the bottom of the box since those areas wouldn't get glittered, and I wanted them to look nice and not streaky.  Let the paint dry completely.

Next, I painted the ribbon design with one coat of a contrasting color paint. I chose silver, red and green since I was doing Christmas boxes, but you could do any color.  These don't have to be just for Christmas, but you might have an easier time of finding the boxes at Christmastime. Let the contrasting paint dry.

Here comes the fun part!  Working with just one side of the box at a time, add an even layer of craft glue with a foam brush, and then heavily sprinkle/pour on the glitter and gently tap off the excess. Work your way around the box, being careful not to damage any wet freshly-glittered areas as you go.  Do the same with the lid. Allow the glue to dry overnight or until it is completely dry.  Don't worry if a little glitter falls off as you touch the boxes; that's normal.

Glitter Paper Mache Box 4

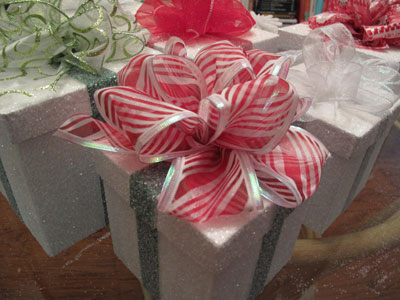
When your boxes are absolutely dry, you can add a pre-made bow or ornament to the top, or make your own bows as I did.  I also used a dollar store snowflake ornament on a couple of mine for fun.

Glitter Paper Mache Box 5

I went to a bow-making class at Container Store a few years ago, but I needed a refresher.  I found their Gorgeous Gift Presentation pdf on their web site, and it includes bow-making instructions with photos.

Glitter Paper Mache Box 1

You just start with wired ribbon and follow the directions for the type of bow you like.  I'm not a pro, but it's a pretty fun little holiday exercise.  When you're satisfied with your bow, hot glue it to the top of the box and you're done!  Voila and ta da!

Glitter Paper Mache Box 7

Fill your boxes up with baked goodies as I did, or with any other gift.  Your recipient will love it and think you're uber crafty!

Glitter Paper Mache Box Filled


~BigSis

Poinsettias, poinsettias, and more poinsettias!

December 1, 2011

Know what a 6oo foot long greenhouse full of beautiful pots of poinsettias looks like?

Answer: Gorgeous!

BigSis and I took a little road trip with a couple of friends to a local casino the other day just for a little penny-slot playing and lunch by the pool in some nice, warm sunshine!

On the way back, we decided to make an impromptu visit to Zalinda Farms, which happens to have the largest selection of poinsettias that I've ever seen! I didn't know it, but California is the top growing state for poinsettias in the U.S.

(It was so much fun being in the middle of all these flowers.)

Unfortunately, BigSis is allergic to these beautiful flowers so she stayed back with our friend, G, while Patty and I took a few quick pics. Even though they were closing, the owner was nice enough to let us in for just a few minutes. (We probably did beg just a little bit.) 🙂

Christmas Poinsettias

Christmas Poinsettias

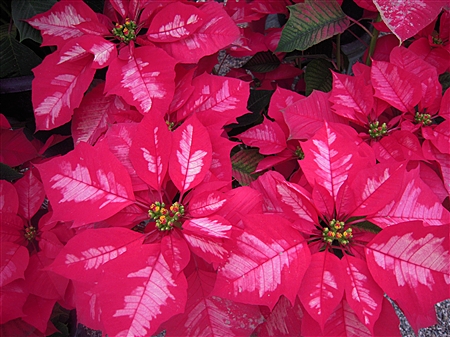
They had so many varieties of poinsettias to choose from but this was one of my favorites!

Christmas Poinsettias

Our time together while BigSis was here in California flew by faster than ever but we had a great time, as usual! BigSis is back in Dallas now and we both had to get back to reality and back to work today.

Since the big Charity Bake Sale is right around the corner, I'm sure we'll be hearing from BigSis about some of the goodies that she's working on. Hopefully, she'll have time to share with everyone a quick “how to” on some gorgeous glittery gift boxes that she made for the Bake Sale.  🙂

~LilSis

The Best Gift and Food Packaging Store is PaperMart!

November 20, 2011

How often do you shop online and find great selection, speedy shipping and excellent value?  Not often enough, if you ask me!  I have a site to tell you about that has all three of those boxes checked, and what's even better; they'll help you get ready for Christmas!

Thanks to Anna's recommendation on CookieMadness, I found out about PaperMart a few years back and have been using them ever since.  PaperMart  says they are the largest and most complete packaging store, and I'm here to tell you their claim is justified.

What can you find at PaperMart?  What can't you find might be a better question!  Here are a few of the items we ordered this year for our Charity Bake Sale for Animals (benefiting In-Sync Exotics, by the way).

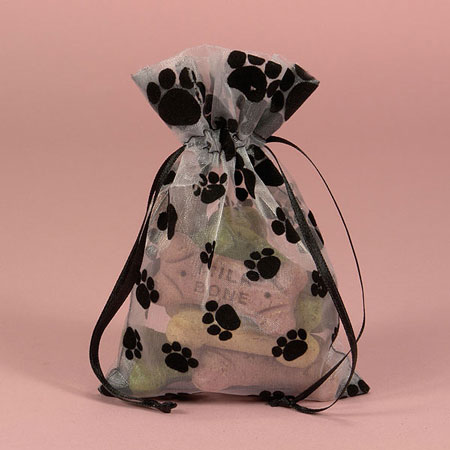
Paper Mart Paw Print Bags

Paw Print Organza Bags (5″ x 7″ $0.60 each)

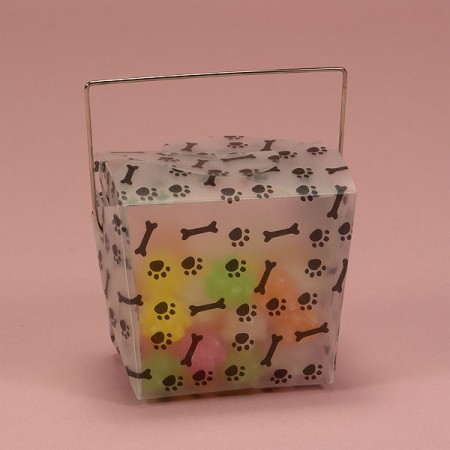
PaperMart Paw Print Wire Handle Box

Paw Print Wire Handle Boxes (4″ x 3.5″ $0.88 each)

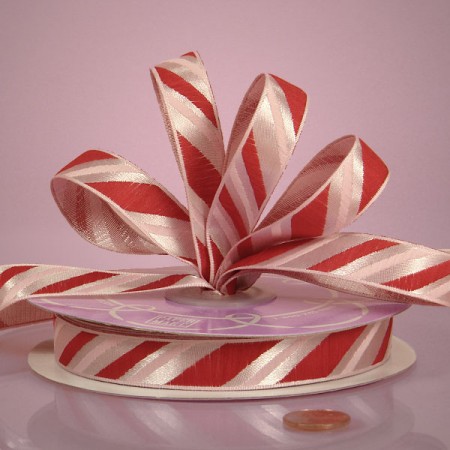
Paper Mart Candy Cane Ribbon

Candy Cane Satin Ribbon (5/8″ 25 yds $3.94 per roll)

We got the red/pink variety and the red/green one.  Both are gorgeous! These ribbons have the design woven into them, not just printed on like you'll find with cheap ribbon.

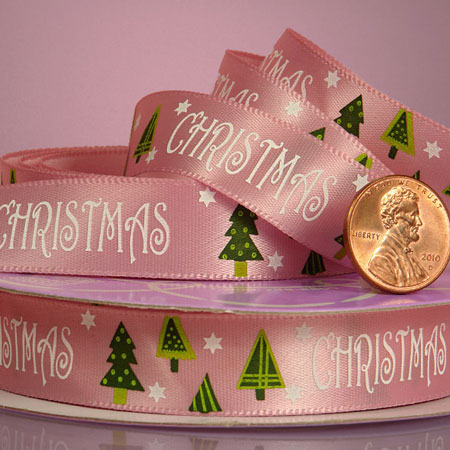
Paper Mart Christmas Pink Ribbon

Narrow Christmas Satin Printed Ribbon (5/8″ 25 yds $5.96 roll)

We got the pink Christmas print and the white Christmas ornament prints, and loved both of them.

We loaded up on red and green solid color 5/8″ ribbon too, which was a steal at 100 yds for $3.52.  We were completely impressed by the high quality of all these ribbons.  They are shiny on one side, and matte on the back, but you can upgrade to a variety that is shiny on both sides if you're even more obsessive than we are and don't mind paying a bit more.

We also buy the hard-to-find cello bags that we use for breads and cakes at PaperMart.  I daresay that PaperMart carries pretty much anything and everything you might need for packaging gifts and food this Christmas and year-round.  Check them out and let us know how your shopping experience goes!

~BigSis

40 Days Until Christmas

November 15, 2011

When we opened our doors for business at 4:30 this morning where I work, Christmas trees and beautiful decorations were revealed, Christmas Blend was brewing, our holiday packaging filled the shelves, red aprons were donned, and, yes; the Christmas music began.

BUT, am I ready? No.

Is it time to start getting ready? Yes!

After Halloween, it seems like the days fly by, even faster than normal. I'm never quite ready to think about Christmas when the retailers fill their shelves with Christmas items, which seems to get earlier and earlier every year. With so many other things on our minds; Christmas, which is supposed to be a joyous time of year, just seems to add more stress to our lives. My goal is to not allow that to happen this year.

For a lot of us, myself included, there's going to be a tighter budget for Christmas this year. So, what that means for me is better planning and getting my list ready earlier. My intention is to try to make a lot of my family's Christmas gifts this year, which means that I need to get started now!

Over the next few weeks, we'll be talking a lot about the big Charity Bake Sale benefiting In-Sync Exotics, but we'll also be sharing some tips to hopefully help make your Christmas planning and shopping go a little smoother.

To get you started, this 4 Top Tips to Get your Christmas Planning Started that was posted by BigSis last year is worth taking a peek at again in case you want to get started early. And this one on how to Make a Christmas Game Plan has links to sites where you can download free printable planning pages.

It may seem too early to start talking about all this Christmas planning, but the best way to avoid stress and last minute chaos is to be organized and plan ahead. So, I'm getting started; how about you?


~LilSis

How to Make Painted Glass Marble Magnets

March 20, 2011

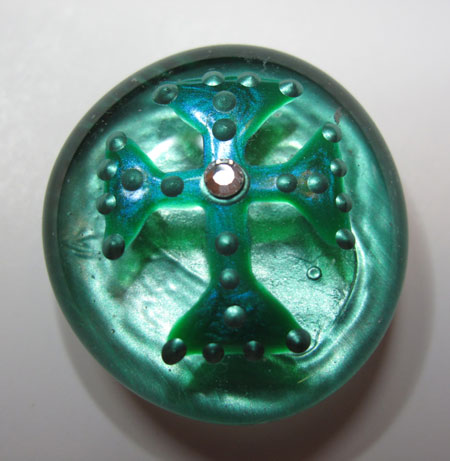
Glass Marble Done Fav Green

You've probably seen tutorials for making adorable magnets from the flat glass marbles that are used as filler in vases of flowers. Most of the instructions I've seen involve gluing paper of some kind to the back of the marble: scrapbook paper, gift wrap, newsprint, hand-drawn images, whatever.
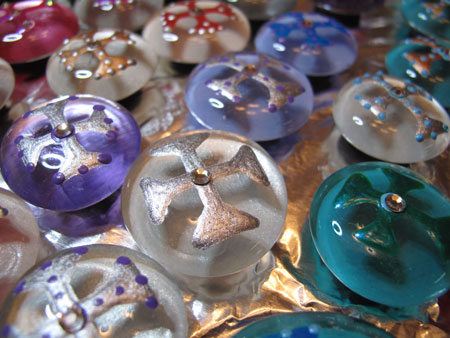
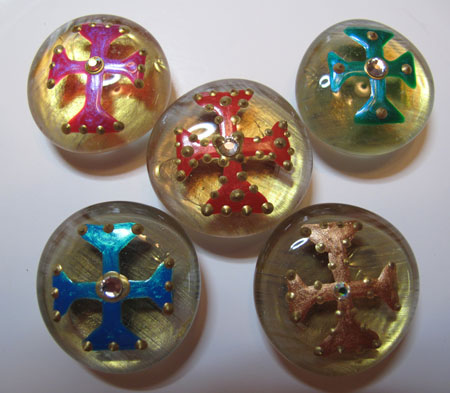
Glass Marble Done Group1

I think those marble magnets are really cute and easy to make, but I like to do mine in a different way.  I like to paint them!

There are probably lots of ways to do this, and you can absolutely inject your own creativity.  I'll show you the method I came up with, and then you can take off with your own ideas.
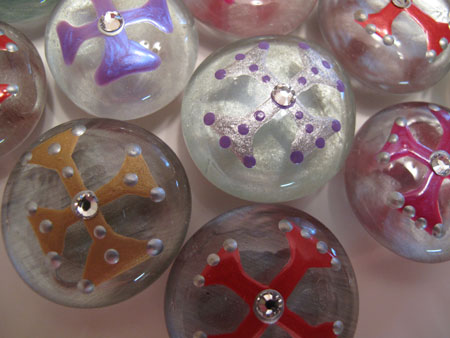
Glass Marble Done Group4

Let's start with the supplies you need:

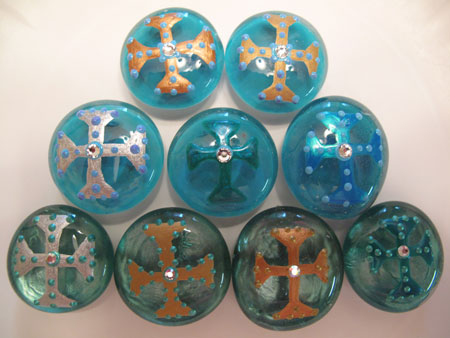
  • Flat glass marbles: Available at craft stores, discount stores, pretty much everywhere. I buy the clear ones because I can see my template through them, but you can also find really pretty blue, green and amber colored ones.
Glass Marble Paint

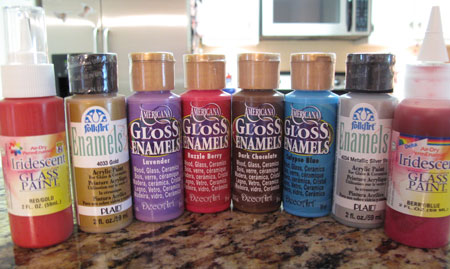
  • Glass paint: I prefer the air-dry kind that doesn't require baking.  I use FolkArt Enamels, Americana Gloss Enamels, DecoArt Ultra Gloss Metallics (these might be discontinued), and Delta PermEnamel.  My favorites are PermEnamel Shimmers and their Iridescent Glass Paint.  Delta PermEnamel is the glass paint equivalent of MAC eyeshadows: they come in jillions of colors, have great textures, apply well and look beautiful!
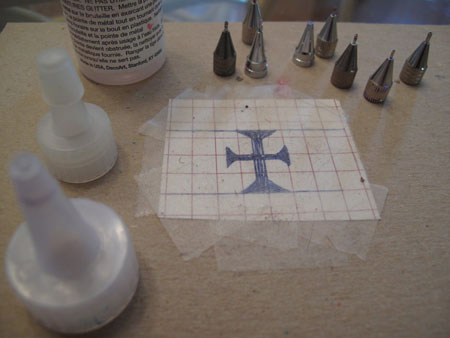
  • Glass painting kit with tips, adapter caps and plastic bottles.
Glass Marble Tip Kit

  • Grid paper:  To make your painting template.
  • Swarovsky crystals: Find them in the jewelry-making aisle at your craft store.
  • Tweezers: To apply the crystals.  Just raid your bathroom drawer, don't buy special jewelry-making ones.

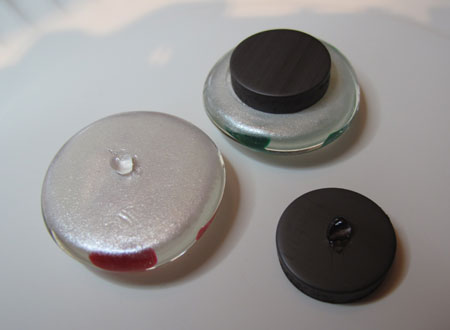
Glass Marble Magnets Glue

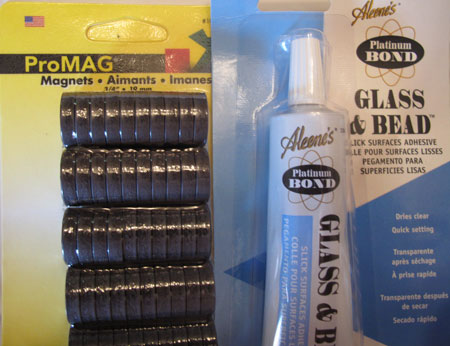
  • Magnet “buttons”
  • Glue: Strong glue for slick surfaces, like Aleene's Glass & Bead Adhesive, E6000 or Bond 527.
  • Magnifying craft light: If your eyes are “mature” like mine.  This is close work, so don't be too proud to use it!

The first step is to create a clean painting surface, and sometimes these marbles are a little dirty.  I give mine a quick rinse in straight white vinegar, but you could also use alcohol.  I use a large plastic container, and fill it with the marbles.  As you remove the marbles from the bag, be very careful.  They're glass, of course, and it isn't unusual to find a broken or badly-chipped marble.

You'll notice that I'm working with a lot of marbles.  It makes sense to me to paint a large batch at one time, since I already have all the stuff out.  Changing paint colors requires washing supplies, so I might as well do several marbles of each color while I'm at it. For this tutorial, I painted 7 dozen marbles.

Add vinegar or alcohol to cover the marbles, and let them sit for a few minutes.  Scoop them out with a slotted spoon, and lay them out on a thick towel in a single layer.
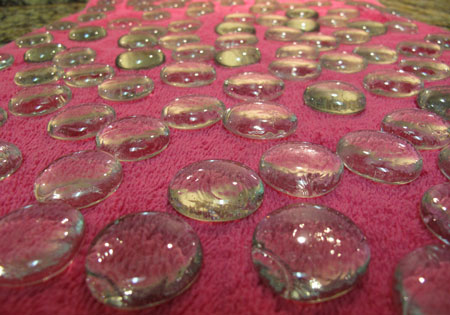
Glass Marble Magnet Wash

You can blot them a little or just let them naturally dry.  I've never had a problem with spots forming, so air drying is usually fine. You definitely want the marbles to be completely dry before you start painting.  Try not to touch the surface of the marbles from this point on, since the natural oils in your fingers could interfere with the paint adhering.

Once they're dry, remove the marbles from the towel and place them on an old foil-lined cookie sheet or tray.  I also cover another tray or sheet with foil to have a place for the marbles as I finish working on each one.  This 7 dozen is all lined up, ready to get dolled up!
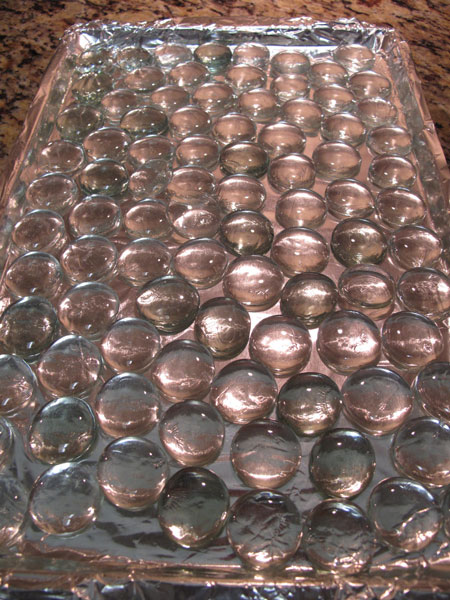
Glass Marble Magnet Dry

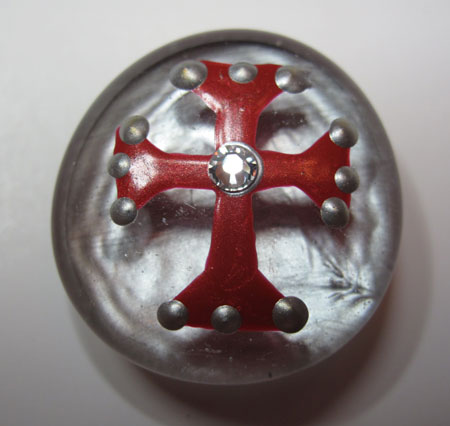
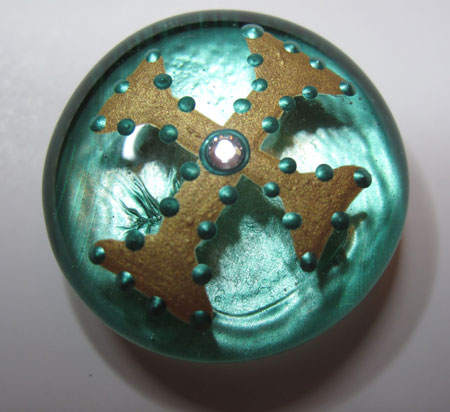
You may be able to freehand your design, but I can't.  Years ago, when I came up with the idea of painting these, I tried freehanding and it wasn't pretty.  I'm crafty, but not artsy, so I need a template.  I like to paint crosses, so it was very easy to draw a cross template on a piece of gridpaper.  Can you tell how well used/loved this template is? 🙂
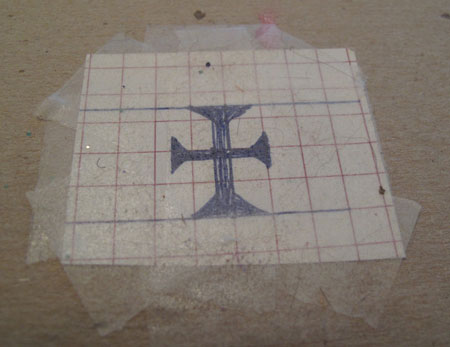
Glass Marble Magnet Template

Once you get your design drawn out, attach it to a piece of cardboard so it's sturdy.  Here's a trick for you.  Cover the design with a few pieces of removable two-sided tape.  This semi-sticky surface will hold onto the marble just enough to keep it stable and in place while you're painting on it.  When the tape eventually gets covered with cat hair (or dog hair or lint) you can easily peel it off and replace it with fresh tape.  It really makes a big difference.

If you need the magnifying light, now is the time to pull it out. Place your template on your work surface, and choose a marble, any marble.  Imperfections are common in these guys, so don't expect a perfect flawless one.  That's part of their appeal.  Discard chipped ones or any that just aren't pretty to you.  Center your marble on top of the sticky template.

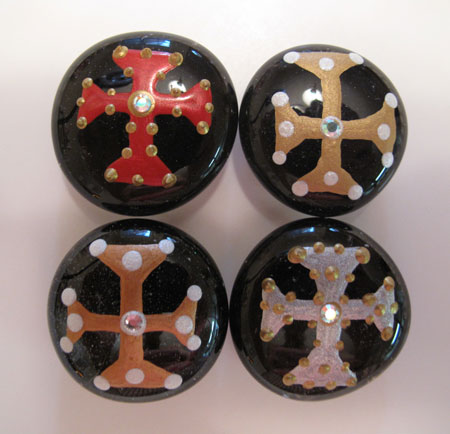
Here comes the fun part…painting!  Select the color you want to paint your crosses.  I love metallics: gold, silver and bronze.  I also love the gorgeous shimmery opalescent colors from Delta PermEnamels.  You can customize the color of your marbles for the occasion or the season, or just use the colors you like.
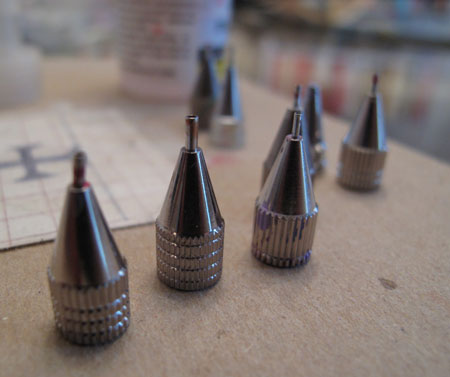
Glass Marble Magnet Tips

So how do you get the paint on the marbles?  Using a brush is too tricky for non-artist me, so I went looking for an easier solution. What I found are these brilliant metal glass painting tips that look like little ballpoint pen tips.  I've seen a couple of different kits at the craft store, and the tips may vary a smidge, but they always include the tips, small plastic bottles, and the adapter caps that screw onto the paint bottle.

The little metal tips snuggly screw onto the plastic adapter caps. I find that they also fit perfectly on the caps of some paint bottles.  If you're using paint that comes in a chubby jar like the Delta PermEnamel, you'll need to pour a bit of it into a small paint bottle that fits the adapter cap.
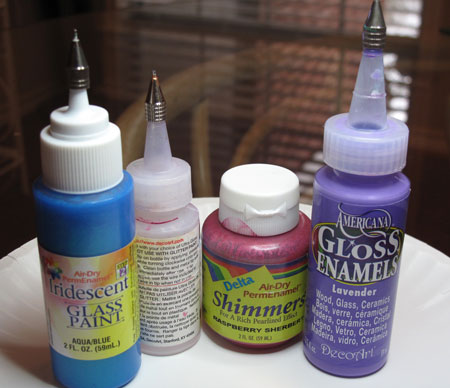
Glass Marble Tips on Caps

Once you have the tip securely on the paint bottle, test it out before you paint.  I keep a paper plate and a paper towel nearby for this purpose. Draw a line of paint on the paper plate to make sure the paint is flowing smoothly, and then wipe off the tip cleanly.

These painting kits also come with a little piece of wire that you can use to dislodge any clogs that might form in the tips, so keep this little jewel on your paper plate too.  Some paints are really bad about clogging, but others don't clog at all.

And a word to the wise, when you change paint colors and switch to a new tip, be sure to drop the used tip and cap into a cup of water.  If you let it sit and dry out, you'll pretty much be up a creek and have to toss those pieces.  You'll never get dried paint out of that skinny little tip.

Now, back to painting.  I start at one end of the marble, and just follow the template, filling in the design.  You don't want to squeeze the paint bottle really, just hold the bottle like you were holding a marker or pen, and guide the paint around the template.  The paint shouldn't be so thick that it will drip or ooze, but you do want good even coverage after two coats.
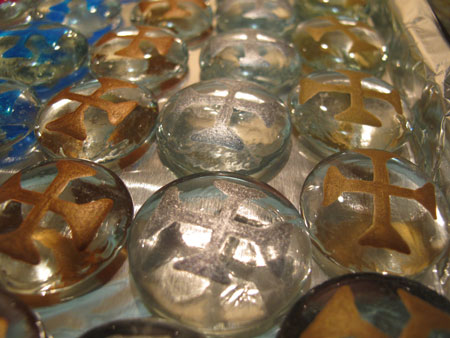
Glass Marble Magnet 1 Coat Metallic

Don't drive yourself crazy by striving for perfection, especially with this first coat. After the second coat, you'll be happy with what you see, so don't worry.  The main thing is to keep within the lines, and have fun!  If you make a mistake, you can try to clean it up with a toothpick.  If it's a doozie of a boo boo, just toss the marble and move on to the next one!

Tada!  First coat complete!
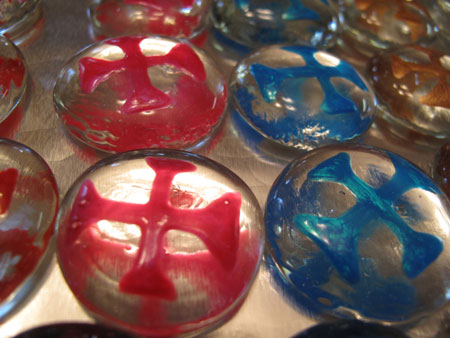
Glass Marble Magnet 1 Coat Close

Let the first coat dry thoroughly; I prefer overnight.  For the second coat, you won't need the template, so just make sure you stash it in a safe place for next time.

Take the same color paint, and add your second coat.  You can smooth out any rough edges and fill in any sparse areas.  Once you're finished, allow the second coat to dry overnight again.
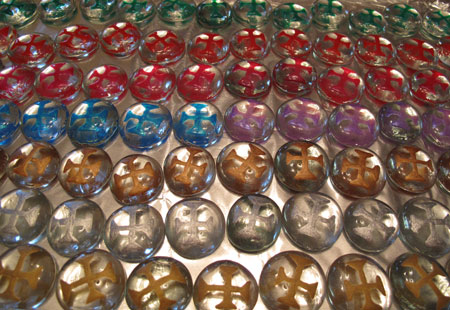
Glass Marble Magnet 1 Coat Wide

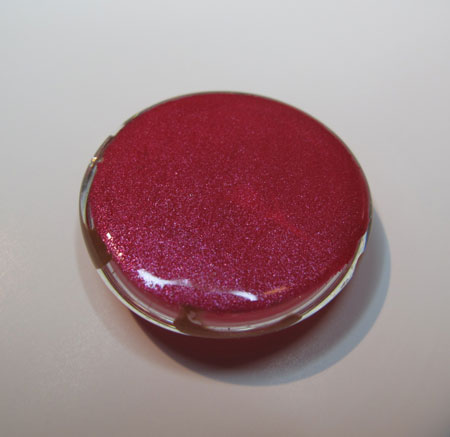
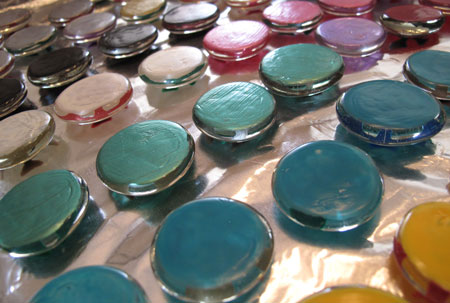
Did you think we were finished?  Oh, heck no.  The fun's just starting!  We're going to add a background color to the BACK of your marble.  You can skip this step if you want to, and sometimes I do, but I think it really adds a lot.  It gives dimension and depth to the marble, adds a contrasting or complementary color, AND hides the magnet you're going to glue on the back. Go a little crazy with your background color, or just let the design color be the star.
Glass Marble Magnet Back1

For this step, I use a small flat paintbrush.  And…you got it, let it dry overnight.
Glass Marble Magnet Back All

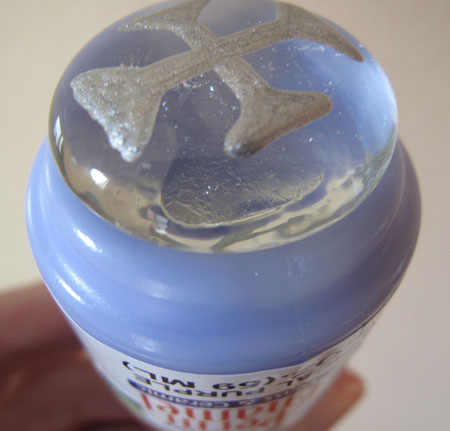
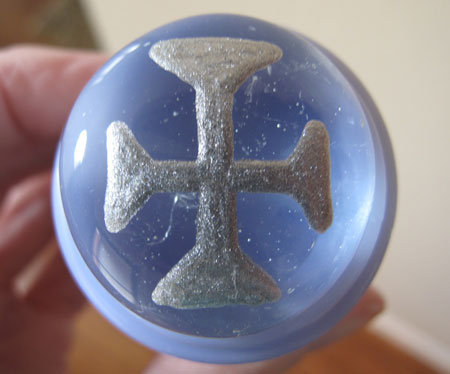
If you've chosen a sheer color, like my pearly white, you might want to add a second coat after the first sets up, but it isn't necessary.  It's up to you!  If you want to see how a color might look behind your cross, just hold up your marble to the bottom of the paint bottle, like this.
Glass Marble Magnet on Paint2

Glass Marble Magnet on Paint1

We're coming down the home stretch, so stay with me.  You have two coats of color on your cross, plus a coat or two of background color on the back of the marble.  I like to add a magnet at this point.  If I do it now, I don't have to rest the marble on it's frontside after the delicate little dots are applied, and risk smushing them down a bit.  I like for the decorations to be as dimensional as possible.
Glass Marble Magnet Glue

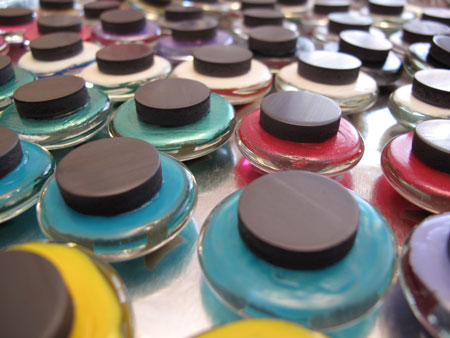
To attach the magnet, add a tiny dot of glue to the magnet and to the back of the marble, and allow it to sit for a minute or two (check your particular adhesive for directions).  Any longer and the glue may dry too much.  Attach the magnet, and set aside to dry… overnight.
Glass Marble Magnets All

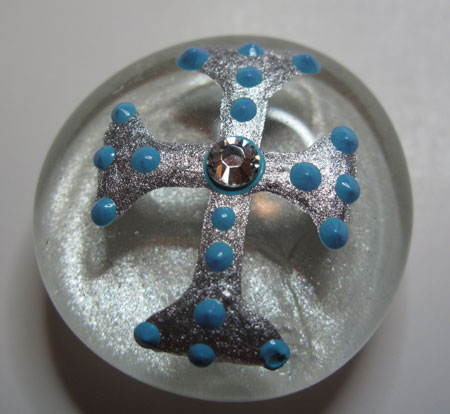
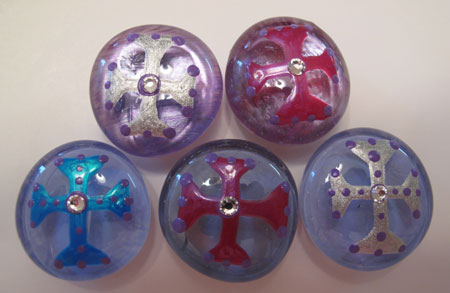
Now the last steps!  It's time to decorate the front of the marbles.  I do dots because they're easy and I like how they look, but you could do squiggles or lines or anything else your imagination can conceive of.  Choose any color!  I really like adding a dot color that coordinates with the background color, but other times, the dot color just comes out of the blue.

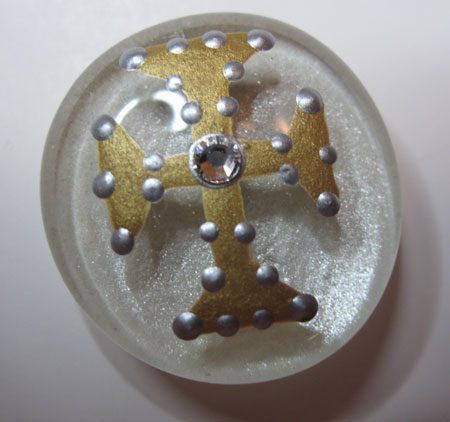
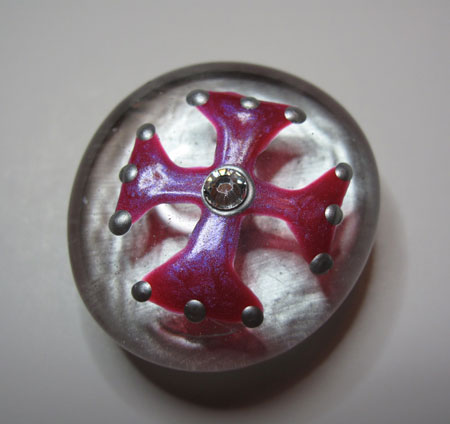
Before I add the decorative dots, I add one teensy tiny dot of paint (you could use glue, but you already have paint in your hand) to the center of the cross and carefully place a swarovsky crystal with the tweezers.  Press it down very gently.  Then just add dots here and there all over the marble, in any pattern you like.
Glass Marble  Magnet Done Fav Gold

Voila!  Your marble magnet is finished! Do you love it?
Glass Marble Magnet Done Fav Pink

I love to give these painted marble magnets as little gifts, so they need to be packaged up cute.  I've seen people put the paper-backed magnets in Altoid tins, and it's kind of cool that they stick in place and don't rattle around.  You'd have to decorate the tin though, and you have to deal with the raised logo on the front of the tin unless you buy flat new ones.
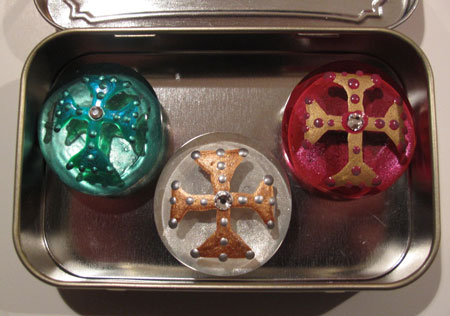
Glass Marble Magnet in Altoid Tin

You could also put the marble magnet in a little drawstring bag with a bit of pretty shred.  This is kind of sweet and Eastery-baskety.
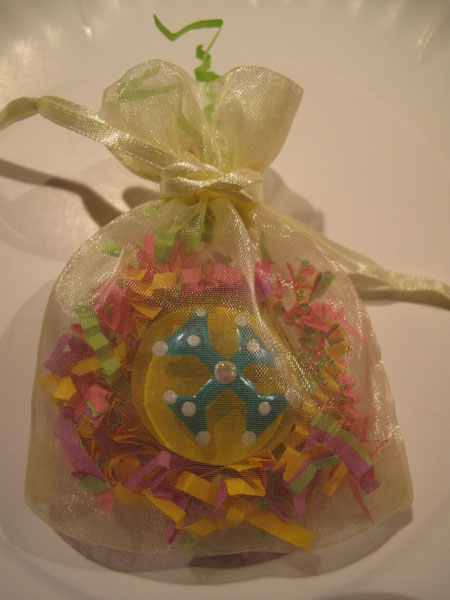
Glass Marble Magnet Favor Bag

What I like to do though is to take this beautiful marble to the next level by customizing a little paper mache box for it, with stamping, embossing and a scripture hidden inside.  Then it goes into the drawstring bag, and then into a handmade origami box. And if that isn't enough, we'll then wrap up the whole thing with a tulle bow.  Overkill?  Nah!  There's no such thing as overkill when it comes to giving gifties!

I'll show you how to do all of that next time, and share some of my favorite ways to give these away!  Til then, here are a few more of my favorite marble magnets from this big batch.  See you soon!
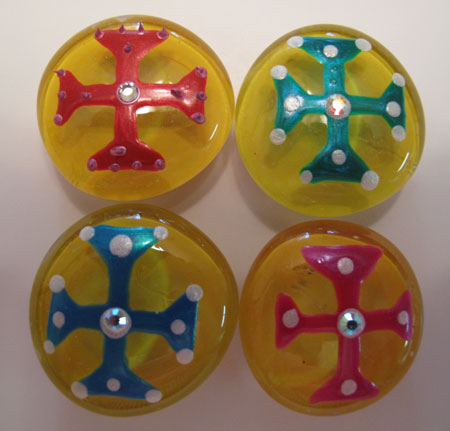
Glass Marble Magnet Done Yellow

Glass Marble Magnets Done Blue

Glass Marble Magnet Done Fav Silver

Glass Marble Magnet Done Black

Glass Marble Magnet Done Gold

Glass Marble Magnet Done Fav Red

Glass Marble Magnet Done Purple

Glass Marble Magnet Done Fav Green2

Glass Marble Magnet Done Pink

~BigSis

Christmas Wrap Up

December 29, 2010

I wasn't quite as productive as BigSis on the day after Christmas, but I did manage to clean up the last of the aftermath from a huge party on Thursday, sort through all the wads of gift wrap, gifts bags, and boxes strewn all over the living room floor from Christmas Eve night, and finish up the remaining leftover dirty dishes from Christmas Dinner.

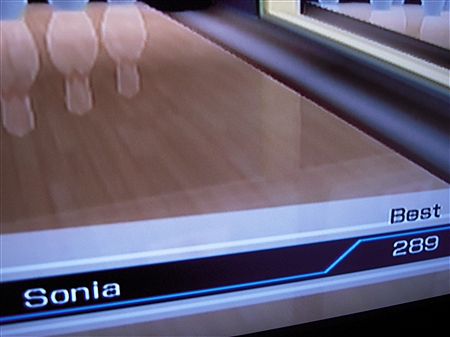
I figured that was enough for one day, so I did nothing really productive for the rest of the day, except for beating the guys in a couple of games of Wii bowling. (They can't stand the fact that I still hold the record for best game!) 🙂

No one has yet to beat my 289!

Wii Bowling Best Score

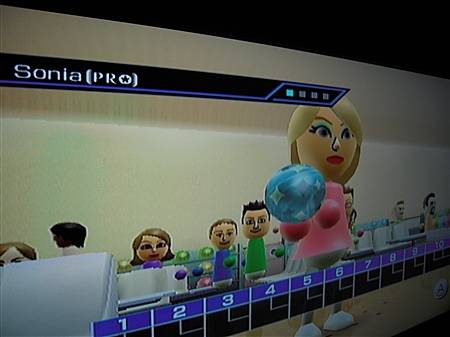
Here”s my lil Mii, the Pro.

Wii Bowling Mii

And, I can't wrap up Christmas without sharing a couple of Santa Hat shots!

Santa Guys

My Santa Guys! (Aren't they cute?)

Santa TomTom

We all know how much TomTom LOVES sporting a Santa Hat!

So, now that Christmas is behind us and the New Year is fast approaching, I've spent some time the past couple of days reflecting on what all has happened and changed for us during this year. Like a lot of people, 2010 was a tough year for us so I'm looking forward to saying goodbye to 2010 and welcoming 2011! I'll be back in a few days to officially wrap up the year.

~LilSis

Christmas 2010 Aftermath and Onward

December 27, 2010

Can you believe that Christmas 2010 is behind us?  As always, it snuck up on us and then became history in the blink of Santa's eye, didn't it?

So what did you do the day after Christmas?  Here's what I did:

Used the Amazon gift cards I got for Christmas. I got a pink (of course) Cuisinart 7-speed hand mixer and 6 books. Yes, Amazon cards DO burn a hole in my pocket!

Ordered Beachbody's Brazil Butt Lift. My plan is to integrate this different workout in with the second round of P90X that I'm about to start.  Confused muscles are happy muscles!

Balanced my checkbook (boo!)

Went crazy on the furkids with the FURminator deShedding Tool and cleaned their recent barfage from my carpet with the magic carpet cleaning potion

Did a boatload of laundry using my new favorite laundry detergent: Seventh Generation Laundry Detergent Free & Clear.  Adios, Tide!  Let me know when you stop animal testing and maybe I'll consider coming back to you.  Til then…

Chose the Franklin Covey planner refill that I want for 2011: Blooms Monthly Tabs

Packed up all of the 2010 SPCA Bake Sale materials for next year. Our total so far for this year's sale is close to $3,400.

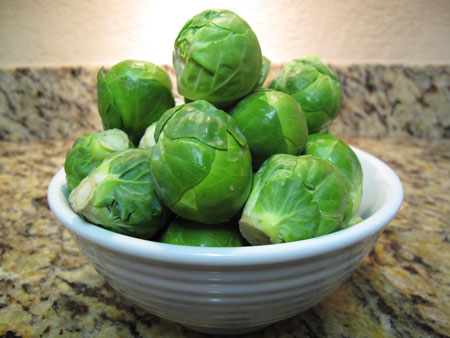
And last but not least, I roasted up a big pile of Brussels Sprouts to try to counteract all of the chips, lemon bars and pasta salad I've eaten in the last couple of days!

Brussels Sprouts

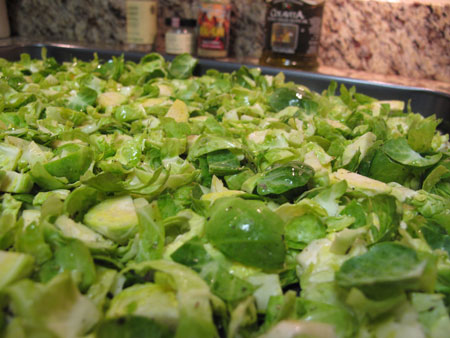
Just slice them up, and then toss with a touch of olive oil, garlic powder and lemon pepper.

Brussels Sprouts Sliced

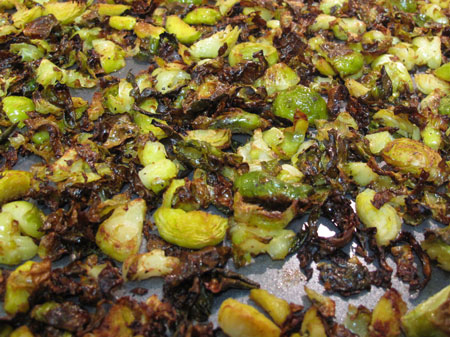
Roast at 450 degrees for around 30 minutes or until crispy.

Brussels Sprouts Roasted

So that was my day.  Did you feel a fire lit under you to get things organized and ready for the new year, as I did?

~BigSis

Merry Christmas!

December 24, 2010

Merry Christmas! God bless us every one!

Gaby Merry Christmas

~BigSis

Favorite Christmas Cookie: Snowballs

December 23, 2010

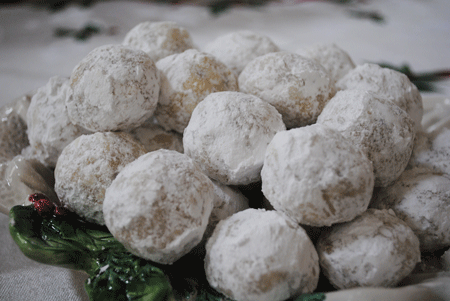
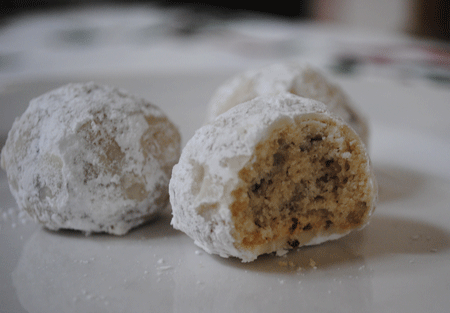
Snowball Christmas Cookies

For many years, our kids would wait, with much anticipation, for the tin of Grandma's cookies to arrive in the mail right before Christmas. Without fail, every year, until she wasn't able to do it anymore, my mother-in-law would mail a gorgeous tin full of a beautiful assortment of homemade Christmas cookies to each of the grand-kids.

Everyone had their favorite, so if you wanted one in our household, you had to be quick! One year, our beloved, SarahGirl (1/2 Lab & 1/2 Great Dane) decided that she wasn't going to wait for her cookie. The tin arrived as we were dashing out the door one day, so we quickly put it under the tree, not even thinking that the dog could possibly get into it since it was taped shut.

Yet, when we arrived home, we found that SarahGirl had somehow managed to remove the tape, open the tin and devour every single, ding, dang, last cookie!  (Shhhh… we never could bring ourselves to tell Grandma about the incident.)

Her Snowballs were always my favorite!

Christmas Snowball Cookies

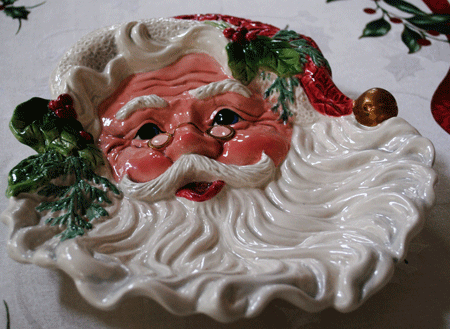
My Mother-in-law gave me this beautiful Fitz & Floyd Santa Plate about 15 years ago and ever since then, it's been the plate we've used to leave cookies for Santa on Christmas Eve night.

Santa Cookie Plate

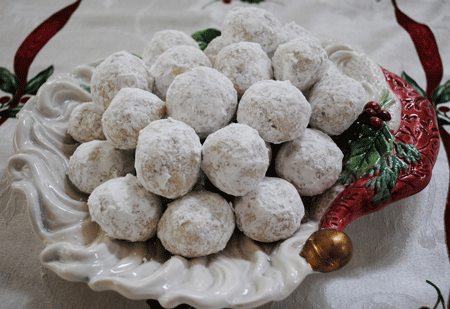
Tonight, I'll be serving the Snowballs on it for a Christmas get-together we're having with a few friends.

Santa Cookie Plate with Christmas Snowballs

Snowballs

1/2 lb. butter, at room temperature
2 c. flour
1 c. chopped pecans
1 t. vanilla
1 c. powdered sugar

Preheat oven to 350 degrees. Cut the butter into small pieces, place in a large mixing bowl and gradually add the flour, the pecans, then the vanilla, combining all with your hands.

Form the dough into walnut size balls and place on a cookie sheet about an inch apart. Bake for 18 – 20 minutes, just until the bottoms are slightly brown.  Let cool for 5  minutes, then roll in the powdered sugar. Once completely cool, dust again with powdered sugar.

(Before I made these, I did a little browsing online and I did find quite a few variations of this recipe. Some have salt, sugar and even eggs in the dough but I decided to stick to my mother-in-law's recipe.)

The good news is that when my hubby tried one, he said they were perfect and tasted just like his Mom's. In my house, that's the best compliment I can receive. 🙂

~LilSis