How to make a Baby Name Wall Hanging with Fabric Letters

July 21, 2011

Guess who came 2 weeks early?  Little Baby Jack, that’s who!  He decided not to wait for his due date, and made his appearance on July 8th, so we’re all thrilled to have another sweet little boy in the family!

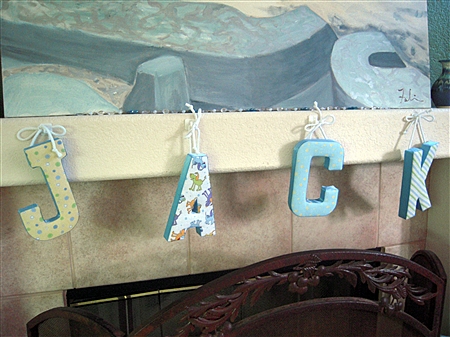
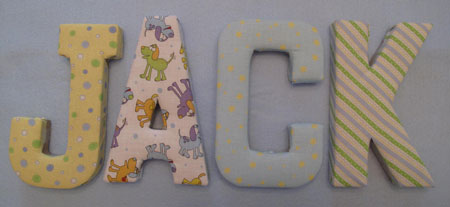
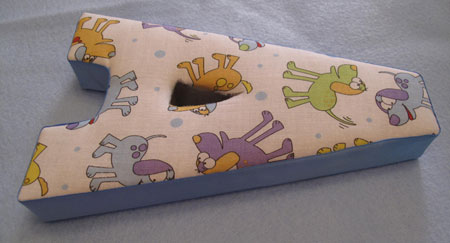
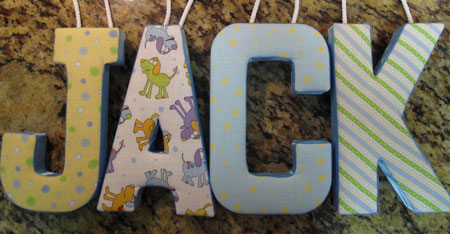
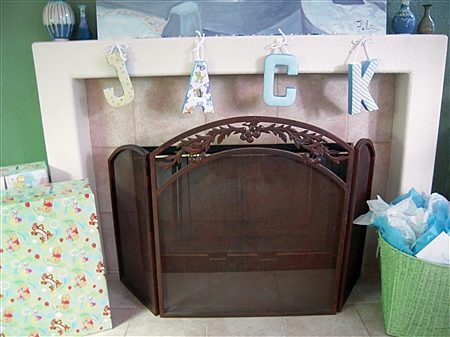
LilSis had a baby shower for Bry and Rach on June 1st, and we talked about all of the fun things we did for it.  I had a complete blast making these fabric-wrapped letters for Jack’s room:

Jack Fabric Letters

I’m not gonna lie to you though…these little dudes were tricky in parts!  I would absolutely do them again, especially since I learned a few tricks of my own along the way.  What kind of a friend would I be if I didn’t share them with you?  Not a very good one, I’d say, so let’s get busy making some cute letters.

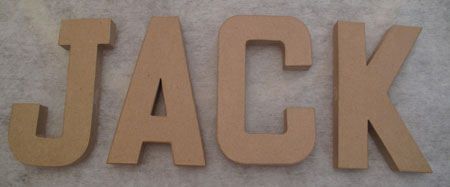
Paper Mache Letters

Start by choosing the name. It sounds simple since you can’t change the child’s name, but there are some things to consider.  I originally planned on making Jack’s middle name too, since I love it so much.  Once I really thought about it though, I realized that would add 6 more letters.  Finding 4 fabrics that coordinated the way I wanted them to was challenging enough, and I think that finding 10 fabrics would have been a gargantuan challenge (aka pain in the tookus).

Besides the fabric selection issue, you also need to think about where the letters will be hung.  I was thinking about “Jack” on one line, and his middle name on a line below it.  But I didn’t know what his mom and pop had planned for his room, and I didn’t want to assume they’d have space for a wall hanging that large.

Decide on your color scheme as it coordinates with the child’s room. I think selecting 2 or 3 colors from his/her color palette is a good rule of thumb.  If you have a sample of their existing fabrics and colors to go by, all the better.

Select your fabrics. Go a little crazy! I love mixing different patterns for a really fun combination.  This is for a baby’s name, not a stuffy corporate boardroom, right?  As long as each fabric has the unifying color or colors to tie them all together, they’ll work fine.  Try patterns, polka dots, stripes, plaids; whatever grabs you.  I chose fabrics that all had blue, yellow and/or green in them, and opted not to use any solids.

You won’t need a lot of fabric.  I got half a yard of each and had plenty extra, just in case of a big boo boo.  One cool thing  I discovered is that a quilter’s “fat quarter” is a great size for this project and comes at a fabulous price.  The doggie fabric on Jack’s “A” was from a fat quarter that I paid $1.99 for.

Assemble the rest of your supplies. Here’s what you’ll need in addition to your fabrics:

  • Paper mache letters (I got my chunky ones at Hobby Lobby. They also have thinner cardboard ones.)
  • Quilters batting (I like the thicker poofier batting for this project.)
  • Felt (for the back of the letters; in a color that coordinates with the fabrics)
  • Wide ribbon (for the sides of the letters; choose a color that works with all of the fabrics)
  • Thin ribbon or rope (to hang the letters from)
  • Spray adhesive (to attach the batting to the letters)
  • Staple gun (to attach the fabric to the letters)
  • Hot glue gun (to attach the felt to the back)
  • Scotch tape (for any areas the staple gun won’t reach)
  • Xyron sticker maker (to turn the ribbon into a sticker)
  • Pen or marker (to trace letters’ outlines on fabric and felt)

Here we go!

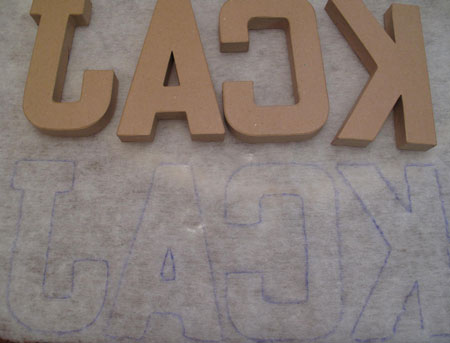
Letters on Batting

First, turn your letters upside down on the batting and trace around them.  Marking on the backside of the batting reduces the chance it will show through any lighter fabrics.  Go ahead and trace around the letters on the felt too while you’re at it.  For the felt, trace so that the marker will be hidden when it attaches to the back of the letter.

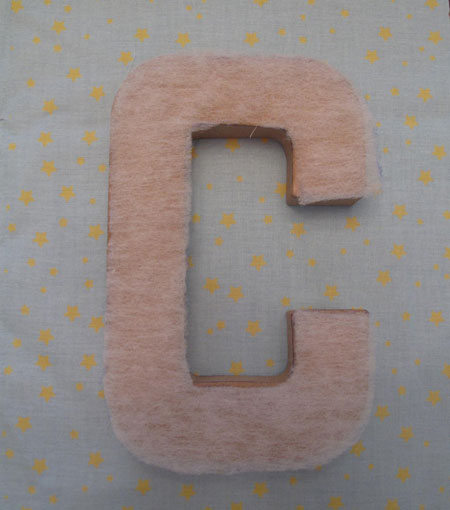
Batting on Letters

Cut out the batting and felt along your lines.  Follow the directions on your brand of spray adhesive, and apply the batting to the front of the letters. Press it down lightly, and allow to dry for a bit.

Decide which fabric goes with each letter.  Lay them out next to each other in different orders, so you can see which ones look the prettiest/most handsome next to each other.

Cut a piece of fabric slightly larger than the letter; I like to allow several generous inches all the way around, especially since the letters I used are so chunky.

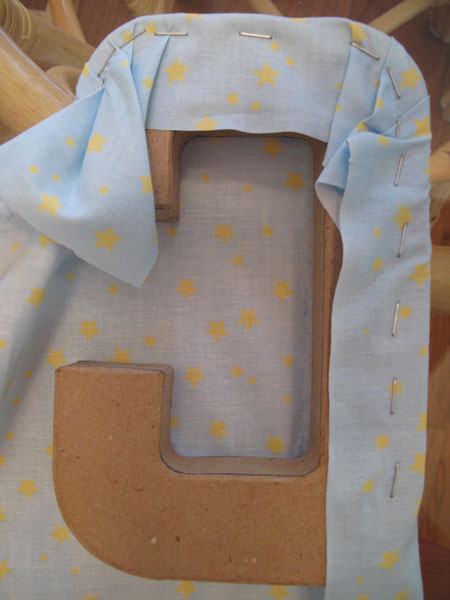
Now comes the part that needs all your attention and a bit of patience.  With the fabric right side down, place the letter face down on it.  You’re going to go around each letter, keeping tension on the fabric as you pull it to the back of the letter and attach it with the staple gun.

#1, make sure your fingers are out of the way!  #2, make sure the tension on the fabric is consistent all the way around the letter.  I like to do the straight sides first.  If you’re working with stripes or plaids, check the front of the letter as you go to make sure the pattern is straight.

Wrap Fabric

When you come to a curve, you’re going to ease in the fullness, making smooth little pleats as you go.  You’ll need to snip the fabric here and there to allow it to fit smoothly.  I use lots of staples on curves and take my time.

On corners, try to fold under the excess fabric as you would make a hospital corner with your bed sheets.  You can fiddle with it until you get it smooth and sharp, then staple it down.

Back Fabric

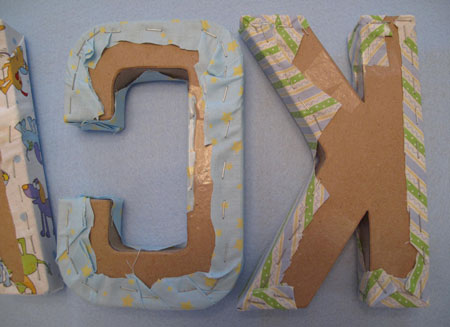
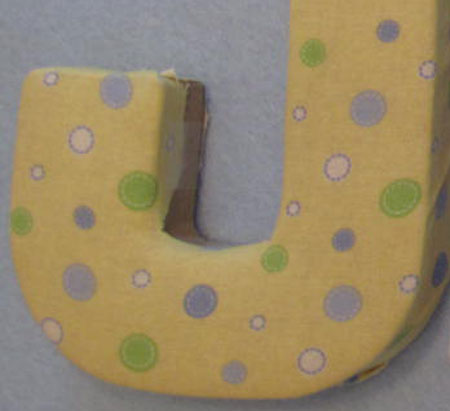
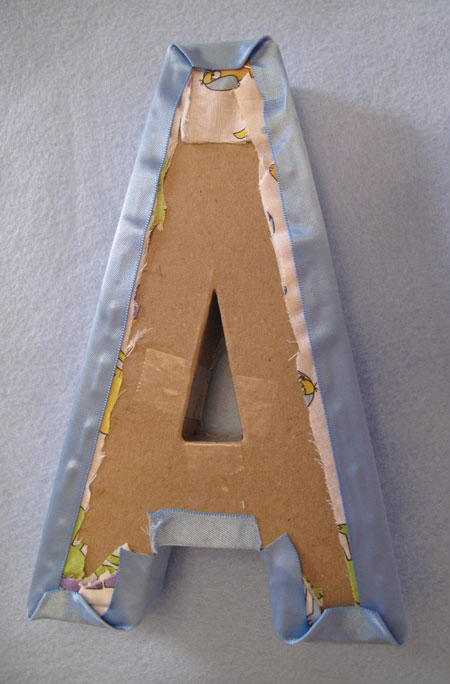
Now for the tricky part I mentioned!  Some spots on these letters are a bear to do, especially if you’re a perfectionist like me!  The inside of the “A” and the inside angles on the top and bottom of the “K” gave me fits.  I found there wasn’t enough fabric in those spots to fold to the back of the letter, so that’s when I had to resort to bits of scotch tape.

Just remember, you want to keep the sides of the letters as smooth as you can so bumps won’t show through your ribbon, but the ribbon is going to be there to hide any remaining gaps the fabric didn’t cover.

Fabric Gap

Once all your letters are covered with fabric, admire your work! The hard part is done!

Front Fabric Done

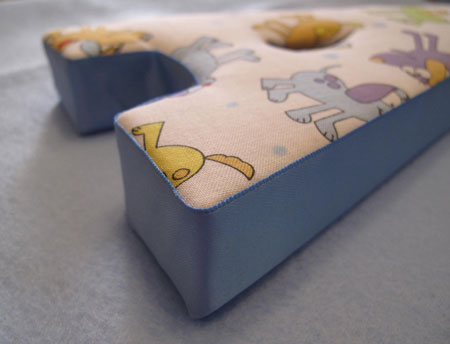
The next step is to cover the sides with the wide ribbon.  My letters were thick and I wanted a ribbon that would cover the whole side, and not leave any gaps.  I needed a 3/4″ ribbon.  Guess what? They don’t MAKE a 3/4″ ribbon, at least not that I could find after many many craft store trips!  Who knew?

What I decided to do was buy a 1″ ribbon and wrap the excess to the back of the letter.  It ended up creating a really finished edge, and I think it worked out even better than a 3/4″ ribbon would have.

Back Ribbon Wrap

I experimented with many different adhesives and fabric glues to attach the ribbon, and couldn’t find one that would have great sticking ability but would not stain the ribbon or show through. Hot glue would leave that ugly bumpy ridge so that was out.

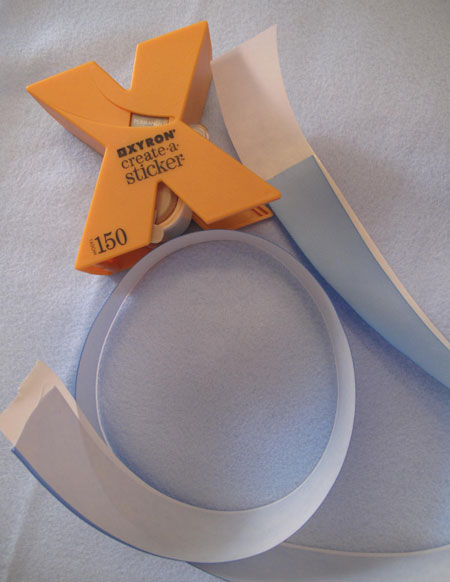
My solution?  Run the ribbon through a Xyron sticker maker (with the permanent adhesive).  It works like a charm!  It sticks incredibly well with no staining, and the excess ribbon sticks nicely to the back of the letter.

Xyron Ribbon Sticker

Measure the length of ribbon you need, allowing a bit extra so you don’t come up 1/4″ short!  Run it through the Xyron, peel off the backing, and start applying to the sides of the letters, beginning in the most hidden part of the letter so your seam will be as invisible as you can make it.

Ribbon Corner

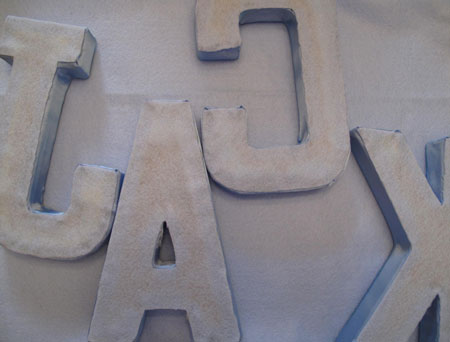
Attach your felt to the back of the letters with hot glue.  I like to trim off any excess fabric before I do this, just to make the back as smooth as possible.  You can add extra tape or staples to any spots that are wild.  Since hot glue dries so fast, I like to lay down a small amount of glue at a time, working my way around the letter. All of your crazy mess is your secret now!

Felt Back Letters

You’re almost done!  The last step is to attach the ribbon or rope (or whatever you like) that the letters will hang from.  I chose a thin white rope trim.  To keep it from slipping out of the staple, I made a small tight knot at the end, and just attached it to the top of the back with the staple gun.

Finished Letter

There are lots of different things you could do with these once they’re done.  You can hang them from little wooden pegs like I did, or you could hang them on a curtain rod like a valence over a window.  You could skip the rope (ha ha), and just stand the letters up on a dresser or bookshelf.  Use your imagination!

Finished Letters

That’s it!  Adorable, custom-made letters for some lucky adorable custom-made baby!

~BigSis

Beach Break Cafe Review

June 25, 2011

It’s been a couple of weeks since I’ve been back home from my extended weekend trip to California, and I’m still thinking about Beach Break Cafe! On our way to take me to the airport, we stopped in for a late breakfast/early lunch and we can’t believe it took us so long to eat there!

We happened to be at Beach Break Cafe on the last day of school, and this was apparently THE go-to spot for happy high schoolers who were eager to celebrate their freedom with an awesome California-style meal. HayHay saw oodles of kids he knew. We had to wait for a table for 15 or 20 minutes, but it was well worth the wait.

Even before our food came, we were loving the cafe. All of the staff were so friendly and our server told us that they were experimenting with new restaurant POS systems to try and make their service even more efficient. The decor and vibe was very beachy-cool, and fun. We sat out on the patio and enjoyed the fresh air and people watching. This is our kind of place! You can keep your fancy fah-fah-fah restaurants. Give us a laid back hole in the wall cafe and we’re happy girls!

Being vegan 99% of the time, my food choices were somewhat limited as usual, but I did have options. Take a look at the menu. I was dying to try the legendary crispy hashbrowns, so that’s what I had, along with sliced tomatoes, biscuits and coffee. There was no way I was going to be virtuous with oatmeal or fresh fruit on this trip! I wish I’d gotten the fresh-squeezed tangerine juice that LilSis tried. It was pure California gold in a glass! Beach Break also offers fresh-squeezed grapefruit and orange juice.

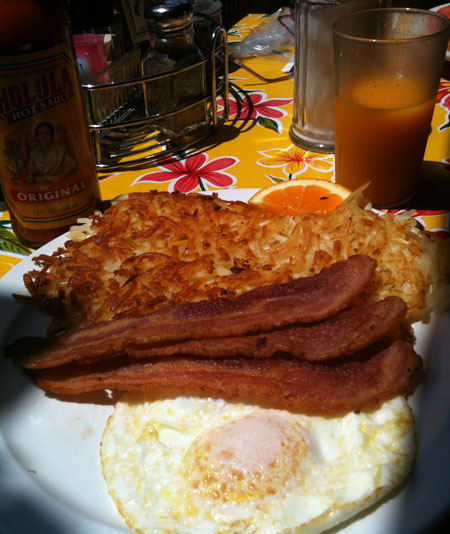
Here’s LilSis’ meal before she tore into it. Check out those crispy golden hashbrowns!

Beach Break LilSis

LilSis' plate at Beach Break Cafe

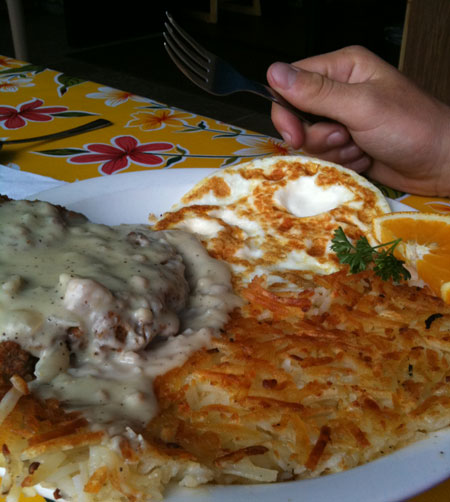
Check out HayHay’s plate. You can’t even see the 2 ginormous slabs of sourdough toast on the side!

Beach Break Chicken Fried Steak

Beach Break Chicken Fried Steak

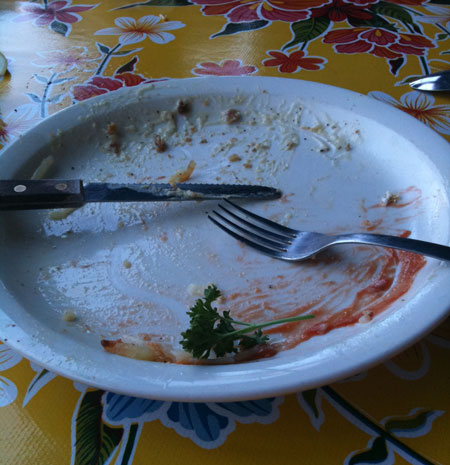
You see that hand on the right of the photo? It belongs to a 17 year old surfer and it’s holding a fork. You know what that means? It means in 10 minutes flat you have this situation:

Beach Break Empty Plate

Beach Break plate after HayHay attack!

I guess he was too full or the garnish would have been history too!

We’ll definitely make breakfast at the Beach Break Cafe a regular stop when I’m visiting. The whole fam damily is hearding out to Californie later this summer after my new great nephew is born, so Beach Break better get ready! We’ll need lots of those delicious hashbrowns!


~BigSis

Baking and Crafting and Cleaning…oh my!

June 6, 2011

We’ve been busy little bees lately. Wanna guess what we were up to?

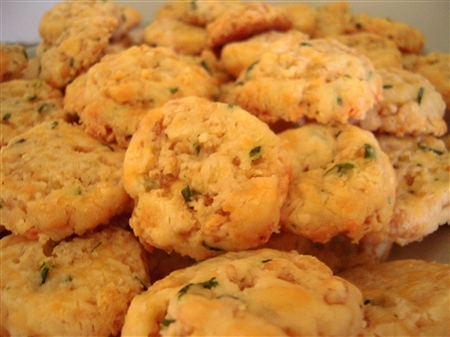
We made these…

Crispy Cheese Crackers

Crispy Cheese Crackers

and these…

bought these…

assembled this…

made these…

put these together…

got the back yard ready for guests…


and tried to keep TomTom out of everything…

Aren't you going to unwrap it for me?


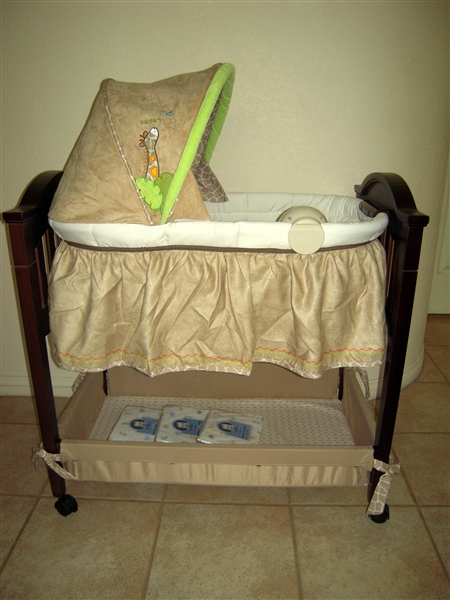
You said the bassinet was for the baby!


If you guessed we had a baby shower you’d be right!

Saturday we hosted the shower for Bry and his wife Rach’s soon-to-arrive little boy, so we spent a few days baking, cleaning, planning and crafting.

We had a lot of fun putting the shower together and can’t wait to share some of the ideas with you.  We’ll be back soon with the recipe for the cheese crackers and the directions for the fabric-wrapped letters.

But for now, there are more important things to do on my last day in San Diego, like walking on the beach and eating more Mexican food.  Adios!


~BigSis

My First Green Juice!

May 22, 2011

What do you get when you mix this:

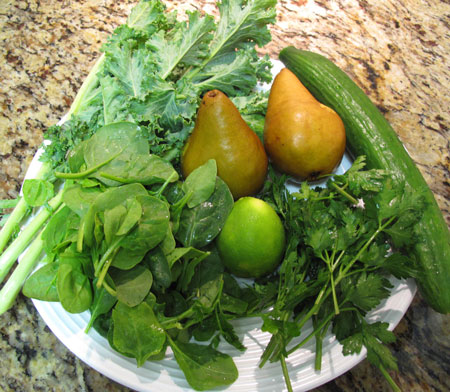
Green Juice Fruit Veg

Kale, cucumber, spinach, parsley, pears, and lime


with this:

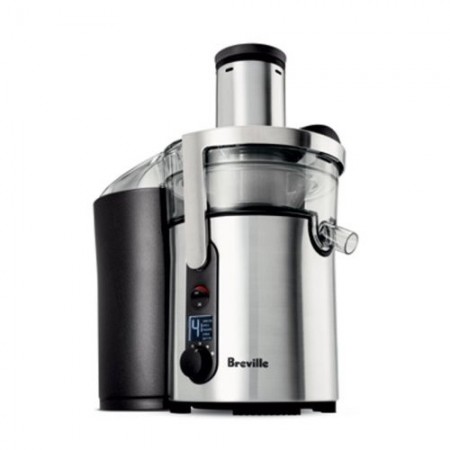
Breville Ikon

Breville Ikon Juicer


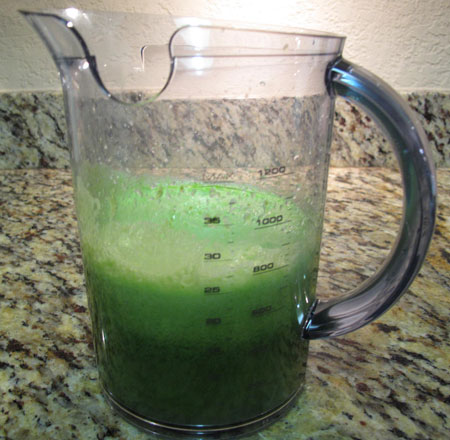
You get this!

Green Juice

Green Juice!


My very first green juice!  I finally gave in to my desire for a juicer, and bought the Breville BJE510XL Ikon 900-Watt Variable-Speed Juice Extractor.

I’m reading Kris Carr’s book Crazy Sexy Diet right now, which I highly recommend by the way!  This is one of the juicers she suggests, and I think her opinion on the subject is pretty credible, so I went for it.

I started out slowly; juicing carrots with apples and carrots with oranges.  I knew I wanted to go green, but I also knew I couldn’t jump into the green pond right away.  You have to work up to these things!

After a couple of weeks I dove in…green juice.  Greens are full of all kinds of nutrients including vitamin A and iron, plus they have an alkalizing effect on your body.  You’ve probably heard the buzz about how diseases love an acidic environment, so maintaining a balanced pH is one thing you can do to help minimize your risk.

I bet you’re wondering how this lovely greenness tasted!  It actually wasn’t bad.  I expected a thick sludgy drink with all the personality of pureed spinach, but I was pleasantly surprised.  I did toss in a small lime and a slice of ginger to cut through some of the blandness, and I think it helped.

I’m not gonna lie and say that this was scrumptiously delicious, but I was able to get the whole drink down without making a face.  I think my palate will grow to appreciate a nice glass of green juice, and until then, I’ll just think about the good things I’m doing for my body as I’m drinking it!

~BigSis

What to Eat for Cinco de Mayo

May 5, 2011

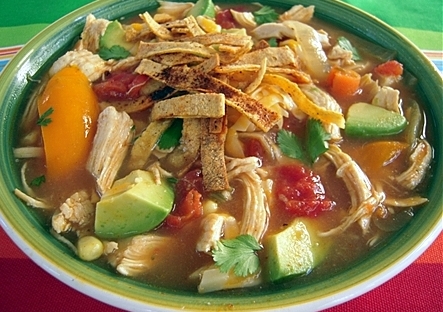
Classic Tortilla Soup

Classic Tortilla Soup

Like most of our Texas sisters from other misters and brothers from other mothers, we sisters love our Mexican food!  Give us a reason to eat it.  Please!

Or don’t give us a reason.  We’ll still eat it.

Morning, noon and night.  We’ll eat it 3 times a day.  Or more.  Girls need snacks sometimes, you know.

Cinco de Mayo is the official Mexican food eating holiday though, so bring it on!  Check out the recap we put together last year with some of our favorite Cinco de Mayo dishes.

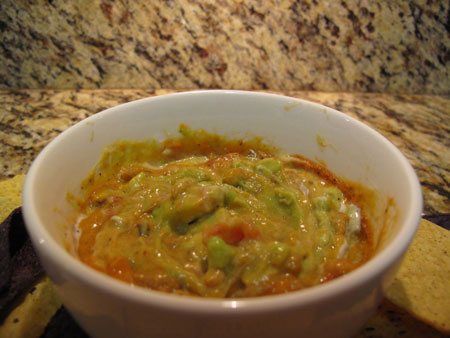
My new favorite Mexican food snack is veganized Bob Armstrong Dip, so that’s what I’ll be making.

Vegan Bob Armstrong Queso Dip

Vegan Bob Armstrong Queso Dip

Whatever you feast on, enjoy your Cinco de Mayo!

~BigSis

Cruelty-Free Eye Makeup Remover: Philosophy Just Release Me

May 1, 2011

Hurray!  I finally found it after almost a year of searching…the perfect eye make-up remover!  It’s oil-free, cruelty-free, and super-effective yet extremely gentle thanks to the aloe, chamomile and cucumber.

What is it?  It’s Philosophy Just Release Me.

One of the things I love about Philosophy is their sense of humor. Here’s the story from the bottle of Just Release Me:

“from caked on to baked on, from lid lock to grid lock, from dressed up to stressed out, from high shoes to win-lose, from run fast to slow down, it’s time to release your eye makeup and set your sights free”

Cute, huh?  I like it already!

Philosophy Just Release MeJust Release Me reminds me a lot of my old long-time favorite eye makeup remover; Lancome Bi-Facil, which I dropped like a hot potato when I banned animal-tested products from my home last summer.

Both of these removers are oil-free, dual-phase and look the same in the bottle: thin blue liquid separated in two layers that need to be shaken before using to blend together.

Both removers quickly remove all traces of makeup – even loads of mascara – without pulling or rubbing delicate under-eye skin, and without losing any eyelashes.

I’ve used both of these products in the same manner, with great results.  I wet a cotton round with hot water and squeeze out most of the water, then add a dab of remover.  I hold the cotton round over my eye for a few seconds, and then gently wipe away all of the remaining makeup, turning the pad over if necessary to finish up.

What’s different between the two?  Just Release Me is $18 for 6 ounces ($3 per ounce), and Bi-Facil is $26 for 4.2 ounces ($6.19 per ounce).  That’s more than double the price!

And the biggie that I already mentioned is that Lancome animal tests and Philosophy does not.  That’s more than big…it’s huge.

Just Release Me is currently sold out on the Philosophy web site, but it’s in stock at Drugstore.com, Sephora and at Ulta, which is where I got mine.

Philosophy does not animal test, but they are not a vegan company.  If you’re ok with that, then Just Release Me may be the eye makeup remover for you!

~BigSis

Swirled Cookie Suckers for Easter

April 22, 2011

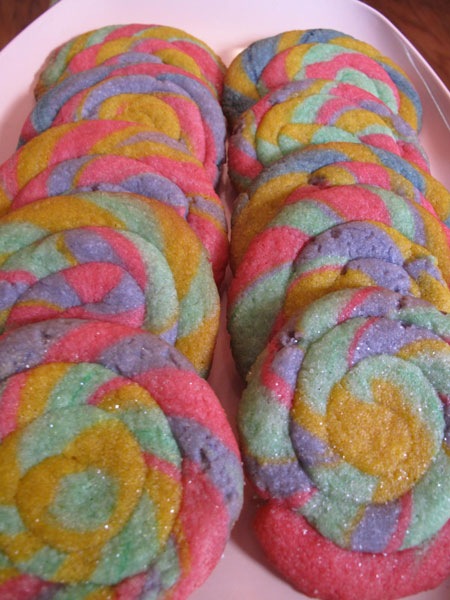
Cookie Suckers Plate Rows

We’ve got one more fun project for you before Easter hops on in, and it’s another one you can get your little bunnies and chickies involved with!

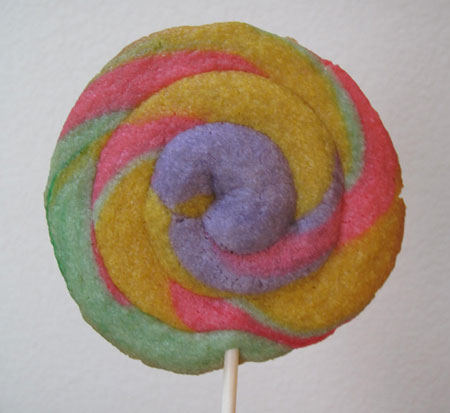
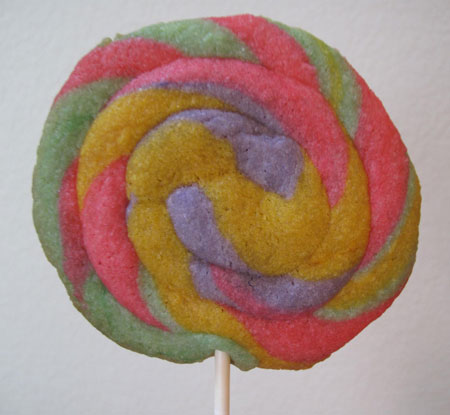
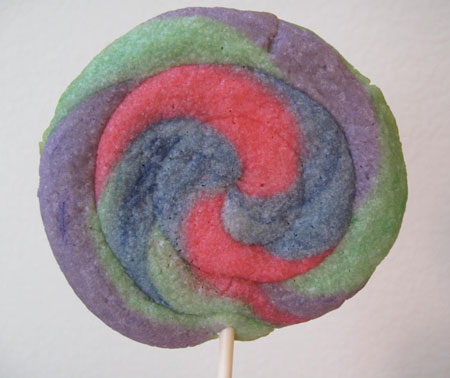
Several years ago, I made 3oo to 400 of these fun cookie suckers for the volunteers who were serving on Easter weekend in my church preschool.  Yeah, it was a pretty big church with LOTS of preschoolers!

I can still vividly remember staying up until 3 am, swirling and twirling the dough into cookie suckers on sticks, wrapped up in a treat bag and tied with a ribbon.  Even though it was exhausting, my main memory is that it was a really fun project!

Let me show you how to make these so you can enjoy them too!  I used a vegan cookie dough recipe this time, but the recipe I used to use is a rich one with cream cheese that’s usually called play doh cookie dough.

Cookie Suckers Plate

I want to experiment with other vegan cookie recipes, since this one spread a tiny bit more than I would have liked, but it held up surprisingly well.  You just need a basic sugar cookie dough that will stay together and be pliable while you’re rolling it out into a snake.  If it’s too soft, it’ll fall apart, but if it’s too stiff it will crack instead of roll.

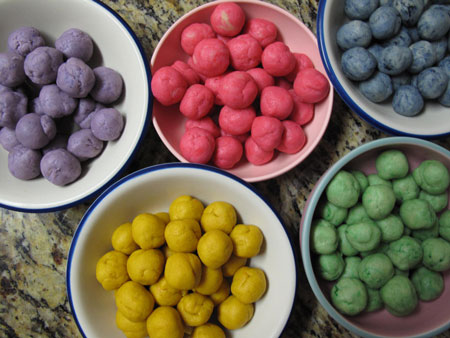
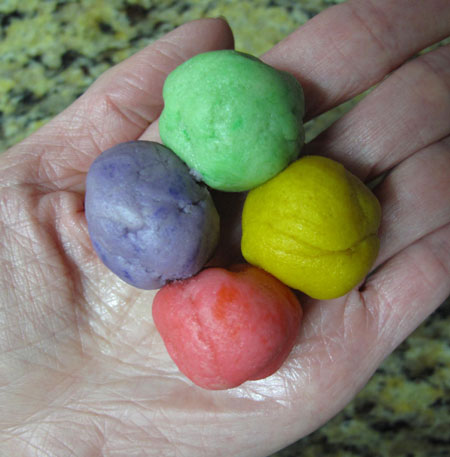
Whatever cookie recipe you prefer, make a couple of batches, then divide it up and mix in your favorite paste food colorings.  I like to use 4 different colors of  dough for each cookie, but you could use more or less.  That’s the beauty of this project: you can use your imagination and do whatever you feel like!

Cookie Suckers Colored Balls

After the dough is made, refrigerate it overnight or until very cold, then start rolling!  This is where you call in the kids to help.

I use the bigger end of my melon baller to scoop out the dough, and then roll it lightly in my hands until it’s semi-round.  My balls were probably close to 1″ in diameter, but I didn’t measure.  The key is to make the balls the same size and use the same number of balls per cookie so that they all bake evenly.

Once you have the balls made, chill them again.  If you start out with soft warm dough, you’ll have a hard time rolling it out.  When the dough is cold, take 4 balls of any color and line them up in your hand.

Cookie Suckers 4 Balls

Gently roll the  balls together between your palms so they start to mingle and get happy with each other.

Cookie Suckers Balls Mingle

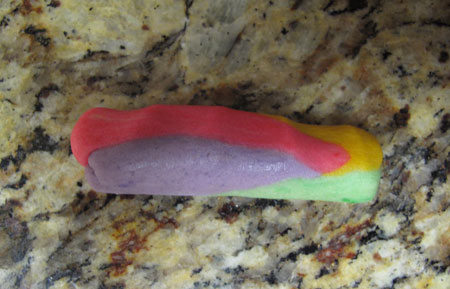
Then lay the dough onto your work surface and gently form it into a snake.  I thoroughly cleaned my granite counter, and it worked great for rolling.

Cookie Suckers Log

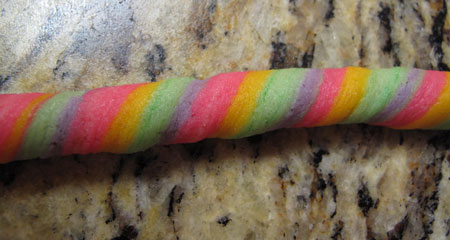
Keep gently rolling until you have a dough snake about a foot long, more or less.

Cookie Suckers Snake

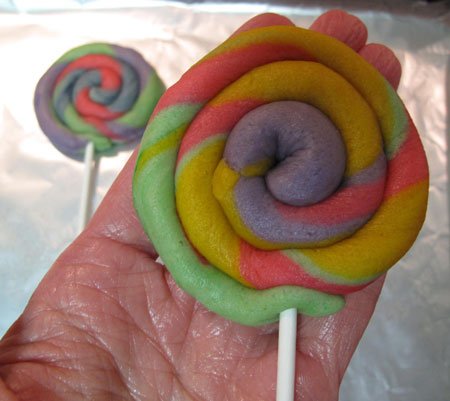
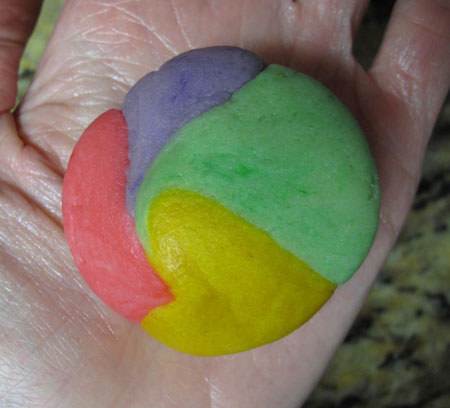
As I’m rolling it, I like to roll one end one way, and the other end the other way.  That’s how you get the swirled candy cane effect.

Cookie Suckers Swirled

If the dough breaks, just mash it back together.  No one will ever know!  Now start coiling the snake around itself until you get to the end.

Cookie Suckers Coil

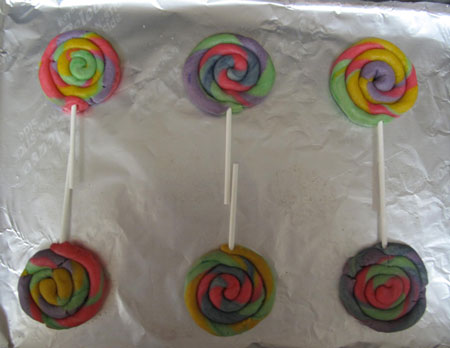
Add a sucker stick, and you have a finished cookie sucker ready to bake.

Cookie Suckers Bake

Repeat with the rest of the balls.  If you don’t have cookie sticks, just bake the cookies as is.

Cookie Suckers 6 Bake

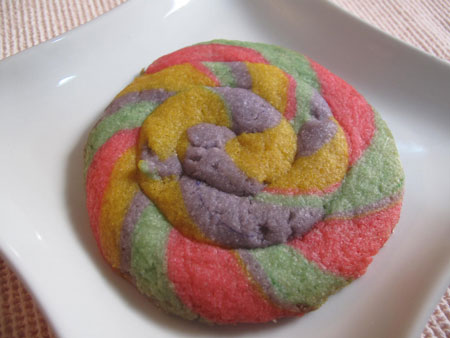
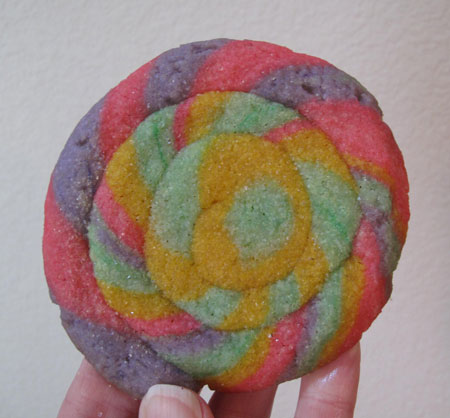
If you want to, you can add a sprinkle of colored sparkly sugar before you bake, like I did in the cookie below.

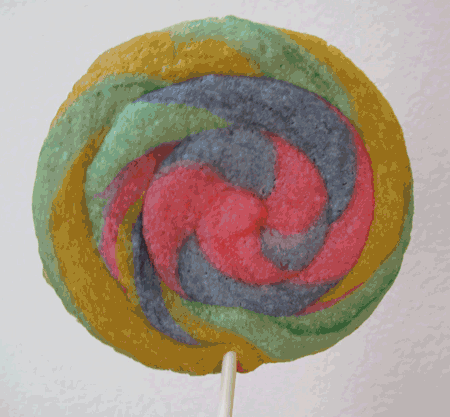
Cookie Suckers Baked

Cookie Suckers 1

Cookie Suckers 2

Cookie Suckers 3

Cookie Suckers 4

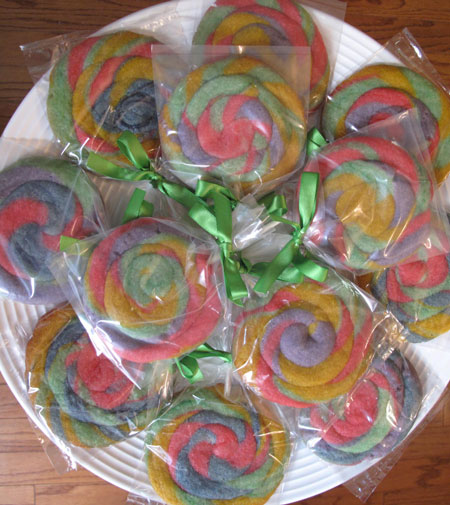
I like to insert the cooled cookie suckers into a treat bag that will fit, and tie on a little ribbon bow.  These make great gifts for your friends, neighbors and coworkers, and would be a really cute addition to your Easter table or to a special someone’s Easter basket!
Cookie Suckers Platter

Happy Easter!

~BigSis

Homemade Easter Chocolate Candies

April 16, 2011

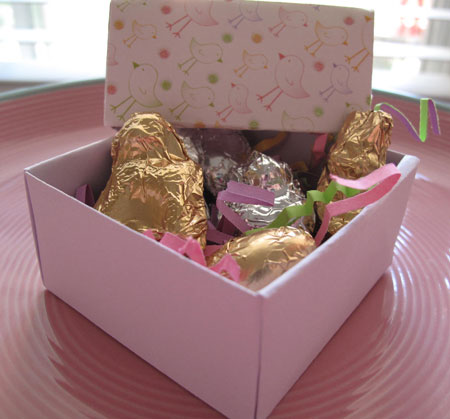
Easter Chocolate Candy Box Chicks

By now, you may know that I don’t do dairy or eggs, and chances are you know some other vegans.  You may be even more likely to know someone who is lactose-intolerant, or who just finds that dairy products don’t agree with them.
What if your children can’t have most of the candy that you find for sale at Easter time?  What if they can’t have eggs?  What do you do for them to keep them from feeling left out when all the other kids are eating Cadbury eggs and hunting for colored boiled eggs? How about making some special easy homemade Easter chocolates for them or with them?
It’s a stretch for me to even say these candies are homemade, because all you really do is melt chocolate.  First, choose a chocolate that’s made without milk products; Trader Joe’s semi-sweet chocolate chips are one example.

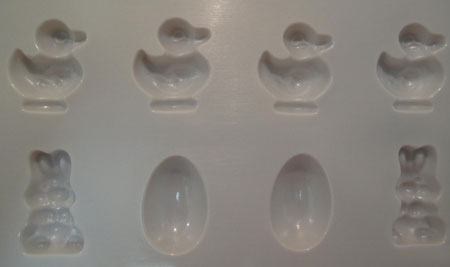
Then, find one of these Easter candy/chocolate molds.  If you plan ahead you could order it online, but if you have a cake supply store nearby like I do, you can find one there.  Craft stores carry some of these, but you usually don’t find a very broad selection there.

I’m semi-obsessed with these molds.  You fill the little cavities with a small amount of melted chocolate or hard candy syrup, and refrigerate for an hour or so til completely set.  When you tip it upside down to unmold, you have the cutest little things ever.  I promise you people will be impressed and think you’re some kind of culinary genius, when all you did was melt chocolate and buy a $2 mold!

Easter Chocolate Candy Mold

For Easter, I chose this mold with bunnies, duckies, Easter eggs and lambs.  I like to put the chocolate chips in a glass measuring cup, and microwave them until melted, stirring every 30 seconds. It won’t take very long; less than 2 minutes usually depending on how much chocolate you’re working with at once.  I’d recommend a small amount in each batch so that it doesn’t start to cool and thicken before you get it all into the molds.

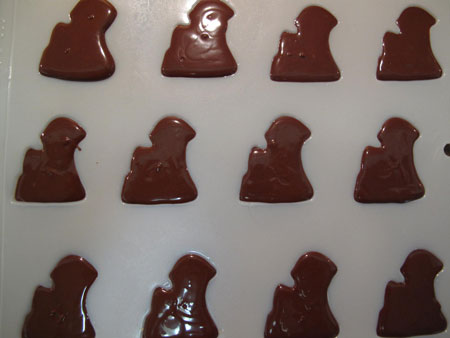
I spoon the chocolate into a plastic squeeze bottle to fill the molds, but you could just use a small spoon to do it.  When all the cavities are filled, you need to carefully smack the filled mold on the countertop to settle the chocolate into all the little nooks and crannies.  You also want any trapped air bubbles to rise to the surface.  It might take a few smacks to get the job done.

Easter Chocolate Mold Poured

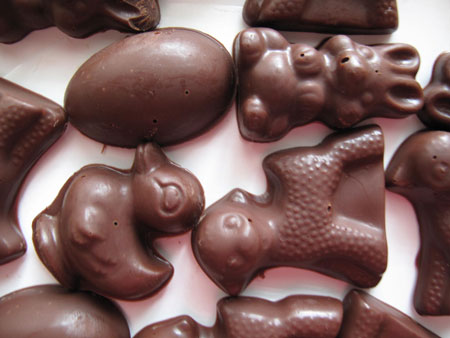
After unmolding, this is what you have.  You can see that I got in too big of a hurry, and didn’t get all the air bubbles out of my candies.  No worries though!  We’re going to wrap each chocolate in a foil square, and the bubbles won’t show.

Easter Chocolate Molded

I found gold and silver 4″ foil squares at my craft store, but I’ve seen pastel-colored ones at the cake supply store that would have been even cuter.

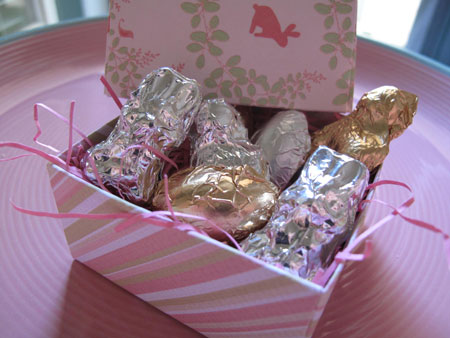
You could sprinkle these wrapped chocolates into an Easter basket, or you could use them as little Easter gifts or party favors. Remember the origami boxes I made for the painted glass marble cross magnets?  Let’s use those to give these chocolates away.

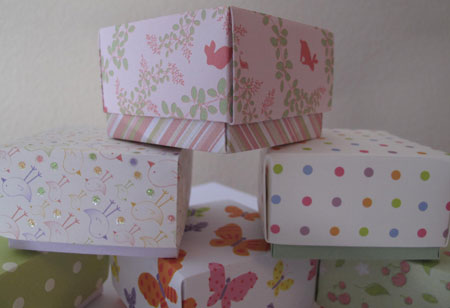
Origami Boxes

Add some pretty paper shred or Easter grass into the box, fill with the chocolates, and voila!  You have an adorable little gift that is handmade with love, but no eggs or dairy!

Easter Chocolate Candy Box Bunnies

~BigSis

Decorate Your Easter Cookies

April 12, 2011

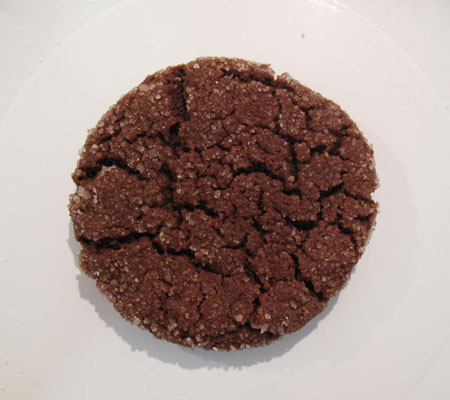
Chocolate Cookies Decorate Easter

I said the other day that Easter required chocolate, and I meant it!

These are my favorite chocolate cookies right now, since I made them for the SPCA Bake Sale last December.  They’re Isa Chandra Moskowitz’s Mexican Chocolate Snickerdoodles from Vegan Cookies Invade Your Cookie Jar, and they’re delicious!

They do need to be dolled up and decorated just a touch for Easter though, don’t you think?  I thought!  And this is what I came up with.

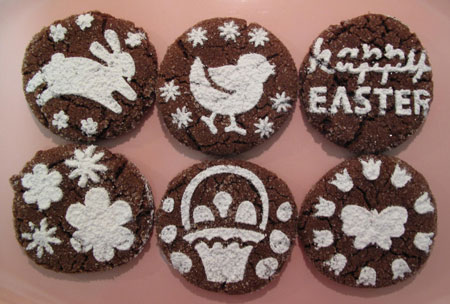
Easter Stencils Cookies Decorate

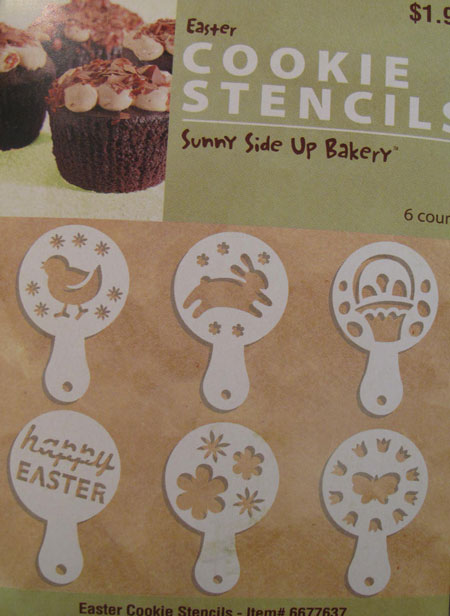
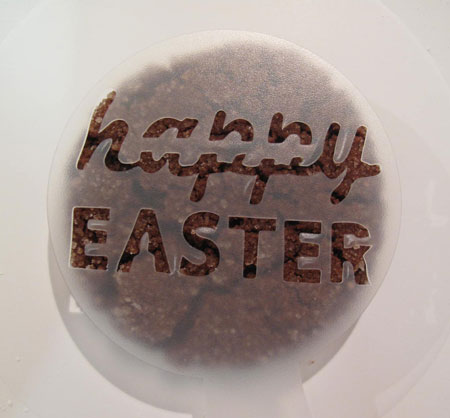
I found these cute Easter stencils at Hobby Lobby.  If you have a Hobby Lobby near you, you know that no one does adorable holiday food packaging and goodies like they do!  Most of our decorative bake sale packaging comes from Hobby Lobby.

Back to the Easter stencils.  For just $1.99, I got 6 reusable plastic stencils that can be used with cookies, cupcakes, or anything else that is flat.

All you do is choose a cookie or cupcake with a level surface.

Chocolate Cookies Decorate Bare

Place a stencil on the cookie.

Chocolate Cookies Decorate Stencil Easter

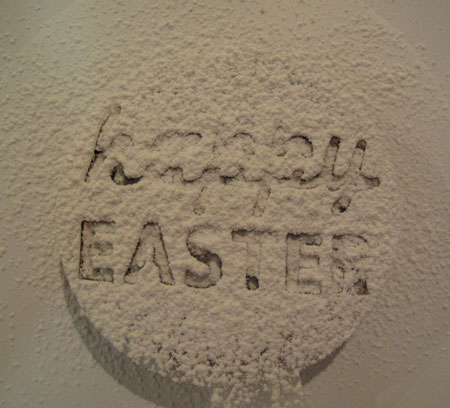
Sprinkle it with powdered sugar, as heavily or as lightly as you like.

Chocolate Cookies Easter Decorate Stencil

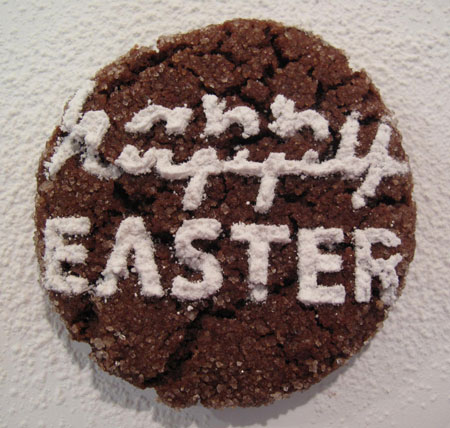
Carefully remove the stencil and admire your pretty image!  How fun is that!

Chocolate Cookie Decorate Easter

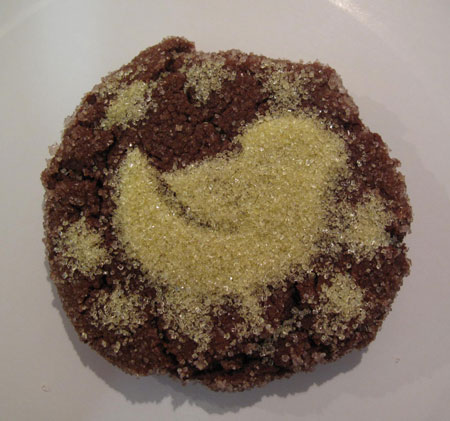
I experimented with colored coarser sugar on a cookie, and it didn’t work out too well.  So I had to eat that one.  Oh, darn.  This blogging thing is rough.  🙂

Chocolate Cookie Decorate Easter Goof

Powdered sugar looks pretty on a cookie, but it doesn’t stick so you have to be careful not to disturb the image.  I bet it would stick better if you sprinkled the sugar on a frosted cookie or cupcake.

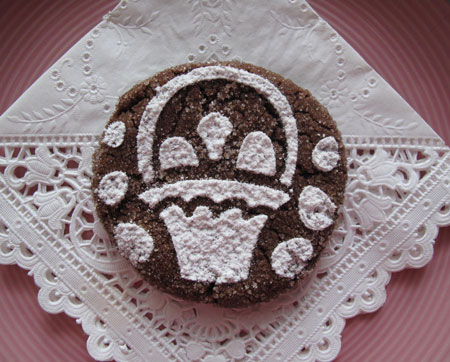
I already showed you the “Happy Easter” cookie close-up.  Here’s the Easter basket

Chocolate Cookie Decorate Easter Basket

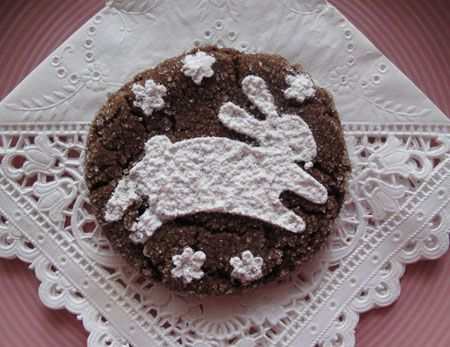
the Easter Bunny

Chocolate Cookie Decorate Easter Bunny

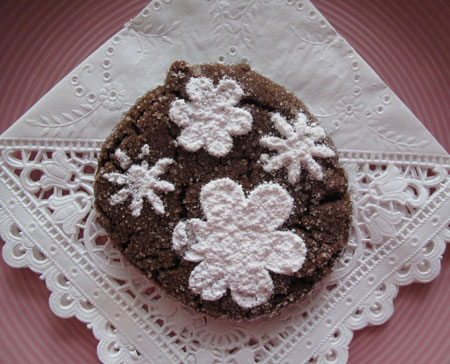
the flowers

Chocolate Cookie Decorate Easter Flowers

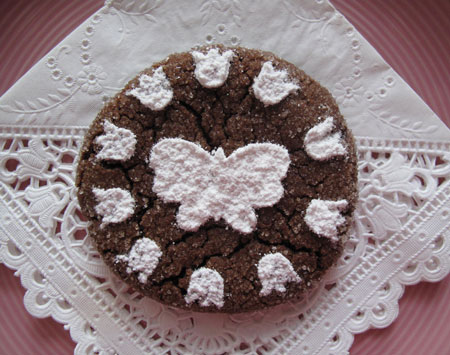
the butterfly with tulips

Chocolate Cookie Decorate Easter Butterfly

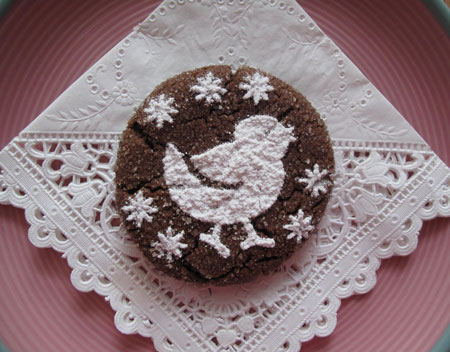
and the chickie!

Chocolate Cookie Decorate Easter Chick

This was a fun and super-easy project to do, and I bet your kids would love to help with it!  You may be cleaning up powdered sugar til next Easter, but at least you’ll have great memories to show for it!

We’re still hatching up more Easter fun, so check back with us soon!

~BigSis

Here Comes Easter!

April 10, 2011

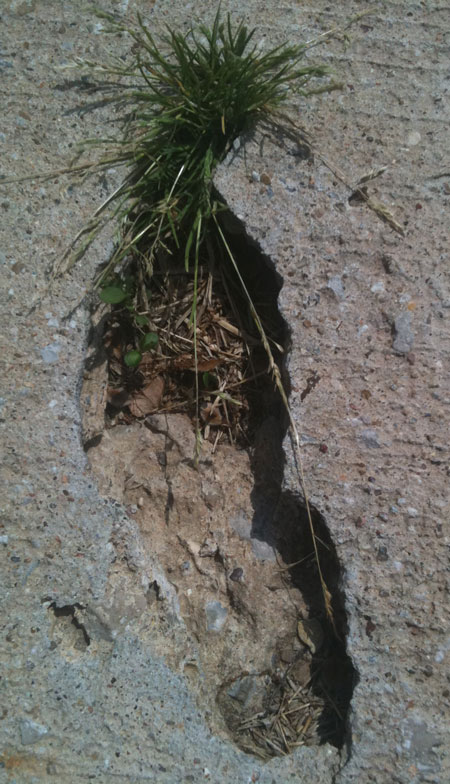
Easter Bunny Carrot

Here comes Peter Cottontail, hoppin’ down the bunny trail.
Hippity, hoppity, Easter’s on its way!

How’s that for a non-traditional photo to kick off the Easter season?   I was out for a walk last weekend, and passed by this crack in the sidewalk.  It looks to me as though Peter Cottontail left an image of his carrot embossed here in the concrete to remind us that Easter is on its way!

Easter comes late this year on April 24th, so we have just 2 more weeks til it’s here.  The meaning of the holiday is the heart of it of course: that Jesus died for us and rose again 3 days later.  It’s also a holiday set on a backdrop of spring, pastel colors, new clothes, and oh yeah…candy!

Just because it’s an important time in our lives as Christians doesn’t mean that we can’t also enjoy it and have some good, clean chocolatey fun too. 😀  Now’s the time to get those bunny cake pans out of storage and get busy.

In the next couple of weeks, we’ll be sharing some Easter joy with you.  We’re planning some Easter cookies, crafts,and maybe even a bunny cake!

~BigSis