SPCA Bake Sale Recipes

Lots o' baking is going on in my itty bitty kitchen this week!  I've tried to choose recipes that have universal appeal, and that are holidayish.  Most are pretty easy to make, with a decent “profit margin” but I've thrown in a few that are a bit more challenging and expensive to keep me on my toes!

I thought you might like to see what's coming out of my kitchen, since this IS the primo baking season and perhaps you're in the market for a good sweet recipe.  So far, just since last Saturday, I've already prepared multiple batches of each of these:

  • Gingerbread from Cooks Illustrated.  A subscription is required to access this recipe, but don't be put off by that.  Cook's Illustrated is the only food site that I pay a fee for, and to me it's totally worth it.  Their product reviews alone are invaluable, and their recipes always work.  They have total credibility with me.
  • Chocolate Sheath Cake – it's a classic recipe that you can find lots of places, including on RecipeZaar.  Moist, chocolaty, delicious!
  • Super Moist Pumpkin Bread with walnuts (vegan) from AllRecipes.  This is a unique recipe with coconut milk but no eggs and no dairy.  It's fabulous!  I made lots of them for our last bake sale.
  • Cranberry Pumpkin Bread from RecipeZaar. I first found this recipe when my freezer went on strike recently and I had to use up a giant bag of thawed cranberries.  It's very easy, extremely moist, and the combination of flavors is surprisingly good.
  • Strawberry Bread.  I've been making this forever, and don't know where I originally got the recipe, but this version from RecipeZaar is similar to mine. In this bread, the pecans are non-optional in my book.
  • Root Beer Bundt Cake from Baked: New Frontiers in Baking by Matt Lewis and Renato Poliafito. This was a new recipe to me, and I'm glad I tried it.  It's really really moist and deeply chocolate.  I don't get that much root beer flavor without the icing, but it's wonderful regardless.
  • Chocolate Chip Cookie Bars from the back of the Nestle's package.  You can find the recipe on RecipeZaar too.
  • Texas Pecan Pie Bars from The Pastry Queen by Rebecca Rather. This recipe makes a ginormous batch of these wicked bars, but I still made a second batch.  They were that good.

Still on the agenda for this weekend:

  • Almond Toffee from CookieMadness.net.  Absolutely an A+ recipe!  I made bunches of it last year, and got rave reviews.  You MUST have a thermometer to make this!
  • Soft Peanut Brittle from CookieMadness.net.  Another great one from Anna!  I don't usually care for traditional peanut brittle, but this is nothing like that.  It's flavorful, tender, and just delicious!
  • Pralines from The American Family Cookbook by the Culinary Arts Institute. I think this cookbook is out of print, but I've seen it on ebay.
  • Outrageous Oreo Crunch Brownies from Culinary in the Country.  Christmas Oreos and brownies together in a recipe adapted from the Barefoot Contessa?  How bad can that be?  I'll also do some without the Oreos.
  • Chocolate Fudge from the back of marshmallow cream jar.  You know the one.
  • Mrs. Busch's Caramel Bars – a finalist in the Dallas News' cookie contest a few years ago.  The recipe's been taken offline, darnit.  I'll post it another time if these come out as good as I remember them.
  • Razz-Ma-Tazz Bars from CookieMadness.  I've never made these, so I'm trusting the Cookie Queen that these will be incredible.  I'm doing them with my homemade cranberry jam instead of raspberry since that's what I have.

That's it!  I've already eliminated 2 or 3 things from the weekend's list, and I still have more than one little elf can do!  I better eat my Wheaties this weekend, you think?  All of the expense and all of the work will be SO worth making some money for this incredible charity!

~BigSis

Posted under Food

This post was written by BigSis on December 12, 2008

Tags: , , , , , , ,

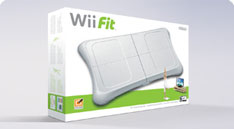
Fun and Fitness all in one with Wii Fit

It's definitely a busy time of the year and we all have more to do than usual. When I'm feeling overwhelmed and stressed, it is even more important to make sure that I exercise every day. On the days when I may not want to go to the gym or if it's not nice enough outdoors to go for a run, our new Wii Fit game is going to make it so much more fun to do something at home. I've never been good about doing exercise videos at home, so having a Wii fit game that can help me is great. Even if you don't have a Wii at home, you can use an emulator similar to the Dolphin iOS emulator to turn your phone into a Wii console! If this is something you're interested in, you can learn how to install dolphin emulator here. Not only is it great for keeping you fit but it makes a great Christmas gift!

The Wii Fit is really an amazing game! Thanks Bo for the great Christmas gift! I'm not going to lie, I was a bit skeptical about this game at first, but once I realized how popular it was amongst people who enjoy playing the Nintendo Wii, I just knew that I had hit the jackpot. I would even go as far as saying that it's on the same level as these options for wii games download because these are very enjoyable too. My friends are just some of the people that would know how good these games are. So, we couldn't wait to get stuck into the Wii Fit. On Christmas Day, we all took turns getting weighed and getting our BMI calculated. (Sounds like fun, huh?)

I intentionally have not stepped on a scale in a long time. And, I really had no intention of doing so on Christmas Day after a week of parties and overindulging. So, when we got the Wii Fit, HayHay persuaded me to get on the balance board. Not only does it weigh you very precisely, it also calculates your BMI. First, you take a body test and go through a few balance tests that enables the Wii Fit to calculate your BMI and your Wii Fit Age. (And it also tells you if you're overweight.) If you're not happy with your weight or your BMI, you can set a goal and track your progress daily. Visit the Nintendo site to check it out!

Once you start training, you can choose from yoga, balance games, strength training or aerobics. I had a friend from my yoga class tell me that the yoga on Wii Fit was really hard and she was right! It's really good and the hula hoop is a hoot! I think HayHay and BigT like the snow skiing the best.

My BMI was good, but I've set a goal to lose a little weight. I've recorded my goal on the Wii Fit and am now putting it in black and white so the pressure is on! My first New Year's Resolution is to lose five pounds in the next month.

If I crank up my regular exercise routine and add some fun aerobics from Wii Fit, I'm hoping, and praying, that I can accomplish this goal.

~LilSis

Posted under Fitness

This post was written by LilSis on December 28, 2008

Tags: ,

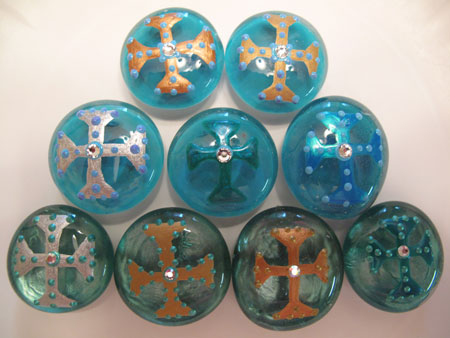
How to Make Painted Glass Marble Magnets

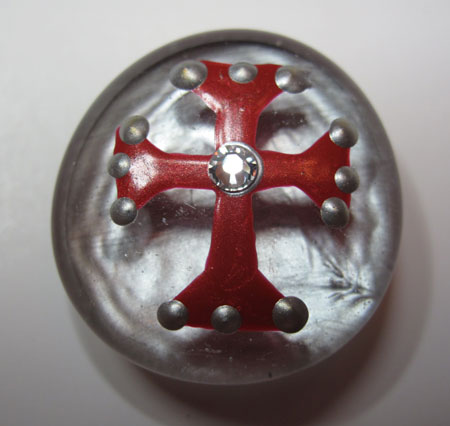
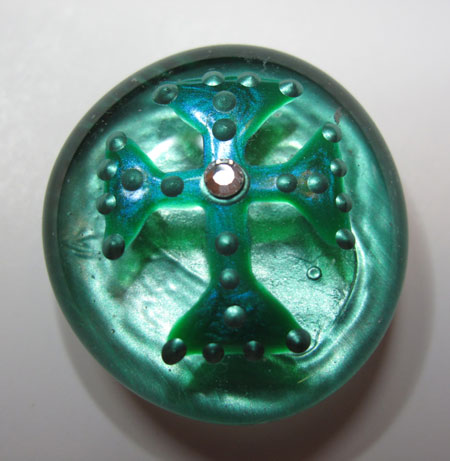
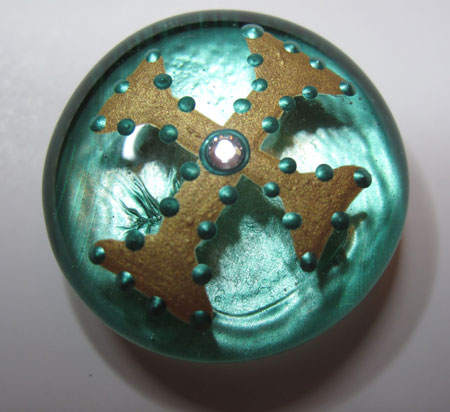
Glass Marble Done Fav Green

You've probably seen tutorials for making adorable magnets from the flat glass marbles that are used as filler in vases of flowers. Most of the instructions I've seen involve gluing paper of some kind to the back of the marble: scrapbook paper, gift wrap, newsprint, hand-drawn images, whatever.
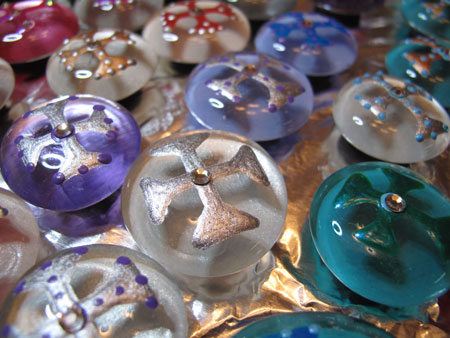
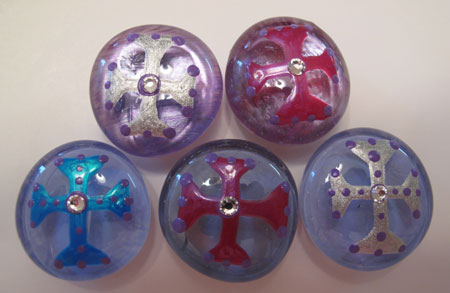
Glass Marble Done Group1

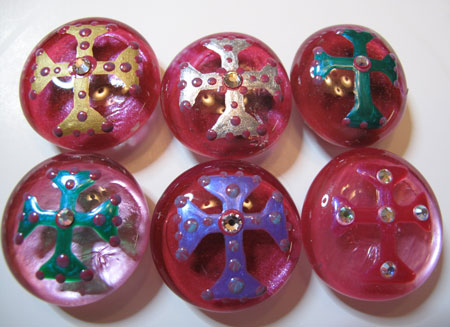
I think those marble magnets are really cute and easy to make, but I like to do mine in a different way.  I like to paint them!

There are probably lots of ways to do this, and you can absolutely inject your own creativity.  I'll show you the method I came up with, and then you can take off with your own ideas.
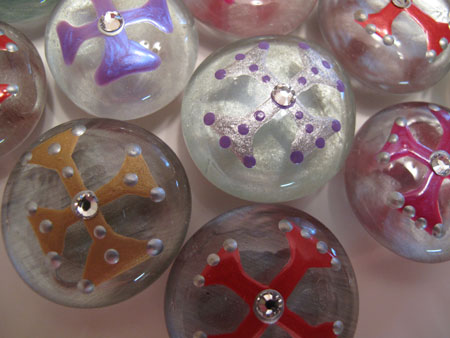
Glass Marble Done Group4

Let's start with the supplies you need:

  • Flat glass marbles: Available at craft stores, discount stores, pretty much everywhere. I buy the clear ones because I can see my template through them, but you can also find really pretty blue, green and amber colored ones.
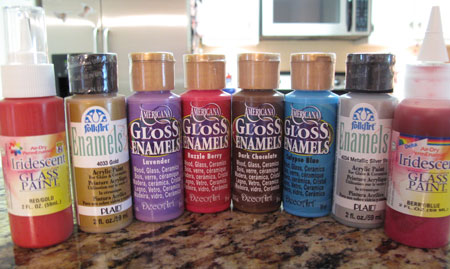
Glass Marble Paint

  • Glass paint: I prefer the air-dry kind that doesn't require baking.  I use FolkArt Enamels, Americana Gloss Enamels, DecoArt Ultra Gloss Metallics (these might be discontinued), and Delta PermEnamel.  My favorites are PermEnamel Shimmers and their Iridescent Glass Paint.  Delta PermEnamel is the glass paint equivalent of MAC eyeshadows: they come in jillions of colors, have great textures, apply well and look beautiful!
  • Glass painting kit with tips, adapter caps and plastic bottles.
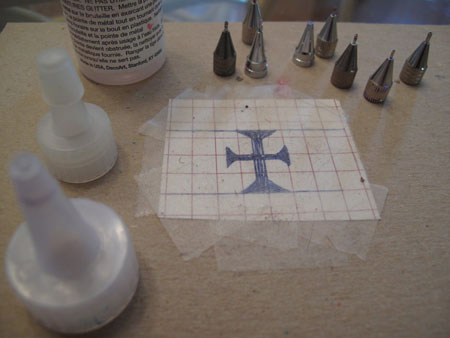
Glass Marble Tip Kit

  • Grid paper:  To make your painting template.
  • Swarovsky crystals: Find them in the jewelry-making aisle at your craft store.
  • Tweezers: To apply the crystals.  Just raid your bathroom drawer, don't buy special jewelry-making ones.
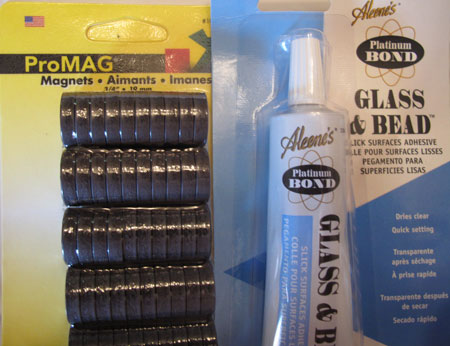
Glass Marble Magnets Glue

  • Magnet “buttons”
  • Glue: Strong glue for slick surfaces, like Aleene's Glass & Bead Adhesive, E6000 or Bond 527.
  • Magnifying craft light: If your eyes are “mature” like mine.  This is close work, so don't be too proud to use it!

The first step is to create a clean painting surface, and sometimes these marbles are a little dirty.  I give mine a quick rinse in straight white vinegar, but you could also use alcohol.  I use a large plastic container, and fill it with the marbles.  As you remove the marbles from the bag, be very careful.  They're glass, of course, and it isn't unusual to find a broken or badly-chipped marble.

You'll notice that I'm working with a lot of marbles.  It makes sense to me to paint a large batch at one time, since I already have all the stuff out.  Changing paint colors requires washing supplies, so I might as well do several marbles of each color while I'm at it. For this tutorial, I painted 7 dozen marbles.

Add vinegar or alcohol to cover the marbles, and let them sit for a few minutes.  Scoop them out with a slotted spoon, and lay them out on a thick towel in a single layer.
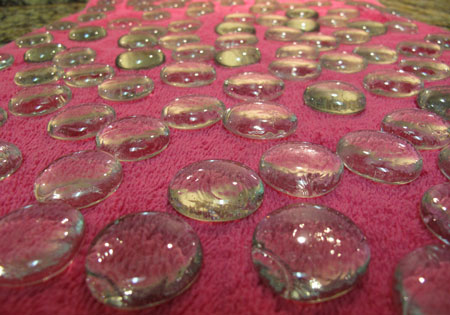
Glass Marble Magnet Wash

You can blot them a little or just let them naturally dry.  I've never had a problem with spots forming, so air drying is usually fine. You definitely want the marbles to be completely dry before you start painting.  Try not to touch the surface of the marbles from this point on, since the natural oils in your fingers could interfere with the paint adhering.

Once they're dry, remove the marbles from the towel and place them on an old foil-lined cookie sheet or tray.  I also cover another tray or sheet with foil to have a place for the marbles as I finish working on each one.  This 7 dozen is all lined up, ready to get dolled up!
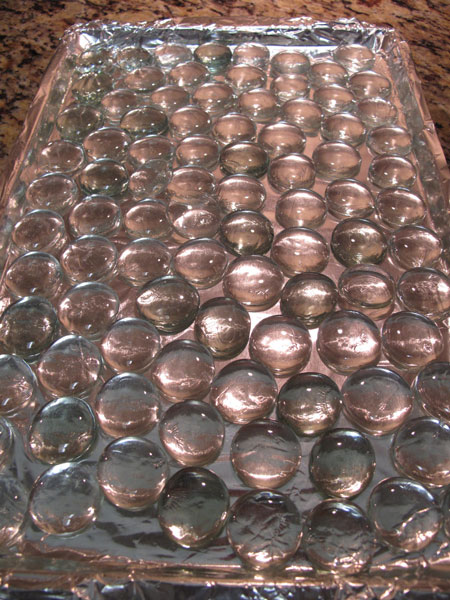
Glass Marble Magnet Dry

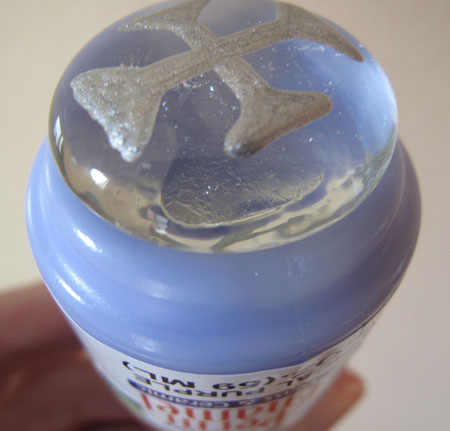
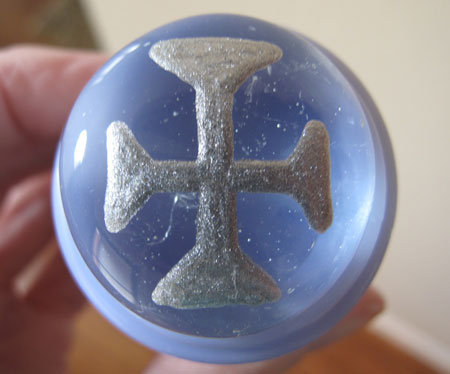
You may be able to freehand your design, but I can't.  Years ago, when I came up with the idea of painting these, I tried freehanding and it wasn't pretty.  I'm crafty, but not artsy, so I need a template.  I like to paint crosses, so it was very easy to draw a cross template on a piece of gridpaper.  Can you tell how well used/loved this template is? 🙂
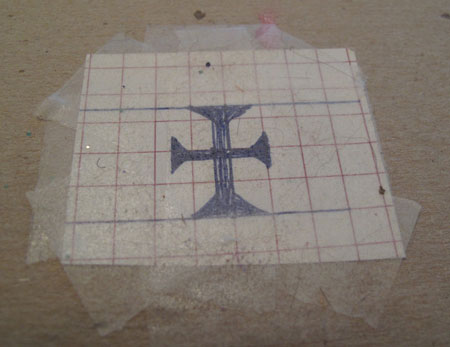
Glass Marble Magnet Template

Once you get your design drawn out, attach it to a piece of cardboard so it's sturdy.  Here's a trick for you.  Cover the design with a few pieces of removable two-sided tape.  This semi-sticky surface will hold onto the marble just enough to keep it stable and in place while you're painting on it.  When the tape eventually gets covered with cat hair (or dog hair or lint) you can easily peel it off and replace it with fresh tape.  It really makes a big difference.

If you need the magnifying light, now is the time to pull it out. Place your template on your work surface, and choose a marble, any marble.  Imperfections are common in these guys, so don't expect a perfect flawless one.  That's part of their appeal.  Discard chipped ones or any that just aren't pretty to you.  Center your marble on top of the sticky template.

Here comes the fun part…painting!  Select the color you want to paint your crosses.  I love metallics: gold, silver and bronze.  I also love the gorgeous shimmery opalescent colors from Delta PermEnamels.  You can customize the color of your marbles for the occasion or the season, or just use the colors you like.
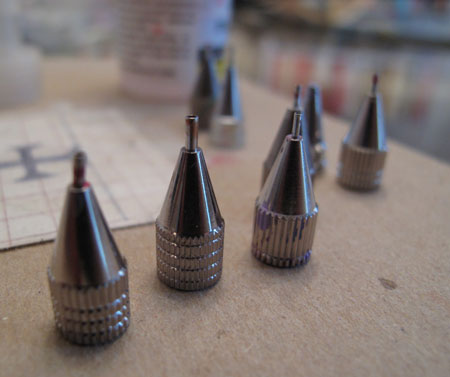
Glass Marble Magnet Tips

So how do you get the paint on the marbles?  Using a brush is too tricky for non-artist me, so I went looking for an easier solution. What I found are these brilliant metal glass painting tips that look like little ballpoint pen tips.  I've seen a couple of different kits at the craft store, and the tips may vary a smidge, but they always include the tips, small plastic bottles, and the adapter caps that screw onto the paint bottle.

The little metal tips snuggly screw onto the plastic adapter caps. I find that they also fit perfectly on the caps of some paint bottles.  If you're using paint that comes in a chubby jar like the Delta PermEnamel, you'll need to pour a bit of it into a small paint bottle that fits the adapter cap.
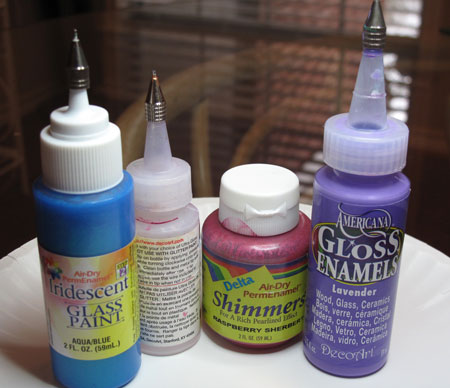
Glass Marble Tips on Caps

Once you have the tip securely on the paint bottle, test it out before you paint.  I keep a paper plate and a paper towel nearby for this purpose. Draw a line of paint on the paper plate to make sure the paint is flowing smoothly, and then wipe off the tip cleanly.

These painting kits also come with a little piece of wire that you can use to dislodge any clogs that might form in the tips, so keep this little jewel on your paper plate too.  Some paints are really bad about clogging, but others don't clog at all.

And a word to the wise, when you change paint colors and switch to a new tip, be sure to drop the used tip and cap into a cup of water.  If you let it sit and dry out, you'll pretty much be up a creek and have to toss those pieces.  You'll never get dried paint out of that skinny little tip.

Now, back to painting.  I start at one end of the marble, and just follow the template, filling in the design.  You don't want to squeeze the paint bottle really, just hold the bottle like you were holding a marker or pen, and guide the paint around the template.  The paint shouldn't be so thick that it will drip or ooze, but you do want good even coverage after two coats.
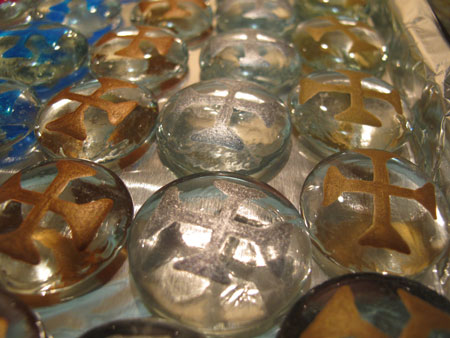
Glass Marble Magnet 1 Coat Metallic

Don't drive yourself crazy by striving for perfection, especially with this first coat. After the second coat, you'll be happy with what you see, so don't worry.  The main thing is to keep within the lines, and have fun!  If you make a mistake, you can try to clean it up with a toothpick.  If it's a doozie of a boo boo, just toss the marble and move on to the next one!

Tada!  First coat complete!
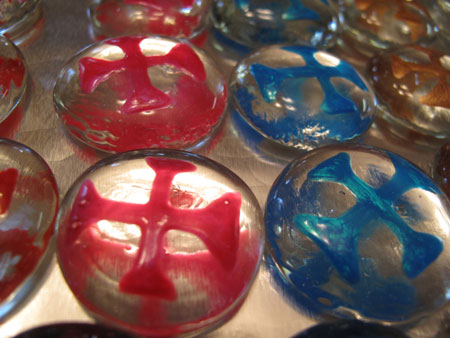
Glass Marble Magnet 1 Coat Close

Let the first coat dry thoroughly; I prefer overnight.  For the second coat, you won't need the template, so just make sure you stash it in a safe place for next time.

Take the same color paint, and add your second coat.  You can smooth out any rough edges and fill in any sparse areas.  Once you're finished, allow the second coat to dry overnight again.
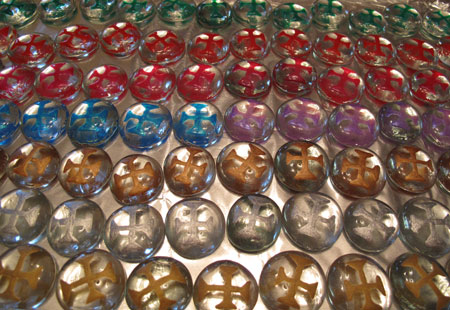
Glass Marble Magnet 1 Coat Wide

Did you think we were finished?  Oh, heck no.  The fun's just starting!  We're going to add a background color to the BACK of your marble.  You can skip this step if you want to, and sometimes I do, but I think it really adds a lot.  It gives dimension and depth to the marble, adds a contrasting or complementary color, AND hides the magnet you're going to glue on the back. Go a little crazy with your background color, or just let the design color be the star.
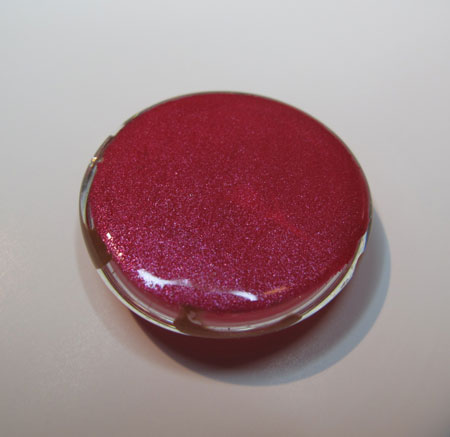
Glass Marble Magnet Back1

For this step, I use a small flat paintbrush.  And…you got it, let it dry overnight.
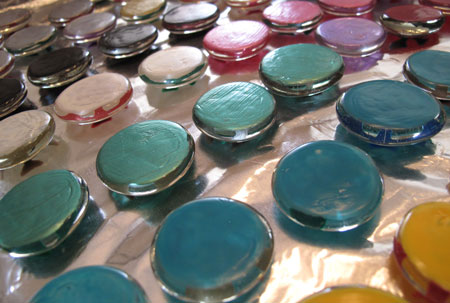
Glass Marble Magnet Back All

If you've chosen a sheer color, like my pearly white, you might want to add a second coat after the first sets up, but it isn't necessary.  It's up to you!  If you want to see how a color might look behind your cross, just hold up your marble to the bottom of the paint bottle, like this.
Glass Marble Magnet on Paint2

Glass Marble Magnet on Paint1

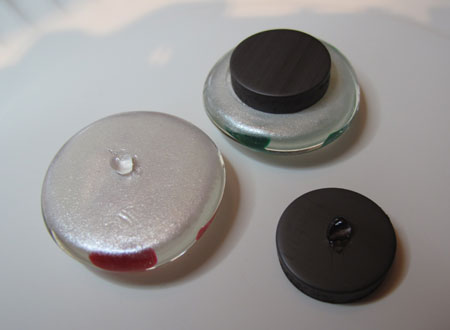
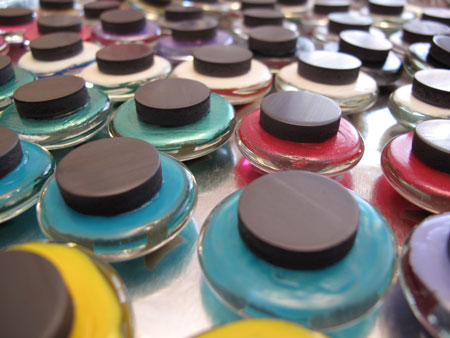
We're coming down the home stretch, so stay with me.  You have two coats of color on your cross, plus a coat or two of background color on the back of the marble.  I like to add a magnet at this point.  If I do it now, I don't have to rest the marble on it's frontside after the delicate little dots are applied, and risk smushing them down a bit.  I like for the decorations to be as dimensional as possible.
Glass Marble Magnet Glue

To attach the magnet, add a tiny dot of glue to the magnet and to the back of the marble, and allow it to sit for a minute or two (check your particular adhesive for directions).  Any longer and the glue may dry too much.  Attach the magnet, and set aside to dry… overnight.
Glass Marble Magnets All

Now the last steps!  It's time to decorate the front of the marbles.  I do dots because they're easy and I like how they look, but you could do squiggles or lines or anything else your imagination can conceive of.  Choose any color!  I really like adding a dot color that coordinates with the background color, but other times, the dot color just comes out of the blue.

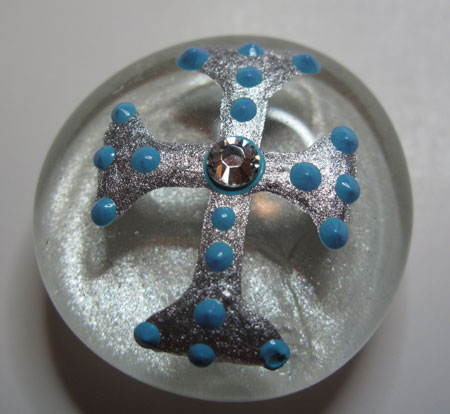
Before I add the decorative dots, I add one teensy tiny dot of paint (you could use glue, but you already have paint in your hand) to the center of the cross and carefully place a swarovsky crystal with the tweezers.  Press it down very gently.  Then just add dots here and there all over the marble, in any pattern you like.
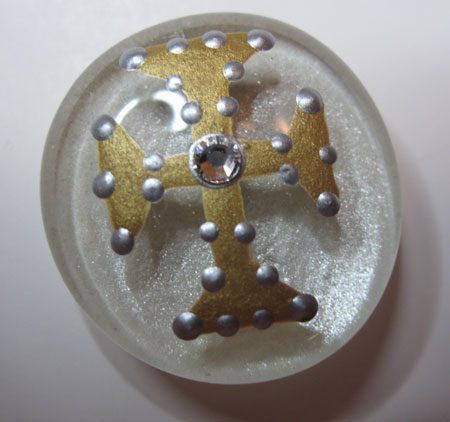
Glass Marble  Magnet Done Fav Gold

Voila!  Your marble magnet is finished! Do you love it?
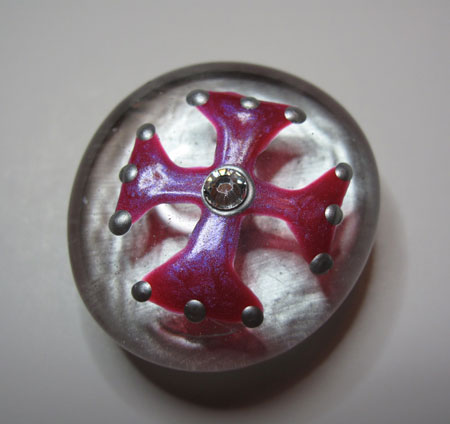
Glass Marble Magnet Done Fav Pink

I love to give these painted marble magnets as little gifts, so they need to be packaged up cute.  I've seen people put the paper-backed magnets in Altoid tins, and it's kind of cool that they stick in place and don't rattle around.  You'd have to decorate the tin though, and you have to deal with the raised logo on the front of the tin unless you buy flat new ones.
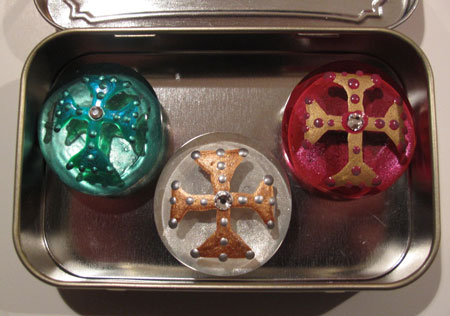
Glass Marble Magnet in Altoid Tin

You could also put the marble magnet in a little drawstring bag with a bit of pretty shred.  This is kind of sweet and Eastery-baskety.
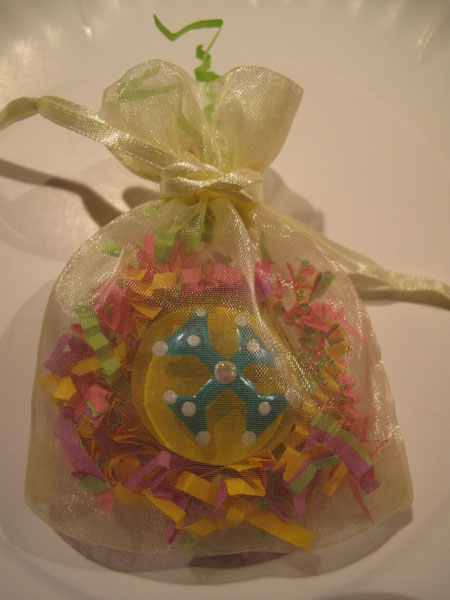
Glass Marble Magnet Favor Bag

What I like to do though is to take this beautiful marble to the next level by customizing a little paper mache box for it, with stamping, embossing and a scripture hidden inside.  Then it goes into the drawstring bag, and then into a handmade origami box. And if that isn't enough, we'll then wrap up the whole thing with a tulle bow.  Overkill?  Nah!  There's no such thing as overkill when it comes to giving gifties!

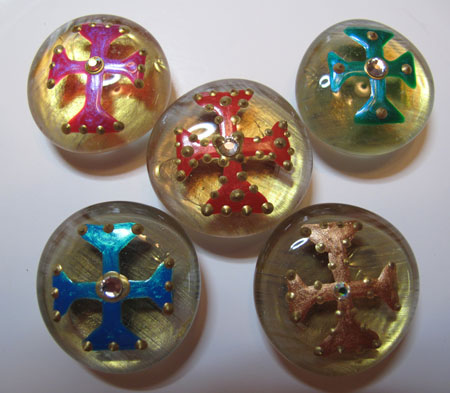
I'll show you how to do all of that next time, and share some of my favorite ways to give these away!  Til then, here are a few more of my favorite marble magnets from this big batch.  See you soon!
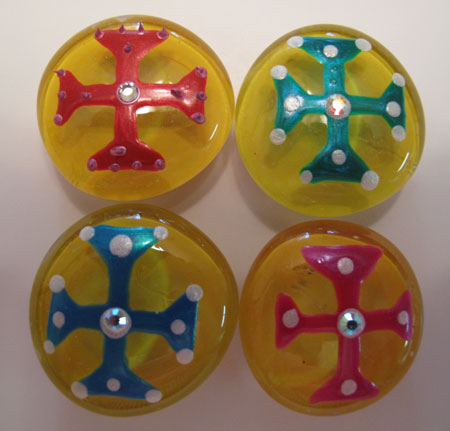
Glass Marble Magnet Done Yellow

Glass Marble Magnets Done Blue

Glass Marble Magnet Done Fav Silver

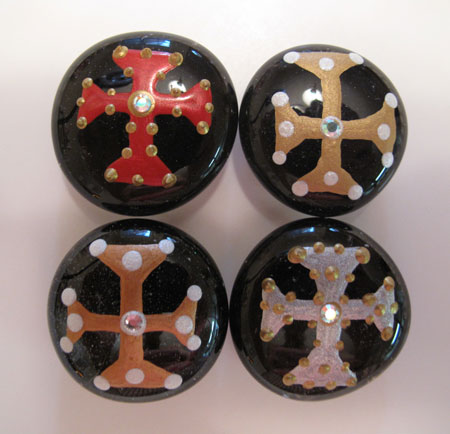
Glass Marble Magnet Done Black

Glass Marble Magnet Done Gold

Glass Marble Magnet Done Fav Red

Glass Marble Magnet Done Purple

Glass Marble Magnet Done Fav Green2

Glass Marble Magnet Done Pink

~BigSis

Posted under Home

This post was written by BigSis on March 20, 2011

Tags: , ,

25 Simple Things You Can Do To Go Green

We've been very busy talking about Easter projects and goodies these past few weeks, but I didn't want this day to go by without mentioning it.

This past Friday, April 22nd was the 41st anniversary of the first Earth Day. Earth Day is a day that was founded and is intended to raise awareness for our Earth's natural environment and promote green living.

As the population increases at a mind-boggling rate, more and more people are becoming increasingly aware and concerned about the threat to our world's natural resources.

Both BigSis and I have committed to making 2011 the year that we make going green a part of our daily lives. It doesn't take a lot of effort, but simple things we do every day can make a huge impact!

Did you know that you can run a TV for six hours on the amount of electricity that is saved by recycling one aluminum can? And by recycling one glass bottle, you save enough electricity to power a 100-watt bulb for four hours.

I've put together a list of 25 very simple things you can do right now to help reduce your environmental impact, save money, and live a happier, healthier life.

Recycle.

  • Bring your own reusable bags when you go shopping.
  • R, R, and R. Reduce consumption, reuse whatever possible, and re-purpose old items.
  • Know what can and can't be recycled in your area.
  • Use a reusable stainless steel water bottle instead of buying plastic bottles.
  • Buy recycled products.
  • Before you throw something out, research online to find out if it's recyclable. Items such as yoga mats and old gym shoes are now being recycled to make new products.
  • DON'T throw batteries or electronics into your trash.
  • Recycle your cell phones and computer equipment.
  • Give your gadgets a new life and fight e-waste by trading on Ebay Instant Sale.

Save energy.

  • Turn off all lights when not in use. (This is my biggest pet peeve and my hubby hears about it every time I walk in a room where he's left the lights on.)
  • Change all light bulbs to compact fluorescent lamps, CFLs.
  • Unplug all electronics when not in use.
  • Lower your thermostat in the winter and raise it in the summer.
  • When time to replace an appliance, choose one with an Energy Star Approval.
  • Wash as many clothes as possible in cold water.
  • Hang clothes on a rack or clothesline whenever possible instead of using the dryer.

Save water.

  • Switch to a low-flow shower head.
  • Repair leaky faucets.
  • Turn the water off when you brush your teeth.
  • Wash only full loads of laundry.
  • Take shorter showers. (This will lower your water bill and energy bill.)
  • Plant drought-tolerant, native plants in your garden.

Save a tree.

  • Convert to online statements and payments for as many bills as possible. To organize, just set up email folders for payment statements and confirmations.
  • Instead of tossing tons of paper, tissue, and gift bags each year, get creative and try packaging gifts in reusable items like tea towels, scarves, or bandanas.
  • Instead of buying boxed or bagged items, switch to glass storage containers and buy staples such as cereal, nuts, lentils, and rice in the bulk section of your store.

I hope this gives you some ideas of simple things that you can start doing today in and around your own home. Most of these can be done on a daily basis without too much trouble and when you GO GREEN, you SAVE GREEN!

~LilSis

Posted under Home

This post was written by LilSis on April 25, 2011

Tags: ,

Shoe Shelves and Shoe Racks

So, you wanna see my shoe closet, BigSis?  Well, I know you won't be surprised to find out that I do not have a color photo of each pair of shoes on the outside of a plastic Container Store shoe box. For some reason, I've never liked keeping my shoes in boxes. I'm sure it's better for the shoe to be tucked away in a dust free box, but I tried it once and it bothered me. I like to keep my shoes in racks or on shelves so I can see them.  Right now, I have a combination of the two. The top ranked favorites get the shelf.
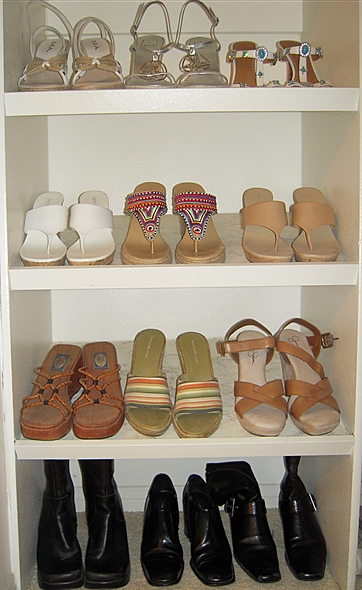
shoe-shelves

Now, when a new pair comes into the picture, another has to get demoted to the rack, as the shelves are full.

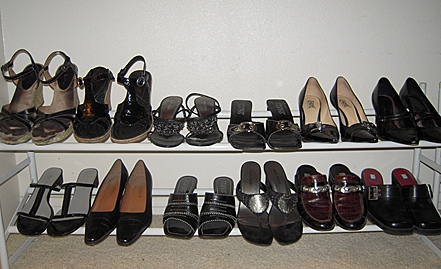
Here are my two shoe racks. Oh, and did you say you like black shoes? I have a few myself.

shoe-rack

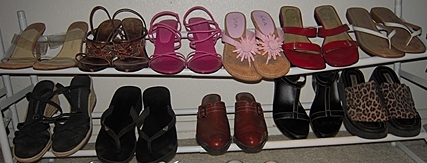
Here's the other rack. These are the least worn and in line to be donated to a local womens shelter.  I usually go through my closet a couple of times a year and donate those that haven't been worn for a while.

shoe-rack-2-1

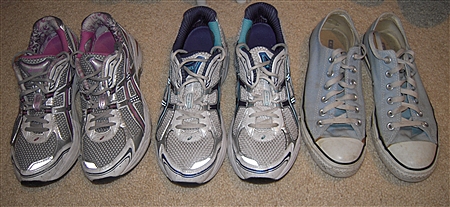
And I always keep two pair of running shoes handy, just on the floor in my closet, not in a nice hanging shoe bag. When I buy a new pair for running on the street, the old pair gets is used for running on the beach. And, I've got my baby blue pair of converse just for casual running around.

gym-shoes

So, now you know how I keep my shoes organized. Nothing fancy.

I definitely think that we will have to talk about the P-Touch Labeler at a later date, when we're ready to talk about another obsession:  office supplies.  I've got a cute, cute set of little baby erasers shaped like little pastries that I'm about to order. (They were so popular that they've been on back order.)  I'll share those with everyone soon!

Are we weird, or do we both just have a mild case of OCD?

~LilSis

Posted under Shopping

This post was written by LilSis on January 30, 2009

Tags: ,

Loving Hut Vegan Cafe Review

Loving Hut

Do I have a surprising food find to share with you!  And guess what, LilSis?  There's one in your hood!

I'm talking about Loving Hut, a casual and inexpensive vegan cafe. They don't use any MSG, dairy, eggs, or any animal products at all.

So if food is super-affordable, fast, full of veggies and protein, and cruelty-free, is it doomed to taste like an old shoe?  An old stinky shoe?

Absolutely NOT, if you eat at Loving Hut!

I just spent a week in Houston on business with a couple of my girls from the office: one pescatarian and one omnivore.  Plus me: 99% vegan for 15 months so far and vegetarian for 17 years.  We stumbled upon Loving Hut (thanks to UrbanSpoon) and decided we were all up for a food adventure; for better or worse!

We ordered a feast of dishes to share, and actually had to put some of our food on another table.  Here's what we ordered and devoured:
Loving Hut Spring Roll

Spring Rolls: Good, but fairly ordinary and a bit bland.  Very carroty!  The jicama was unexpected, and the tofu unnecessary.

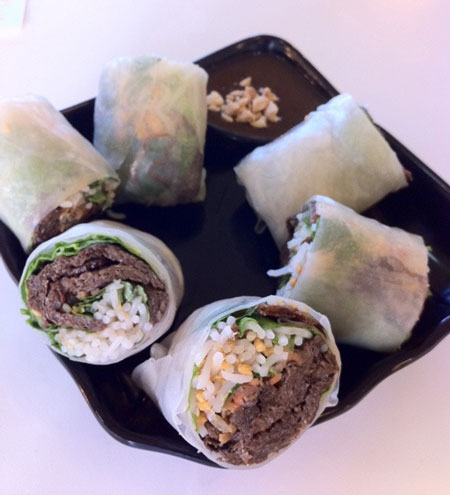
Loving Hut BBQ Roll

BBQ Roll: Love love love these!  Wow!  This subtle little combo of vermicelli, peanut, lettuce and BBQ soy protein blew all three of us away.  I don't know what that orange stuff is, and I don't care.  I just want more of it.  Maybe it's carrot?  All I know is it isn't cheese and that's all I need to know.  When I get to Arlington's Loving Hut, they better have these. I mean it.

Loving Hut Fabulous Pho

Fabulous Pho: Our least favorite dish of the night, but pretty! The broth was a little too perfumey for us.  It seemed to be a well-done dish, just not to our taste.  The flavor tasted strongly of cinnamon basil to me, and was a little more enjoyable when the spicy condiments were added, but we still didn't love it.

Loving Hut Sweet Sour Divine

Sweet and Sour Divine: Delicious!  I wished for more soy protein and pineapple, with less carrots, onions and peppers, but the flavor was great.  I'm not usually a sweet and sour fan, but we all liked this.  I suspect it was pretty high in calories though, so this wouldn't be my go-to dish.  Our pescatarian was crazy about this dish.

Loving Hut Noble Broccoli

Noble Broccoli: Who could tell this wasn't beef and broccoli? Certainly not our omnivore who always orders it in Asian restaurants!  I loved that the broccoli was cooked perfectly: not too crunchy but not overdone.

Loving Hut Mongolian Wonder

Mongolian Wonder: I ordered this really spicy, but light on the ginger since I think it can dominate.  I would order this again.  The flavors were perfect over a little pile of brown rice.  The rice was a touch sticky, but it didn't slow us down.

Carrot and Apple Juice: I'm not a fan of raw carrots at all, so it was a big step outside my comfort zone to order carrot juice.  This was an adventure though, so I went for it.  The carrot and apple blend was actually tasty and I finished the whole glass.  I think I would have loved it even more if it had been colder.

Jasmine Iced Tea: We all agreed this drink was a little bitter. Maybe a touch of sugar would have helped, but it might have just been transformed into bitter sweet tea.

Sunny Forest: What a light refreshing summer drink this was! We're still not sure about what the “zesty petals” were, but we loved this blend of orange juice, mint and sparkling water.

Out of all these dishes, the only things we weren't in love with and wouldn't order again are the Pho and Jasmine Tea.  The good news?  We have a Loving Hut in Arlington, which is where both the girls live.  We don't have one in Big D yet, so for now I'll have to make a small road trip to A-Town.  To get another order of those BBQ rolls that I can't stop thinking about, it's worth it!

There are bunches of Loving Hut locations in the United States. Look for them in Arizona, California, Florida, Georgia, Hawaii, Illinois, Ohio, Massachusetts, New Jersey, New York, Pennsylvania, Texas, Virginia and Washington.

There are also locations internationally.  Each location has their own menu, so check out the web site for your local Loving Hut menu, if you're lucky enough to have one nearby.

LilSis, you have a few Loving Hut locations to choose from in Southern California.  Take your meat-eatin' boys there and see if they like it!

I know that this kind of food isn't without some downside: it usually has high sodium content and can be high in fat due to the oil used.  But for a vegetarian or a vegan, it's a fantabulous thing to have a quick meal option that actually contains a vegetable or two, and not just beans, bread and lettuce. If you're grabbing an occasional fast meal as opposed to making it a daily habit, I think Loving Hut is a great option!

~BigSis

Posted under Food

This post was written by BigSis on April 1, 2011

Tags: ,

Urban Decay Ink for Eyes

Are you an Urban Decay fan? If you've been reading BigSisLilSis for any time at all, then you already know that we're both crazy about our Urban Decay products!

I thought that I'd take a break today from all the talking I've been doing about my 2010 goals to share with you my latest Urban Decay purchase. I've only been using the Urban Decay Ink for Eyes for a few days now, but I'm already in love with this product.

Here's how Urban Decay describes the Ink for Eyes: It’s everything you want in a cream eyeliner! More precise than a pencil, more forgiving than a liquid, this super-smooth formula offers more control, play time, and buildable coverage than your average liner.

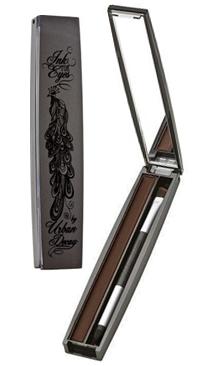
Urban Decay Ink for Eyes

Honestly, what's not to love? First of all, I'm crazy about this case! It's long and slender and comes with a mirror and a double ended applicator that has an angled brush on one end and a smudger on the other end. Before I started using the Urban Decay 24/7 Eye Pencils, I always used my angled MAC brush to apply my eyeshadow as a liner, so that may have something to do with why I like this applicator so much.

The color that I bought is Demolition, which is the chocolate brown color shown in the photo. I really love this color!

Now, let's talk about what's in this pretty, shiny little case. This creamy liner just glides on with such ease that it's really quite surprising. No skips or smears! Really. Urban Decay does have a secret ingredient, though, it's Nylon 12, a high-tech polymer that decreases drag for flawless application while softening and absorbing any excess oil. Urban Decay doesn't claim this is waterproof eyeliner, but when I remove my makeup, this liner is just the same as it was when I applied it, just like the 24/7 pencils.

The liner comes in several other beautiful colors, so now that I know how much I love this product, I'll have to try some other colors.

Luckily, we don't have a Sephora nearby, but anytime I go into Ulta these days, I have to browse the Urban Decay counter. BigSis is ultimately responsible for my new-found Urban Decay addition. She is the one that originally turned me on to the Primer Potion and 24/7 pencils.

In case you missed my Urban Decay Hacker Tutorial, I mentioned that Urban Decay was changing the wand on the Primer Potion. When I finally broke down and bought my new tube, I noticed that it does have a new wand. We'll see if it cuts down on the wasted product at all.

I just bought a friend of mine the cute little case of Urban Decay nail polishes for her birthday. I've never tried any of their nail polishes but I'm hoping that she's happy with them since I've never been disappointed with any Urban Decay product. (And, no, I'm not getting paid to say that.)

Do you have any favorite Urban Decay products that you'd like to share with us?

~LilSis

Posted under Beauty and Skin Care

This post was written by LilSis on January 13, 2010

Tags:

Beach Weather in October!

Today, I was going to write about getting started on decorating the house for Halloween.  I got inspired after my visit to the Pumpkin Farm in Chicago. But, that will have to wait for another day. It feels like summer here and I just can't make myself go pumpkin shopping! Now that I think about it, I haven't even seen pumpkins for sale here yet.  We are having unseasonably hot weather here in Southern California today. It was 91 at the coast! We usually don't even get temps like these in the summer.

Great Waves at the Harbor Today!

HayHay has joined the surf team at his high school and they are supposed to practice at least three times a week. Now he has a perfect excuse to “have to go to the beach.” Somedays, I'm able to stay down there with them, but today, I had too much work to do. So, his friend's mom dropped them off and I picked them up. I always have to take a couple of photos of HayHay, my “surfer dude.”

Time to go!

Time to go!

HayHay loves his new board!

HayHay loves his new board!

There are, however, pros and cons of living in Southern California.  Right as I was leaving our house to go pick them up, I noticed a fire that had started pretty close to where I was located.

On my way to the beach

On my way home from the beach

Plane helping put out the fire!

When we got home, we heard on the news that it had burned 150 acres and then within a few hours, it had burned over 1000 acres. Luckily, there were no structures in immediate danger. There were actually planes and helicopters flying right over our neighborhood.

Photo taken from our house when we arrived home!

Last year, we were surrounded by the California fires.  HayHay missed a week of school due to the poor air quality. We were supposed to stay inside because it was raining “ash.”  Wildfires and earthquakes are definitely the drawbacks to living here in California. I always said that I would never live in California.

But, I also lived in Texas when tornadoes ripped through downtown Ft. Worth and were heading right in our direction. We actually had to take cover that time. We also lived in Upstate New York where it would snow for eight months out of the year. Our first year in New York, the first snow was on Halloween night and the last snow was on Mothers Day.  (And, I had already planted my herb garden.) We did love it there in the summer, though.

I guess no matter where you live, there will always be pros and cons.  We still love it here!

~LilSis

Posted under Family

This post was written by LilSis on October 8, 2008

Tags: , ,

Thanks for great friends at Christmas!

We're hoping that everyone had a wonderful Christmas and was able to spend some time with family and friends and maybe even relax a little bit. We are really used to having large family gatherings during this season, so we really missed not being with either side of the family this Christmas.

Luckily, we have wonderful friends and neighbors that know we don't have family in California so they were kind enough to invite us to join their families. Thank you to D & J for inviting us to join their family for Christmas Eve Dinner and to V & C for including us at their family dinner on Christmas Day. BigT was at his dad's for Christmas this year and I couldn't fathom the idea of cooking a big Christmas Dinner for just three of us. We had intended to just go out to dinner, but instead, we had a great time with our friends and really appreciate them welcoming us into their homes.

Unfortunately, today is a normal work day for many of us so there is no time to sit back and relax. It's back to the grindstone and lots of year end accounting for me. (snarl)

Since New Year's Eve is right around the corner; in the next several days, BigSis and I will probably be talking about appetizers and party food, and maybe I'll come up with some special cocktail to welcome in the New Year.

Oh, and then, we need to get down to some serious business and talk about New Year's Resolutions!

~LilSis

Posted under Holidays

This post was written by LilSis on December 26, 2008

Tags: , ,

Dr. Phil to the Rescue

The past few days have been very draining on me for more than one reason. I think the New Moon on Wednesday had something to do with some of that! Almost everyone I've talked to in the past two days has told me that they also had a lot of things happen on Wednesday. Okay, it is probably a coincidence, but that's when my laptop got attacked by the ‘virus'.  Yesterday, I was able to drop it off for an emergency visit with Phil, my IT guy, also known as Dr. Phil!!

Technically speaking, Dr. Phil says that it's not a virus. It's malicious software that is installed on your computer and when it attacks, it's unstoppable. I tried for a couple of hours to install some new software to try and remove the malicious software, but could not even get Firefox or IE to run.  I hope this never happens to anyone else, but chances are that it will.  Just beware! There is a window that pops up that tells you that your computer is at risk because it has no virus protection. This new window looks very similar to a real Microsoft Windows alert. If you click on enable protection, it will take you to a site to buy their anti virus software. But, it is just a scam to get your credit card information. Don't do it!!

I just found out that a couple of my friends have had more serious issues arise in the past couple of days, so I'm not going to go on and on about my laptop being out of commission. I've just become quite dependent on it and almost feel lost without it.

Besides all my blog work and my ‘real work', I rely on my Outlook  for all my tasks and my appointments. If I had a Blackberry or an  iPhone, I'd be able to retrieve my Outlook from that device.  I'm just not ready to go there yet.

Since I'm such a good-natured, sweet, forgiving, LilSis, I'm not going to fly to Texas to kick BigSis' ass! You know I'm just kidding, BigSis!  🙂 You had no way of knowing that site was malicious.

Hopefully, Dr. Phil will get me up and running on my laptop in the next few days.


~LilSis

Posted under This & That

This post was written by LilSis on February 27, 2009

Tags: