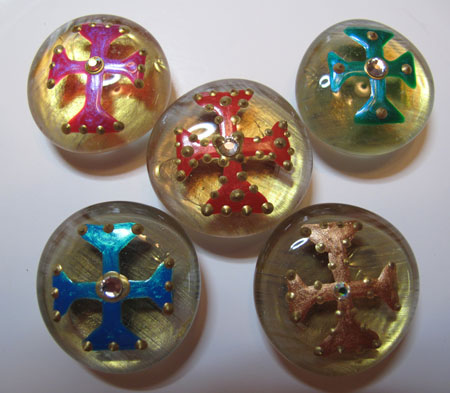
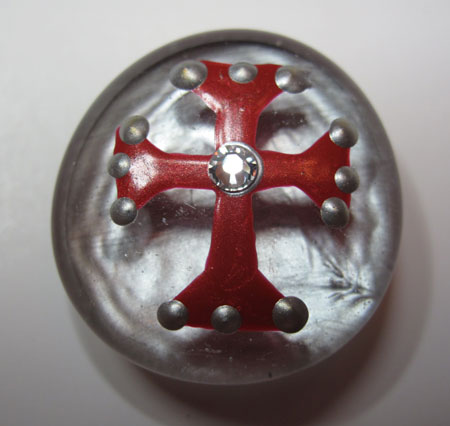
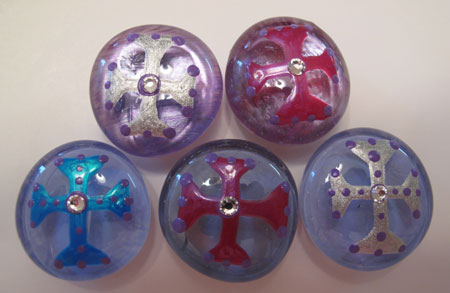
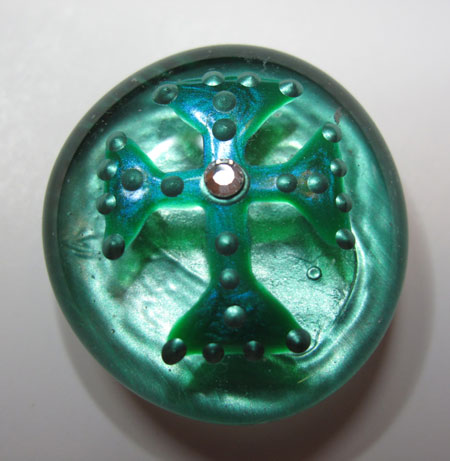
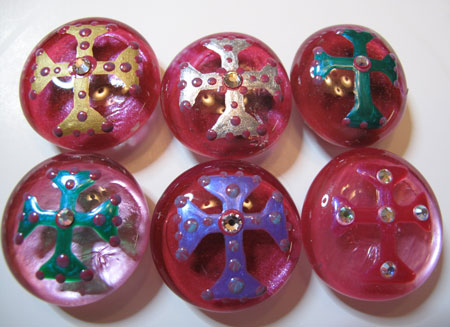
How to Make Painted Glass Marble Magnets

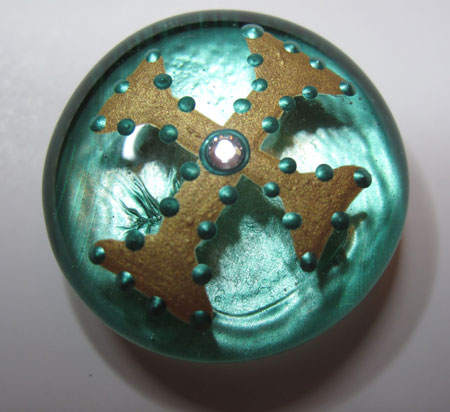
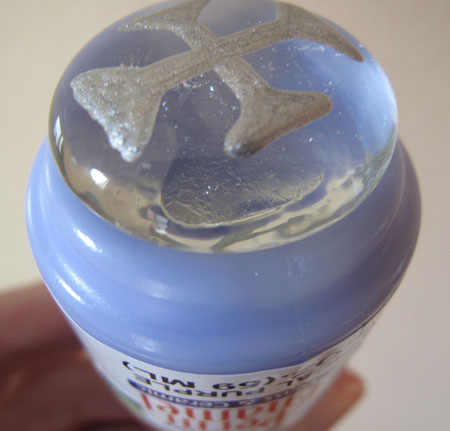
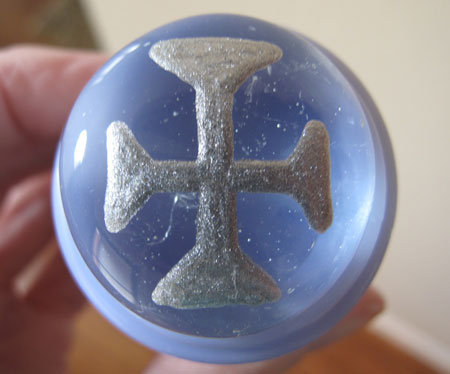
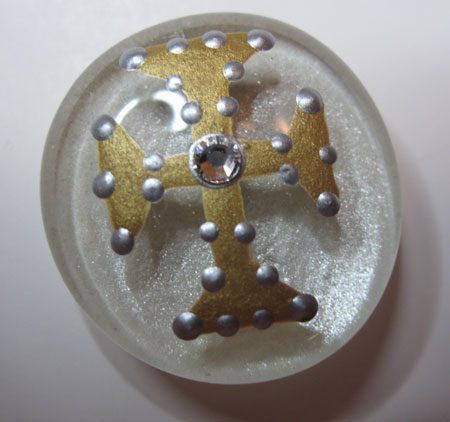
Glass Marble Done Fav Green

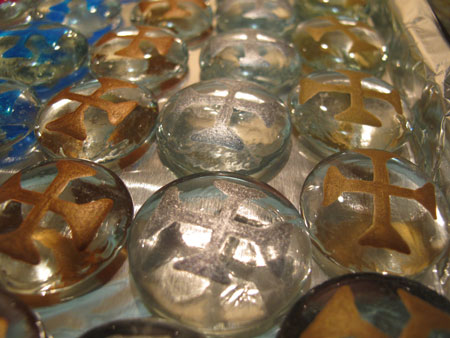
You've probably seen tutorials for making adorable magnets from the flat glass marbles that are used as filler in vases of flowers. Most of the instructions I've seen involve gluing paper of some kind to the back of the marble: scrapbook paper, gift wrap, newsprint, hand-drawn images, whatever.

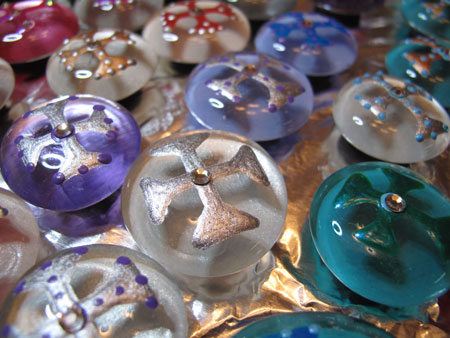
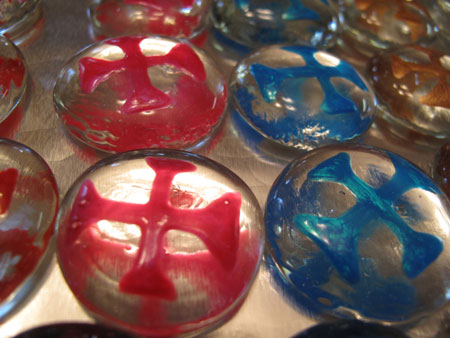
Glass Marble Done Group1

I think those marble magnets are really cute and easy to make, but I like to do mine in a different way.  I like to paint them!

There are probably lots of ways to do this, and you can absolutely inject your own creativity.  I'll show you the method I came up with, and then you can take off with your own ideas.

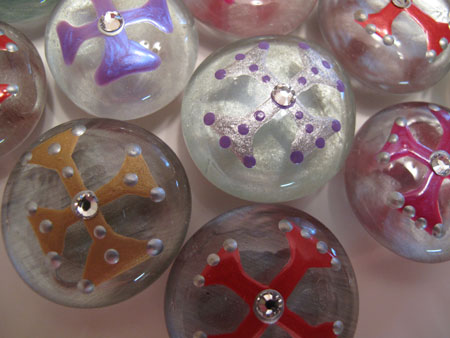
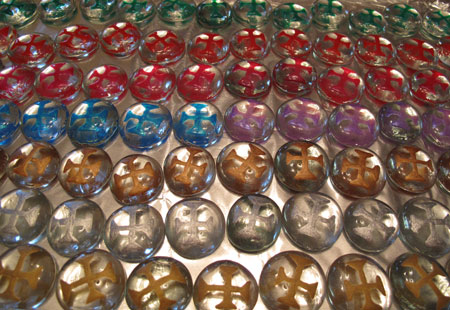
Glass Marble Done Group4

Let's start with the supplies you need:

  • Flat glass marbles: Available at craft stores, discount stores, pretty much everywhere. I buy the clear ones because I can see my template through them, but you can also find really pretty blue, green and amber colored ones.

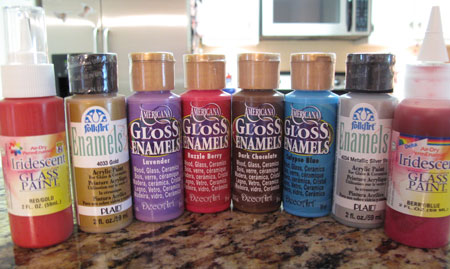
Glass Marble Paint

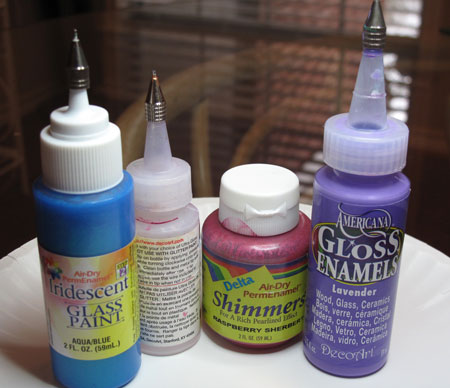
  • Glass paint: I prefer the air-dry kind that doesn't require baking.  I use FolkArt Enamels, Americana Gloss Enamels, DecoArt Ultra Gloss Metallics (these might be discontinued), and Delta PermEnamel.  My favorites are PermEnamel Shimmers and their Iridescent Glass Paint.  Delta PermEnamel is the glass paint equivalent of MAC eyeshadows: they come in jillions of colors, have great textures, apply well and look beautiful!
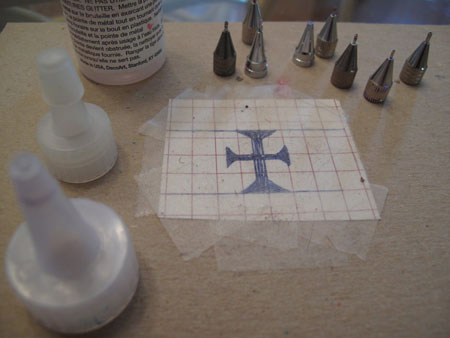
  • Glass painting kit with tips, adapter caps and plastic bottles.

Glass Marble Tip Kit

  • Grid paper:  To make your painting template.
  • Swarovsky crystals: Find them in the jewelry-making aisle at your craft store.
  • Tweezers: To apply the crystals.  Just raid your bathroom drawer, don't buy special jewelry-making ones.

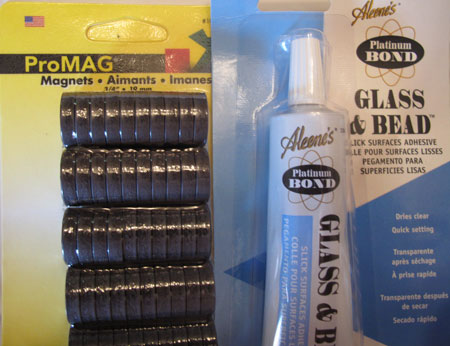
Glass Marble Magnets Glue

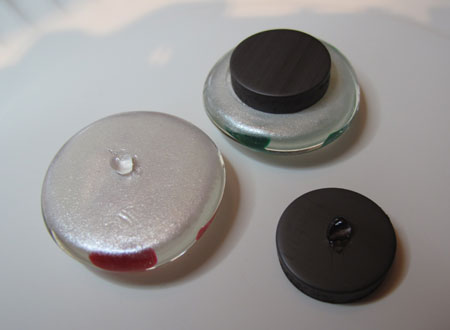
  • Magnet “buttons”
  • Glue: Strong glue for slick surfaces, like Aleene's Glass & Bead Adhesive, E6000 or Bond 527.
  • Magnifying craft light: If your eyes are “mature” like mine.  This is close work, so don't be too proud to use it!

The first step is to create a clean painting surface, and sometimes these marbles are a little dirty.  I give mine a quick rinse in straight white vinegar, but you could also use alcohol.  I use a large plastic container, and fill it with the marbles.  As you remove the marbles from the bag, be very careful.  They're glass, of course, and it isn't unusual to find a broken or badly-chipped marble.

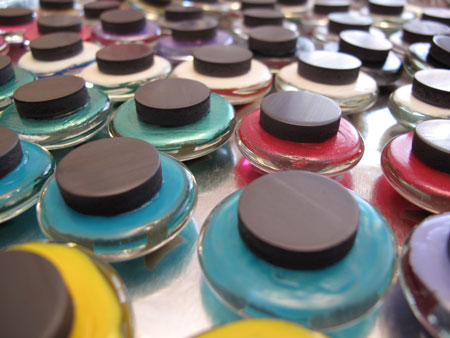
You'll notice that I'm working with a lot of marbles.  It makes sense to me to paint a large batch at one time, since I already have all the stuff out.  Changing paint colors requires washing supplies, so I might as well do several marbles of each color while I'm at it. For this tutorial, I painted 7 dozen marbles.

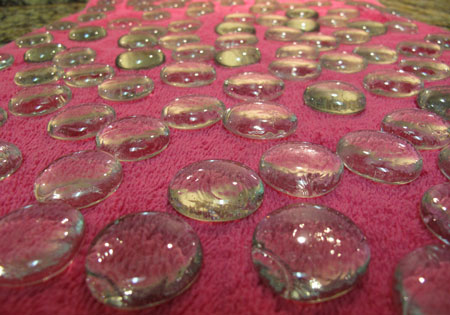
Add vinegar or alcohol to cover the marbles, and let them sit for a few minutes.  Scoop them out with a slotted spoon, and lay them out on a thick towel in a single layer.

Glass Marble Magnet Wash

You can blot them a little or just let them naturally dry.  I've never had a problem with spots forming, so air drying is usually fine. You definitely want the marbles to be completely dry before you start painting.  Try not to touch the surface of the marbles from this point on, since the natural oils in your fingers could interfere with the paint adhering.

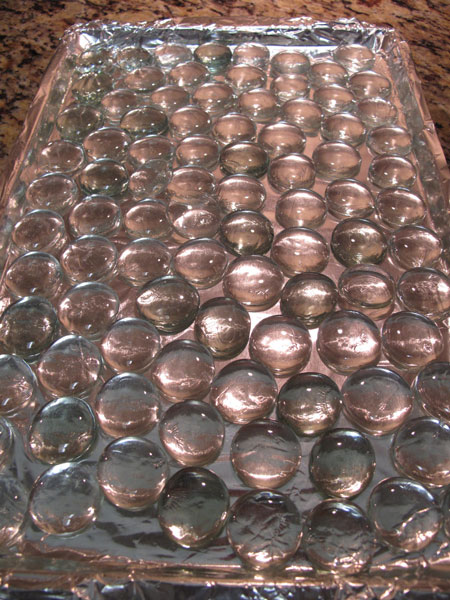
Once they're dry, remove the marbles from the towel and place them on an old foil-lined cookie sheet or tray.  I also cover another tray or sheet with foil to have a place for the marbles as I finish working on each one.  This 7 dozen is all lined up, ready to get dolled up!

Glass Marble Magnet Dry

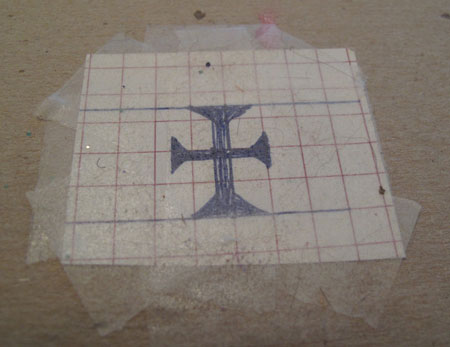
You may be able to freehand your design, but I can't.  Years ago, when I came up with the idea of painting these, I tried freehanding and it wasn't pretty.  I'm crafty, but not artsy, so I need a template.  I like to paint crosses, so it was very easy to draw a cross template on a piece of gridpaper.  Can you tell how well used/loved this template is? 🙂

Glass Marble Magnet Template

Once you get your design drawn out, attach it to a piece of cardboard so it's sturdy.  Here's a trick for you.  Cover the design with a few pieces of removable two-sided tape.  This semi-sticky surface will hold onto the marble just enough to keep it stable and in place while you're painting on it.  When the tape eventually gets covered with cat hair (or dog hair or lint) you can easily peel it off and replace it with fresh tape.  It really makes a big difference.

If you need the magnifying light, now is the time to pull it out. Place your template on your work surface, and choose a marble, any marble.  Imperfections are common in these guys, so don't expect a perfect flawless one.  That's part of their appeal.  Discard chipped ones or any that just aren't pretty to you.  Center your marble on top of the sticky template.

Here comes the fun part…painting!  Select the color you want to paint your crosses.  I love metallics: gold, silver and bronze.  I also love the gorgeous shimmery opalescent colors from Delta PermEnamels.  You can customize the color of your marbles for the occasion or the season, or just use the colors you like.

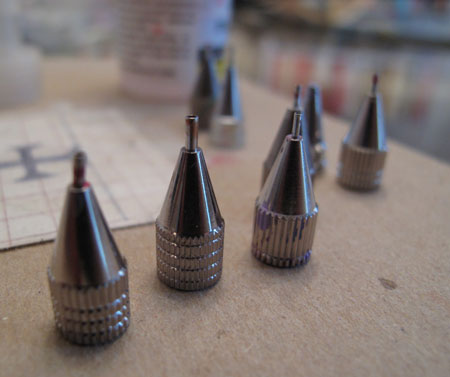
Glass Marble Magnet Tips

So how do you get the paint on the marbles?  Using a brush is too tricky for non-artist me, so I went looking for an easier solution. What I found are these brilliant metal glass painting tips that look like little ballpoint pen tips.  I've seen a couple of different kits at the craft store, and the tips may vary a smidge, but they always include the tips, small plastic bottles, and the adapter caps that screw onto the paint bottle.

The little metal tips snuggly screw onto the plastic adapter caps. I find that they also fit perfectly on the caps of some paint bottles.  If you're using paint that comes in a chubby jar like the Delta PermEnamel, you'll need to pour a bit of it into a small paint bottle that fits the adapter cap.

Glass Marble Tips on Caps

Once you have the tip securely on the paint bottle, test it out before you paint.  I keep a paper plate and a paper towel nearby for this purpose. Draw a line of paint on the paper plate to make sure the paint is flowing smoothly, and then wipe off the tip cleanly.

These painting kits also come with a little piece of wire that you can use to dislodge any clogs that might form in the tips, so keep this little jewel on your paper plate too.  Some paints are really bad about clogging, but others don't clog at all.

And a word to the wise, when you change paint colors and switch to a new tip, be sure to drop the used tip and cap into a cup of water.  If you let it sit and dry out, you'll pretty much be up a creek and have to toss those pieces.  You'll never get dried paint out of that skinny little tip.

Now, back to painting.  I start at one end of the marble, and just follow the template, filling in the design.  You don't want to squeeze the paint bottle really, just hold the bottle like you were holding a marker or pen, and guide the paint around the template.  The paint shouldn't be so thick that it will drip or ooze, but you do want good even coverage after two coats.

Glass Marble Magnet 1 Coat Metallic

Don't drive yourself crazy by striving for perfection, especially with this first coat. After the second coat, you'll be happy with what you see, so don't worry.  The main thing is to keep within the lines, and have fun!  If you make a mistake, you can try to clean it up with a toothpick.  If it's a doozie of a boo boo, just toss the marble and move on to the next one!

Tada!  First coat complete!

Glass Marble Magnet 1 Coat Close

Let the first coat dry thoroughly; I prefer overnight.  For the second coat, you won't need the template, so just make sure you stash it in a safe place for next time.

Take the same color paint, and add your second coat.  You can smooth out any rough edges and fill in any sparse areas.  Once you're finished, allow the second coat to dry overnight again.

Glass Marble Magnet 1 Coat Wide

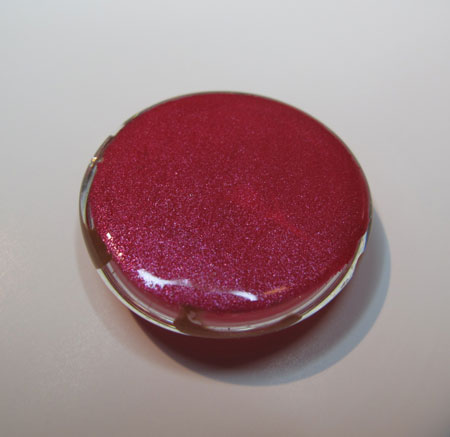
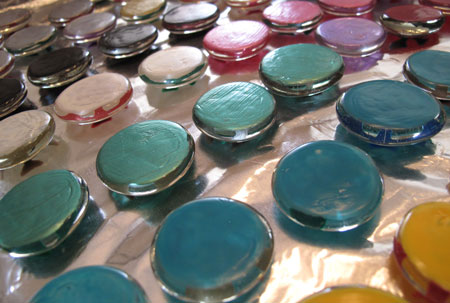
Did you think we were finished?  Oh, heck no.  The fun's just starting!  We're going to add a background color to the BACK of your marble.  You can skip this step if you want to, and sometimes I do, but I think it really adds a lot.  It gives dimension and depth to the marble, adds a contrasting or complementary color, AND hides the magnet you're going to glue on the back. Go a little crazy with your background color, or just let the design color be the star.

Glass Marble Magnet Back1

For this step, I use a small flat paintbrush.  And…you got it, let it dry overnight.

Glass Marble Magnet Back All

If you've chosen a sheer color, like my pearly white, you might want to add a second coat after the first sets up, but it isn't necessary.  It's up to you!  If you want to see how a color might look behind your cross, just hold up your marble to the bottom of the paint bottle, like this.

Glass Marble Magnet on Paint2

Glass Marble Magnet on Paint1

We're coming down the home stretch, so stay with me.  You have two coats of color on your cross, plus a coat or two of background color on the back of the marble.  I like to add a magnet at this point.  If I do it now, I don't have to rest the marble on it's frontside after the delicate little dots are applied, and risk smushing them down a bit.  I like for the decorations to be as dimensional as possible.

Glass Marble Magnet Glue

To attach the magnet, add a tiny dot of glue to the magnet and to the back of the marble, and allow it to sit for a minute or two (check your particular adhesive for directions).  Any longer and the glue may dry too much.  Attach the magnet, and set aside to dry… overnight.

Glass Marble Magnets All

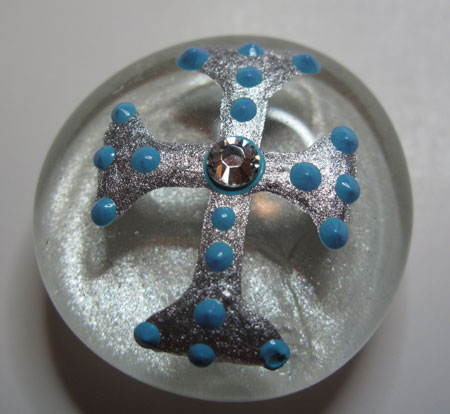
Now the last steps!  It's time to decorate the front of the marbles.  I do dots because they're easy and I like how they look, but you could do squiggles or lines or anything else your imagination can conceive of.  Choose any color!  I really like adding a dot color that coordinates with the background color, but other times, the dot color just comes out of the blue.

Before I add the decorative dots, I add one teensy tiny dot of paint (you could use glue, but you already have paint in your hand) to the center of the cross and carefully place a swarovsky crystal with the tweezers.  Press it down very gently.  Then just add dots here and there all over the marble, in any pattern you like.

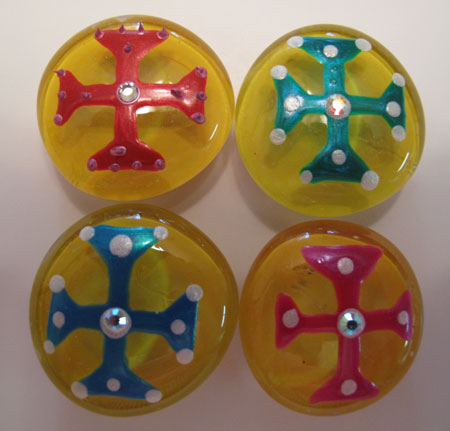
Glass Marble  Magnet Done Fav Gold

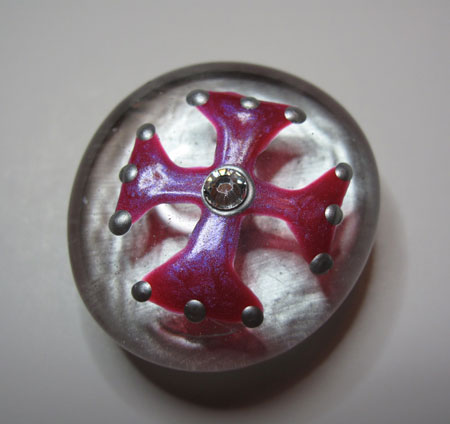
Voila!  Your marble magnet is finished! Do you love it?

Glass Marble Magnet Done Fav Pink

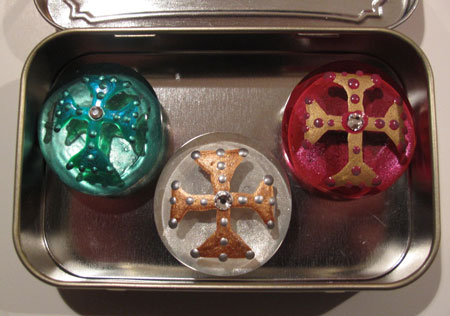
I love to give these painted marble magnets as little gifts, so they need to be packaged up cute.  I've seen people put the paper-backed magnets in Altoid tins, and it's kind of cool that they stick in place and don't rattle around.  You'd have to decorate the tin though, and you have to deal with the raised logo on the front of the tin unless you buy flat new ones.

Glass Marble Magnet in Altoid Tin

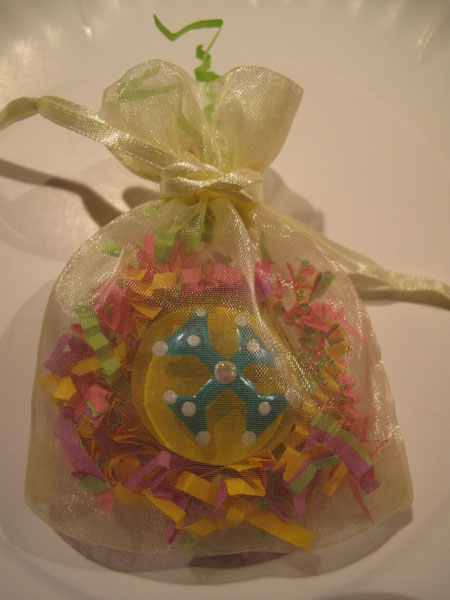
You could also put the marble magnet in a little drawstring bag with a bit of pretty shred.  This is kind of sweet and Eastery-baskety.

Glass Marble Magnet Favor Bag

What I like to do though is to take this beautiful marble to the next level by customizing a little paper mache box for it, with stamping, embossing and a scripture hidden inside.  Then it goes into the drawstring bag, and then into a handmade origami box. And if that isn't enough, we'll then wrap up the whole thing with a tulle bow.  Overkill?  Nah!  There's no such thing as overkill when it comes to giving gifties!

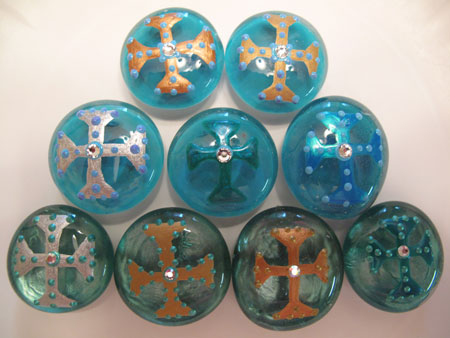
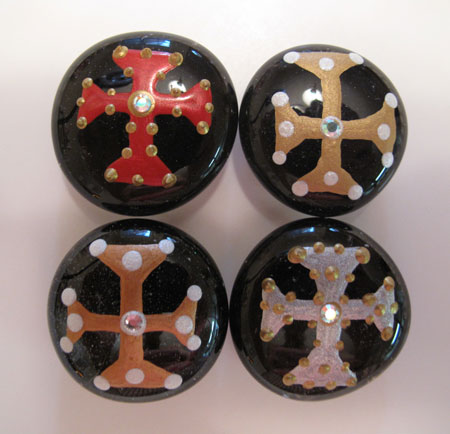
I'll show you how to do all of that next time, and share some of my favorite ways to give these away!  Til then, here are a few more of my favorite marble magnets from this big batch.  See you soon!

Glass Marble Magnet Done Yellow

Glass Marble Magnets Done Blue

Glass Marble Magnet Done Fav Silver

Glass Marble Magnet Done Black

Glass Marble Magnet Done Gold

Glass Marble Magnet Done Fav Red

Glass Marble Magnet Done Purple

Glass Marble Magnet Done Fav Green2

Glass Marble Magnet Done Pink

~BigSis

Posted under Home

This post was written by BigSis on March 20, 2011

Tags: , ,

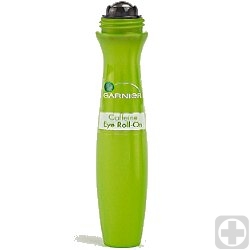
Garnier Nutritioniste Anti-Puff Eye Roller

After overindulging in Mexican food, pizza, or salty chips almost every day for the past ten days, BigSis and I found ourselves waking with what we call “salt bags”. And no, we don't just mean puffy eyes! These are called salt bags for a reason!  Seriously scary!

garnier

When I first saw Sarah Jessica Parker on the commercial for the Garnier Nutritioniste anti-puff eye roller, I actually laughed.  I'm thinking to myself, ”yeah right, here we go again with another product that claims to just roll away the puffy eyes.”  I was definitely skeptical. I read a few positive reviews online about this product, so we picked it up one day when we happened to be at Target.

It might not have been a fair time to test this product since both of our eyes were much puffier than normal.  I really liked how the product went on with the little metal ball; nice and smooth, and cool since we kept it in the fridge.  I also liked the way that the product dried so that you were able to put concealer right on top of it and didn't have to wipe it off like some products.

Overall, I do think that this product reduced the puffiness under my eyes.  (Some mornings, I actually used it twice.) I wouldn't say that it's a miracle product as they make it seem on the commercial, but I'm going to keep using it. For $13.00, it's a good buy and I think worth a try for anyone who has trouble with morning under eye puffiness!

What are your thoughts on the anti-puff eye roller, Big Sis?

~LilSis

Posted under Beauty and Skin Care

This post was written by LilSis on April 20, 2009

Tags:

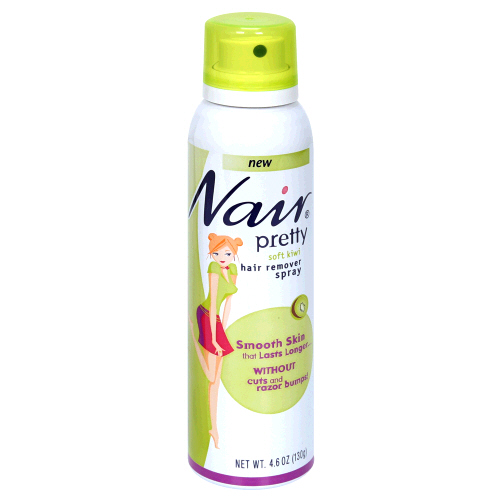
Nair Pretty Spray

Who wants furry little caterpillars for eyebrows? (Just kidding, I get it.) I liked the photo of the furry little critter. I don't have an eyebrow problem, except that I have to pluck every day since I don't have time to get them waxed regularly.

So, why is it that where we have hair, we don't want it; yet where we want hair, we don't have it? We women pluck, tweeze, wax, use depilatories, and laser off hair from ‘almost' every part of our bodies.

Until BigSis mentioned it to me a few months ago, I had never even thought of removing the hair from my arms. She liked how hers looked after she did it, so, of course, I had to try it.

It's so easy, too, with this Nair Pretty Hair Remover Spray! You just spray it on either your legs or arms from about 4 inches away until you have an even foam. Let it sit for 3 – 5 minutes, then wipe off a small test area to check hair removal. You can leave on for up to 10 minutes. Total hair removal depends on the thickness of the hair. The first time I did my arms, I think it did take the full ten minutes. I used to have a lot of blonde hair on my arms!

I hadn't used Nair in years because I always remember how bad it smelled! The days of stinky Nair are gone! This Nair Pretty Soft Kiwi Spray has the least odor of any I've ever used.

nair-spray

They also have Peach, Raspberry, and Green Apple scents.  If you happen to have a teenage daughter, she might even get a kick out of the Nair Pretty Green Apple Glitter Wax Strips.

Is this ‘hair removal' craze just another obsession we women have or is it just the need to try to do everything we can to look our best?

~LilSis

Posted under Beauty and Skin Care

This post was written by LilSis on January 7, 2009

Tags: , ,

Anaphylactic Peaches and Cherry Disaster

When I was about 10 years old, a peach almost killed me.  Yep, a sweet, juicy, fuzzy little peach was nearly the end of me!  I was spending part of the summer in West Texas with my grandparents as usual, and had been eating juicy fresh peaches as usual.  My grandmother made awesome peach fried pies and incredible spiced pickled peaches with cloves.  She had peach trees in the backyard and made great use of them.

So, one nice summer day, I went to my cousins' house for a visit.  I can remember sitting on a swing in their backyard, eating a fresh peach.  I can remember getting itchy, then starting to wheeze, and then getting swollen all over.  By the time I got into the house, I passed out, and then drifted in and out of consciousness for what seemed like hours before they took me to the emergency room to be pumped full of benadryl and adrenalin.

Since I grew up to be BigSis, clearly I survived that attack of anaphylactic shock.  My body just had enough of peaches, and said it wished to have no more of them, please.  When I heard that this month's You Want Pies with That event would have a Childhood Memories theme, those peachy memories came back to me.  My whole family has mouth-watering and sentimental memories of Grandmama's fried pies, although I obviously can't make her peach ones.  In her honor, I decided to make cherry fried pies, for my first time ever.

I don't have my own recipe for these little jewels, so I found recipes online for pie pastry and cherry pie filling that both sounded delicious and got 5 star reviews.  And being a bake-from-scratch snob, I was definitely not interested in using flattened biscuits with canned pie filling.  I did have one little complication right off the bat, which was that the filling was surprisingly too juicy for little fried pies, so I revised my plan a bit and made a whole pie.  No biggie, just a little adjustment.

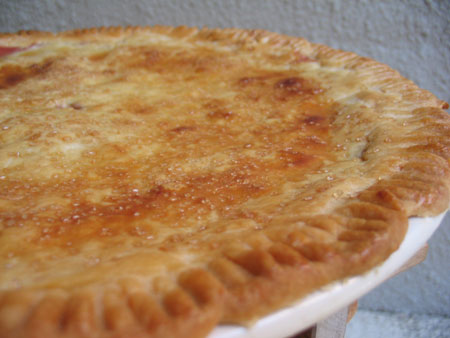
cherrypiewhole

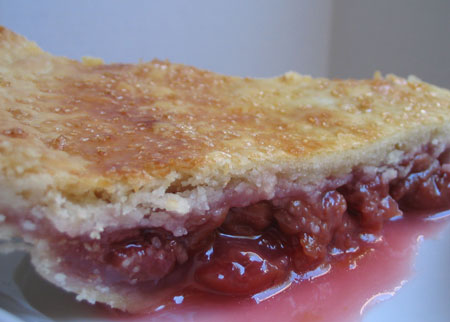
Looks pretty good, right?  I was kind of happy with the golden brownness, and was feeling a little proud of myself since I love to bake, but I'm not a pie maker.  It intimidates me and intrigues me at the same time.  But so far, so good.  I cut into the pie, and still found more juice than I really wanted, but no worries!  It's yummy cherry juice, so it's all good!  And I thought the slice on the plate looked pretty tasty!  What do you think?  Not so bad for a novice pie girl.

cherrypieslice2

The next test…take a bite!  I took a bite, and took another bite, and took another bite.  Guess what?  It was HORRIBLE!!  Not just bad.  Not just “oh, you're so overly critical of your own baking”.  No.  It was DISGUSTING!  It's actually in my sink at this moment, crumpled in bits and pieces, awaiting it's little trip down the garbage disposal.  THAT bad.

What could be so bad, you say?  Well, the pastry was not flaky and light.  It was the polar opposite: heavy and soggy on the top and bottom.  The juice soaked into it and just made yukky mush.  Even though I baked it the recommended amount of time, I don't think the bottom crust was even done.  Bleh.  On top of that, the pastry's flavor was just off and weird.  The tiny bit of almond extract in the filling was grossly overwhelming and the filling was WAY too liquidy.  Altogether, it was so nasty that not even HayHay-the-15-Year-Old-Eating-Machine would touch it.  I would be ashamed to offer it to him or anyone else.

So, why do I bother posting on this disaster?  Cause it's pretty damn funny to me!  It's hilarious, in fact.  I make such a big ding dang deal out of baking from scratch, and then I have a catastrophe of Titanic proportions like this, and it just cracks me up.  One thing I don't do is take myself too seriously, and it's a good thing!  Plus, you can't try anything new if you're too afraid to fail.  Chances are I'll have lots more beautiful disasters on my way to successful pastry baking!

Next time, I'll try to do you proud, Grandmama!  I'm not giving up!  Meanwhile, please visit You Want Pies With That on June 8th to see the work of successful pie bakers!  I'm off to the grocery store for biscuits and canned pie filling.

~BigSis

Posted under Food

This post was written by BigSis on June 6, 2009

Tags:

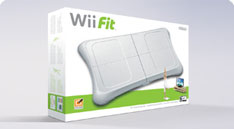
Fun and Fitness all in one with Wii Fit

It's definitely a busy time of the year and we all have more to do than usual. When I'm feeling overwhelmed and stressed, it is even more important to make sure that I exercise every day. On the days when I may not want to go to the gym or if it's not nice enough outdoors to go for a run, our new Wii Fit game is going to make it so much more fun to do something at home. I've never been good about doing exercise videos at home, so having a Wii fit game that can help me is great. Even if you don't have a Wii at home, you can use an emulator similar to the Dolphin iOS emulator to turn your phone into a Wii console! If this is something you're interested in, you can learn how to install dolphin emulator here. Not only is it great for keeping you fit but it makes a great Christmas gift!

The Wii Fit is really an amazing game! Thanks Bo for the great Christmas gift! I'm not going to lie, I was a bit skeptical about this game at first, but once I realized how popular it was amongst people who enjoy playing the Nintendo Wii, I just knew that I had hit the jackpot. I would even go as far as saying that it's on the same level as these options for wii games download because these are very enjoyable too. My friends are just some of the people that would know how good these games are. So, we couldn't wait to get stuck into the Wii Fit. On Christmas Day, we all took turns getting weighed and getting our BMI calculated. (Sounds like fun, huh?)

I intentionally have not stepped on a scale in a long time. And, I really had no intention of doing so on Christmas Day after a week of parties and overindulging. So, when we got the Wii Fit, HayHay persuaded me to get on the balance board. Not only does it weigh you very precisely, it also calculates your BMI. First, you take a body test and go through a few balance tests that enables the Wii Fit to calculate your BMI and your Wii Fit Age. (And it also tells you if you're overweight.) If you're not happy with your weight or your BMI, you can set a goal and track your progress daily. Visit the Nintendo site to check it out!

Once you start training, you can choose from yoga, balance games, strength training or aerobics. I had a friend from my yoga class tell me that the yoga on Wii Fit was really hard and she was right! It's really good and the hula hoop is a hoot! I think HayHay and BigT like the snow skiing the best.

My BMI was good, but I've set a goal to lose a little weight. I've recorded my goal on the Wii Fit and am now putting it in black and white so the pressure is on! My first New Year's Resolution is to lose five pounds in the next month.

If I crank up my regular exercise routine and add some fun aerobics from Wii Fit, I'm hoping, and praying, that I can accomplish this goal.

~LilSis

Posted under Fitness

This post was written by LilSis on December 28, 2008

Tags: ,

Cat Urine and Vomit? No Problem!

We introduced the furkids this week, and anyone who knows me and LilSis knows that we're big animal lovers. We always had animals growing up, and we've both always had animals as adults. LilSis always had dogs til TomTom sauntered into her house, and I've always had cats. Somehow, if there is a high-maintenance health-impaired cat to be cared for, it manages to find its way into my family. So out of necessity I have become an expert on the challenges of cleaning up feline bodily fluids (and not-so-fluids), including, but not limited to, urine, vomit, hairballs, and poop. Sorry to be graphic, but if you're a cat lover, at some time or other you will need the straight scoop (so to speak) on dealing with these problems. However, you may want to check on what your feline creatures eat if they vomit too much because that's not a good sign of a healthy cat. A good way to ensure that your cat eats healthy is by feeding him nutritional supplements such as the ultimate pet nutrition.

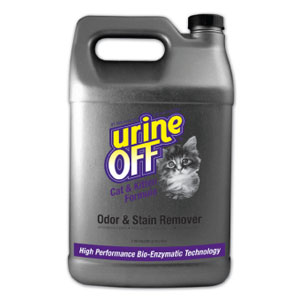
The worst problem of all in my experience is a cat who urinates outside of the litter box. It goes without saying that the first thing you need to do is get the cat to the vet to determine if there is a health issue responsible for the problem. Then you can move on to the stain and odor issue that has you googling how to clean a rug. It can be difficult because not all rugs are made from the same materials and most of them have individual care instructions attached which means there isn't one solution that can fix-all. We understand that it can be a daunting task and you may find it easier to look for someone that does Rug Cleaning Toorak based, or whatever area you are in. I tried virtually everything over the last couple of years with Warren Bitey. He literally soaked the carpet in my last apartment, but when I moved out I got my full deposit back because there was no trace of urine left in that carpet. I kid you not. Here's the only solution – don't mess around with anything else, you'll just waste your money and the peeing will continue because the odor is still there. The only product to buy is called UrineOff. You can buy it from some vets, but I found their prices to be about double the direct online price, plus they only carried the 16 ounce spray bottle and my problem was bigger than that!This stuff is not cheap – about $40 plus shipping for a gallon, but it WORKS and is worth every penny. You saturate the carpet and let the enzymatic solution work its magic. I found it works best if you let it slowly dry without a fan blowing on it. If you have a badly soiled area, it may need a couple of treatments, but don't give up.

Hopefully, you don't have the mega-problem of cat urine. But chances are you do have the random hairball barf, a full-blown vomit spot, a dirty hiney spot on your carpet (gross), or even a poop accident. What do you do for those stains? You won't believe it when I tell you because I didn't believe the professional carpet cleaner when he told me. You get a wide-mouth jar with a screw-on lid, and you fill it with the Magic Solution of 1 part white vinegar to 10 parts club soda. That's it. To use it, get a supply of unprinted white paper towels. If there is any solid matter on the stain, remove it first. This is nasty to say, but if a hairball has dried on your carpet while you were away, you can usually just peel it off the carpet and proceed. Take a paper towel and saturate it with the Magic Solution. Dab it generously onto the stain until it's pretty wet. Then you want to gently massage the solution into the carpet, but don't rub. Change to a clean wet paper towel as you need to, and then switch to dry paper towels as you see the stain lifting. With the dry paper towels, dab dab dab, turning to a fresh spot of towel. Keep dabbing until the carpet is as dry as you can get it. If the stain was really heinous, it may be best to do the cleaning in 2 sessions. You don't want to push the soil down into the pad. Let the spot dry after one session, and then come back the next day for a second try. I've never had a stain resist the second treatment, and I lived with 3 cats on off-white carpet for 10 years!
If the trick doesn't work, I'm afraid you would have to call in an expert Carpet Cleaning Joplin, MO (if you're from Joplin City, Missouri) like the ones at Sharp Chem-Dry and others to get your carpet spanking clean! It might be a bit of a pocket pinch than your regular home remedies, but it will leave your carpet looking brand new.

Nevertheless, I really hope these two miracle workers will make your life with cats a little bit easier, as they have mine! Give them a try and share your results with me!

~BigSis

Posted under Animals

This post was written by BigSis on October 17, 2008

Tags: ,

Treat Yourself to a Clarisonic!

Have you been really disciplined with your New Year's resolutions and want to reward yourself?  Maybe you've already lost a couple of pounds and need a non-food treat?  How about getting yourself a Clarisonic Skin Cleansing System!

I've mentioned before that I'm not an early-adopter.  I've only had an iPod for a year, an iPhone for a few months, a Wii for a couple of weeks, and I've yet to buy a blu-ray player.  My television is over 20 years old and weighs as much as I do.  Oh yeah, and my car will be 10 years old in a couple of months.  With all that in mind, I'm sure it doesn't surprise you that I've been hearing about the Clarisonic for over a year and just now got one.

Why did I wait so long!  My skin is already dramatically different in only two weeks of using the Clarisonic:

  • It feels much much cleaner deep down, and clogged pores are becoming clearer
  • It's radically smoother in texture
  • The color is healthy
  • Pores look smaller
  • It feels firmer!

I noticed some of these benefits immediately, and I continue to be pleased with the cumulative improvement I see in my skin, which is a pretty big deal for me.  I've never had pretty skin in my life.  I started making weekly trips to the dermatologist when my skin started breaking out at age 12.  In my early 20s, I was one of the first people to use Accutane, but by then I had scarring that really bothered me.  In late 2007, I had 6 Fraxel laser treatments at a cost of well over $5000.  By the way, I have a high tolerance to pain, but that was the most painful thing I've ever experienced.  Thankfully, I did see substantial improvement in my skin's texture and scarring was reduced somewhat.

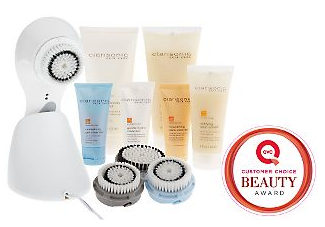
But even so, I'm still not happy with my skin and I'll always be looking for ways to improve it.  The Clarisonic is an excellent tool, and it cost much less than $5000!  I got mine for $225 through QVC because their deal came with some extra goodies like cleansers and additional brush heads.  The model I got comes with a brush for your body, as well as 3 facial brushes.  You can also buy the Clarisonic through Amazon, Ulta, Sephora, and probably lots of other retailers.

I highly recommend the Clarisonic…don't wait forever like I did!

~BigSis

Posted under Beauty and Skin Care

This post was written by BigSis on January 18, 2010

Tags:

Urban Decay Ink for Eyes

Are you an Urban Decay fan? If you've been reading BigSisLilSis for any time at all, then you already know that we're both crazy about our Urban Decay products!

I thought that I'd take a break today from all the talking I've been doing about my 2010 goals to share with you my latest Urban Decay purchase. I've only been using the Urban Decay Ink for Eyes for a few days now, but I'm already in love with this product.

Here's how Urban Decay describes the Ink for Eyes: It’s everything you want in a cream eyeliner! More precise than a pencil, more forgiving than a liquid, this super-smooth formula offers more control, play time, and buildable coverage than your average liner.

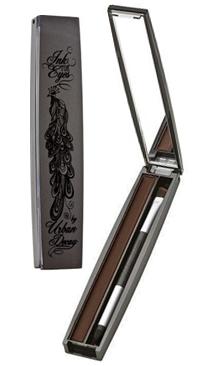
Urban Decay Ink for Eyes

Honestly, what's not to love? First of all, I'm crazy about this case! It's long and slender and comes with a mirror and a double ended applicator that has an angled brush on one end and a smudger on the other end. Before I started using the Urban Decay 24/7 Eye Pencils, I always used my angled MAC brush to apply my eyeshadow as a liner, so that may have something to do with why I like this applicator so much.

The color that I bought is Demolition, which is the chocolate brown color shown in the photo. I really love this color!

Now, let's talk about what's in this pretty, shiny little case. This creamy liner just glides on with such ease that it's really quite surprising. No skips or smears! Really. Urban Decay does have a secret ingredient, though, it's Nylon 12, a high-tech polymer that decreases drag for flawless application while softening and absorbing any excess oil. Urban Decay doesn't claim this is waterproof eyeliner, but when I remove my makeup, this liner is just the same as it was when I applied it, just like the 24/7 pencils.

The liner comes in several other beautiful colors, so now that I know how much I love this product, I'll have to try some other colors.

Luckily, we don't have a Sephora nearby, but anytime I go into Ulta these days, I have to browse the Urban Decay counter. BigSis is ultimately responsible for my new-found Urban Decay addition. She is the one that originally turned me on to the Primer Potion and 24/7 pencils.

In case you missed my Urban Decay Hacker Tutorial, I mentioned that Urban Decay was changing the wand on the Primer Potion. When I finally broke down and bought my new tube, I noticed that it does have a new wand. We'll see if it cuts down on the wasted product at all.

I just bought a friend of mine the cute little case of Urban Decay nail polishes for her birthday. I've never tried any of their nail polishes but I'm hoping that she's happy with them since I've never been disappointed with any Urban Decay product. (And, no, I'm not getting paid to say that.)

Do you have any favorite Urban Decay products that you'd like to share with us?

~LilSis

Posted under Beauty and Skin Care

This post was written by LilSis on January 13, 2010

Tags:

7 Tips for Sunburn Relief

Sunburn photo by Genosfear on Flickr

Sunburn photo by Genosfear on Flickr

This is a big outdoors weekend for most folks, and I'm betting that more than a few of you have a nasty sunburn today! I'm sorry about that! We know that using a good sunblock is your best protection against a burn, but if you're already burned, what you need now is sunburn relief…not a lecture! These are my favorite tips for easing the pain, itching and burning, although you should be carrying a first aid kit with you if you're venturing outside in the sun for a while. So you can also get the lowdown here on first aid kits and preventing it all together!

  • Apply aloe vera gel, ideally cool gel that has been kept in the refrigerator. If you have an aloe vera plant, pluck off some leaves, squeeze out the gel and use it.
  • Wet some clean towels, and place in the freezer until almost frozen, then apply gently to burned areas. Repeat as often as you wish.
  • Brew a bunch of tea bags, and add the bags and the cooled tea to a tub full of tepid water. Soak.
  • Add some oatmeal (uncooked!) to a tepid bath and soak for as long as you can.
  • Mix a handful of baking soda into a tepid bath and soak.
  • Take aspirin for the inflammation and pain (if you don't have any problems with taking aspirin).
  • After using one or more of these treatments, I'd also recommend that you sleep au naturale (nekkid) under a ceiling fan turned on high! But make sure you have it covered from somewhere like First American Home Warranty, afterall you'll need it this summer!

Ceiling fans are the perfect alternative to HVAC systems, as they can provide you with cool air throughout the summer, as well as all year round too. Some people even suggest that they are better than air conditioning systems, but only if you have enlisted the help of a professional electrician (navigate to this website to find out more) in order to install it and make sure it functions to the highest quality. Because it would be pointless having a ceiling fan if it isn't working as it should, and if you have a sunburn, you definitely need it to be working.

It's my understanding that you do not want to use any creams or oils or butter on a bad blistered burn, because they can cause infection. I've heard about lots of other home remedies for relief from sunburn, but have not tried them and can't personally recommend them. If you have any experience with these remedies, let me know.

  • With a spray bottle, spritz apple cider vinegar on the affected areas and allow to air dry. I've heard this can be very cooling, but I imagine it would also be drying and irritating.
  • Apply shaving cream. Again, seems cooling but potentially irritating.
  • Apply Preparation H or other hemorrhoid treatments to the burn. It is said to reduce swelling and burning, similar to the claims of reducing under-eye wrinkles and puffiness.

To all of the miserable sunburn victims out there, I wish for you some relief and a good night's sleep!

~BigSis

Posted under Beauty and Skin Care

This post was written by BigSis on July 5, 2009

Tags: ,

What to do with Beanie Babies??

Beanie Baby Kaleidoscope by lyle58

Beanie Baby Kaleidoscope by lyle58

Do you have boxes and boxes of Beanies?  I hate to even bring up this topic, because it makes me cringe.  I think that LilSis and SisMama feel the same way.  We fell victim to the hysteria that surrounded Beanie Babies, and we absolutely wish we never had.  Now, what the heckie darn do we do with all of them?  I have boxes and boxes taking up room that I don't have, and I'd love to find a solution to the overpopulation problem.

I have three ideas so far, and obviously I'm not sold on any of them since I haven't done a ding dang thing yet:

  • Send the Beanies to the Beanies for Baghdad project. You send the Beanies to this organization, and they ship them to our military personnel overseas to give away to little kids who have so very little.  I wonder if this is still a viable option, since the president is talking about withdrawal timelines.  Once they arrive, could we be sure there would still be a purpose, a distribution channel and a home for them?
  • Take them to children's hospitals.  I've heard that hospitals aren't always thrilled about taking in Beanies because they can't be sure they haven't been played with, and they can't risk introducing any additional germs into the hospital environment.  Are there any nurses out there who might know about this?
  • Try to sell them.  In this economic market, however, it's the worst possible time to try to sell a collectible item.  It's totally a buyer's market, and prices are way down.  I also think demand is too low and the supply is too high.  This idea seems useless to me.  I'd much rather donate them than fiddle around with selling them for a song.

So, if you have tried any of these ideas or if you have any other solutions, I (we) would LOVE to hear them!!  I don't want to just impulsively trash all these Beanies to get them out of my way … heaven knows how much money I invested.  But if they could be put to good use somehow, I think it would be selfish of me to hang onto them.  Help!

~BigSis

Posted under Shopping

This post was written by BigSis on August 8, 2009

Tags: